Starting in March 2020, I began a large stream project to model a comprehensive, highly-detailed Caterpillar 434E backhoe. Please watch the first stream (first 3 minutes of abridged version at least) for an overview.
It's a straight-forward project of building a complex model over an extended period of time. The spin on the project is that I want your help to accomplish it! If I build some parts and you build some parts, we will finish this thing much quicker. Plus the contribution format will include reviews, the potential of having your piece(s) assimilated into the final model. Not to mention large quantities of XP are at stake 🤑
NOTE: This is an involved project reserved for Citizen members.

The general idea is that I kickoff stages of the project via live stream, which is typically once per month. For the time in between streams, you choose a piece of the backhoe and apply what you learned from the stream to that piece. For example, the first stream covered initial block out. So between stream 1 and stream 2, your job is to pick a piece and block it out.
This is the repeating protocol for each Assignment Period (between-streams):
I will reply to this thread after each stream with a [big] assignment post denoted by a 📣 emoji in the title. There I will clarify instructions about each Assignment Period.
We will centralize our collaborative communication between the streams and this thread. Ask any and all questions pertaining to the Backhoe project here.
![]() dostovel Good question. You can "submit" a .blend file any time by supplying a share like (as you have, which I was able to download fine btw). I'm only going to consider these submissions final after the due date (which is a week before the next stream, April 7th specifically). This means anyone can update their .blend file after submitting via link until April 7th.
dostovel Good question. You can "submit" a .blend file any time by supplying a share like (as you have, which I was able to download fine btw). I'm only going to consider these submissions final after the due date (which is a week before the next stream, April 7th specifically). This means anyone can update their .blend file after submitting via link until April 7th.
I will post your link to the spreadsheet. Your "battery boxes" look great!
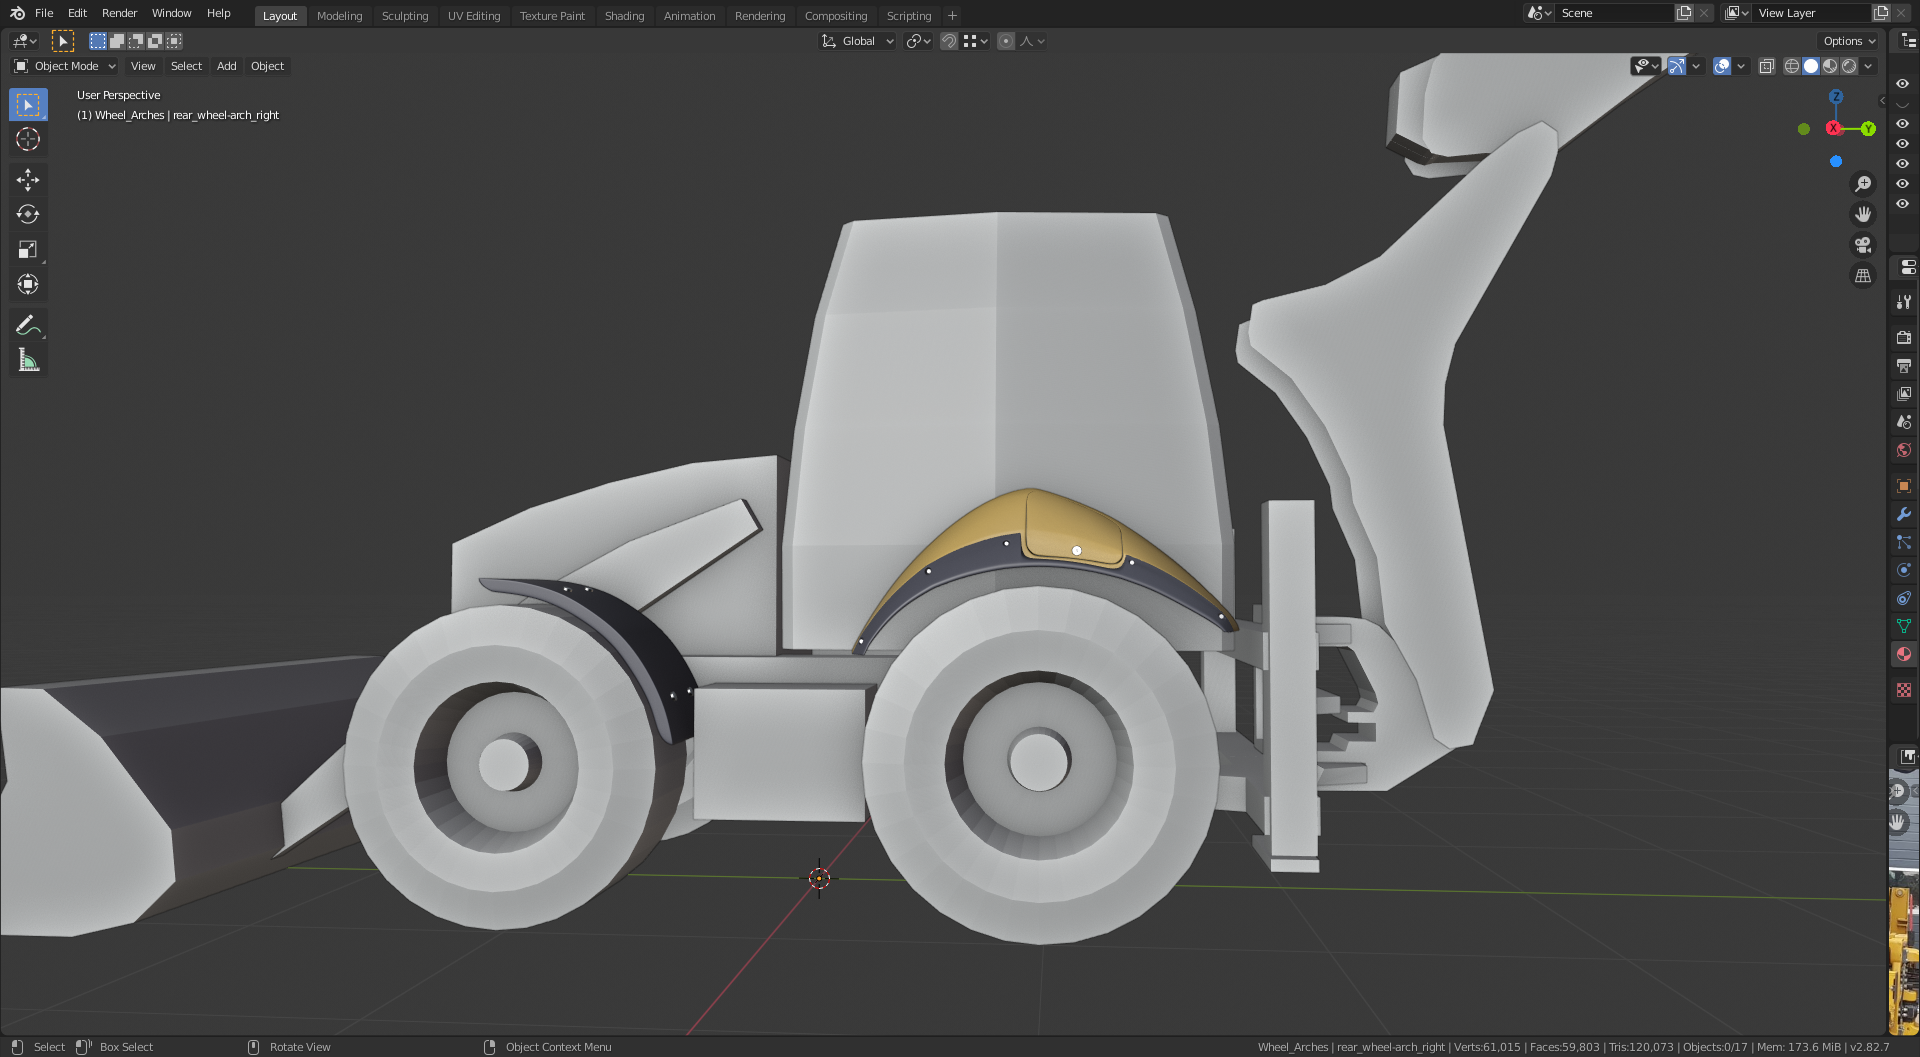
I noticed the wheel arches are not on the list. So I thought I would have a go. I added a comment and a link.
Yes multiple people can do the same thing.
Remember that it is OK for multiple people to model the same piece. But lets try to have at least one person assigned to each piece before doubling up.
Refer to Collaboration Details at top of feed.👌👆
This is what I've modeled so far for blockout level 2 of the wheels:
And a closer look:
[Q] Do you want us to upload the entire scene like we downloaded with the collection for our part, or just the collection?
Here an augmented version of my wheels blockout level 2 with tyre treads:
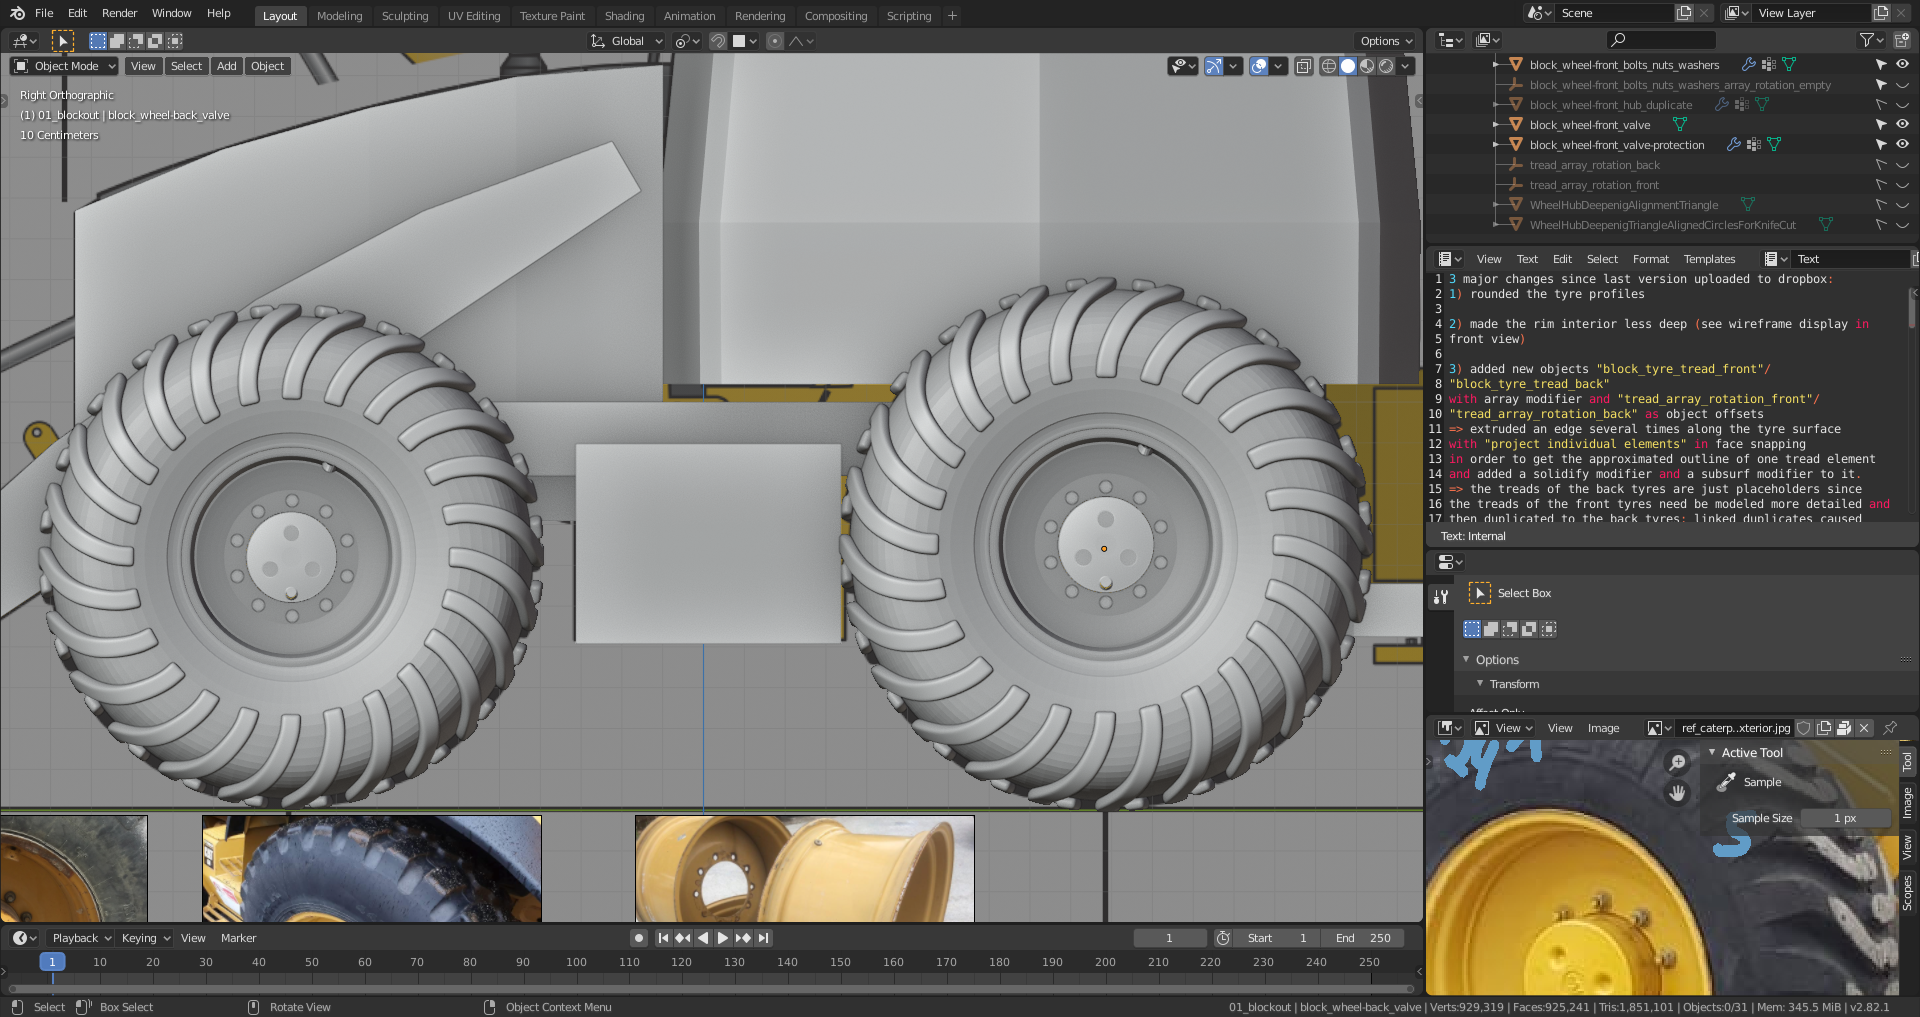
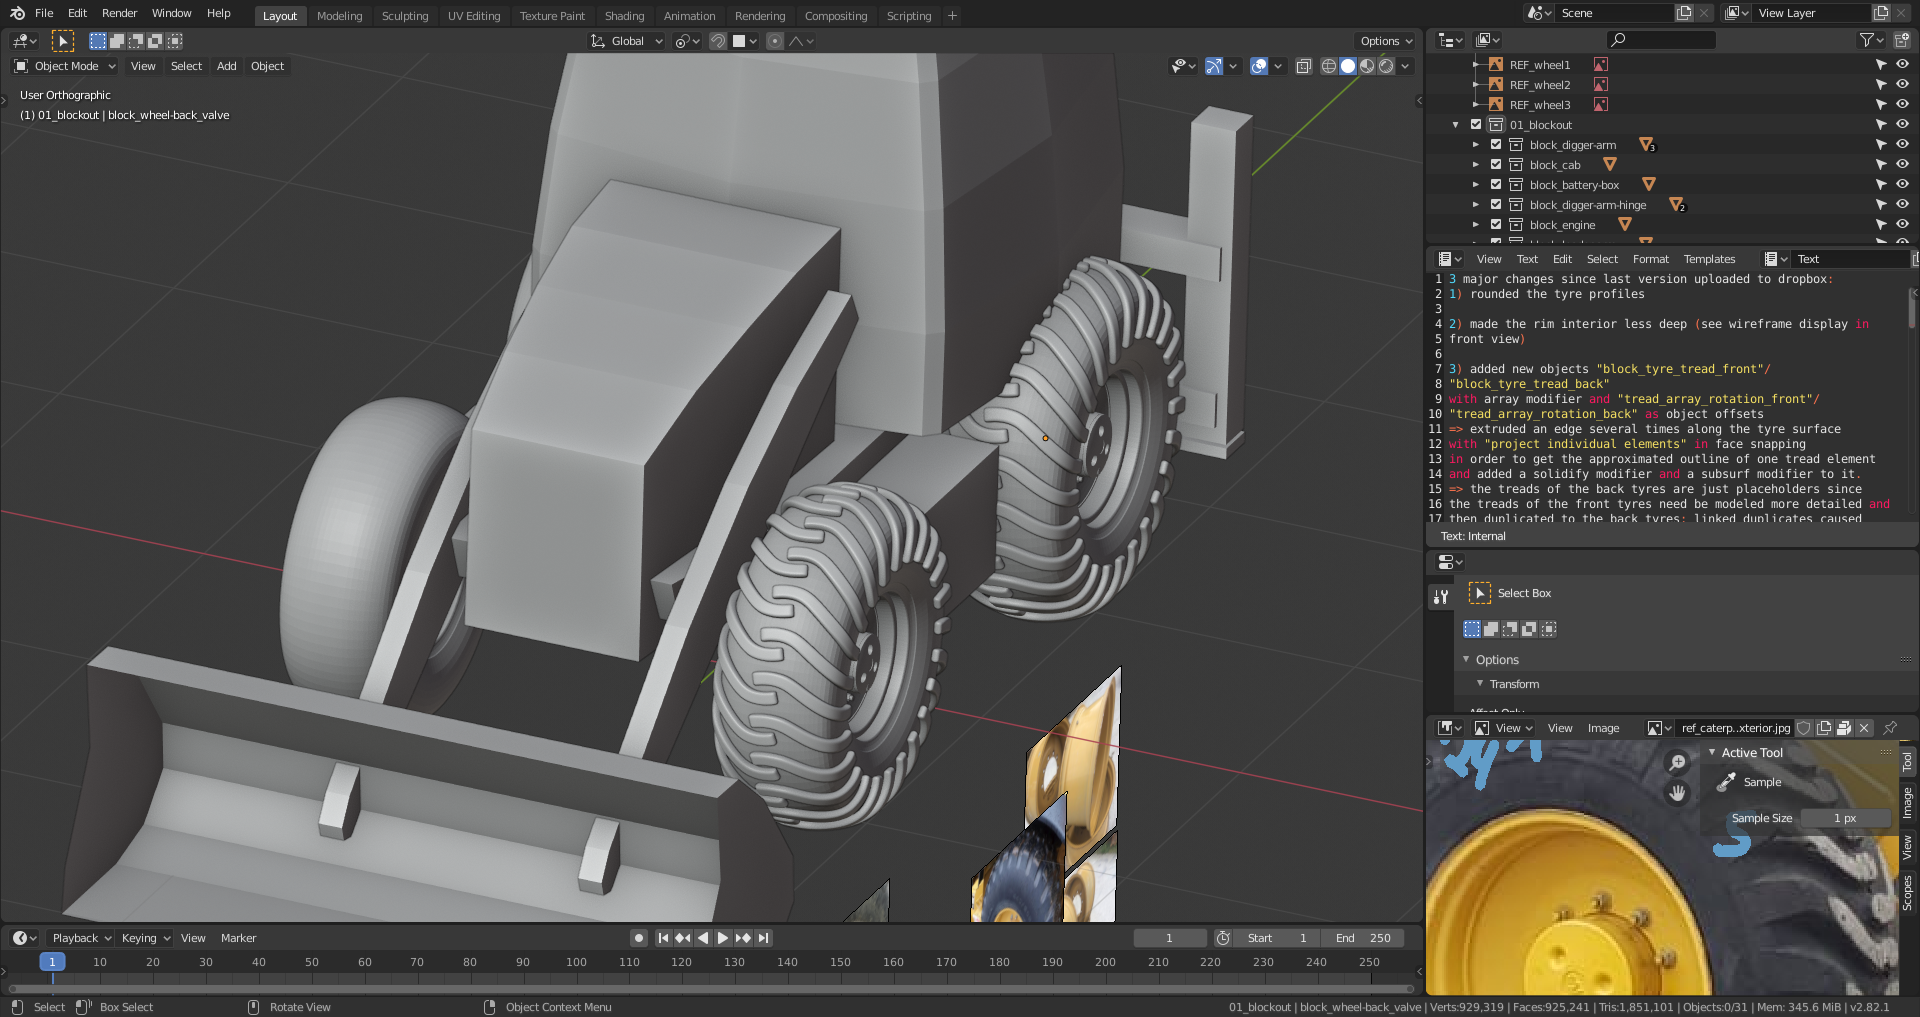
PS: I accidentally closed all but one tab (active tool seetings and workspace) in my properties editor as you can see it in the screenshots above the reference images sheet in the bottom right corner. I've fixed it by leaving "Load UI" in the properties region of the blender file browser unchecked. But I stil don't know how I've run into this situation.
Also blocked out the treads and as the drawing has 23 treads and the pictures 22, I thought it might be fun to give the possibility to change the number of treads. You' ll have to do the front and back wheels separately, but it's working....
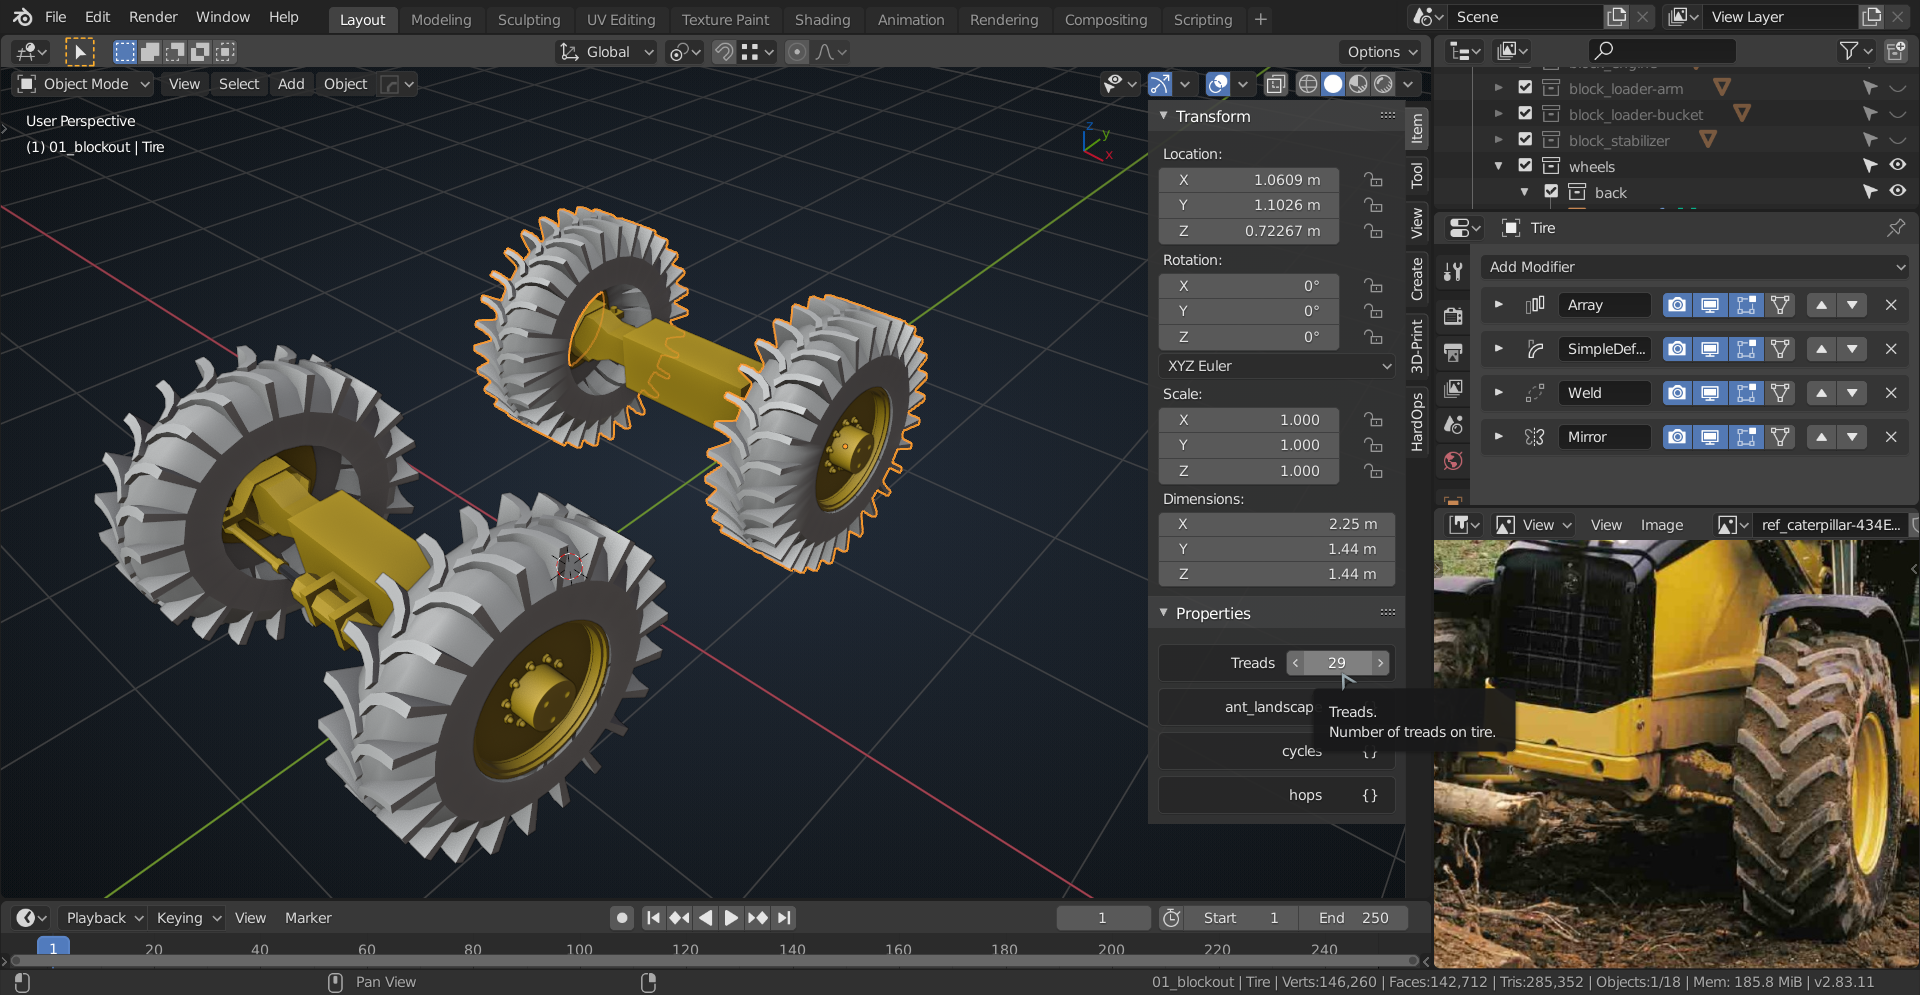
Clever technique! Didn't know that there is now a "weld modifier" in Blender 2.83. I'm just using the good old 2.82 Alpha ;) .
Actually, I don't think I actually need the Weld Modifier. It's just to make sure, because of rounding errors.
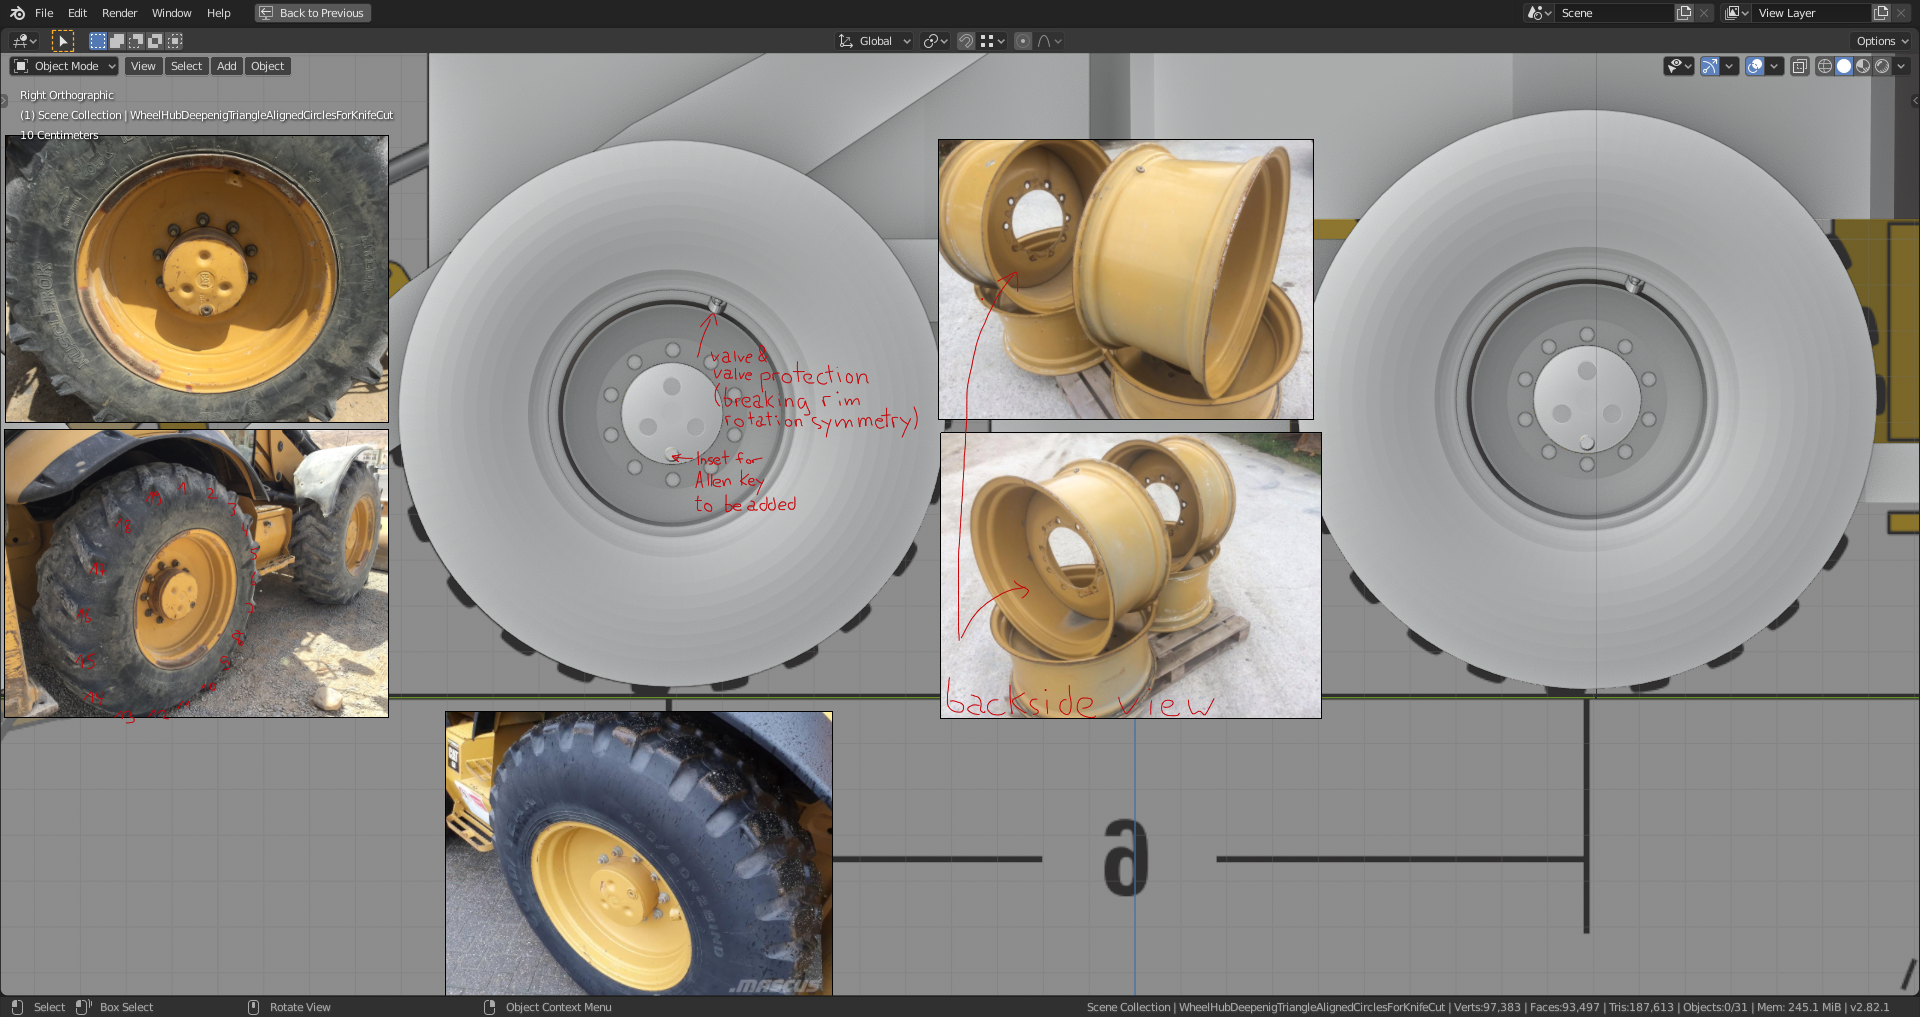
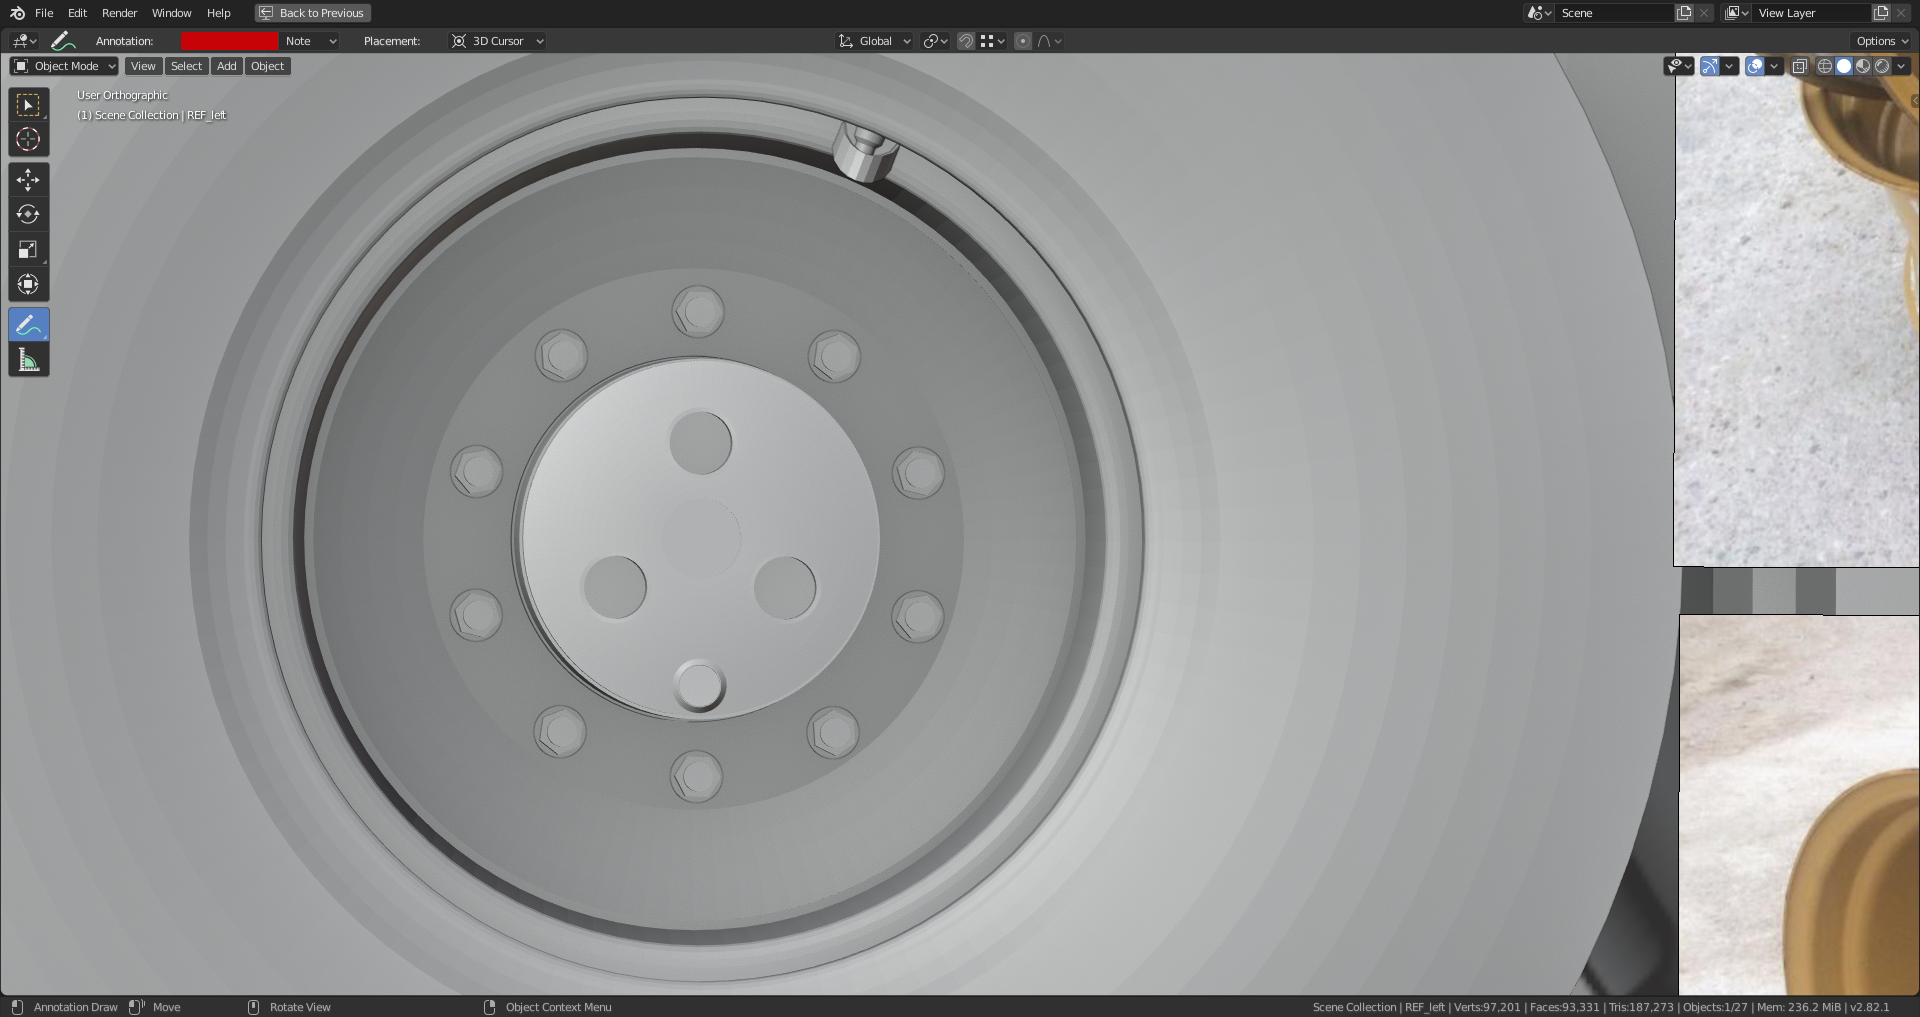
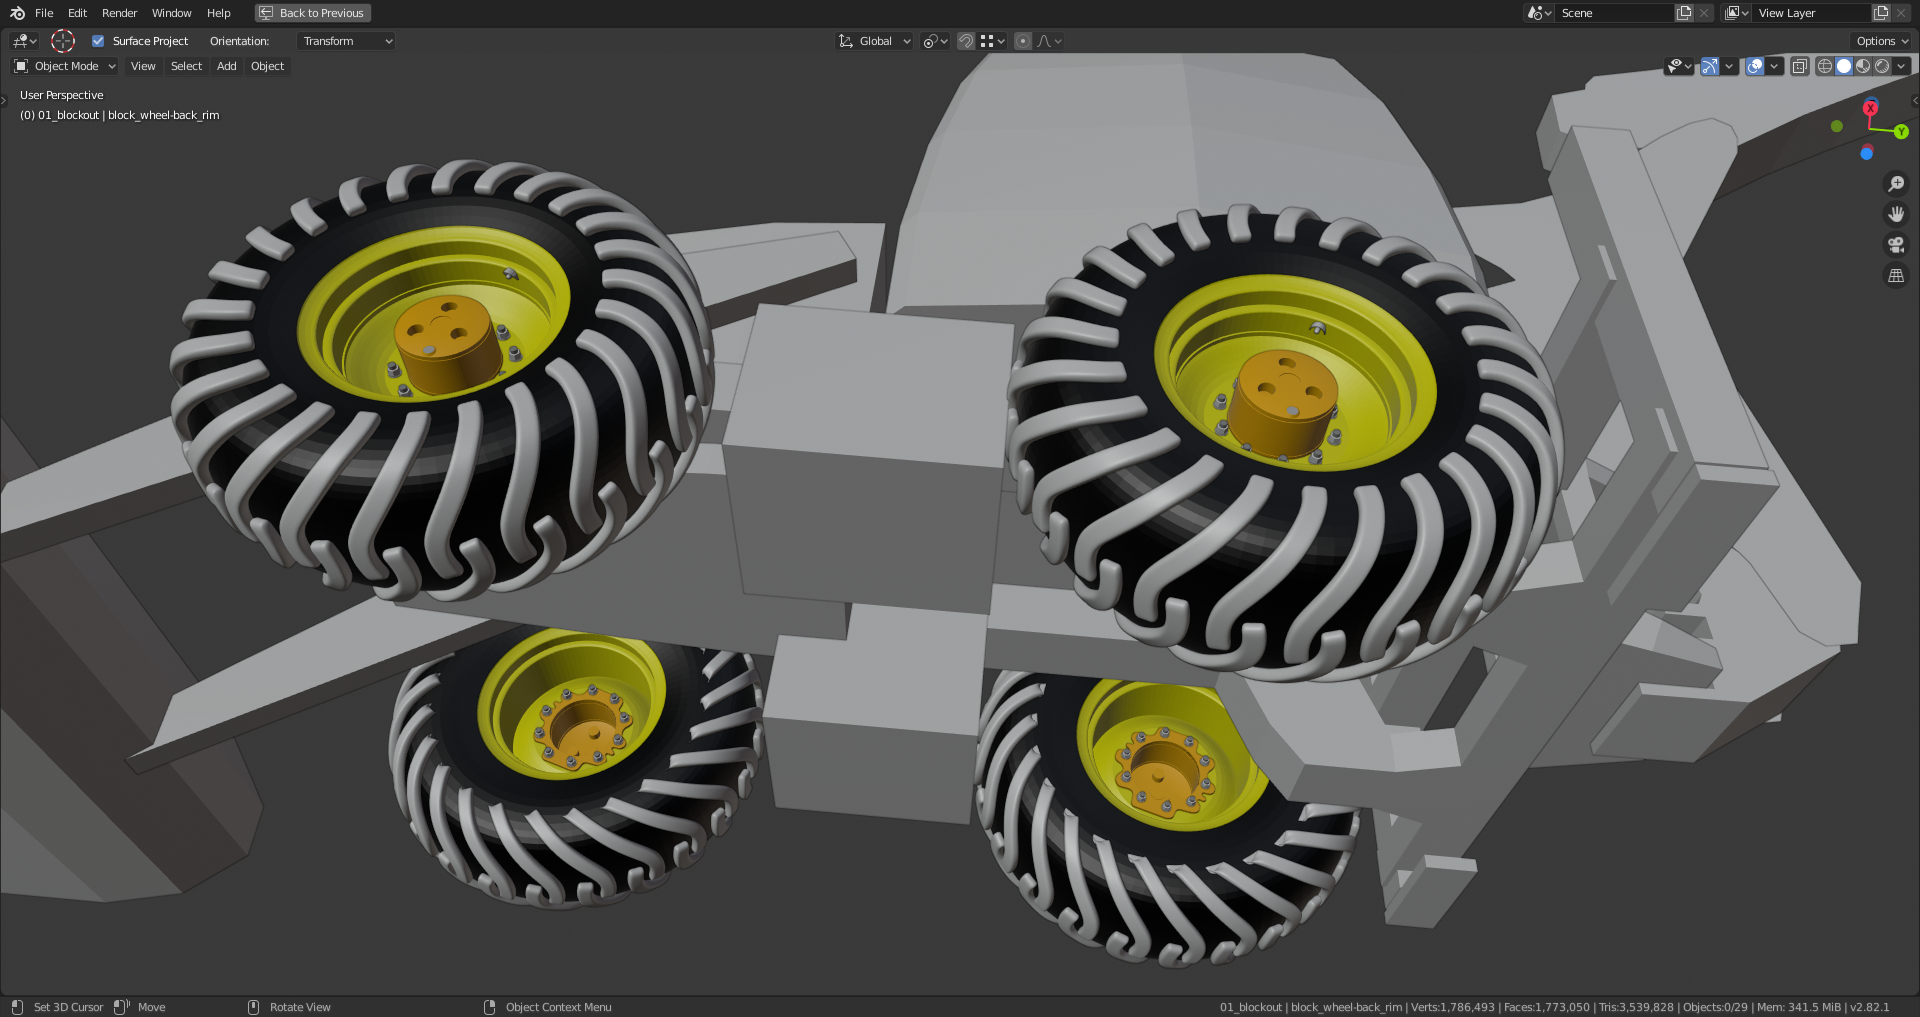
Here's my last version for the wheels blockout level 2:

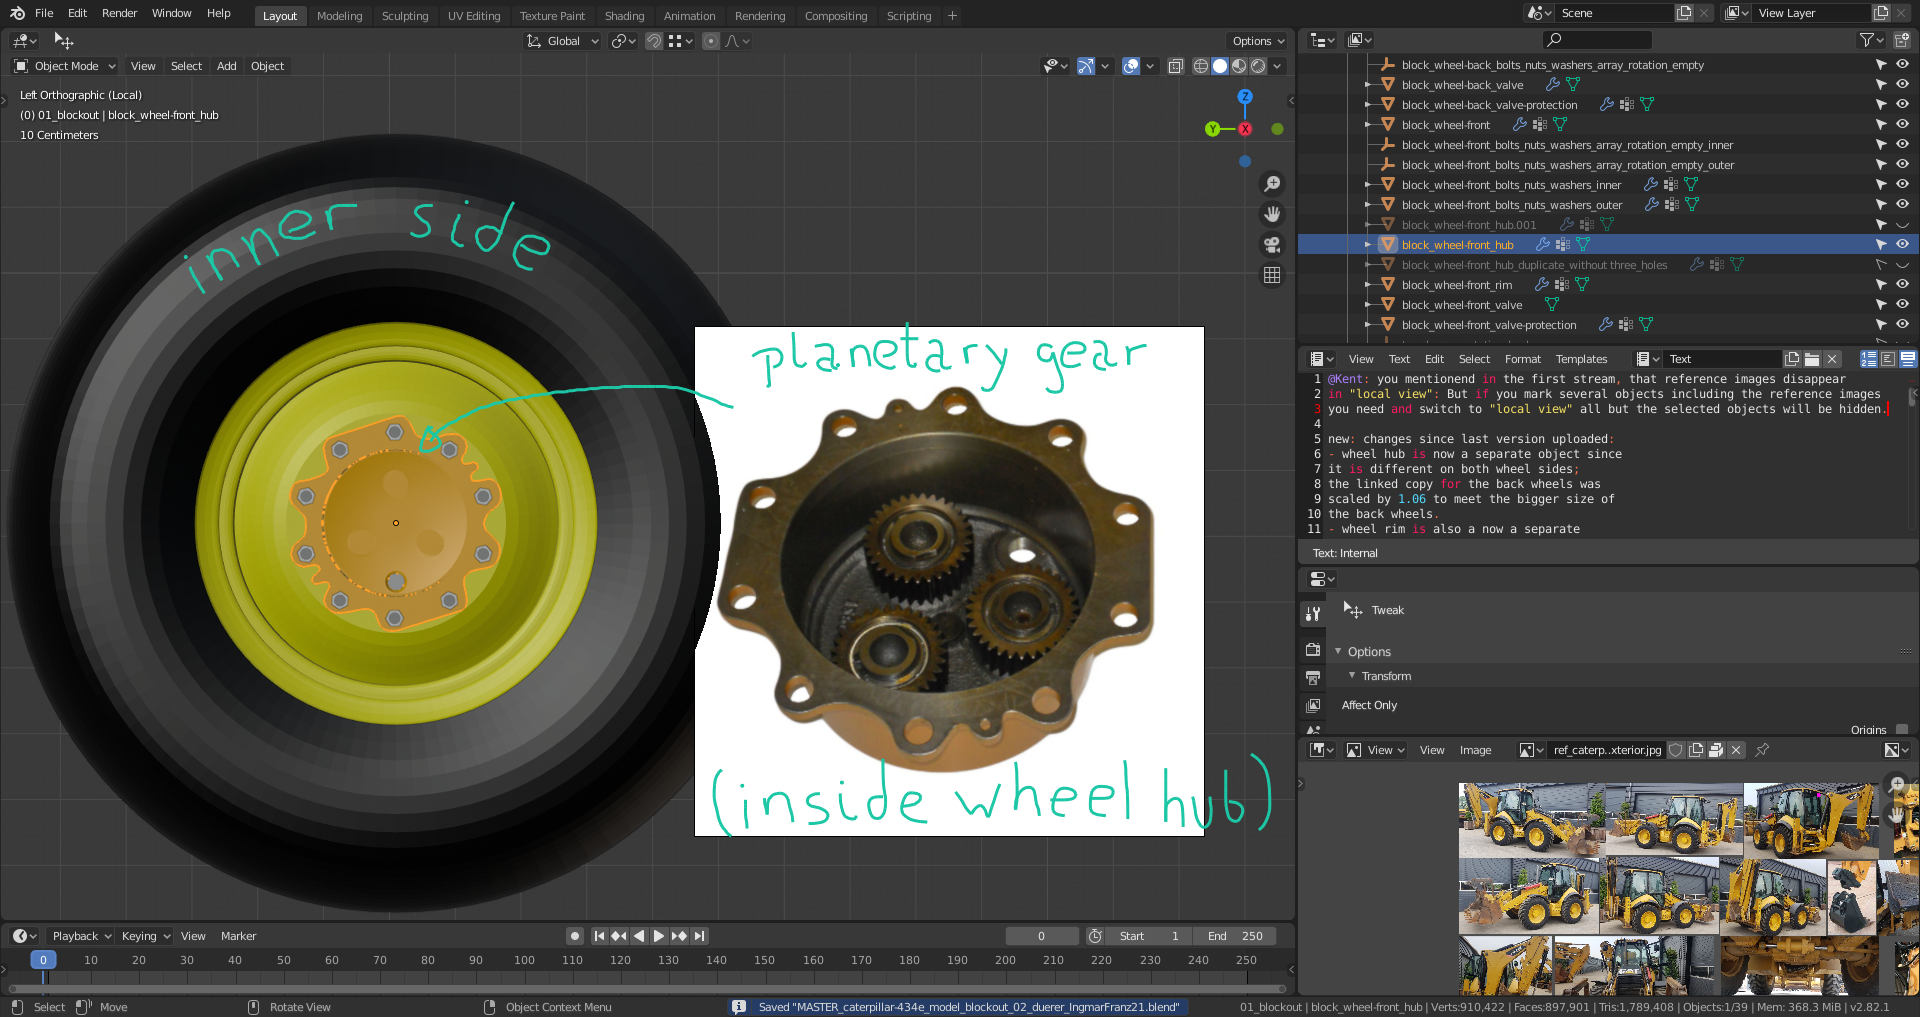
It took me a lot more time than originally thought. I've done the modeling of the inner part of the wheel hub manually by eyeballing. Maybe it would be more precise using a plane orientated in the same way as the object in the reference image of the planetary gear and then tracing the outline on the surface while in perspective view. I'm still looking for reference images showing the connection between the wheel hub and the axle. Are the front axle and the back axle identical?
Are the front axle and the back axle identical?
I just used the pictures that were in the file. I know that all wheels are able to rotate from the description and by the looks of it the front and back are the same, just mirrored....
In cases like this, you just have to think about how this would be able to work, look at a lot of reference pictures and don't trust those drawings too much!
Those rim pictures you got are great!
Your profile of the treads however looks like it is put on top of the tire and the tire is made out of one piece of rubber...
Yes, I was wondering how this vehicle is driven, but for the heavy work it has to fullfill, I supposed that it uses a four-wheel-drive. My tyre treads have to be reshaped since their outlines are just a very rough approximation. I made them by extruding an edge with snapping "individual elements" on the tyre surface and adding a solidify modifier. The "rubber" look comes from the subsurf modifier. I need to sharpen the tread outlines more after the blocking stage.
I don't know if you can access my file, but this is what my tire looks like without Modifiers:
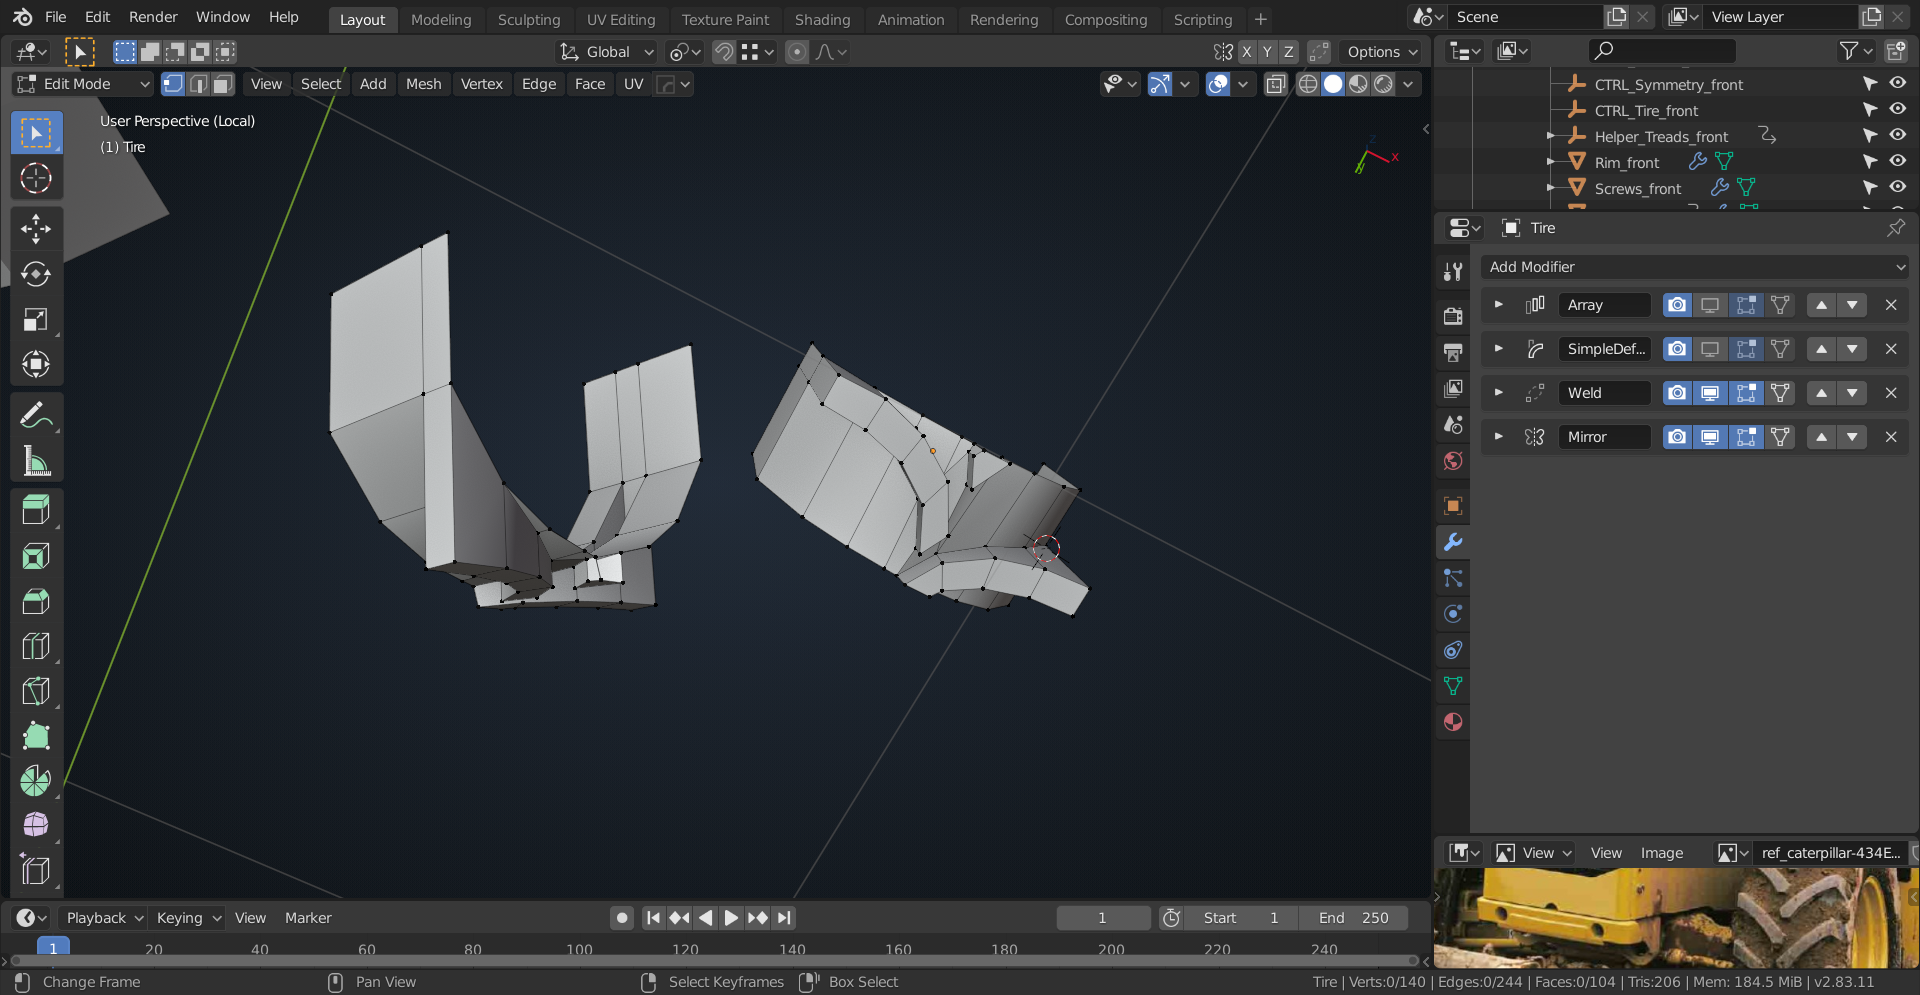
Quite simple and easy to modify, I think.
This is the first time I've used the google spreadsheet, so I don't know if I got my dropbox link in it or not. Here's the link in case I screwed something up:
https://www.dropbox.com/s/e5hoau9endftzop/Engine_block.blend?dl=0
Yes, I can access your file and have also done it with your first wheel version where I especially admired your already complex blocking of the axles. Your approach of dividing the tyre into repeating segments is a clever idea. I also wanted to find a solution that offers the possibility to manipulate the tread pattern easily. The main focus for the treads now is to match the correct shape better. Later, I'll tackle the transition between the treads and the rest of tyre with a concave beveling so that the treads look like organically "growing" out of the tyre instead of just lying on its surface. There's also a clearly visible bigger bevel towards the tyre sides. By the way: I've already seen 3 different tyre versions by Michelin, Goodyear and Musclerok. I'm not sure whether Caterpillar offers all 3 of them to the clients or delivers the backhoe just with one standard type.