Starting in March 2020, I began a large stream project to model a comprehensive, highly-detailed Caterpillar 434E backhoe. Please watch the first stream (first 3 minutes of abridged version at least) for an overview.
It's a straight-forward project of building a complex model over an extended period of time. The spin on the project is that I want your help to accomplish it! If I build some parts and you build some parts, we will finish this thing much quicker. Plus the contribution format will include reviews, the potential of having your piece(s) assimilated into the final model. Not to mention large quantities of XP are at stake 🤑
NOTE: This is an involved project reserved for Citizen members.

The general idea is that I kickoff stages of the project via live stream, which is typically once per month. For the time in between streams, you choose a piece of the backhoe and apply what you learned from the stream to that piece. For example, the first stream covered initial block out. So between stream 1 and stream 2, your job is to pick a piece and block it out.
This is the repeating protocol for each Assignment Period (between-streams):
I will reply to this thread after each stream with a [big] assignment post denoted by a 📣 emoji in the title. There I will clarify instructions about each Assignment Period.
We will centralize our collaborative communication between the streams and this thread. Ask any and all questions pertaining to the Backhoe project here.
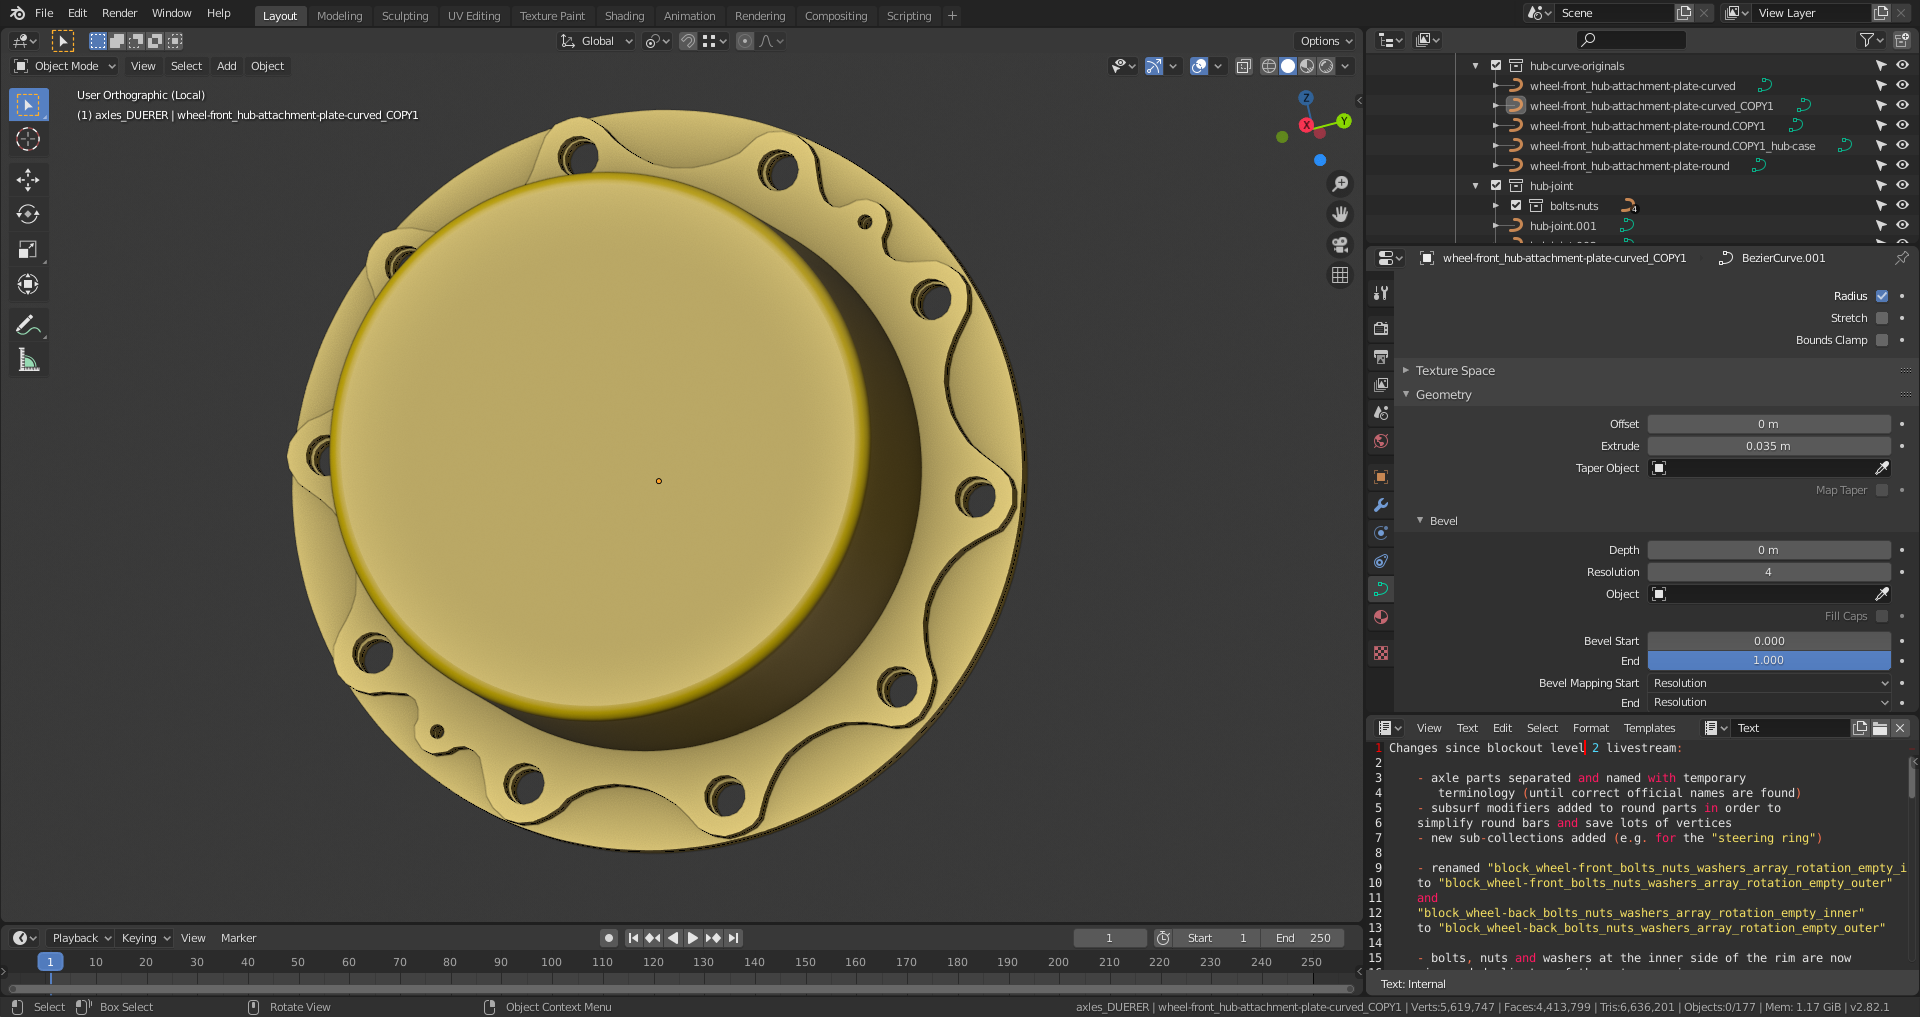
I'm playing a little bit with 2D-Bezier curves and the drawings from Jake's treasure chest:
PS: I've just downloaded Blender 2.9alpha only to take a look at but will continue with 2.82 for the backhoe modeling.
What's in a name? I'm so confused. I took a pill for a headache and went to sleep, I feel I woke up in another dimension. Let me google John Lennon, maybe he's alive in this one.
![]() dostovel https://code.blender.org/2020/02/release-planning-2020-2025/
dostovel https://code.blender.org/2020/02/release-planning-2020-2025/
Maybe enlightening, maybe confusing, but this is the plan...
That was enlightening, thanks Spikey.
I'm starting to get the feeling that Blender is going to get much more complicated and difficult to keep up with, lots of new features are already piling up for me that I still have yet to look at.
So for users like me, who don't even know anyone else in real life that does 3D, uses Blender sporadically and has been a great hobby to do some extra freelance job... it is starting to look like maybe it will be harder to keep up with the pace in the not too distant future.
![]() dostovel Blender is not the only thing going that way. Technology has been getting hard to keep up with in recent years. I stop trying to know everything and just look forward to @jlampel live streams for the release info. He does a lot of the hard work for us.
dostovel Blender is not the only thing going that way. Technology has been getting hard to keep up with in recent years. I stop trying to know everything and just look forward to @jlampel live streams for the release info. He does a lot of the hard work for us.
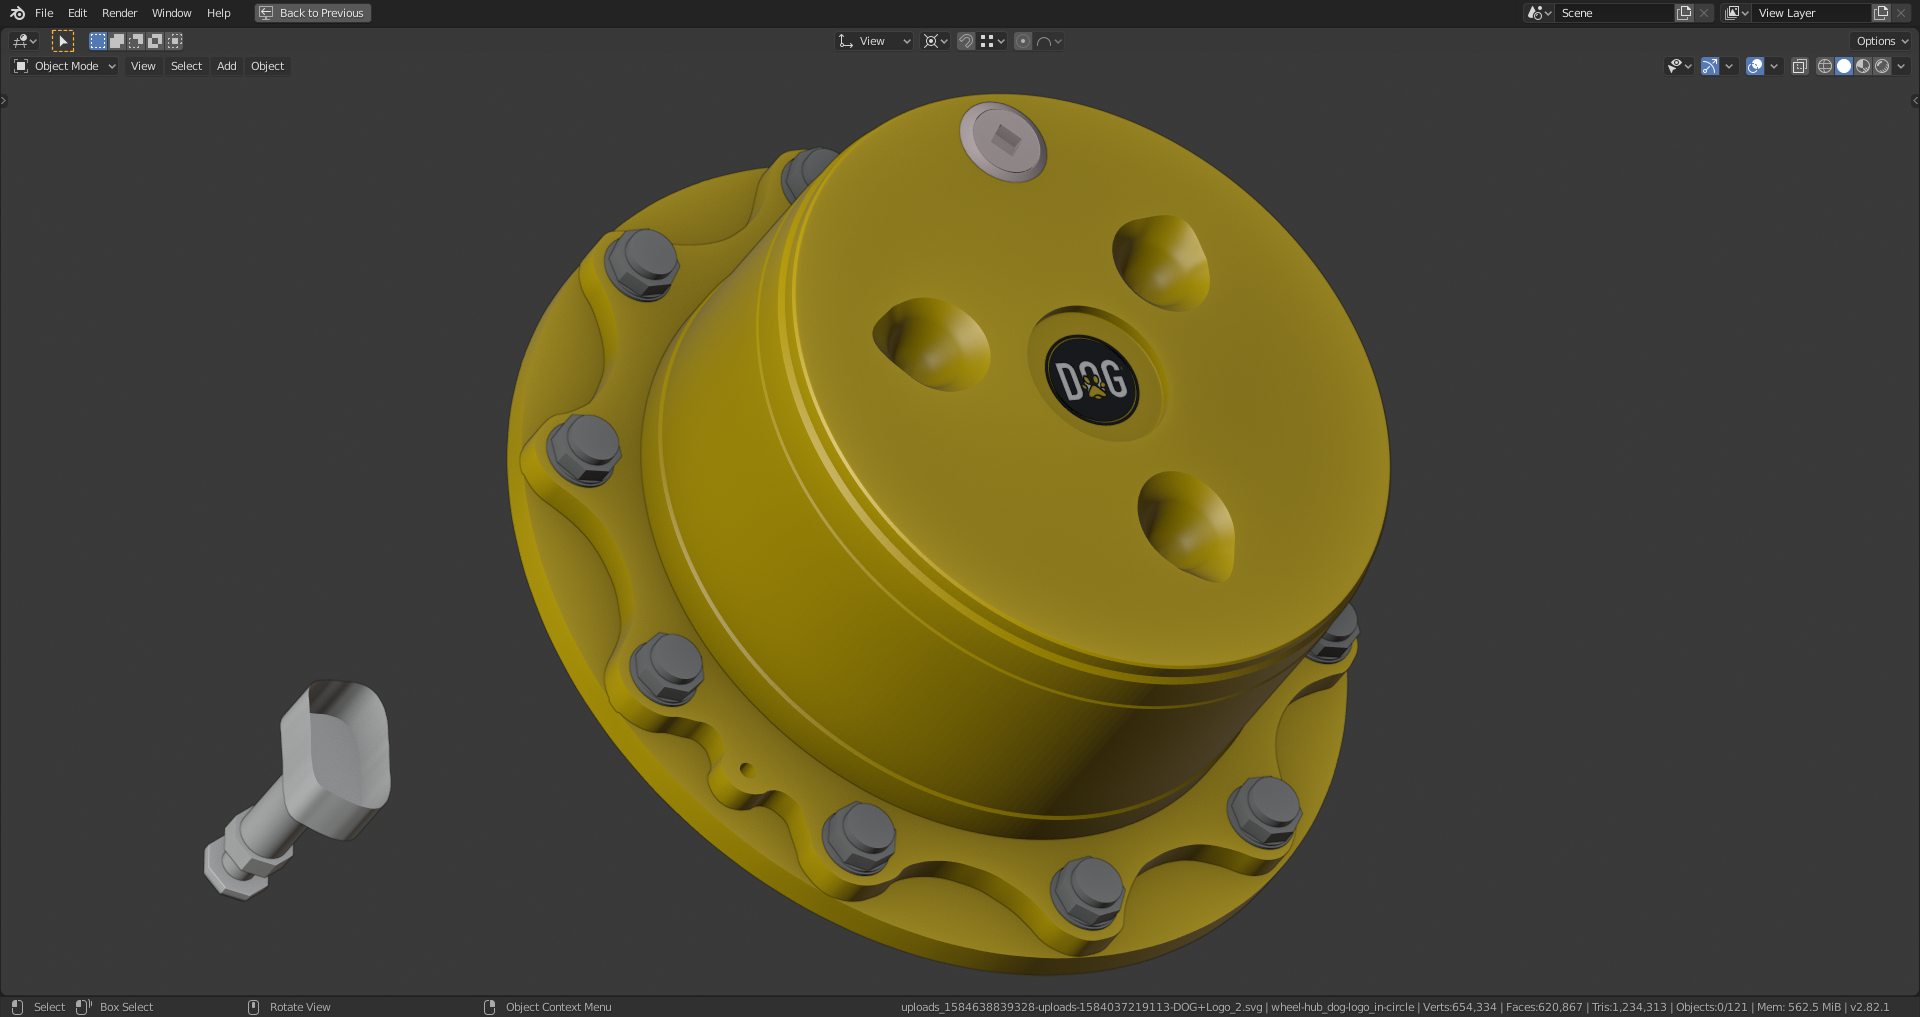
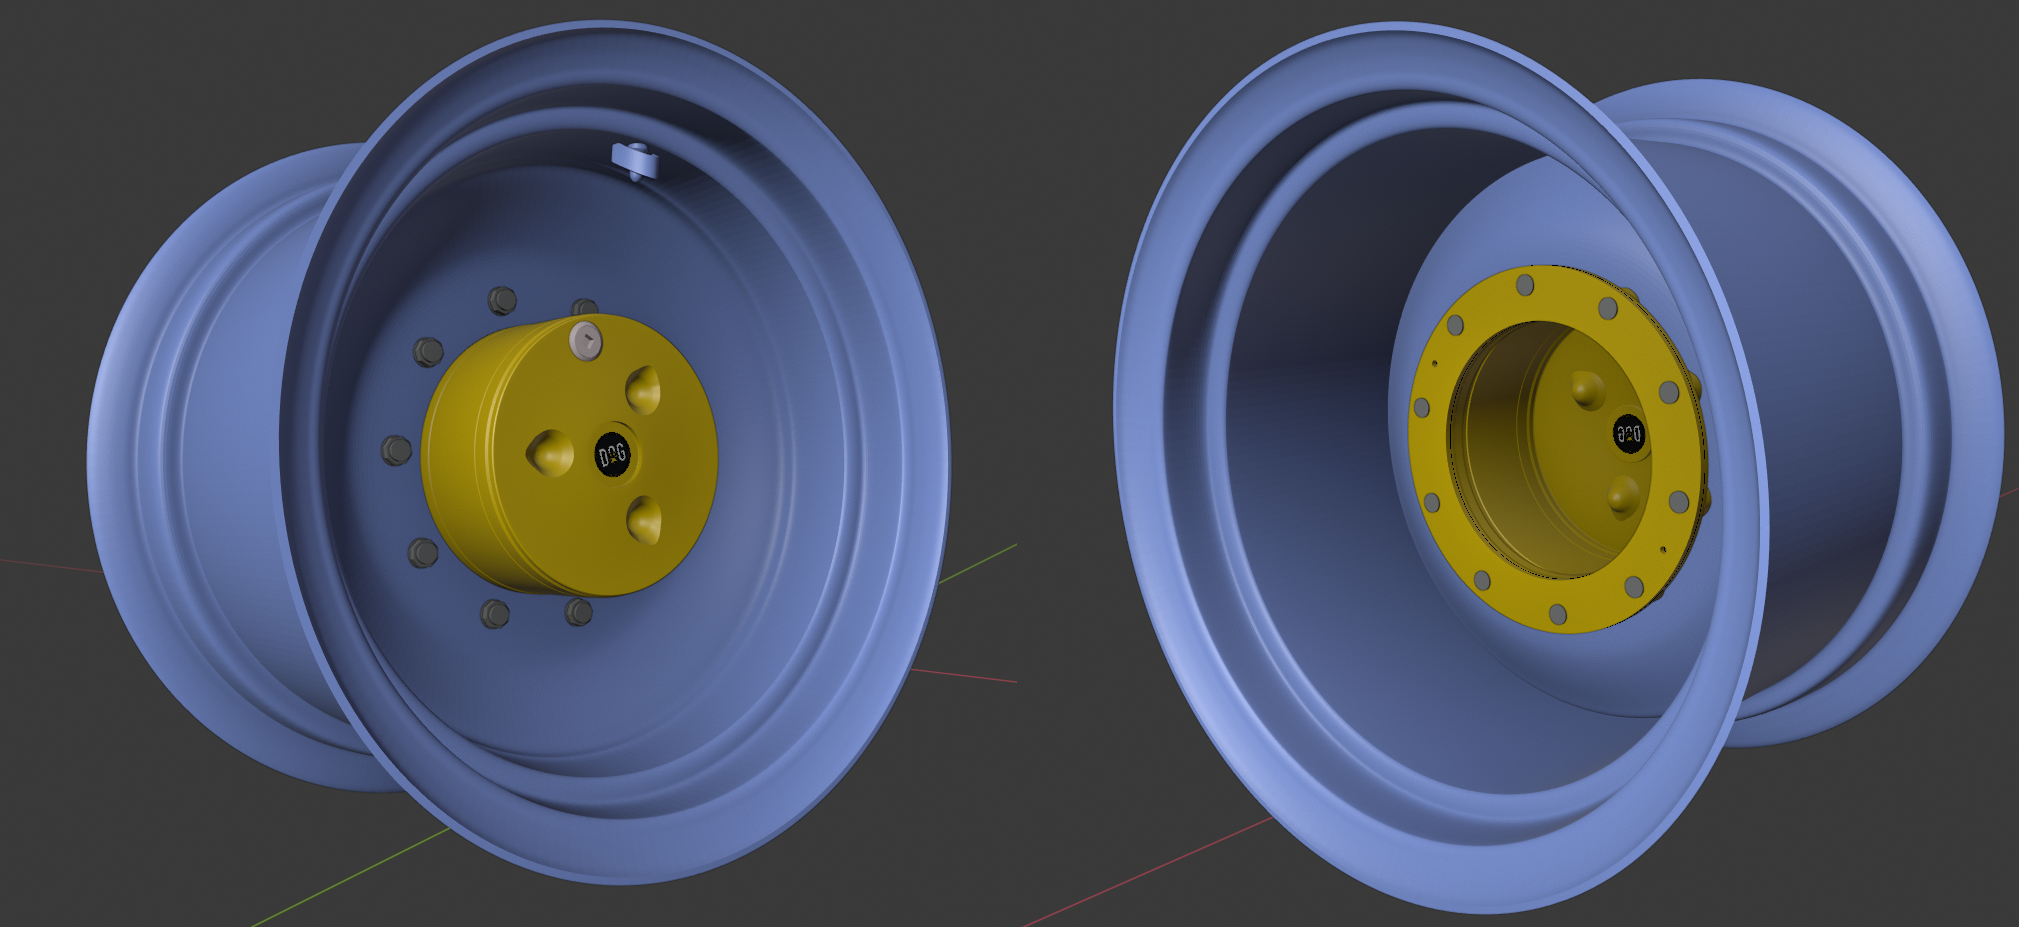
![]() duerer That is looking awesome. I know from the images that the interface to the wheel appears quite different on the back axle versus the front.
duerer That is looking awesome. I know from the images that the interface to the wheel appears quite different on the back axle versus the front.
I'm going to play it safe unfortunately........Many of the images that I have access to are already in Jake's link so I'll keep in line with the copyright stuff and we'll see how far we can get without me providing more.
![]() duerer you're a good chap my boy, DOG is going to own CAT in no time. I should make a circular logo now that I see that.
duerer you're a good chap my boy, DOG is going to own CAT in no time. I should make a circular logo now that I see that.
sshanr: you don't need a curve. For your treads, take an Empty and rotate it 36 degrees around the global x-axis (which is our wheel's rotation axis). The object origin of your tread must be in the same place as your Empty (that is where the axes of your Empty are crossing). Add an Array Modifier to your tread and only select "Object Offset" as offset in your Array Modifier). Set the "Fixed Count" to 10 (since 10 * 36 degrees is a full circle of 360 degrees). Rotations and scaling should be applied (with CTRL + R and CTRL + S) because otherwise these transformations would be applied for every duplicate in relation to its predecessor in the duplication order. You can analyze it here in this file:
https://www.dropbox.com/s/5z9nvdcyaegl3kh/ArrayModifier_Demonstration.blend?dl=0
Select the original monkey head (top middle; this also selects the duplicates) and scale it, rotate it or move it in object mode and see how it influences the duplication. Doing the same transformations in edit mode also applies to every duplicate but the duplicates now change identically in an absolute manner and not relatively to the preceding object instance.
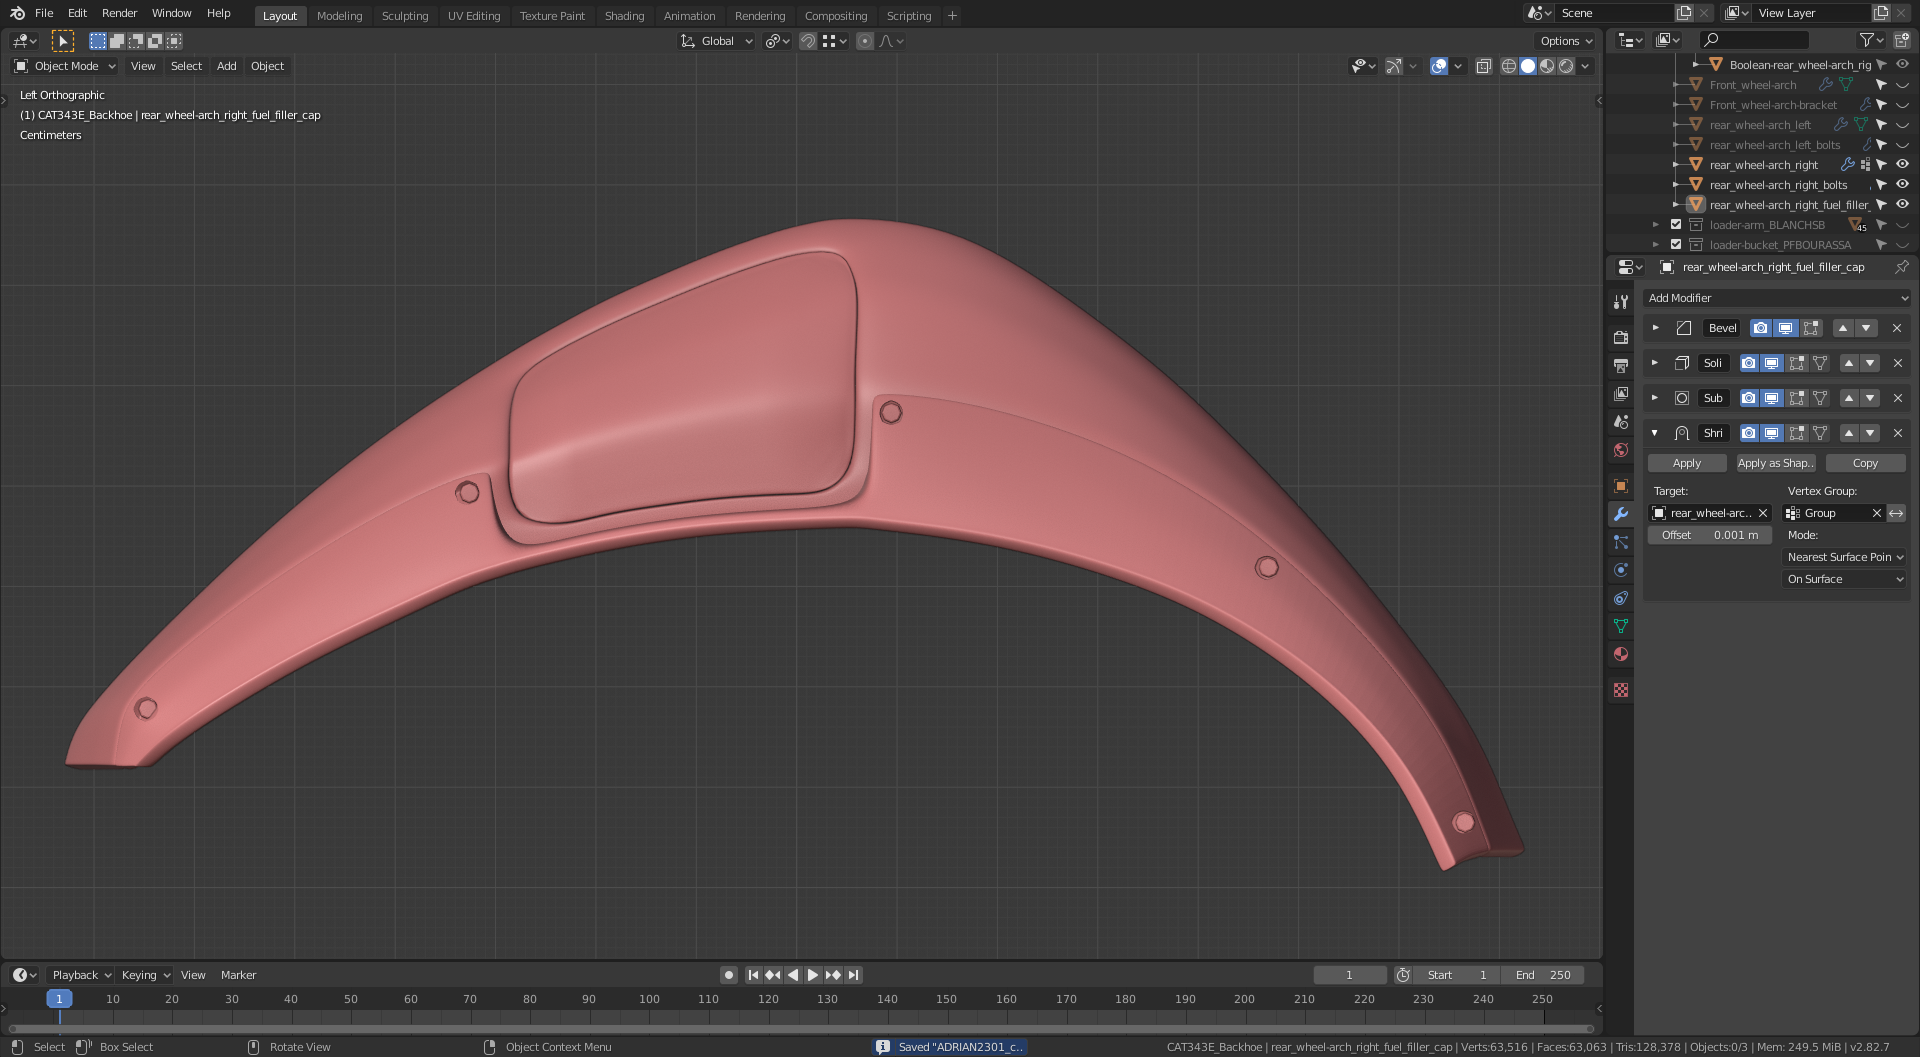
Trying out the Shrink Wrap Mod on the fuel (gas) filler cap as suggested by @theluthier during the live stream. Looks OK.
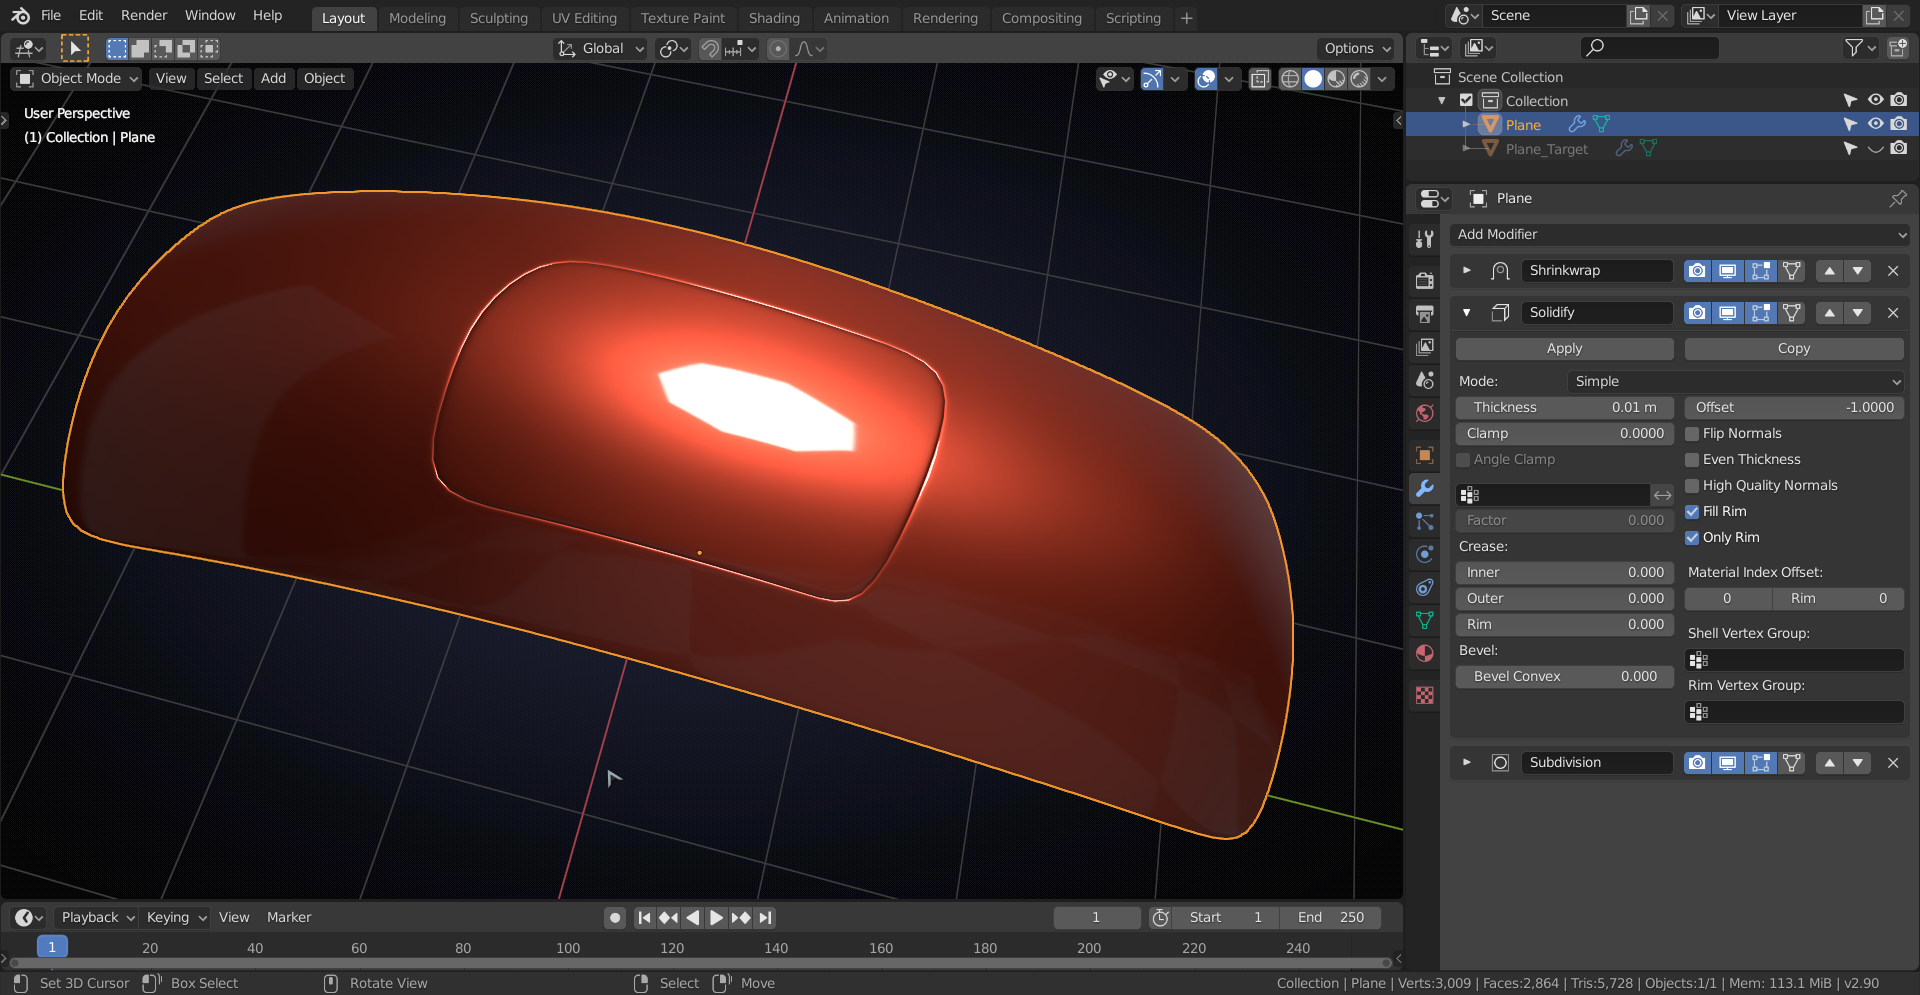
In case someone is interested,here's how I make something like that (general technique):
Make a copy of your curved surface and give it a Subsurf Modifier (set at least one higher than what you are going to use on your surface) as a target for the Shrinkwrap (nothing special so far).
Outline the 'seam' for the cap and go into Edge Select Mode:

Press CTRL+B,, 'mousewheel up to 3' and select the middle ring.
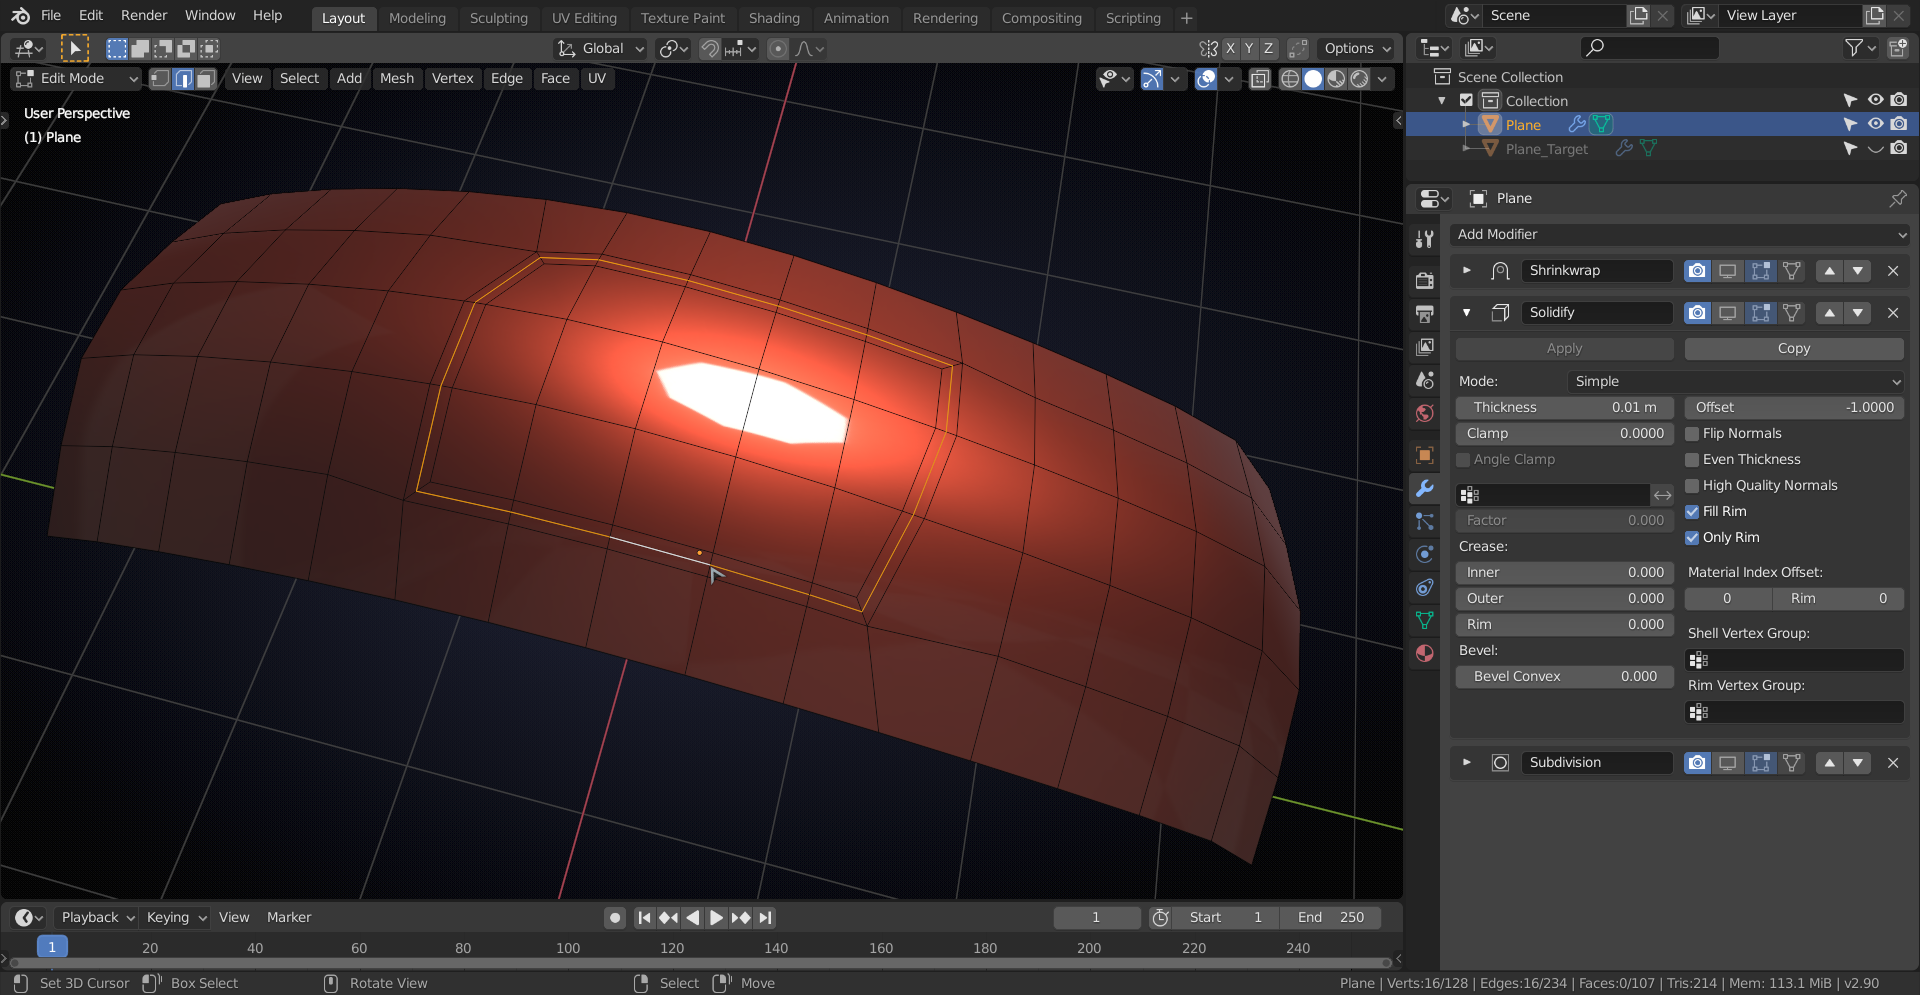
Press V (that's the magic touch...).
If you set up and enable your Modifiers, you get something like this:
![]() duerer is absolutely right.
duerer is absolutely right.
The only thing that can change the size of your object with Object Offset is when the Scale of your object or of the offset object is not 1 in x, y and z.
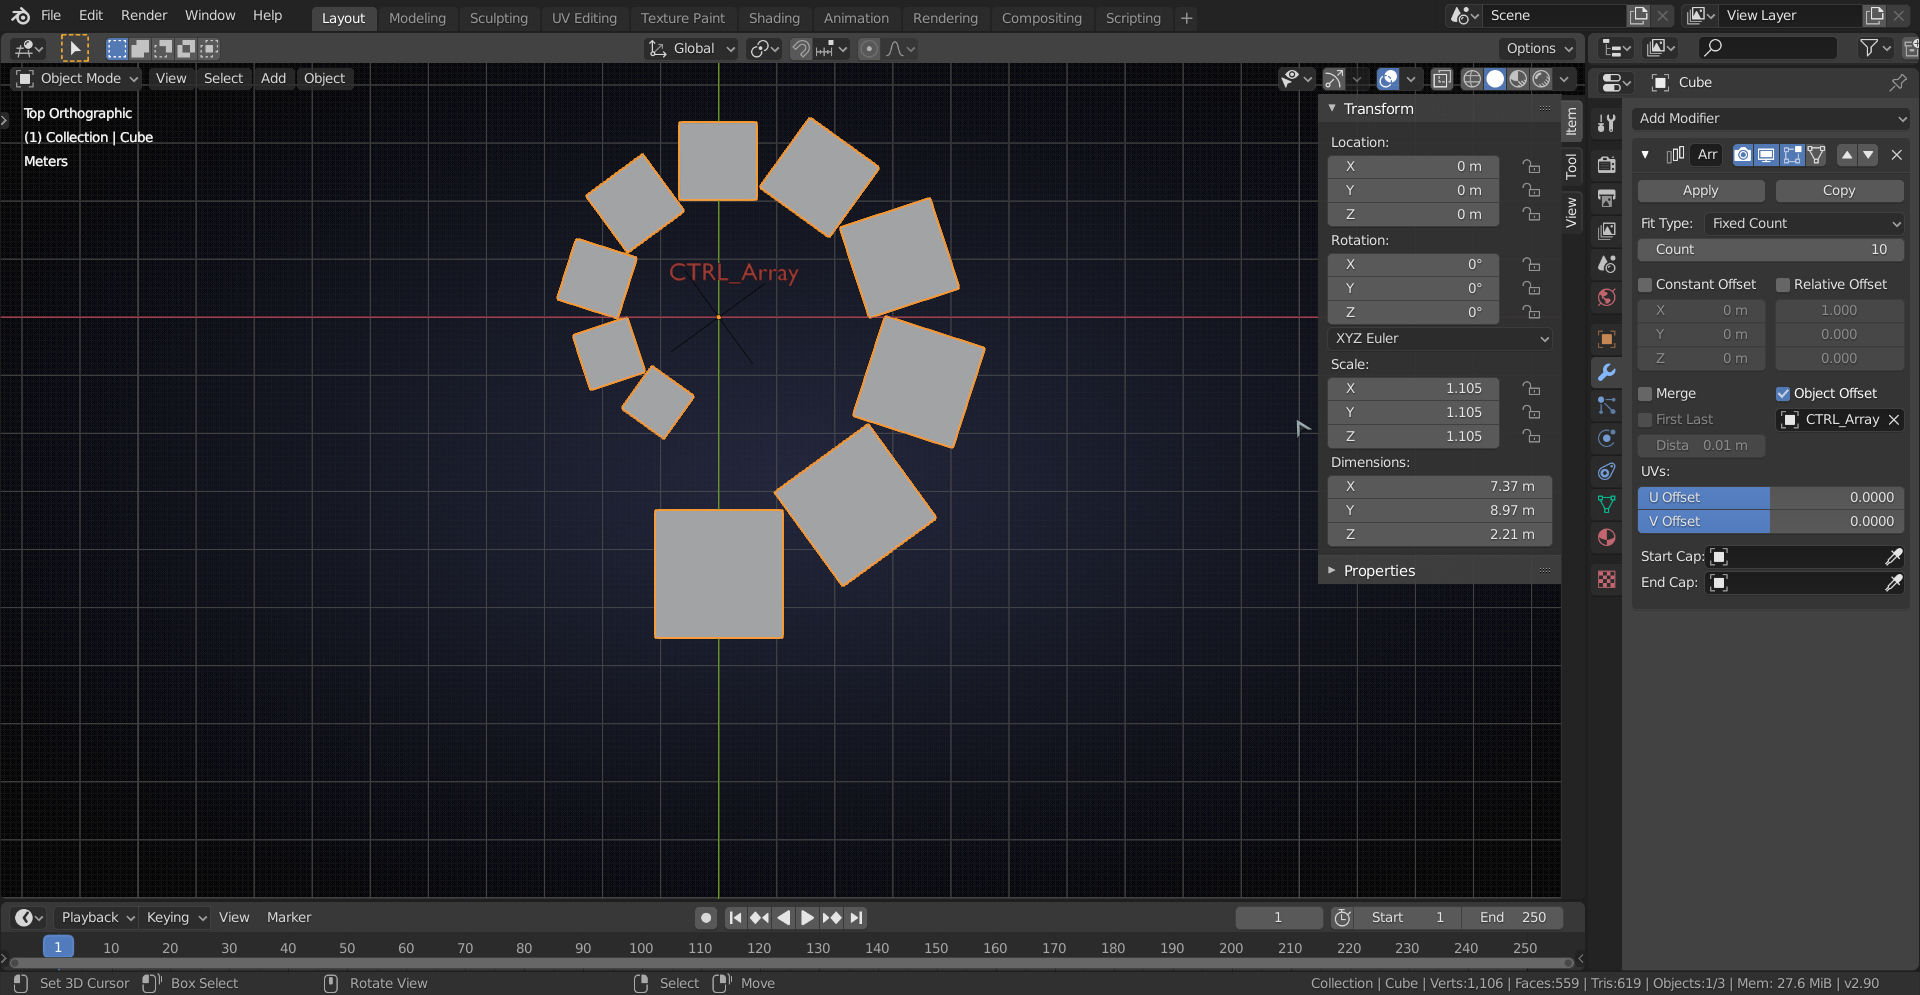
If you make sure that the origin of your object and of the offset object are in the same place you should get something like this:
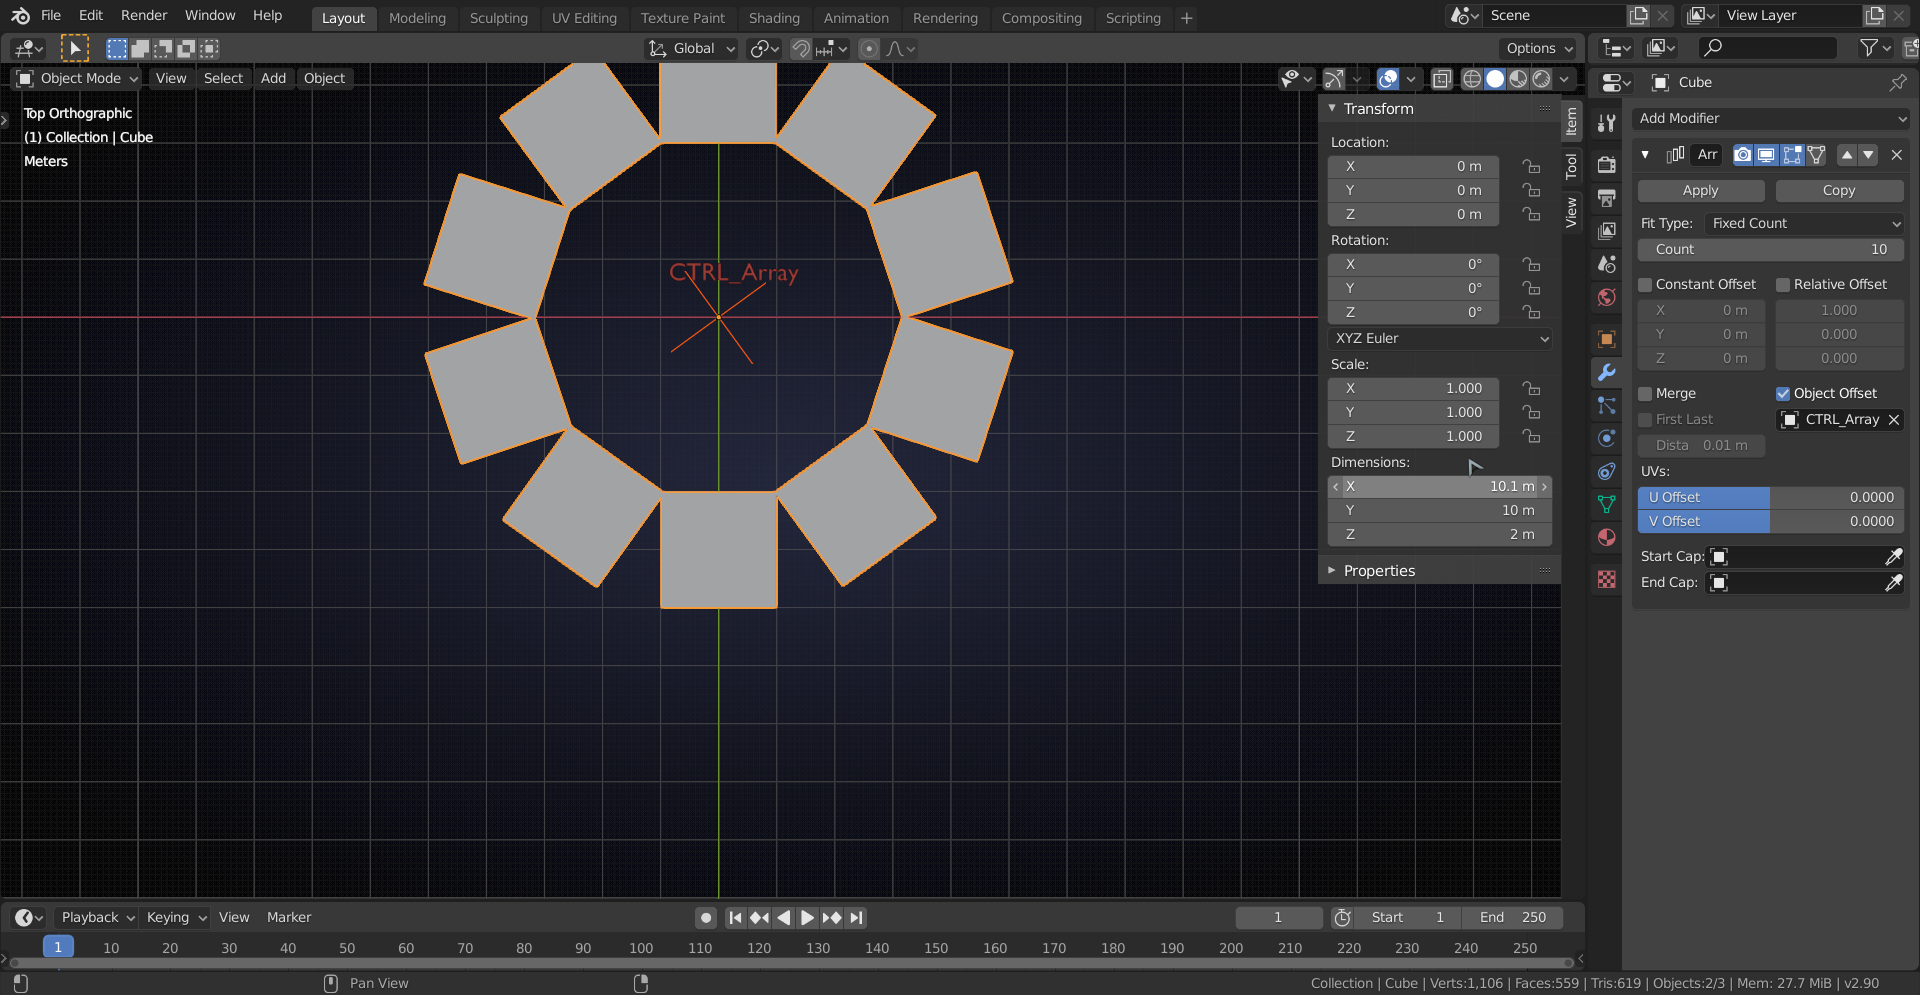
Personally I would not use Object Offset in the Array Modifier for a wheel or tyre, because you'll have to make a tapered (and curved) section in order to not get holes (like in above picture) or overlaps and that is harder to model than something straight. Also making adjustments to that section later on is a lot easier with a straight model. That is why I always use an Array with Relative Offset followed by a Simple Deform Modifier set to Bend (360° Angle):
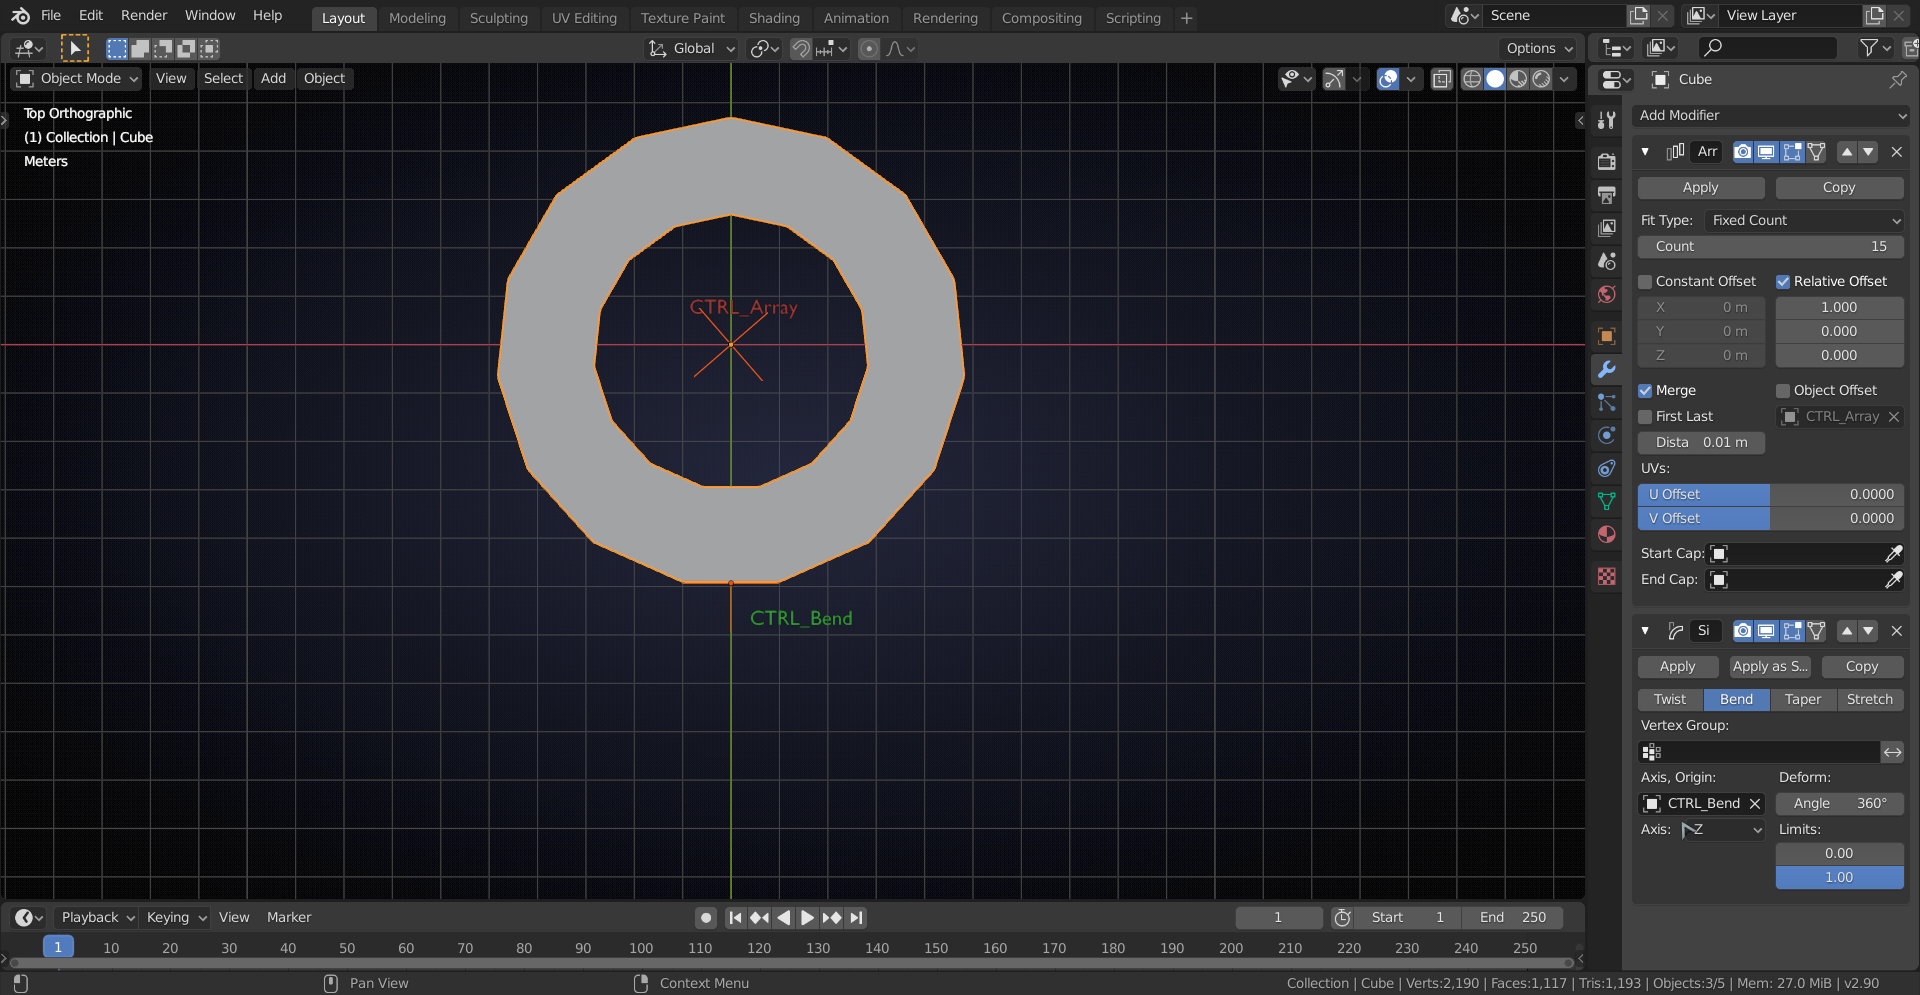
You'll have to put your Empty at the 'bottom' of the wheel, but no need to calculate the rotation of an Empty like in the Object Offset;)
Modifiers can be tricky (you have to get everything correct), but once you've figured them out, they are like a found treasure and you'll be using them all the time!
If you still can't get it to work, feel free to post your .blend, so that we can see where the problem is exactly.