[FINAL, FINAL] CLASS ANNOUNCEMENT #7 (Apr 11, 2018): Thanks to those of you who have responded to the Questionnaire. The feedback is extremely helpful. If you haven't responded yet and you participated in the class - or even if you didn't participate - please fill that out and I will gift you 20 Breath of the Wild screenshots from my Switch.
[FINAL] CLASS ANNOUNCEMENT #6 (Apr 9, 2018): We've reached the end of the homework extension period and this class officially comes to end. What a month! It's been a thrill to see each of you forge your characters, learn new things, share tips with each other, and offer critiques along the way.
This thread will be open indefinitely but it's officially at the end of it's "class lifespan" meaning I won't be able to commit weekly time to it anymore and I will unpin it from the forum topics list. I'll pop in occasionally if I see activity but you all are more than welcome to keep working on their characters here if you wish!
UPDATE: Closing post on page 44 and XP has been added to each participating account.
CLASS ANNOUNCEMENT #5 (Mar 28, 2018): Week 4's stream is archived and available via the Past Events button on the Live Event page. Also a reminder that I'm extending the 'deadline' of this month and will be keeping this thread alive through the end of the first week in April. Hopefully that gives you all a bit more time to get your characters done!
CLASS ANNOUNCEMENT #4 (Mar 26, 2018): Week 3, done! Thanks to everyone who submitted by Sunday. I'm quite impressed by the neutralization and retoplogy work I've seen. It's a lot of work and I can see that effort in the WIPs and especially completed submissions.
Week 4 - the final week - dives into adding color to our model, primarily in the form of creating textures. Check out this week's breakdown a little further down in this description and see you tomorrow at the Live Event!
CLASS ANNOUNCEMENT #3 (Mar 19, 2018): Week 2 is accomplished and I'm finally caught up on submissions! Thanks to everyone who submitted by Sunday. We have some impressive character concept sculpts underway. In fact, I have yet to bestow a grade lower than an A this week.
Week 3 continues our 3-week character building production. Specifically we're going to look at pursuing an animation friendly version of our character - both how and why we would do this. See you tomorrow at the Live Event! Don't forget to RSVP.
CLASS ANNOUNCEMENT #2 (Mar 12, 2018): Week 1 is done! Thanks to everyone who submitted by Sunday. It's been a lot of fun seeing your caricature work and concept art choices.
Week 2 begins the 3-week process of building a character based on the concepts we choose. Don't forget to RSVP to the Live Event tomorrow - See you then!
CLASS ANNOUNCEMENT #1 (Mar 5, 2018): Class is in session! Today officially begins the BC2-1803 class. Please check the syllabus below for Week 1's focus and assignments. Begin watching the pre-recorded courses if you haven't already and begin looking for a cool, stylized character design for creating in 3D this month. The first Live Event is tomorrow at 2pm EST - SEE YOU THERE! 😎
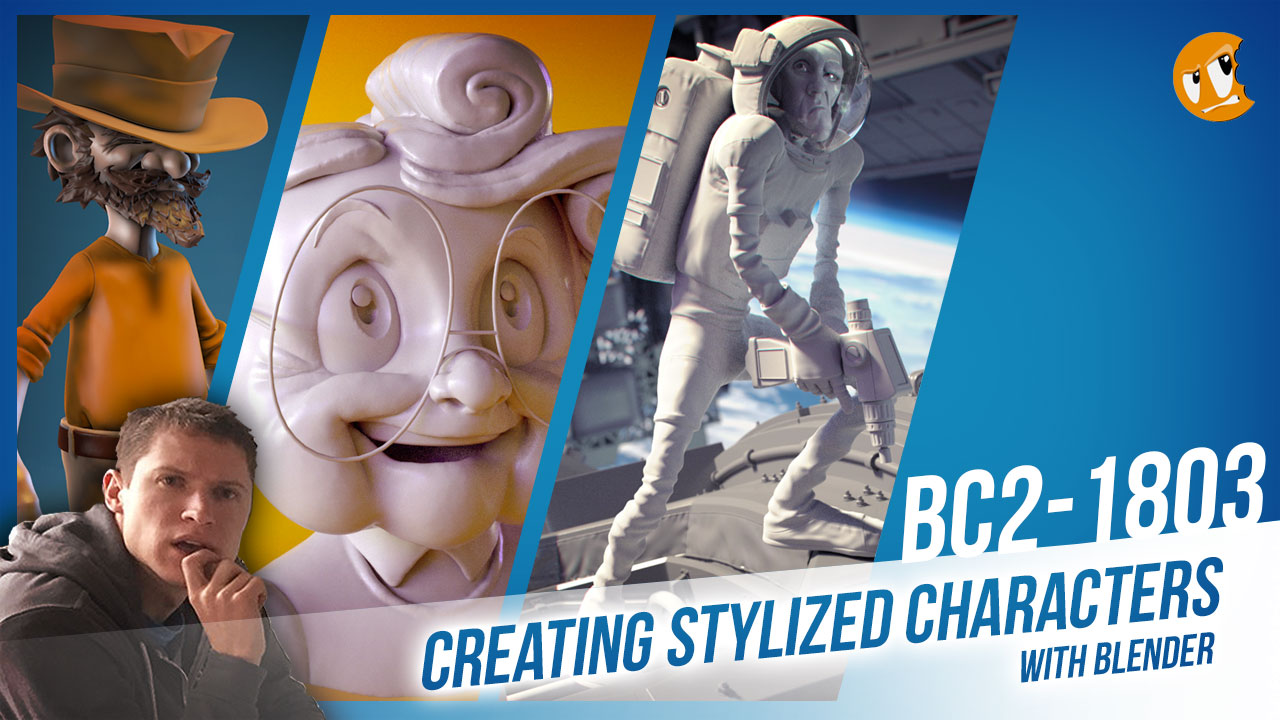
Welcome to the CGCookie Class: Creating Stylized Characters with Blender! This class is designed to teach you everything you need to know about building stylized 3D characters. If you’re diligent in watching all content and hitting homework deadlines, by the end you will have a modeled and textured stylized character! It’s an intermediate-to-advanced class which means you’ll do best by having some experience with Blender and 3D modeling before committing to this class.
This is the second "Class" format where Citizen members are invited to focus together on a particular topic/skill for a month. Participation looks like this:
WHEN? The class will take place from March 5th through March 31st
 Abstract: Stylization is any deviation from realism. Thus it’s a broad spectrum from slight liberty away from reality to extreme abstraction of reality. This week we're going to sift through various examples of stylized characters, noting their qualities, and categorizing a spectrum of stylization.
Goal of the Week: Train your eye and mind to stylize your perception. Practice simplifying and exaggerating reality. Loosen up your sculpting approach (gestural sculpting).
Pre-recorded course to watch: Art of Sculpting: Caricature Chapter
Week 1 Live Event (Already happened and archived!)
Homework:
 Abstract: Story plays a big part in stylization. Not necessarily ‘narrative’ but background, personality, and purpose. The success of a character is strengthened by its developmental arc. The best artists create characters that are more than the sum of its pixels; more than the sum of its brush strokes and polygons; more than its final render.
Goal of the Week: Develop a story for your character; one that can fuel your creative workflow for the rest of the month. Then channel that story into the first stage of sculpting.
Pre-recorded courses to watch:
Week 2 Live Event (Don't forget to RSVP)
Homework:
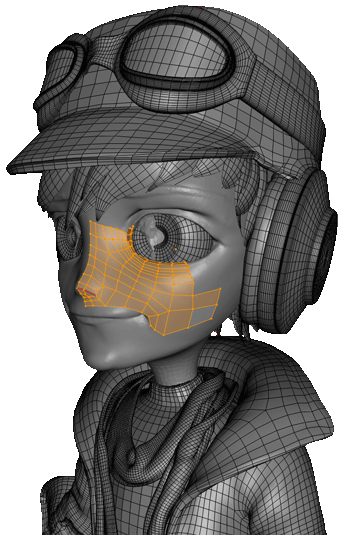 Abstract: At this point a decision needs to be made about our character sculptures: A) Leave it as a sculpture or B) optimize it for ‘production’. Leaving it as a sculpture means it’s a static sculpture that can be painted, rendered, or 3D printed but not animated. Optimizing it for production means you turn your sculpture into a model that’s easiest to work with up to and including animation. If you opt for optimization, this week is mostly a technical and problem-solving task. We need to both retopologize our mesh and also neutralize it if the sculpt is posed.
Goal of the Week: Understand the concept of “production-friendly” and practice retopology.
Pre-recorded courses to watch:
Week 3 Live Event (Don't forget to RSVP)
Homework:
 Abstract: Like Dorothy, our characters have so far lived in a black and white world. This week we’re leaving Kansas and adding color. There’s many methods for creating our character texture(s) including hand-painting, baking maps that accent the painting process (great for the less painterly character artists), as well as photo-sourcing. There's also a couple different formats: Vertex Colors and UV/Textures.
Goal of the Week: Get comfortable with painting textures.
Pre-recorded courses to watch:
Week 4 Live Event (Don't forget to RSVP)
Homework:
This thread is reserved for CG Cookie Citizens that are participating in the "Creating Stylized Characters with Blender" class. Its purpose is to serve as central communication for all participating Citizens (excluding Hobby plan Citizens) to ask me and each other questions and to post homework. As the instructor of the class, I will be monitoring this thread on a daily basis (especially Mon-Thurs) throughout the month of March to review homework and answer questions.
Free members are welcome to observe the thread but please respect that communication is reserved for Citizens.
HOMEWORK W-2.
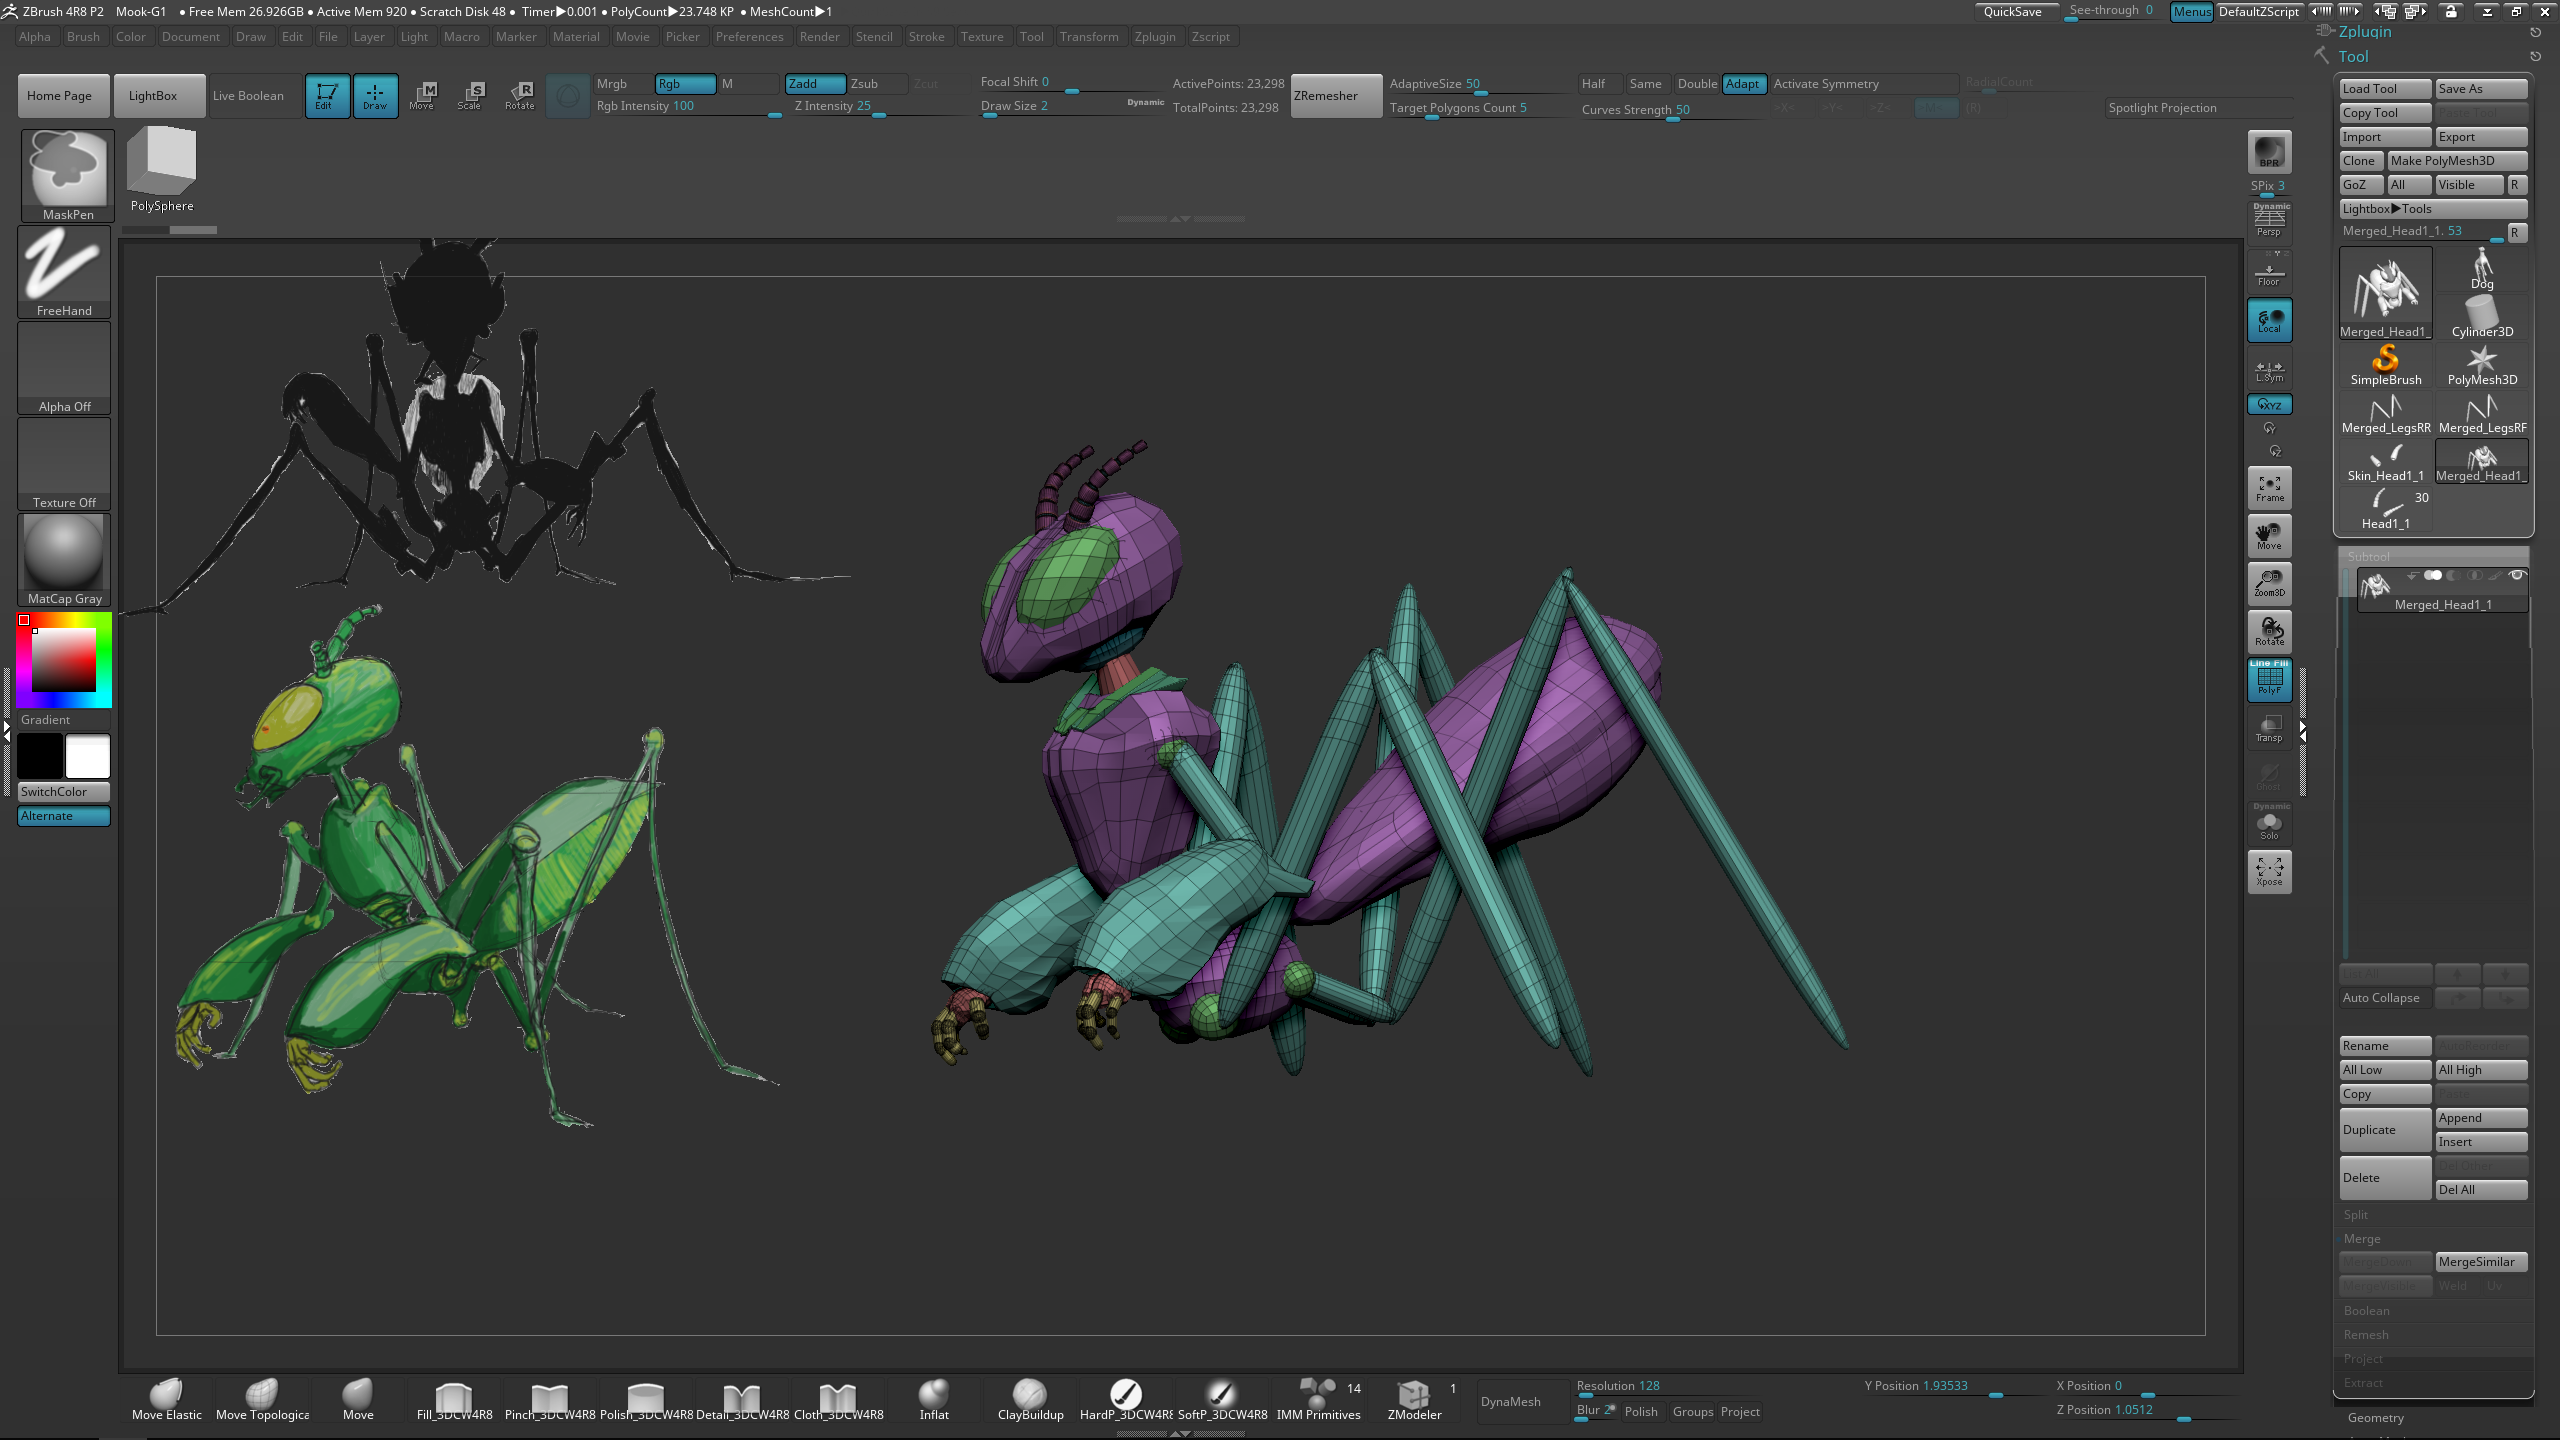
I would just like to mention, which I suppose I should have before ... that I have hours and hours worth of story outline built for a universe for my characters. Not really comfortable with story details at this point but, I will share the name origins of Doden - (a reptilian -boy) and Moorkata (an insectoid -boy).
This is a low poly blockout -base?- method I was working on, based on some Zbrush-Gumroad content by The Red Beard. Moorkata is Doden's right hand. He's tech savvy, intelligent, yet impulsively stupid. Ah, pre-teen adolescence. Will try to have something more "polished" by Monday night for me. 23:00 CeT, maybe Tuesday.
https://en.bab.la/dictionary/norwegian-english/doeden
http://www.maxgyan.com/hindi/m/moorkata-meaning-in-english.html
Looking good ![]() jack07 - I like the colors you've chosen. I'm not a color expert, but these colors certainly appear together with sports teams (LSU, Lakers, Vikings) at least 👌
jack07 - I like the colors you've chosen. I'm not a color expert, but these colors certainly appear together with sports teams (LSU, Lakers, Vikings) at least 👌
Nice job with the assignments this week ![]() jakeblended. And thanks for sharing about your workflow, including things you learned and problems you solved. That's so helpful to others reading through the thread. 👍
jakeblended. And thanks for sharing about your workflow, including things you learned and problems you solved. That's so helpful to others reading through the thread. 👍
A's for both the axe and Indy's texture. This makes you the first in the class to complete all BC2-1803's homework 👏
Your retopo in general is very clean and evenly gridded. In that way, great job! It's clear that you have been diligent in those principles.
If you were to animate this head, the density of the retopo is a little on the high side which could threaten the ability for the mesh to be animated and played back in real time. Also the mouth especially doesn't have concentric edge loops surrounding the mouth which is very important for reliable mouth deformation.
If you're not aiming to animate this character (or you're not trying to make it animation friendly) those notes don't really apply. I'm looking forward to seeing you finish Boogerman's whole body 💪
Your character really came together, ![]() shiennar! The textures finished him off very well. I had to view the large version to tell if the hair was particle hair or painted - that means it's a great job! Easily an A this week, including the axe assignment. Congrats on finishing your character this month 👏
shiennar! The textures finished him off very well. I had to view the large version to tell if the hair was particle hair or painted - that means it's a great job! Easily an A this week, including the axe assignment. Congrats on finishing your character this month 👏
Moorkata's blockout is shaping up very nicely, ![]() hypester77. I'm excited to see this progress 🤘
hypester77. I'm excited to see this progress 🤘
Very unique take on the AXErcise (pun credit: ![]() ullreym). Good stuff! And thanks for sharing about your experience with Zbrush polypaint and 3Dcoat. It always bothered me a bit that polypaint was dependent on mesh polycount and there wasn't a texel-based painting option. Not sure if there is now..
ullreym). Good stuff! And thanks for sharing about your experience with Zbrush polypaint and 3Dcoat. It always bothered me a bit that polypaint was dependent on mesh polycount and there wasn't a texel-based painting option. Not sure if there is now..
Thanks for breaking down your thoughts and suggestions around the shortfilm class idea ![]() hypester77! Reading this has reminded me/inspired me to officially put it on my live event ideas list.
hypester77! Reading this has reminded me/inspired me to officially put it on my live event ideas list.
You hit on some key points, including the difficulty of ensuring committed teams. This whole idea could be epic! Or it could fizzle out with only a few teams barely getting any work done lol. I'm thinking we should do an "application thread" outlining the Class idea and calling for teams to form with some sort of application criteria. If we get enough committed teams, then I pull the trigger on the class officially.
Because the active teams is going to be the meat and potatoes of the class. Without that, the class will be too abstract I fear. It'll definitely be a different type of class. Making shorts are so expansive and various that general lectures might be too irrelevant to the teams. It might make more sense to do detailed "guidance" sessions for teams and where they are in their production.
I dunno - talking out loud. Anyhoo, it's on the list and I'm going to continue chewing on the idea.
hey everybody ,hey @theluthier Sensei! i wish u r doing fine!
here is my progress so far , and it is a nightmare , i think that i overestimated my hardware , and my abilities to sculpt and paint with a mouse. my Pc is lagging when going beyond level 4 of subdivision , 4k textures is blowing my rig .and cloth simulation is impossible to do .
anyway i took a lot of time to reproduce the pose , laying uvs. for the textures i wanted to hand paint the skin and eyes. i started with a subdermal map , then a layout a multiple painting , i didnt want it to be so realistic to keep the stylized feeling !
i m disapointed with the result for now ,but i ll not be able to do better with my pc :( i still have a lot to do but i ll do my best to post a final rendur befor sunday.
hopefully u r doing better than me with ur homework


Could I please ask a small advice, maybe that is some evidence why.. So what can be the reason that the red spots on the giraffe does not appear in the Render view?
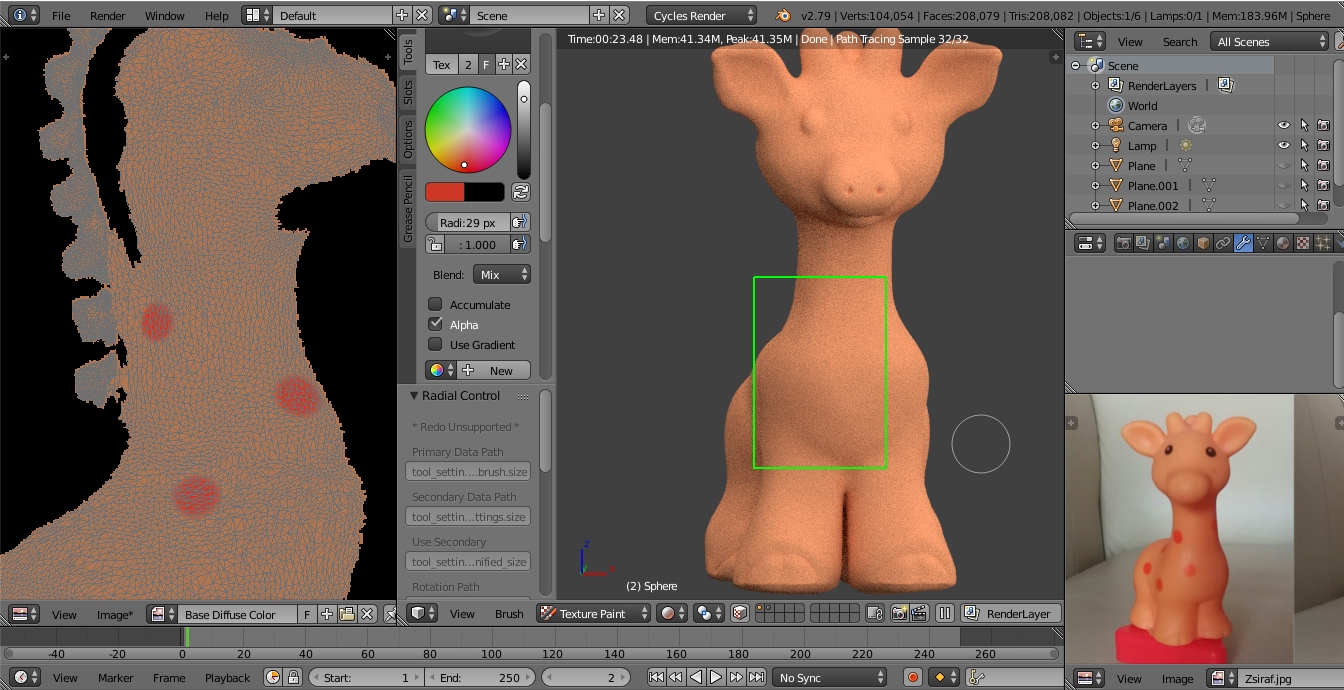
The brush strength is 1 and clicked around 10 times with the mouse on the most front spot for sure with the TexDraw brush, presumably that is not some computer performance issue? (having not too modern computer for Blender)
mmalhomsi just hold on, understanding your frustration with the computer, but I think that looks much much (much) better than you think.
mmalhomsi it looks INCREDIBLE!! You could get a job at pixar with just that haha!
![]() csehz The only thing I can think of is that the texture is not assigned to the material. If you haven't been able to solve it, upload the file so we can see what's going on 😊
csehz The only thing I can think of is that the texture is not assigned to the material. If you haven't been able to solve it, upload the file so we can see what's going on 😊
Check texture view and see if it shows up there? Can we see your nodes for the material? You may already be aware of this, but the "Base Diffuse Color" image texture will need to be plugged in to the the color input for your shader. Also I notice there is an asterisk next to the image menu. You will need to save it externally before you can import it into cycles effectively. UV image editor-->Image-->Save as image-->then open it from your save location in the node editor and plug it in. Hope that helps.
I agree with zsolt and jack, this looks incredible! Great work so far!
Homework Wk 4 (Part 1)
I was shooting for the Christopher Hayes World of Warcraft style, but dialed things back to a less skilled swirly-painterly thing.
Had a lot of fun!
Experimenting with my imports. I have a pretty high res version that's like 3 million faces in blender lol ... hey, it doesn't crash ... but it does take about 2 minutes lol. Testing things out and seeing what seems to be blender friendly and or not. If Blender is my engine, I think I need to lean on it more than "options" within Z-Brush. (modifiers) Decimate in Z-Brush is much faster but, Z-brush I am fairly certain has a different sort of geometry if you're using dynamesh and I am. but in any case, Decimate in Blender (.05) gets me to just under 200k lol. I'm doing different things but, you know, I wanted to throw a brick at Blender with my new machine and see what happened. Next test is only 25k points in Z-brush. Anyhow, about to generate some UV's and scratch my head in Substance Painter.
Going to try and generate some detail tonight and get some texturing/painting and have something to look at .. I hope before I get to bed. =) Wish I could have done this over a 4 week period lol because it's a huge learning process for me lol. Did I say huge? lol
![]() jack07 , pprocyonlotor thanks a lot for your advices, based on those started from the beginning and then the spot appears normally, I guess before had another material as base and that was not replaced by the "Base Diffuse Color"
jack07 , pprocyonlotor thanks a lot for your advices, based on those started from the beginning and then the spot appears normally, I guess before had another material as base and that was not replaced by the "Base Diffuse Color"
Homework Submission Week 4 part A
Oh man, what a month this was! I have to say this class was a lot of fun, but most important, really helpful. It happened at the time I most needed it. I don't think I could have cemented the look of this character without this class, so happy with how it turned out!
Enough babbling! Here's Bianca in fully colored glory!
The hair, tail, and eyes' textures were done in Blender hand painted! While the clothes, skin and normal maps were done in Substance Painter. I went crazy with the textures, no slot was left unfilled! No, seriously my class' folder is 10 GB.
Thanks ![]() silentheart00 for the greyscale workflow, it helped a lot!
silentheart00 for the greyscale workflow, it helped a lot!
I probably should darker the hair of her back, it ended up looking too bright in Sketchfab. Speaking of it, I could have posted this yesterday, but for some reason sketchfab kept butchering her mesh! Turns out it doesn't like the armature modifier...
Another reason why it took longer than expected: I need to learn more about rigging, like how to deal with coats! I wanted to pose her like in the sculpt, but the coat started to eat itself. I know I could simulate it, but I will have to learn how to deal with it for real time processing!
I learnt so much from this experience! I redone stuff so many times because of silly mistakes, but at least now I know what I should not do, ha!
Thanks @theluthier for this amazing class, and to everyone who participated! So many cool characters!
And now, to work on that axe 😎