[FINAL, FINAL] CLASS ANNOUNCEMENT #7 (Apr 11, 2018): Thanks to those of you who have responded to the Questionnaire. The feedback is extremely helpful. If you haven't responded yet and you participated in the class - or even if you didn't participate - please fill that out and I will gift you 20 Breath of the Wild screenshots from my Switch.
[FINAL] CLASS ANNOUNCEMENT #6 (Apr 9, 2018): We've reached the end of the homework extension period and this class officially comes to end. What a month! It's been a thrill to see each of you forge your characters, learn new things, share tips with each other, and offer critiques along the way.
This thread will be open indefinitely but it's officially at the end of it's "class lifespan" meaning I won't be able to commit weekly time to it anymore and I will unpin it from the forum topics list. I'll pop in occasionally if I see activity but you all are more than welcome to keep working on their characters here if you wish!
UPDATE: Closing post on page 44 and XP has been added to each participating account.
CLASS ANNOUNCEMENT #5 (Mar 28, 2018): Week 4's stream is archived and available via the Past Events button on the Live Event page. Also a reminder that I'm extending the 'deadline' of this month and will be keeping this thread alive through the end of the first week in April. Hopefully that gives you all a bit more time to get your characters done!
CLASS ANNOUNCEMENT #4 (Mar 26, 2018): Week 3, done! Thanks to everyone who submitted by Sunday. I'm quite impressed by the neutralization and retoplogy work I've seen. It's a lot of work and I can see that effort in the WIPs and especially completed submissions.
Week 4 - the final week - dives into adding color to our model, primarily in the form of creating textures. Check out this week's breakdown a little further down in this description and see you tomorrow at the Live Event!
CLASS ANNOUNCEMENT #3 (Mar 19, 2018): Week 2 is accomplished and I'm finally caught up on submissions! Thanks to everyone who submitted by Sunday. We have some impressive character concept sculpts underway. In fact, I have yet to bestow a grade lower than an A this week.
Week 3 continues our 3-week character building production. Specifically we're going to look at pursuing an animation friendly version of our character - both how and why we would do this. See you tomorrow at the Live Event! Don't forget to RSVP.
CLASS ANNOUNCEMENT #2 (Mar 12, 2018): Week 1 is done! Thanks to everyone who submitted by Sunday. It's been a lot of fun seeing your caricature work and concept art choices.
Week 2 begins the 3-week process of building a character based on the concepts we choose. Don't forget to RSVP to the Live Event tomorrow - See you then!
CLASS ANNOUNCEMENT #1 (Mar 5, 2018): Class is in session! Today officially begins the BC2-1803 class. Please check the syllabus below for Week 1's focus and assignments. Begin watching the pre-recorded courses if you haven't already and begin looking for a cool, stylized character design for creating in 3D this month. The first Live Event is tomorrow at 2pm EST - SEE YOU THERE! 😎
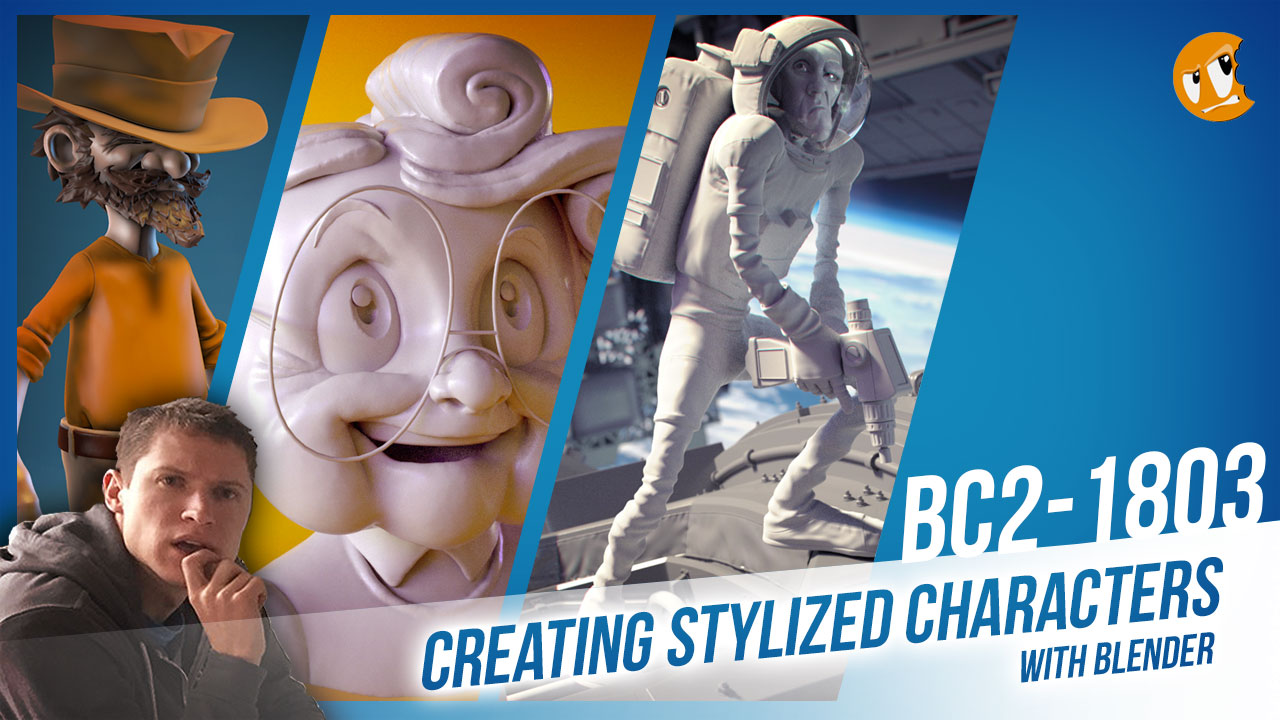
Welcome to the CGCookie Class: Creating Stylized Characters with Blender! This class is designed to teach you everything you need to know about building stylized 3D characters. If you’re diligent in watching all content and hitting homework deadlines, by the end you will have a modeled and textured stylized character! It’s an intermediate-to-advanced class which means you’ll do best by having some experience with Blender and 3D modeling before committing to this class.
This is the second "Class" format where Citizen members are invited to focus together on a particular topic/skill for a month. Participation looks like this:
WHEN? The class will take place from March 5th through March 31st
 Abstract: Stylization is any deviation from realism. Thus it’s a broad spectrum from slight liberty away from reality to extreme abstraction of reality. This week we're going to sift through various examples of stylized characters, noting their qualities, and categorizing a spectrum of stylization.
Goal of the Week: Train your eye and mind to stylize your perception. Practice simplifying and exaggerating reality. Loosen up your sculpting approach (gestural sculpting).
Pre-recorded course to watch: Art of Sculpting: Caricature Chapter
Week 1 Live Event (Already happened and archived!)
Homework:
 Abstract: Story plays a big part in stylization. Not necessarily ‘narrative’ but background, personality, and purpose. The success of a character is strengthened by its developmental arc. The best artists create characters that are more than the sum of its pixels; more than the sum of its brush strokes and polygons; more than its final render.
Goal of the Week: Develop a story for your character; one that can fuel your creative workflow for the rest of the month. Then channel that story into the first stage of sculpting.
Pre-recorded courses to watch:
Week 2 Live Event (Don't forget to RSVP)
Homework:
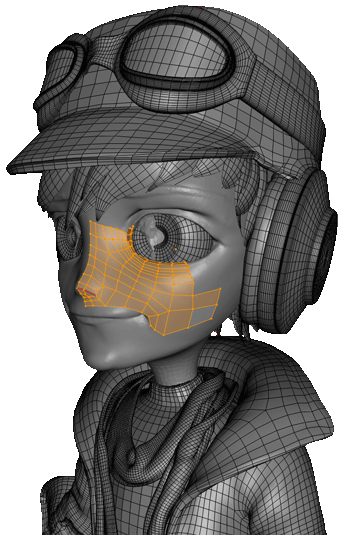 Abstract: At this point a decision needs to be made about our character sculptures: A) Leave it as a sculpture or B) optimize it for ‘production’. Leaving it as a sculpture means it’s a static sculpture that can be painted, rendered, or 3D printed but not animated. Optimizing it for production means you turn your sculpture into a model that’s easiest to work with up to and including animation. If you opt for optimization, this week is mostly a technical and problem-solving task. We need to both retopologize our mesh and also neutralize it if the sculpt is posed.
Goal of the Week: Understand the concept of “production-friendly” and practice retopology.
Pre-recorded courses to watch:
Week 3 Live Event (Don't forget to RSVP)
Homework:
 Abstract: Like Dorothy, our characters have so far lived in a black and white world. This week we’re leaving Kansas and adding color. There’s many methods for creating our character texture(s) including hand-painting, baking maps that accent the painting process (great for the less painterly character artists), as well as photo-sourcing. There's also a couple different formats: Vertex Colors and UV/Textures.
Goal of the Week: Get comfortable with painting textures.
Pre-recorded courses to watch:
Week 4 Live Event (Don't forget to RSVP)
Homework:
This thread is reserved for CG Cookie Citizens that are participating in the "Creating Stylized Characters with Blender" class. Its purpose is to serve as central communication for all participating Citizens (excluding Hobby plan Citizens) to ask me and each other questions and to post homework. As the instructor of the class, I will be monitoring this thread on a daily basis (especially Mon-Thurs) throughout the month of March to review homework and answer questions.
Free members are welcome to observe the thread but please respect that communication is reserved for Citizens.
Homework submission Week 1
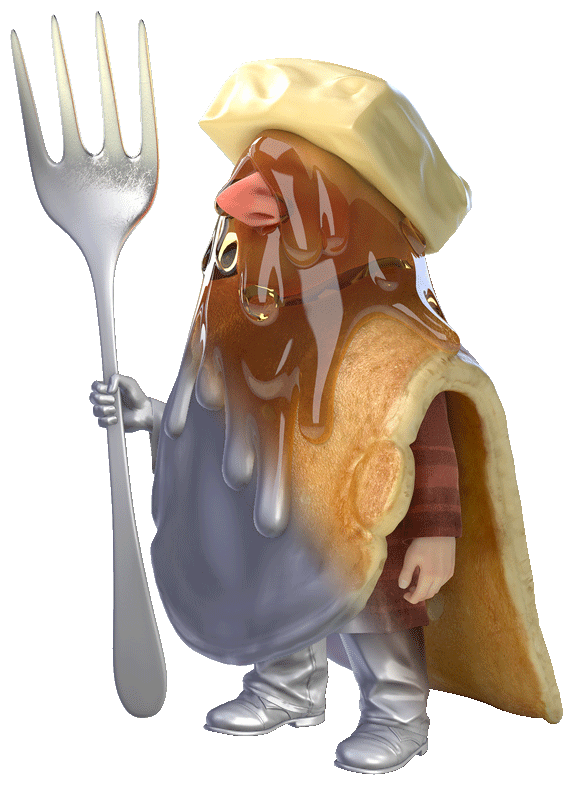
I didn't choose anyone famous as I have a character in mind that I would like to develop during the month (for a short film I'm hoping to make one day).
He should read both as a professor and a magician - for reasons that will become apparent if I ever make that film. He is my first character design, I only recently finished the Intro to Character Modelling. His likeness was slightly inspired by this illustration but I decided to drop the glasses and give him eyes that almost looked like glasses in themselves.
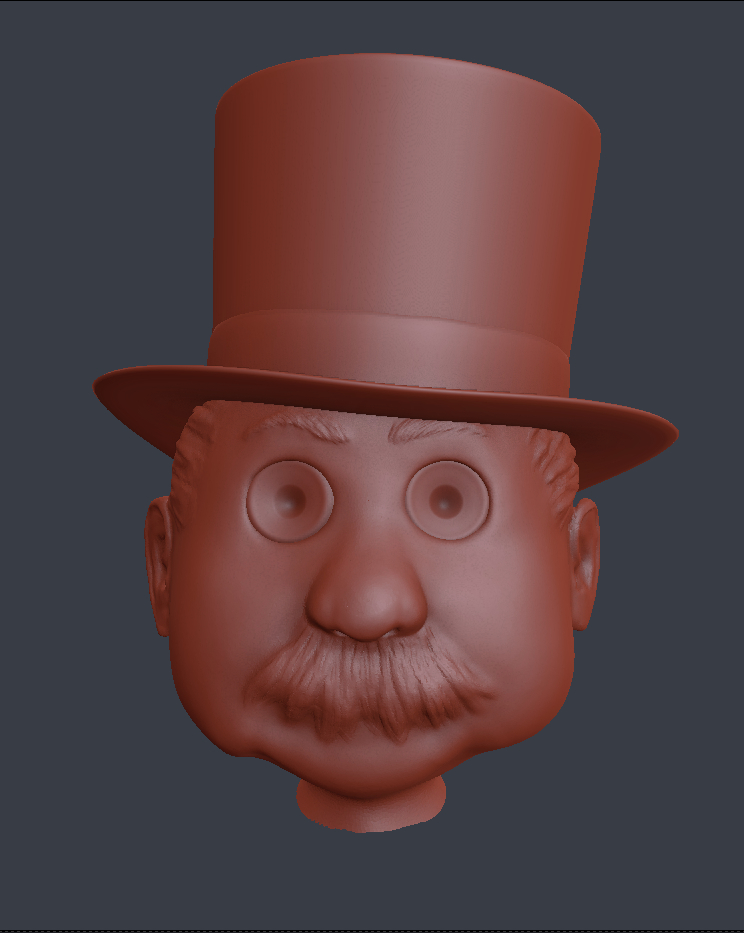
Oh, and here is a Sketchfab link.
I can't tell if it's coming out well or just...crazy weird. Implemented your advice though! Tilted those eyes, shrinking them really helped. Twisted the eyebrows a bit too. Added the smile lines by the nose, and connected those pronounced cheekbones to the brow so his skull-shape makes more sense. I got distracted and made decent-enough ears, which is kinda cool. XD
The worst part is he was looking MUCH better in orthographic mode before I realized it LOL. I'm hoping after adding hair and such he'll look less...creepy. (Using Kent's "unflattering headlight" viewport light setup haha.)
I'm very much torn about being proud of myself, because I can sorta see a likeness emerging...
Much more to be done though, just not sure when to move to finer detail stage.
Thoughts? :)

HOMEWORK: Okay, I'm flirting with an angry wife for this project! lol I'm trying to figure so many things out my head is spinning. So, I must throw in the towel. This is (believe it or not) the first caricature I've ever done in any form. Not enough time to play with textures and fool with more crease/detail brushing in the hair, eyes ... and everywhere in general ... mouth and lips incomplete. /sigh But I am learning. Not really happy with it but, happy that I got something done. Only my second "detailed" sculpt to date! I think for a personal progression thing, I might task myself to do this once a week and set a time limit to help myself along.
The "move brush" is the most simple, subtle, aggressive, magical brush. I think need to play with everyday.
anyways, not quite a render time is not on my side atm. 
That turned out really nice, definitely is the Terminator Arnold guy, well done!
Anatomy is my main focus right now since I started using Blender sculpt tool a month ago. Sketchfab is a good source to study other users uploaded anatomy models because I can study them from all angles which is very helpful.
Nice work there, it registers to me as Mr O'Brian and I agree with malhomsi on the wider forehead.
Homework submission Week 1
When working through the prerecorded course work a few weeks back, i ended up trying a character and this was the result
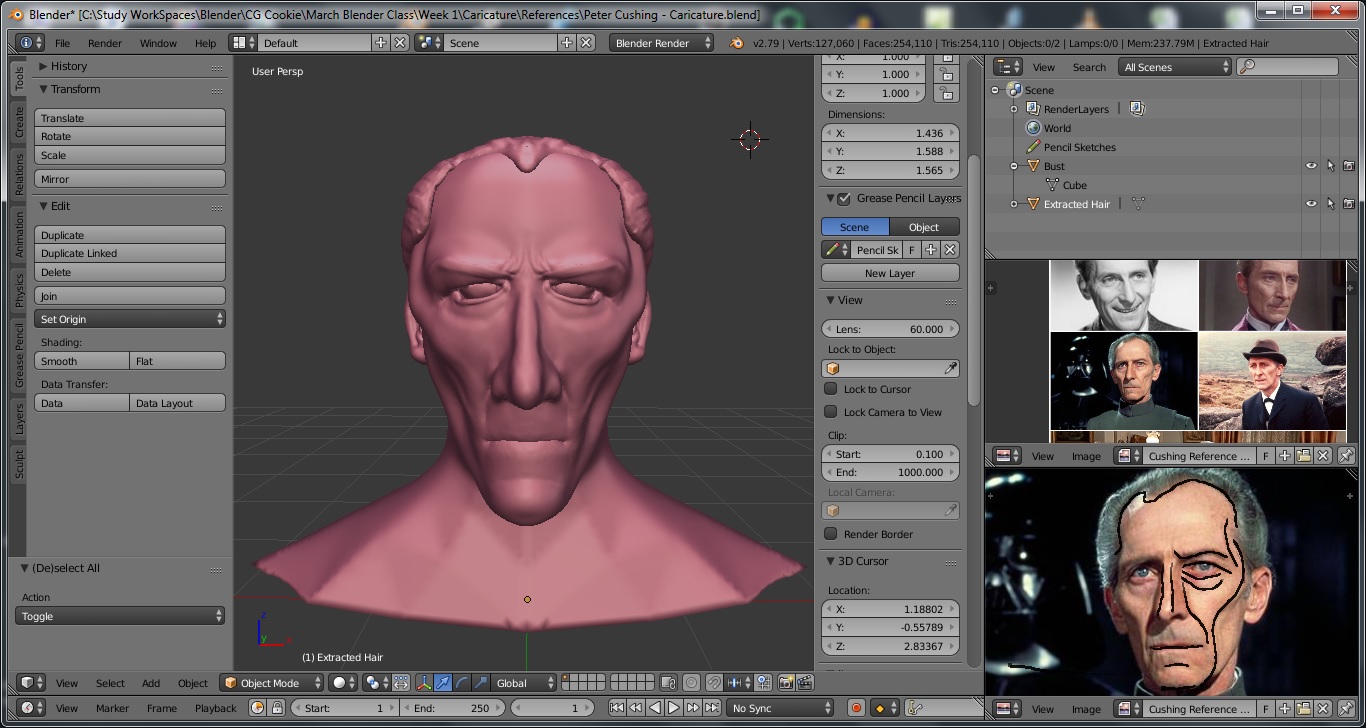
But for this month, I've gone for another person with a little more extravagent features to focus on, Peter Cushing.
Enjoyed trying to work through this. I've scrapped and restarted a few times since i was finding myself, getting too detailed too quick and having to go back and have a word with myself and just try and rough block the shape first.
But its all practice and mistakes and thats all helpful, and hope it will stick in time.
Still alot of work I could have done, hair is too thin. the top jaw line is off, and the furrows just dont seem to gel.
but that said, enjoyed working through it, and watching everyone else progress. picked up alot from reading through, just need the practice to get it all sticking in my head. Great work everyone !!
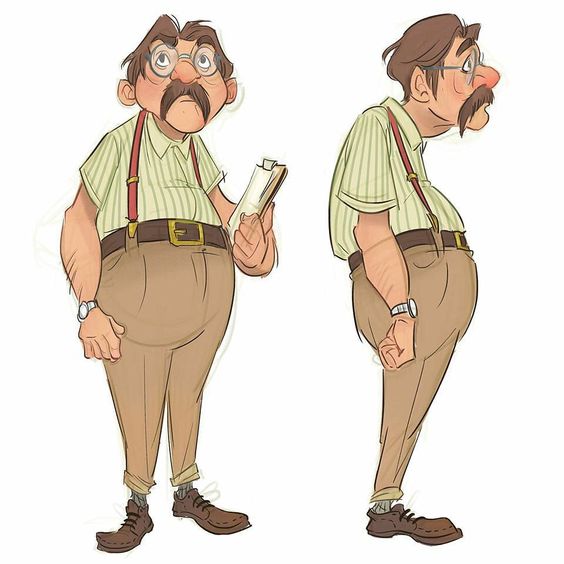
For the concept drawings for next weeks character ive chosen a teacher drawing I found on pintrest, I dont want to dig a hole too deep for myself and then find its far too detailed for me to finish.
So with that said ive chosen a more simplified character for myself as a beginner, and fingers crossed I can get through it.
Nice ttr1bar Vladislav, very nice flow to the face.
I'll poke my head above the ramparts, and say hes got a Kevin Hart look to him *ducks for cover*
If you dont mind me asking, how did you do the sort of roughness of the facial hair?

Progress mostly done just working on a render now and grooming the hair. Any guesses as to who it is?
Homework Submission Week 1:
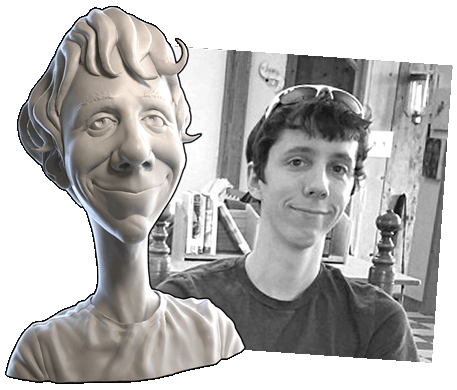
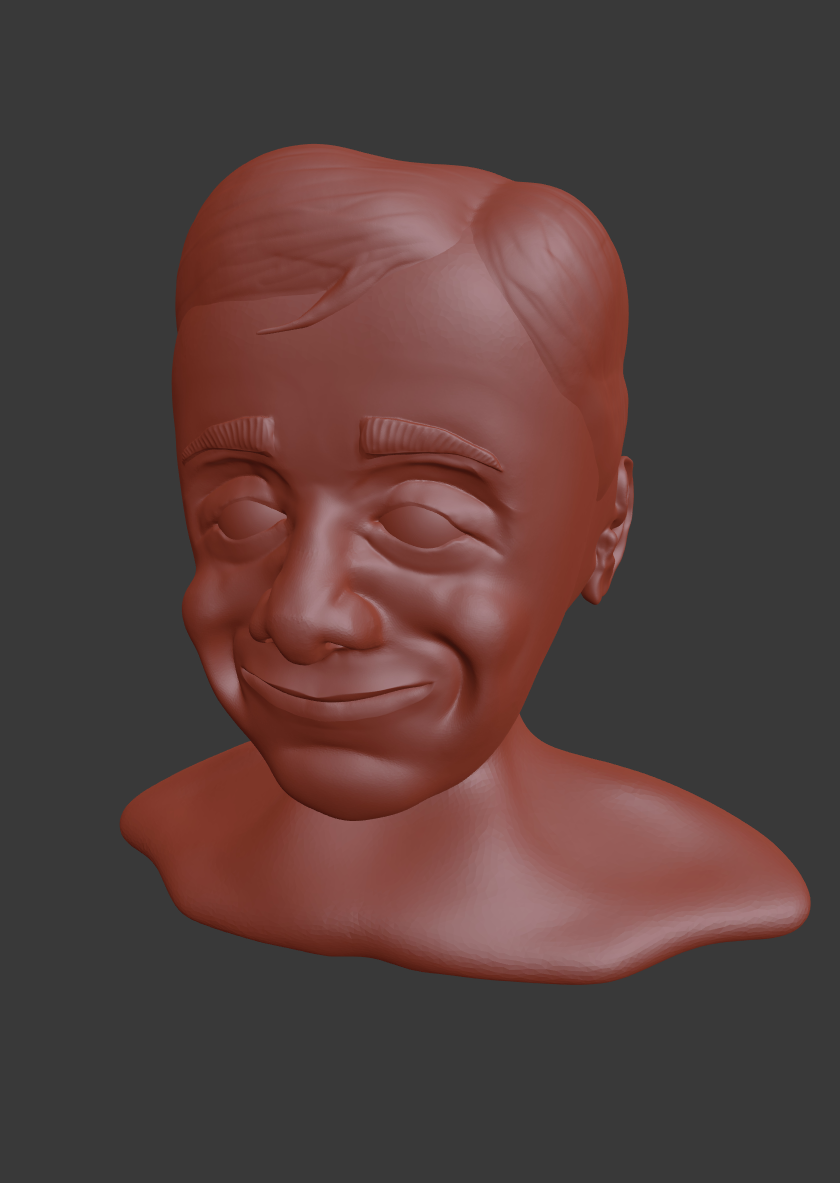
That's my submission, but i'm not totally satisfied with the result (and don't know how to fix it), I think it doesn't resemble me, maybe because my face has no distinguishing features or I just couldn't represent myself.
It is mostly a stylized face "based" on me. I would appreciate if I could get any suggestions on how to improve the artwork.
The art and the ugly face:
(I couldn't find a better photo of me)
And here's the concept:

Thanks and have a nice sunday.
Overall, your Mr Bean sculpt turned out well! It's still mostly an authentic representation of his features, which again, are already so exaggerated/distinct in reality. I can see that you pushed the ear size, but everything else looks pretty close to his actual features.
Could you post a download link to your .blend file for me? I'd like to poke around with it a bit to see what I would push.
And your character concept art is great! That will be a good character to see you build in 3D over the next 3 weeks 👍
This turned out really well mmalhomsi! I give you 👍👍 on the feature exaggerations, details, lighting, and rendering. You knocked this assignment out of the park! A+
I agree, your sculpt is recognizable as Conan to me. I like your choice of features to exaggerate (that quiff!). The only thing I see right away that I would have exaggerated is the slant of his eyes. Still though, great job. A-quality work 👏
Sure, it's no problem doing a character with animal traits or additions (like the rabbit ears). The principles we'll explore in this class are applicable to non-human characters.
Good to see you again for this class, Katerina! This is a fun character. I like your idea to make his eyes feel glasses-like.
I do think mmalhomsi makes a good point about the face being flat in profile. I'm looking forward to seeing this character fleshed out with a body 👍
Thank you ![]() oboshape !
oboshape !
I was aiming for Martin Lawrence, so ccodywinch guessed right.

I did the facial hair with Clay Strips brush, with radius to almost minimum, maximum strength, doing quick brushstrokes. The subdivide modifier seems to preserve the form quick well for these.
@theluthier
Thank you very much for your feedback, Kent! I would give Jason another try :)
Yeah, I gotta go with Ian McKellen too. Not many around with eyebags like that!
