[FINAL, FINAL] CLASS ANNOUNCEMENT #7 (Apr 11, 2018): Thanks to those of you who have responded to the Questionnaire. The feedback is extremely helpful. If you haven't responded yet and you participated in the class - or even if you didn't participate - please fill that out and I will gift you 20 Breath of the Wild screenshots from my Switch.
[FINAL] CLASS ANNOUNCEMENT #6 (Apr 9, 2018): We've reached the end of the homework extension period and this class officially comes to end. What a month! It's been a thrill to see each of you forge your characters, learn new things, share tips with each other, and offer critiques along the way.
This thread will be open indefinitely but it's officially at the end of it's "class lifespan" meaning I won't be able to commit weekly time to it anymore and I will unpin it from the forum topics list. I'll pop in occasionally if I see activity but you all are more than welcome to keep working on their characters here if you wish!
UPDATE: Closing post on page 44 and XP has been added to each participating account.
CLASS ANNOUNCEMENT #5 (Mar 28, 2018): Week 4's stream is archived and available via the Past Events button on the Live Event page. Also a reminder that I'm extending the 'deadline' of this month and will be keeping this thread alive through the end of the first week in April. Hopefully that gives you all a bit more time to get your characters done!
CLASS ANNOUNCEMENT #4 (Mar 26, 2018): Week 3, done! Thanks to everyone who submitted by Sunday. I'm quite impressed by the neutralization and retoplogy work I've seen. It's a lot of work and I can see that effort in the WIPs and especially completed submissions.
Week 4 - the final week - dives into adding color to our model, primarily in the form of creating textures. Check out this week's breakdown a little further down in this description and see you tomorrow at the Live Event!
CLASS ANNOUNCEMENT #3 (Mar 19, 2018): Week 2 is accomplished and I'm finally caught up on submissions! Thanks to everyone who submitted by Sunday. We have some impressive character concept sculpts underway. In fact, I have yet to bestow a grade lower than an A this week.
Week 3 continues our 3-week character building production. Specifically we're going to look at pursuing an animation friendly version of our character - both how and why we would do this. See you tomorrow at the Live Event! Don't forget to RSVP.
CLASS ANNOUNCEMENT #2 (Mar 12, 2018): Week 1 is done! Thanks to everyone who submitted by Sunday. It's been a lot of fun seeing your caricature work and concept art choices.
Week 2 begins the 3-week process of building a character based on the concepts we choose. Don't forget to RSVP to the Live Event tomorrow - See you then!
CLASS ANNOUNCEMENT #1 (Mar 5, 2018): Class is in session! Today officially begins the BC2-1803 class. Please check the syllabus below for Week 1's focus and assignments. Begin watching the pre-recorded courses if you haven't already and begin looking for a cool, stylized character design for creating in 3D this month. The first Live Event is tomorrow at 2pm EST - SEE YOU THERE! 😎
Welcome to the CGCookie Class: Creating Stylized Characters with Blender! This class is designed to teach you everything you need to know about building stylized 3D characters. If you’re diligent in watching all content and hitting homework deadlines, by the end you will have a modeled and textured stylized character! It’s an intermediate-to-advanced class which means you’ll do best by having some experience with Blender and 3D modeling before committing to this class.
This is the second "Class" format where Citizen members are invited to focus together on a particular topic/skill for a month. Participation looks like this:
WHEN? The class will take place from March 5th through March 31st
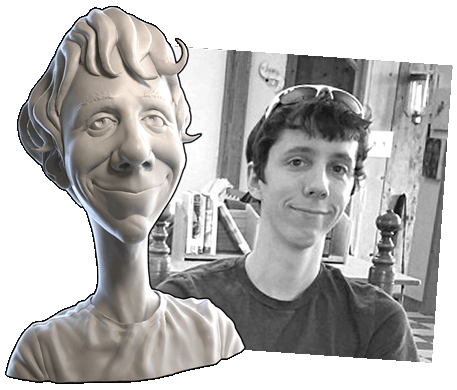 Abstract: Stylization is any deviation from realism. Thus it’s a broad spectrum from slight liberty away from reality to extreme abstraction of reality. This week we're going to sift through various examples of stylized characters, noting their qualities, and categorizing a spectrum of stylization.
Goal of the Week: Train your eye and mind to stylize your perception. Practice simplifying and exaggerating reality. Loosen up your sculpting approach (gestural sculpting).
Pre-recorded course to watch: Art of Sculpting: Caricature Chapter
Week 1 Live Event (Already happened and archived!)
Homework:
 Abstract: Story plays a big part in stylization. Not necessarily ‘narrative’ but background, personality, and purpose. The success of a character is strengthened by its developmental arc. The best artists create characters that are more than the sum of its pixels; more than the sum of its brush strokes and polygons; more than its final render.
Goal of the Week: Develop a story for your character; one that can fuel your creative workflow for the rest of the month. Then channel that story into the first stage of sculpting.
Pre-recorded courses to watch:
Week 2 Live Event (Don't forget to RSVP)
Homework:
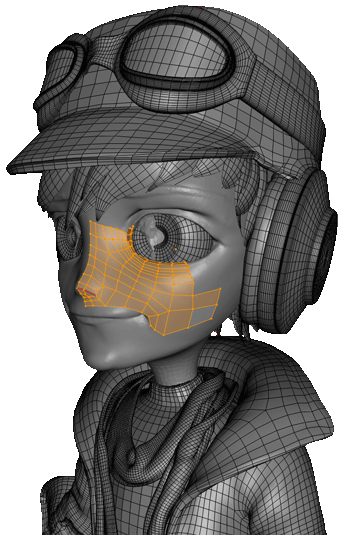 Abstract: At this point a decision needs to be made about our character sculptures: A) Leave it as a sculpture or B) optimize it for ‘production’. Leaving it as a sculpture means it’s a static sculpture that can be painted, rendered, or 3D printed but not animated. Optimizing it for production means you turn your sculpture into a model that’s easiest to work with up to and including animation. If you opt for optimization, this week is mostly a technical and problem-solving task. We need to both retopologize our mesh and also neutralize it if the sculpt is posed.
Goal of the Week: Understand the concept of “production-friendly” and practice retopology.
Pre-recorded courses to watch:
Week 3 Live Event (Don't forget to RSVP)
Homework:
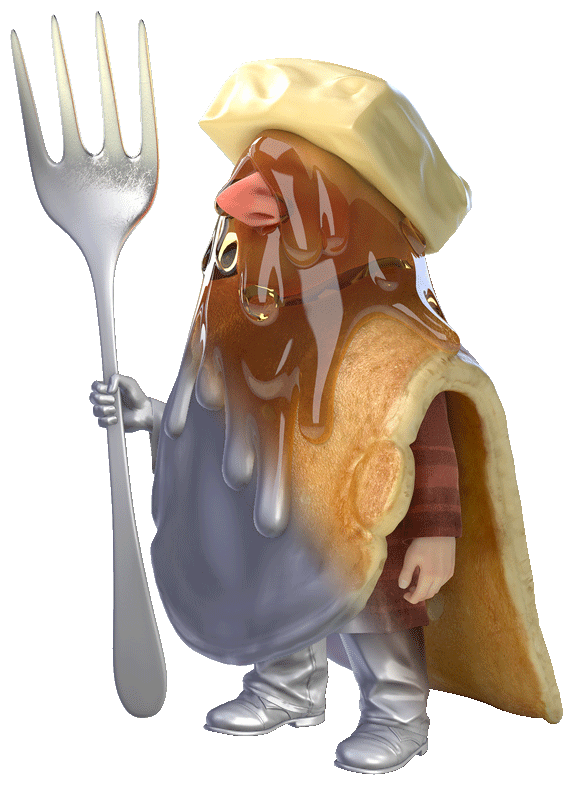 Abstract: Like Dorothy, our characters have so far lived in a black and white world. This week we’re leaving Kansas and adding color. There’s many methods for creating our character texture(s) including hand-painting, baking maps that accent the painting process (great for the less painterly character artists), as well as photo-sourcing. There's also a couple different formats: Vertex Colors and UV/Textures.
Goal of the Week: Get comfortable with painting textures.
Pre-recorded courses to watch:
Week 4 Live Event (Don't forget to RSVP)
Homework:
This thread is reserved for CG Cookie Citizens that are participating in the "Creating Stylized Characters with Blender" class. Its purpose is to serve as central communication for all participating Citizens (excluding Hobby plan Citizens) to ask me and each other questions and to post homework. As the instructor of the class, I will be monitoring this thread on a daily basis (especially Mon-Thurs) throughout the month of March to review homework and answer questions.
Free members are welcome to observe the thread but please respect that communication is reserved for Citizens.
I second Matt's suggestion about pushing a little more into the extreme. I certainly have a tendency to do 'safe caricature' where I push the features slightly, say 25% further than reality. But I try to tell myself to push further, like 50% or more, for the exercise of it.
But yes, it's totally looking great so far!
This turned out well ![]() btiblox! Kudos on going the extra mile with textures and hair 🤘
btiblox! Kudos on going the extra mile with textures and hair 🤘
Is this a caricature of someone? I'd love to see a photo if so. It's a cool approach to do a 2D sketch first before going into 3D!
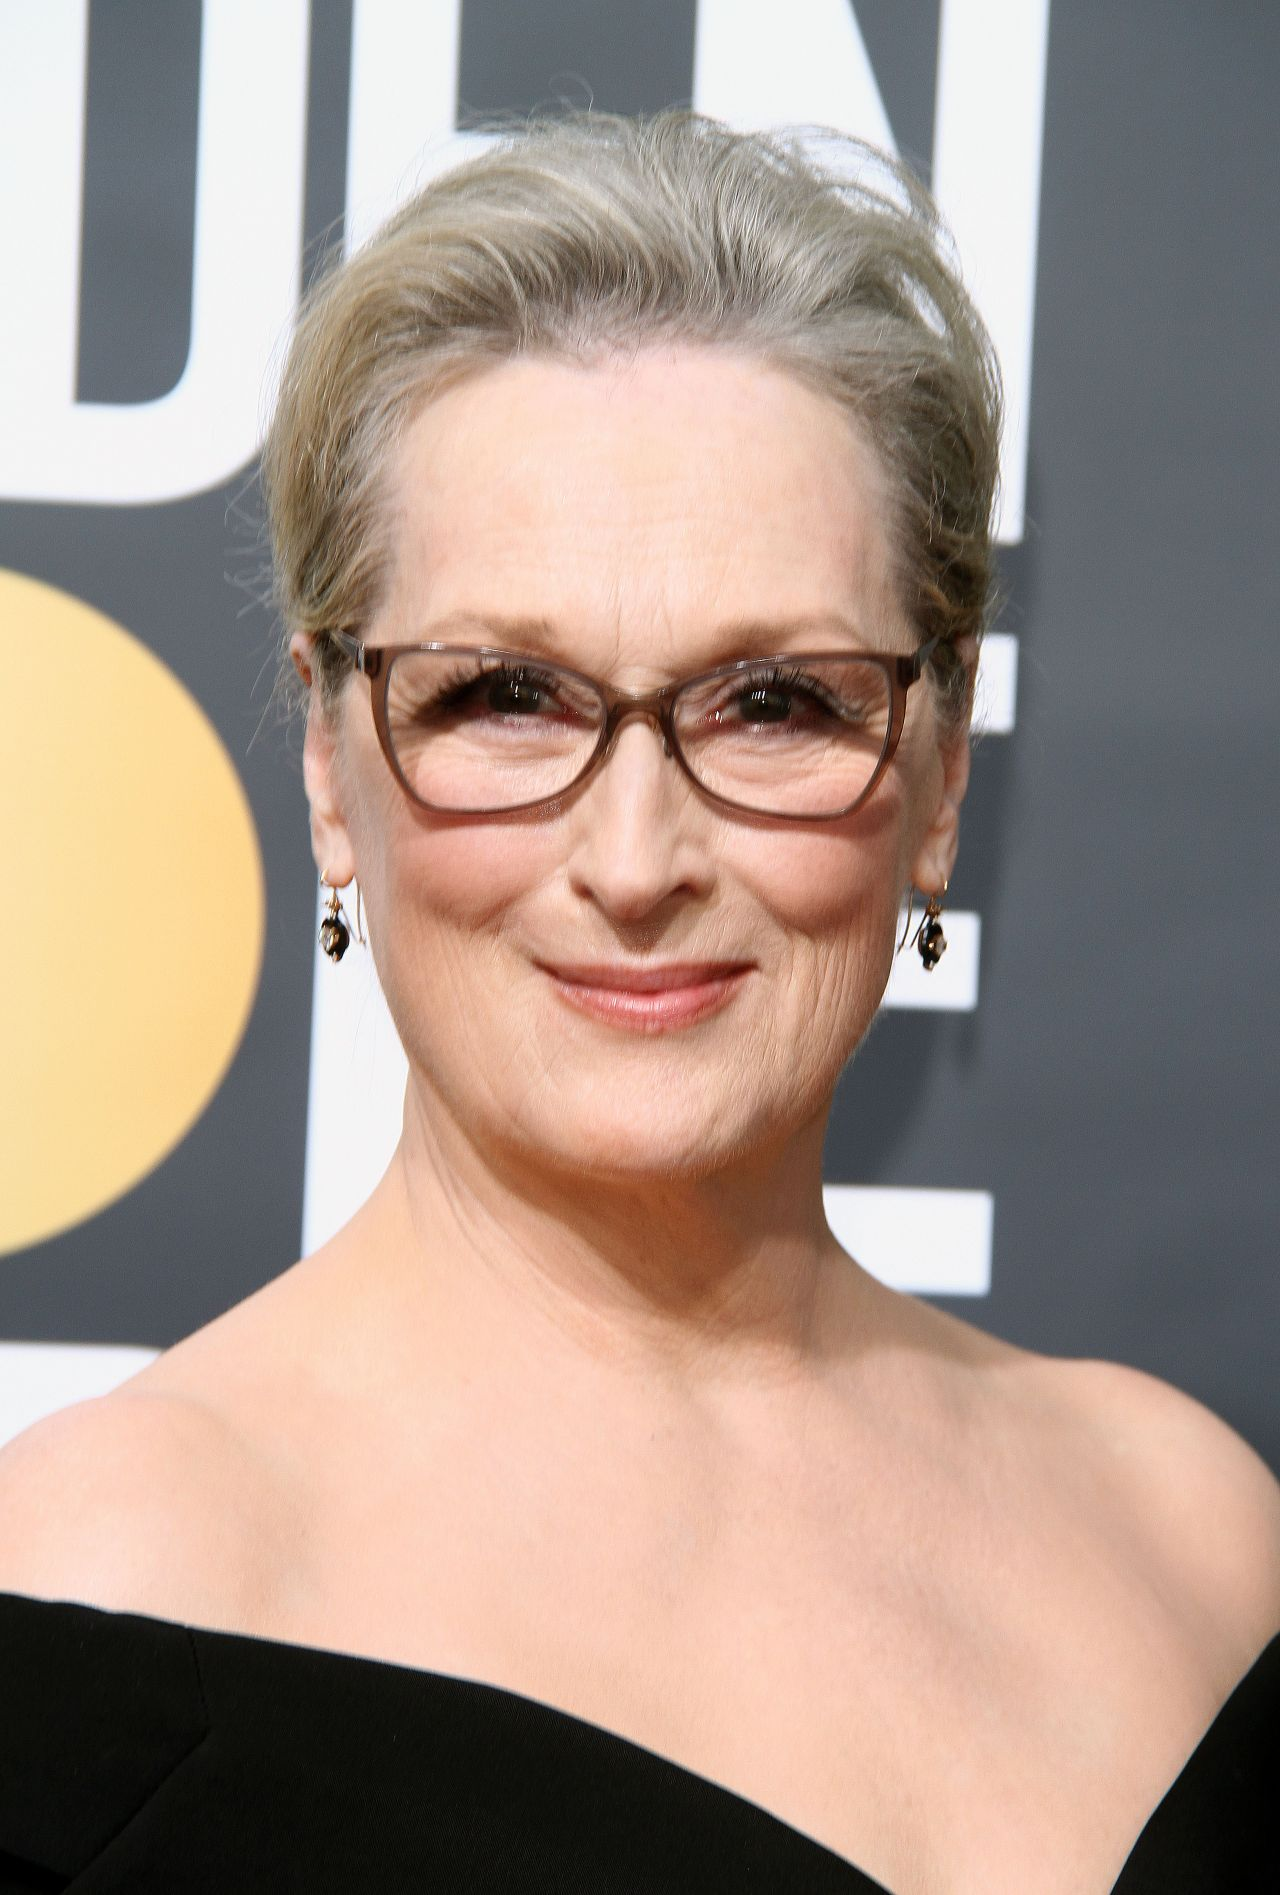
Hi Rebecka - You may have picked a hard one with Mrs. Streep. As I study photos of her, she doesn't strike me as having terribly distinct features. Also she's widely renown as an elegant actress, highest in class, which makes it difficult for me to push her into the less elegant world of caricature.
While I think you've done a good job with your sculpt, I don't immediately recognize her as Meryl Streep. But then I see it a little more compared to this photo:
Here's my annotations over the photo:
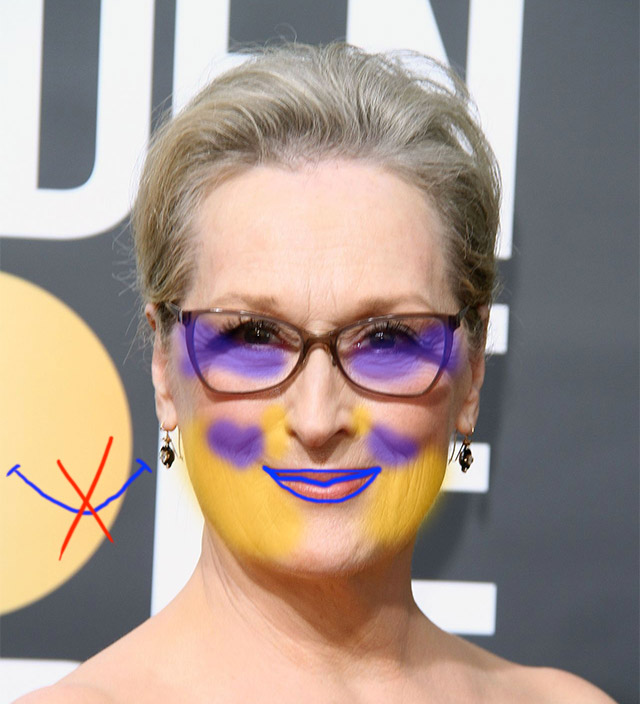
I think your mouth shape is too far of a departure from Streep's smile shape. I tried to outline that in the annotated image. Note how the right corner of her mouth (screen left) hooks up more than the left corner. The contour where her lips meet has a unique wavy shape while the top lip contour is fairly straight across horizontally and the bottom lip has a consistent U-arch. I recommend focusing on this shape and exaggerating it.
Again given her elegance, I would generally avoid accentuating wrinkles - only accentuate essential wrinkles like her crows feet, possibly under her eyes, and the corners of her laugh lines (which you've done pretty good). In the annotations I tried to highlight contour these features to emphasize in blue and the areas to keep smooth in yellow.
Hope this helps, but I really do think she's a hard one to caricaturize.
Perfect! They'll serve very well for this class. Which one are you doing ssowibra2002? Both?!
So, for "my process," his nose is my main focal and problem point atm haha. I get it shaped the way I like from one direction and in the other I have made a mess. This is where I just think .... simply getting more sculpting under my belt will help more than anything. More sculpting more understanding of brushes, behavior, when to use what, and settings. Can't ride a bike by reading a book about it.
Slightly tiresome to try and get all the angles I want from the same film/age. In the end, if I get a "him" out of this I think the hair will help make it look "Emilio."
Haha that explanation cracked me up 😅
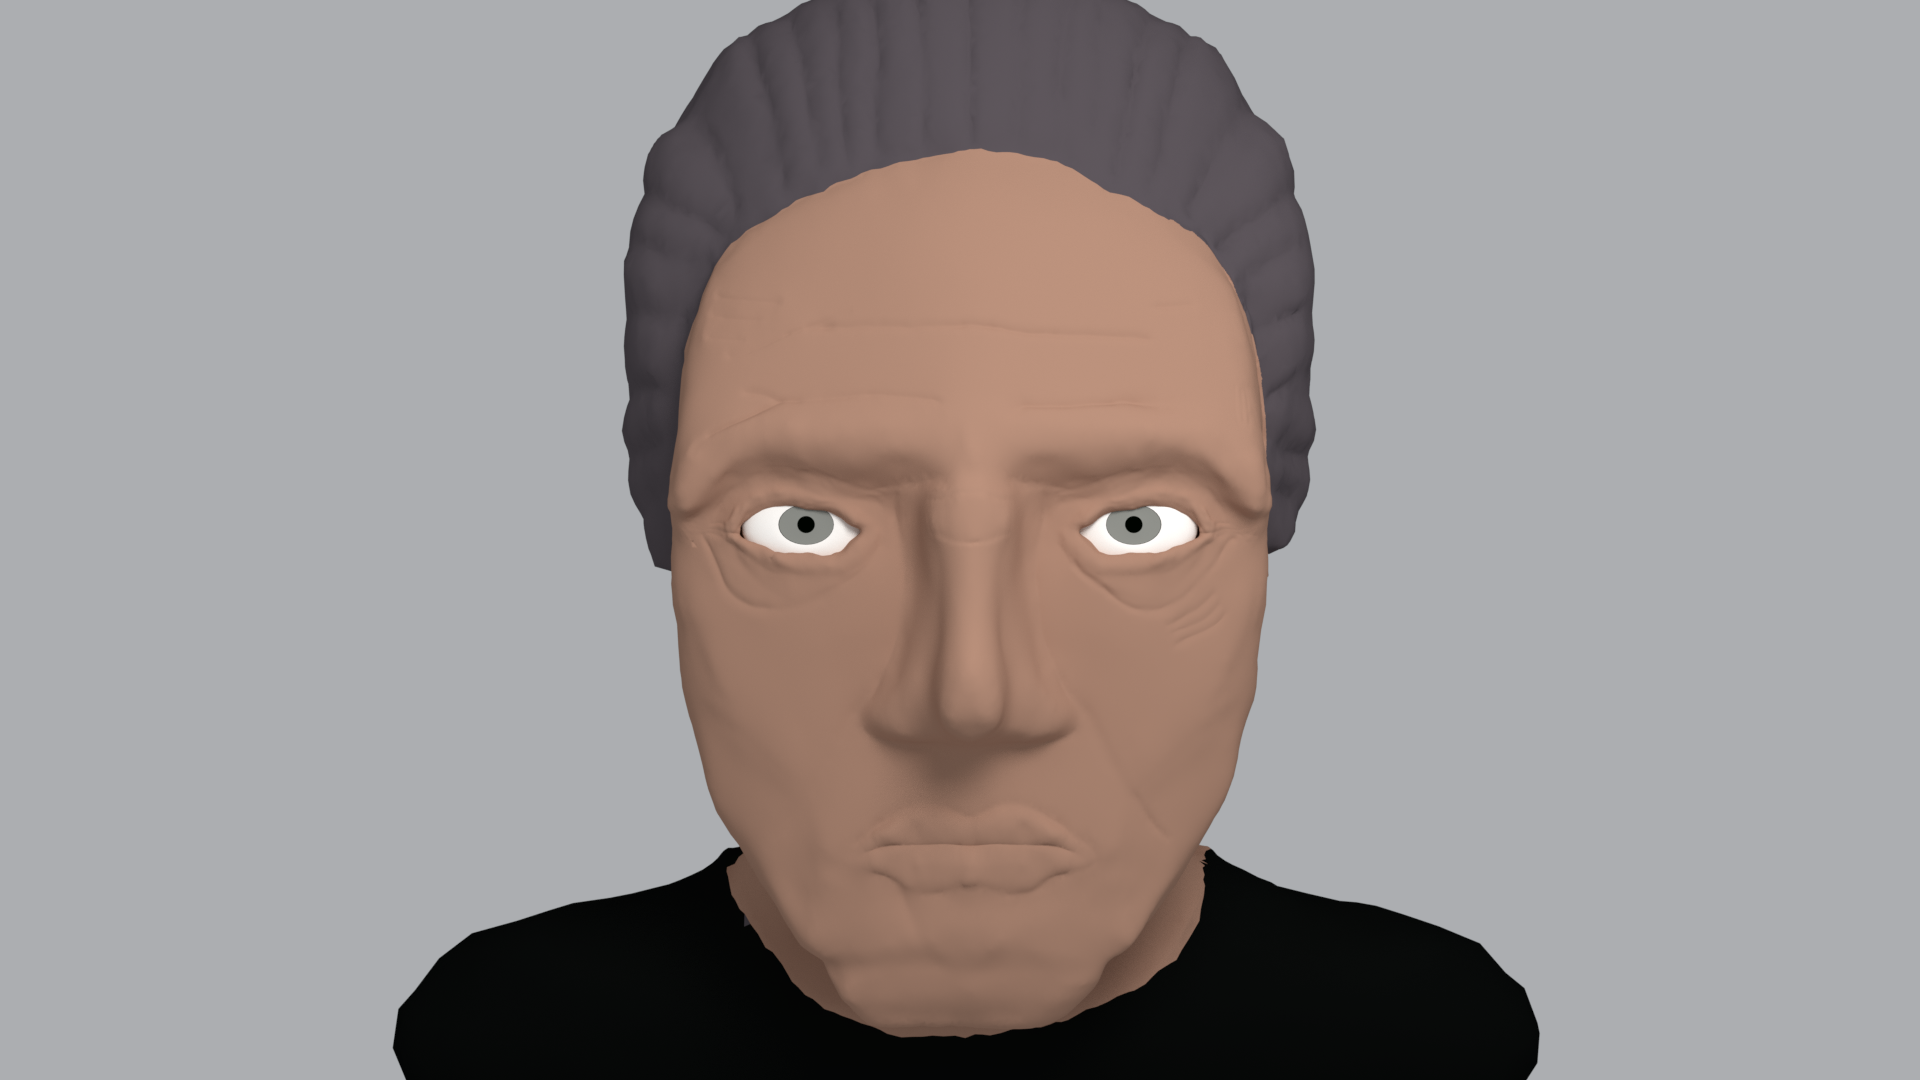
You sculpt and model is certainly very clean and "proper" in a way. But it reads to me like you had trouble identifying and/or committing to certain facial features. Johnny's hair (both scalp and facial) is pretty important to his appearance. Without scalp hair it's even harder to draw the connection to him. But the facial hair is too simplified. The way his mustache curls around the corners of his lip - that'd be a good thing to emphasize.
He's a handsome dude, so he's potentially a more difficult candidate for caricature. You may have a more difficult time than if you'd picked Jim Carrey, for example, but I think Johnny's features are defined enough for the task.
It looks to me like you're well on your way! I can already see Emilio coming out. The nose makes sense to focus on and you're doing a good job with it.
Granted, fighting the tools along the way is super annoying. I say take a break and come back to it hours later. That often helps both the detach and come back with fresh eyes. And remember, you can only get more familiar with the tools from here.
Side note: As a beginner, it is too bad you're not using Blender. We'd be able to offer more direct help if that were the case..
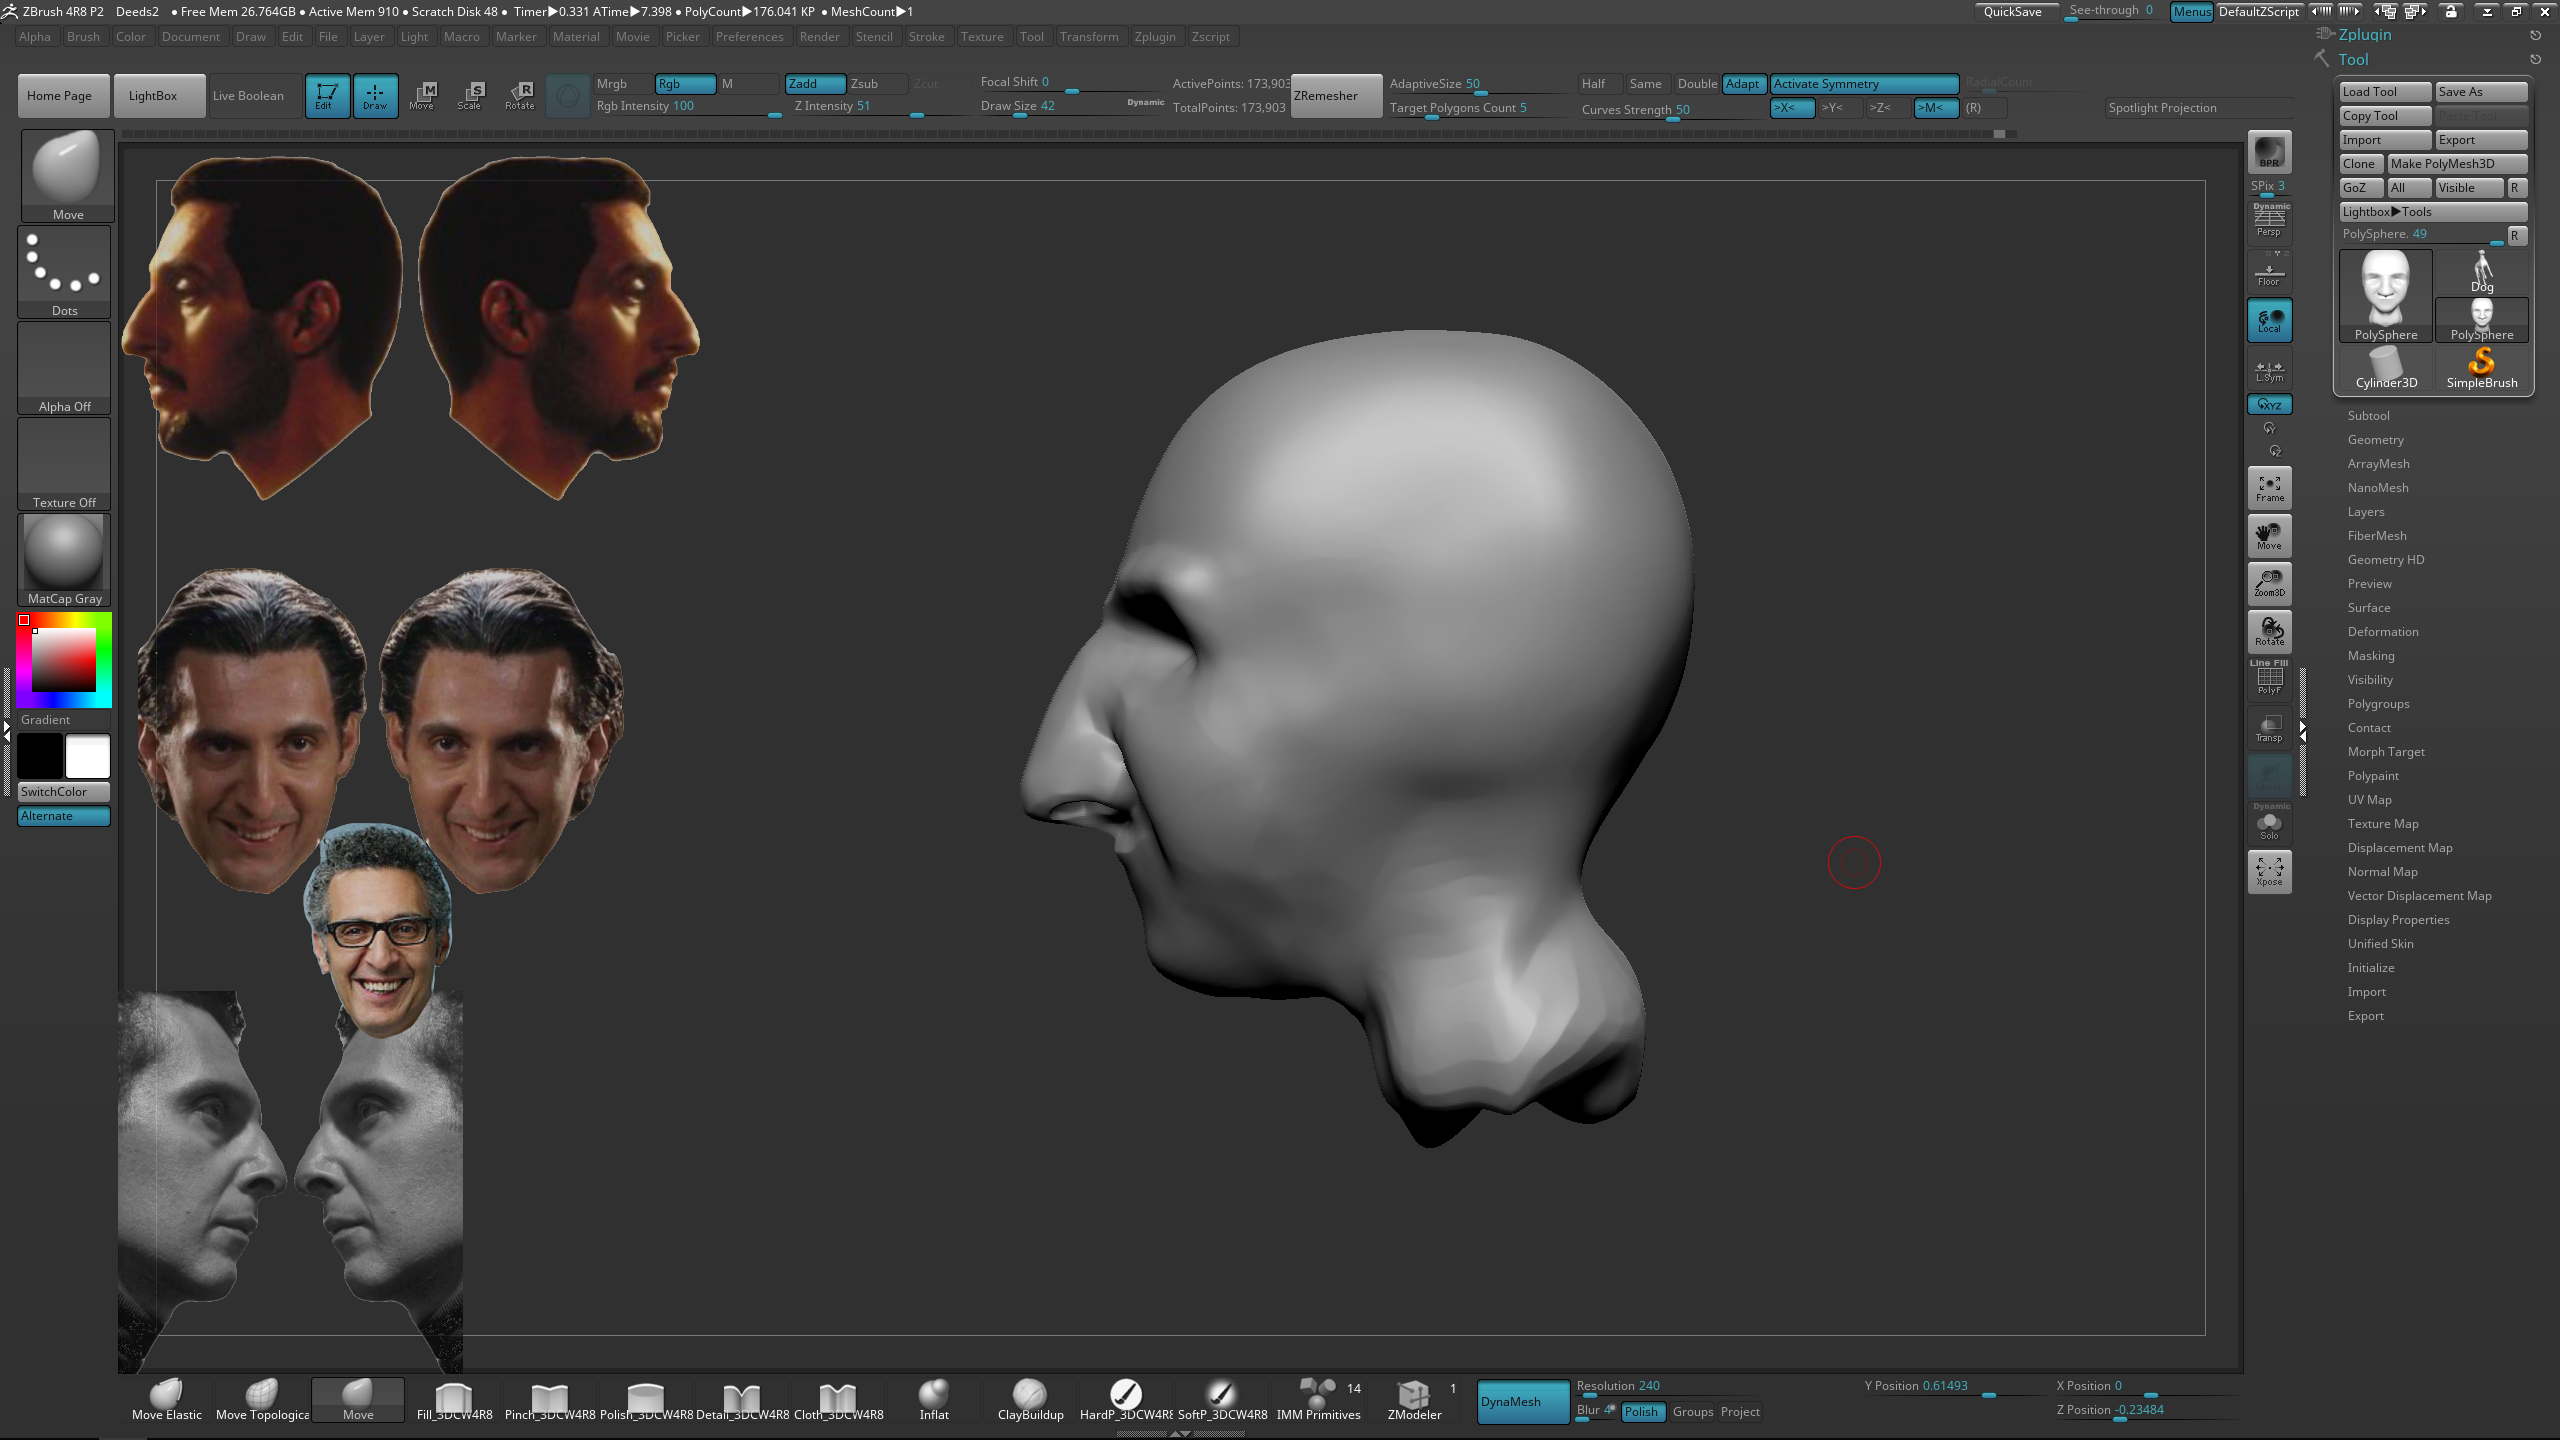
BC2-1803 Week 1 assignment
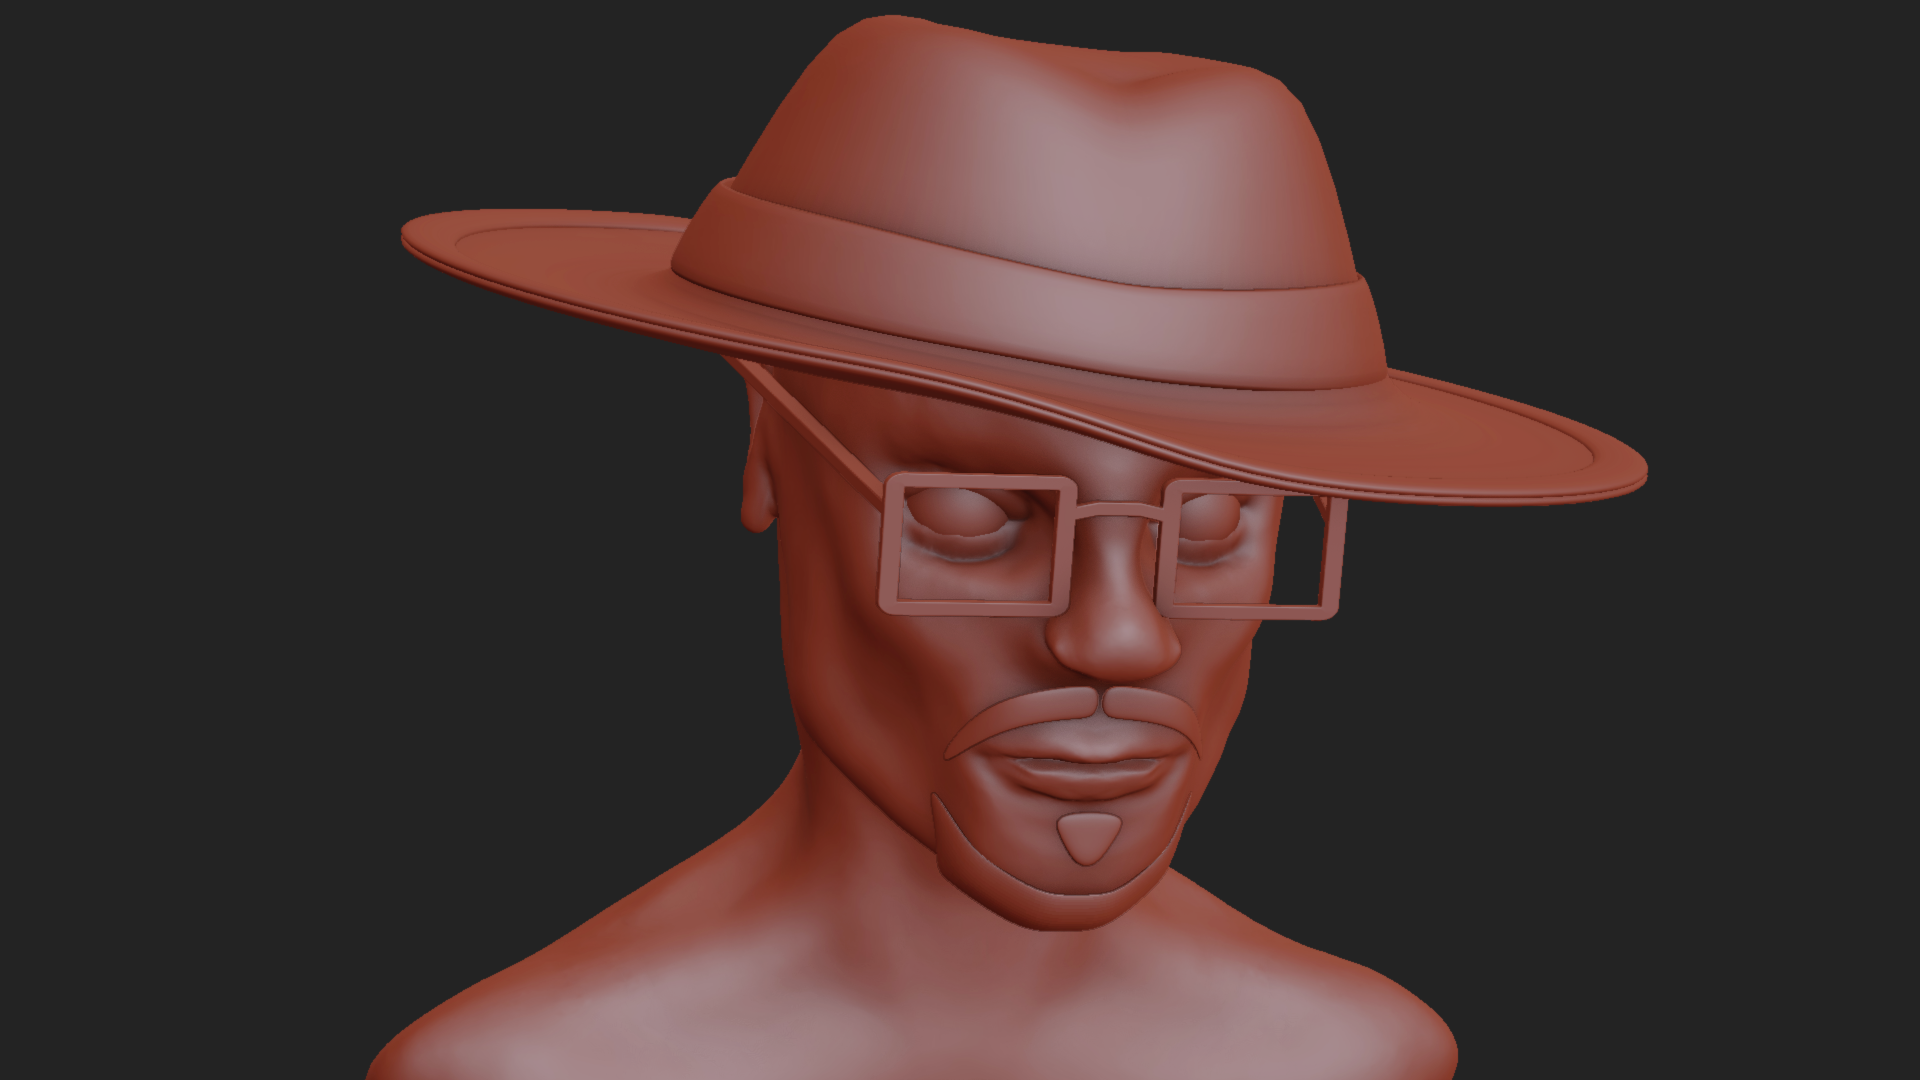
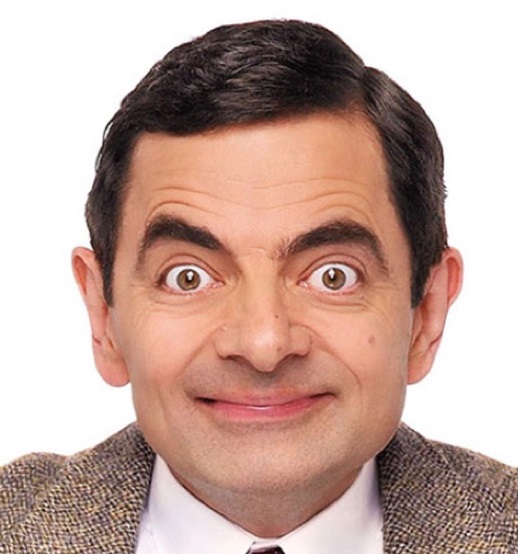
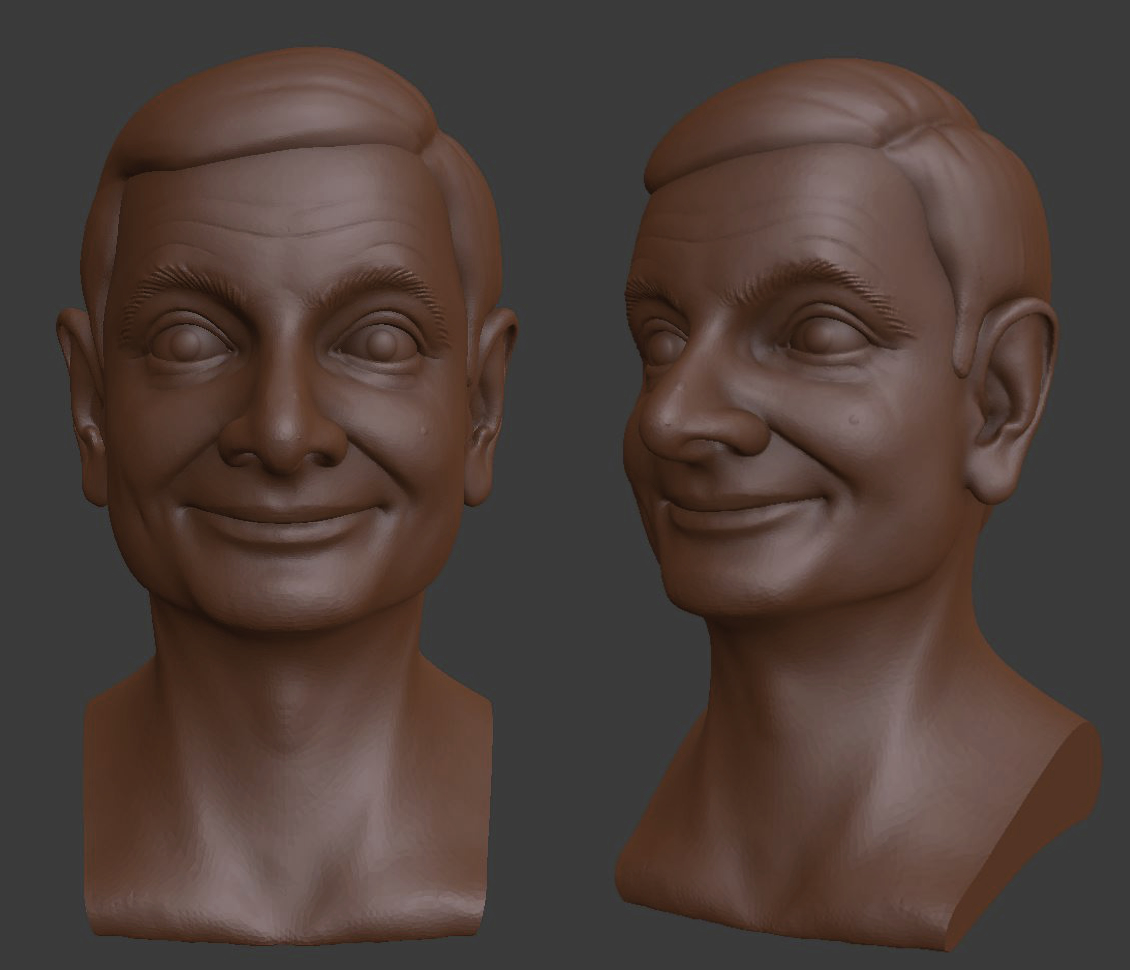
Here's my take on Mr Bean, his ear and nose really standout and also the short and square chin feature. I'm not sure if I emphasize those features enough. I would like to hear your input from you Kent. Thanks!
It would be helpful to post multiple angles or a sketchfab upload would be best.
Good start. The eye area in particular are reading most like christopher walken.
Based on this image it looks flat like you sculpted mostly from a front reference and not enough side or three quarters views. In particular the lips seem like they are drawn on instead of the mass that the lips would have. The cheeks feel like they also don't have the mass that would be needed.
Overall try to sculpt from multiple angles and make sure to add volumes instead of carving in details. Keep it up you are doing good!
Great start! It is definitely recognizable as Mr.Bean. How far are you wanting to take the stylization? On a 0-100% scale 0 being realistic and 100 being extreme I would say you are as around 10-20%
The side view of the nose is nice it pulls out very far but from the front it feels natural almost less extreme than the reference photo. The ears don't really feel exaggerated much as a normal ear goes from just below the nose to the top of the eye/eyebrow area and that is how they are sized in your sculpt currently.
Also the shape of the nostrils in the reference photo is an area you could exaggerate. The nostrils really go upwards to where the tip of the nose is a good bit lower than the sides of the nostrils. You could push that much further.