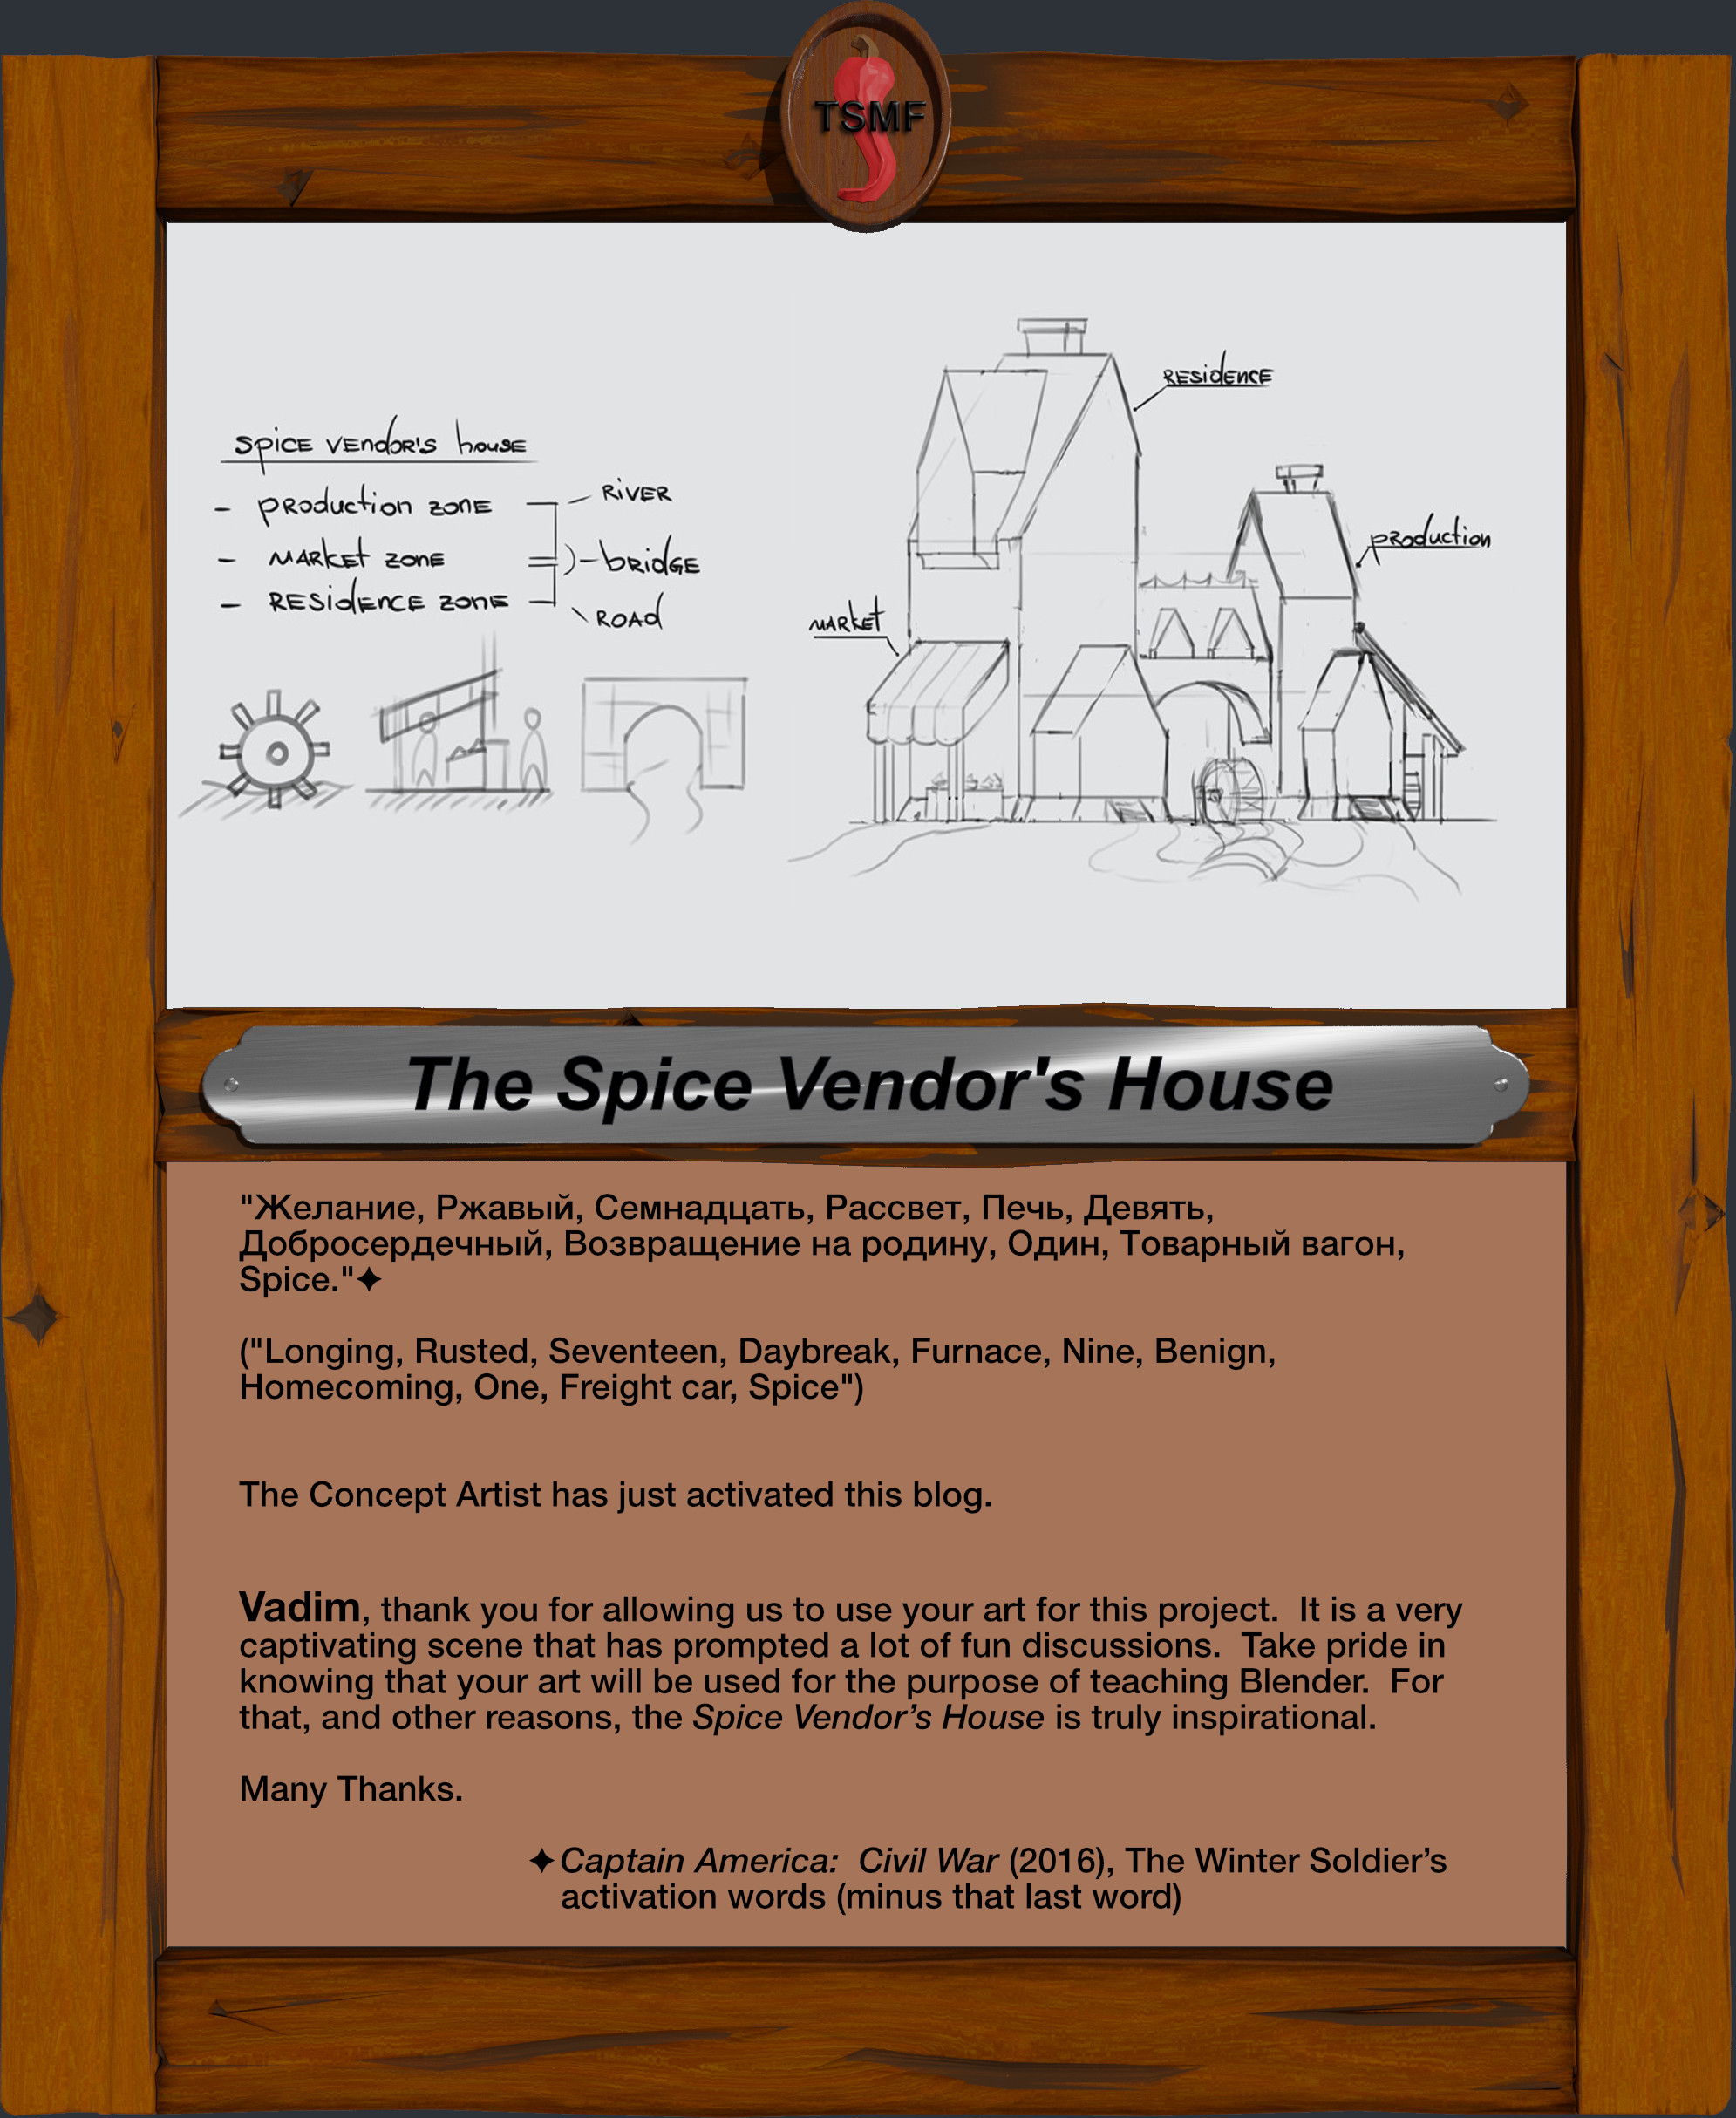
This forum will act as a Blog to document Blender Best Practices as we develop The Spice Vendor’s House project.

Introduction
I believe that many people joined this project to learn. While they may be aware of activities on their team, they may not see what other teams have developed. That is, unless they are reading the ton of forum replies every day and looking at the multitude of WIP threads. I hope to shine a little light on how we are using Blender to develop The Spice Vendor’s House. This forum thread, or Blog, is not only focused on Blender challenges that we experience but also Blender Best Practices.
Part of what I want to do is to showcase project participants’ assets throughout this project. The artwork (or work product) would be displayed along with the participant’s CG Cookie avatar and a link to their WIP. I will be pulling from images the artist has already posted. And, as needed, I may also use the artist’s Blend file to do screen captures of either procedural nodes or posed images. If you would prefer to Opt-out of this and not have your work posted in this blog, please let Kent be aware at kent@cgcookie.com.
With such a late start into the project, please don't expect that this blog to capture all project details in real time. This blog will extend beyond the COLLAB2021-Week5-Closing on 4 May 2021. I would like to document how we put The Spice Vendor’s House together by looking at specific modeling, shading and texturing techniques and best practices. Including procedural nodes, which are being used extensively in the Nature section of our project. That is just too much to document in the remaining two weeks. But, in the remaining time to the official project end, I will do my best to provide some content in real time.
So, let’s get started…
P.S. - There will be many memes based upon the movie Dune (1984) directed by David Lynch. If you haven’t seen the movie in a while, give it a go! I also apologize up front for my sense of humour.
End Introduction


End Table of Contents


19 April 2021 - The House on the Hill
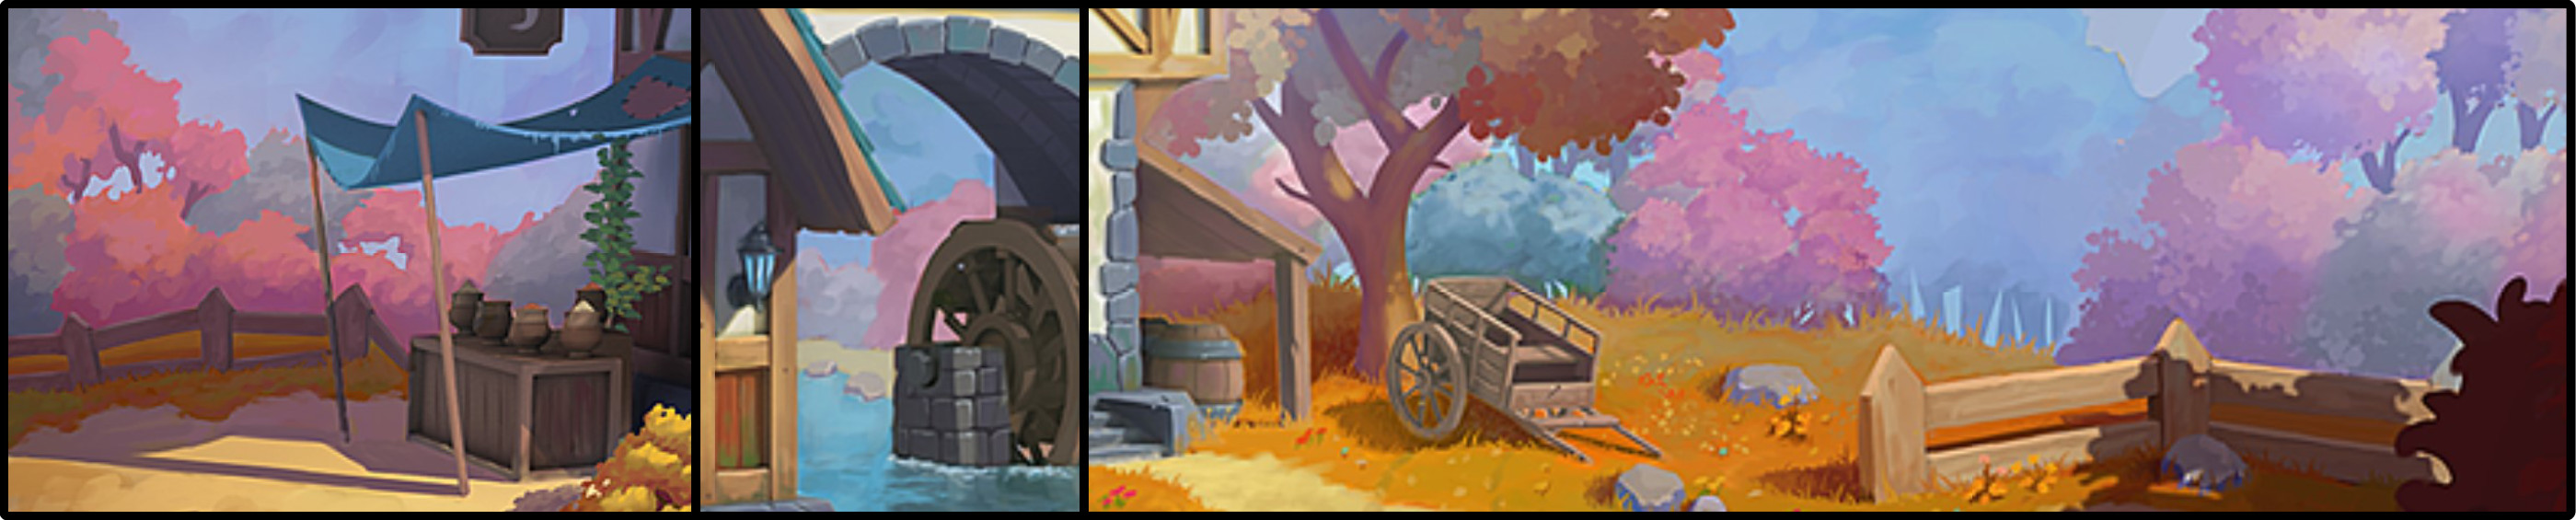
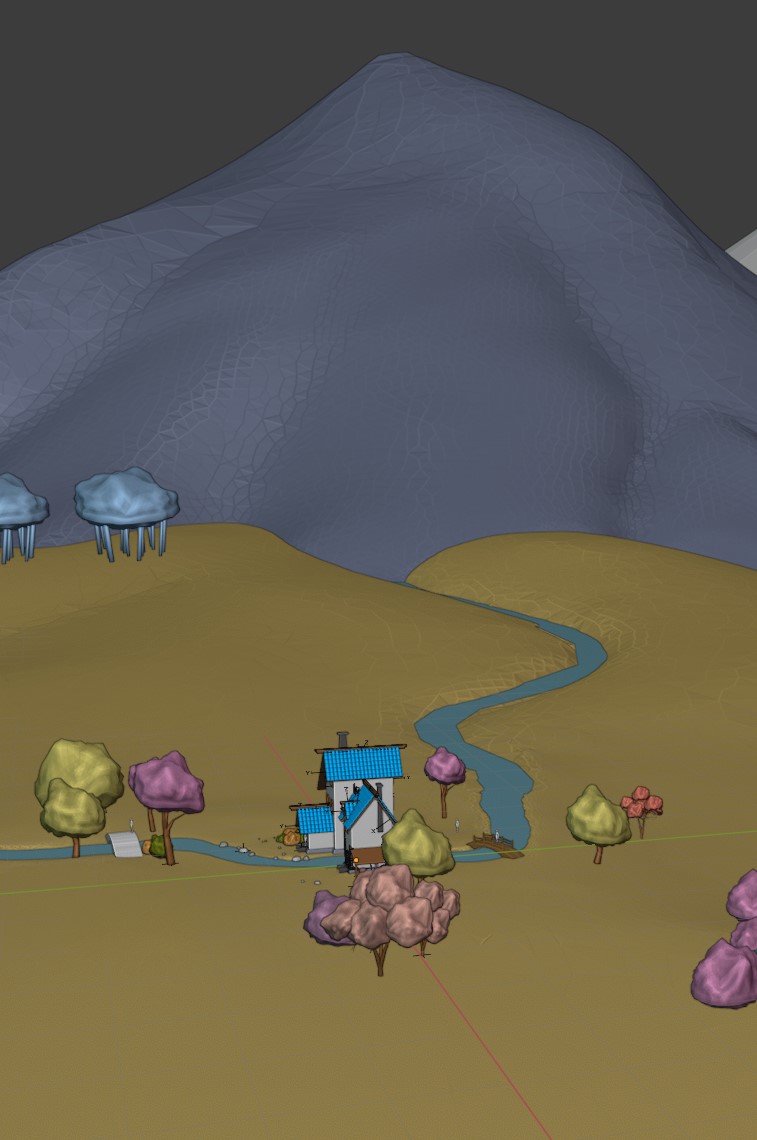
Since the beginning of this project, we have been faced with a dilemma. If you look in the back of the house in all three views (left, center and right), the terrain slopes down and the tree tops are at the same height as the ground. The house sits on a hill. But, there is a creek running through our scene. Based upon the way the watermill catches the creek’s water, the flow of the creek runs from the back of the house to the front of the house. If a creek defied gravity and flowed uphill in our project, a camera view in the back would not look convincing to the viewer.
There were lots of discussions on this issue. This is a stylized fantasy scene, does that give us license to run a creek uphill? Can we break from the concept art and just raise the elevation of the back so that the creek flows from a higher elevation? What about using a waterfall? Or, a dam? Can we have the water flow from the front of the house to the back? In which case, we would deviate from the concept art in that the watermill would catch the water on the backside. Each suggested idea had its drawbacks.
Kent came up with a clever solution to this problem. From the Master Camera view, the creek in the back of the house comes into view from the left and in front and in parallel to the hill horizon.
It then continues to the center of the back of the house. The creek’s source is a mountain to the back left of the house.
On first examination, it doesn’t look like the terrain’s elevation has changed from the original modeling that matched the concept art. It can’t be argued that the creek is taking the path of least resistance. We will see when we start putting the assets in their place, but, it is possible that the fence could hide the stream from the Master Camera view. If not, then Kent plans on judiciously placing shrubbery to obstruct the creek’s view from the primary view. Better to see some bushes instead of the creek.
Considering all of the undesirable ideas that were discussed on how to solve this problem, this is a great example of Occam's Razor. The simplest solution was the right one.
End HQ Update


[Note: I have redesigned this forum thread by eliminating the individual team project status sections. They were placeholders to give status reports. As we are finishing up this project, I will provide an aggregate summary below. These placeholders will remain as future articles can be placed there so that they are in the beginning of the forum and not dispersed throughout. This should make them easier to find.]
I had the privilege to interview several of the Spice Barons during the past few weeks. I asked them the same questions, and documented their responses. Here is a summary of these interviews.
What is the most special thing on your team that you are excited about?
The overwhelming response was: “the people.” The participants of this project were very engaged and helpful to each other. Many brought reference images to study. There were collaborations to problem solve issues. People pushed each other to make better assets. Especially those where more than one person was assigned a specific asset.
One perspective shared was that the first time he had viewed the Spice Vendor’s House that he thought it would be a piece of cake to build 3D models. Once the project started, the perception changed. The project was much bigger and it presented more challenges than originally expected. The conclusion was that this would be a good learning experience for all of us.
Several were excited about the creek and how the water will interact with the watermill in animation. The challenge being: how to get the water to fall off of the paddles of the watermill as the wheel is turning. Also, how will we get the water to show ripples, especially as it flows into an obstacle like a rock?
What are some of the challenges or obstacles that your team have faced in Blender?
Responses were clearly divided between team leaders that had normal 3D modeling and those responsible in leading teams to create Nature assets.
On the 3D modeling side, there was often apprehension coming into a week where, for some, a new technique was introduced. Confidence through practice had to be built when tackling each phase of the project. The types of issues were:
Certainly, these types of challenges are part of the learning process. With a combination of Kent’s streamed instruction, assistance with the team, and perseverance, these issues were overcome - the proof can be found in the finished assets.
The Nature groups had different challenges. At the top of the list was: how to keep the poly count down? It was estimated that there is over 400 square meters of area that needs to be filled with mountains, trees, bushes, ivy, grass, flowers, rocks and a creek. The size of that space is not trivial, and challenges the efficiency of Eevee.
Let’s take a tree for example. It has a trunk, multiple branches and many leaves. The number of vertices in each leaf gets multiplied many times over as they are placed throughout the branches. The poly count adds up quickly. So the challenge is to find the right balance between making a stylistic tree with a low poly count.
During the first few weeks, a lot of time was spent with trial-and-error experimentation to find the right balance between technique and minimizing vertices. Aesthetics was also the focus of testing to find the best way to texture the assets. Hand-painted textures belong to this style, especially for foreground assets that will have the scrutiny of a closer camera. Background assets can get away with procedural textures.
Clouds also presented a challenge in this project. Volumetrics are simply too slow. Primarily because the physics refreshes on every movement of the camera. Again, a lot of experimentation was required to land on the best method.
A general challenge that all teams faced was meeting the objective of stylized art. Simplifying the shapes, lines, features and color down from realism. It is a balance between too much and too little detail. Once this hurdle was overcome, the results truly look fantastic.
What modeling or technique do you think needs to be highlighted within your team?
In general, the responses to this were brief and aligned with the types of assets the team had responsibility. Each team and individuals found the best methods to make wood, tile, stone / rock, trunks / branches, leaves, mountains, etc. Certainly, not without a lot of hard work with experimentation. In all cases, Spice Barons praised their team’s accomplishments. A few quotes include: “knocked it out of the park.” “They succeeded in keeping the poly count low.” And, “taking shape in glorious ways.”
One area that deserves a little discussion is Geometry Nodes. This is a new feature in Blender that offers a significant amount of power and versatility. Especially for a project like this. Several people in the Nature group used geometry nodes; some for the first time. The reason for their use is that there are some things that you cannot do with a Physics Particle System. Let’s use the randomization of leaves as an example. In a Particle System you can only randomize the scale of a leaf. Using Geometry nodes, you can randomize the leaf’s length, width and rotation.
A novel technique was used for background trees. The tree image is placed on a plane. Using Geometry nodes, the plane rotates to be perpendicular to the camera. So, the tree always faces the camera, regardless of the camera’s position. This technique eliminates the need for a 3D tree filled with branches and leaves in the background, which would significantly add to the project’s poly count. Simply brilliant.
Are there any basic tips that you have that would benefit a beginner to Blender?
Universally, the prominent response is to get a solid foundational understanding of Blender. Start with the fundamentals and don’t try to do too much at once. Divide the learning into smaller chunks and learn step-by-step. And, don’t expect to create perfect artwork quickly. It will take time, practice and persistence.
CG Cookie offers in-depth courses on the fundamentals of modeling, sculpting, shading and texturing. If it works for you, go through those courses and take detailed notes that you can quickly refer back to. It is important to know where to find information.
If you encounter a problem in Blender, try to research the solution on your own. A lot of what we do is problem solving; the more self-sufficient a Blender user is, the better in the long run. HOWEVER, before you get too frustrated - ask a question on the forum. There are many people in this community that sincerely want to help. Take advantage of it. The important thing is to hang in there and don’t give up. It is a journey to learn 3D art.
Give feedback (when requested) and also be willing to openly receive critiques. A beginner may feel that they have nothing to offer in providing critical feedback due to their inexperience. Providing feedback forces the evaluation of the art. Perhaps such exercises will result in the beginner to grow faster. Being involved like this will also help in learning the jargon (or technical language) of Blender. When it comes time for you to request feedback, perhaps people would be more receptive to giving you a critique. And we all need a second opinion to grow.
Joining a collaborative project is also encouraged. Following a tutorial is great to build what the author is teaching. In a collaboration, you are challenged by building your own unique asset. Pick an asset to build that is not too hard but will stretch you. Problems will pop up, which is always a great learning experience as you go through the process of learning how to solve them. There is also the benefit of working with others, where you can learn from each other.
What's different about a team project compared to an individual project?
The consensus is that being on a team you can tackle larger projects that may not have easily been accomplished as an individual.
There are several benefits to a team:
An advantage of an individual project is consistency. You should not be able to see that assets in the scene were made by different people, which is more likely in a team setting. Working on a project alone allows for uniformity in the modeling, shading and texturing of assets.
What are the challenges of having a remote team project? What has it taught us?
There are two main challenges:
Of course, it is acknowledged that our collaboration is based upon a volunteer structure. But, in a corporate environment, project meetings are conducted either face-to-face or via video conferencing. If a project member has a question, it is easy to pick up a phone to get an answer. Responses are immediate and less likely to be misinterpreted - even working on different continents. Stronger personal connections among team members are also more likely to be developed.
On COLLAB2021, Discord was setup as a free VoIP, instant messaging and digital distribution platform. Early tests proved that Discord did not perform very well with video conferencing. But it has proven effective in collaborating through chat and audio, where computer screens can be shared. This platform definitely helped in the collaboration, improving communication in real-time and sharing of ideas. But the issue that participants are still in multiple time zones has not changed. And, not everyone on the project utilized this platform.
[Editor’s Note: My personal observation is that it was Kent, Jonathan and the Spice Barons that set the tone of this project. At every step they were engaging and encouraging. They made this an enjoyable and educational experience. The results are truly fantastic!]
End Spice Baron Interviews


If you want to view some of the Blender-specific content of the project video streams, you have come to the right place. Click on the links below to jump to the specific topic within Kent’s streams.
This section will be updated when new streams are published. Casual streams have not been provided at Blog launch time, but will be added eventually.
Week 1 - Modeling
Week 1 - Casual
Week 2 - Sculpting Accents
Week 2 - Casual
End Stream Links


Even though we are moving past the modeling part of the project, I felt it was important to not only include this discussion, but to make it the first real post. When people are new to Blender (including myself) they often come across some of these issues. Experienced modelers make it part of their normal workflow to remove duplicate vertices, apply scale and check for normal directions; it becomes second nature.
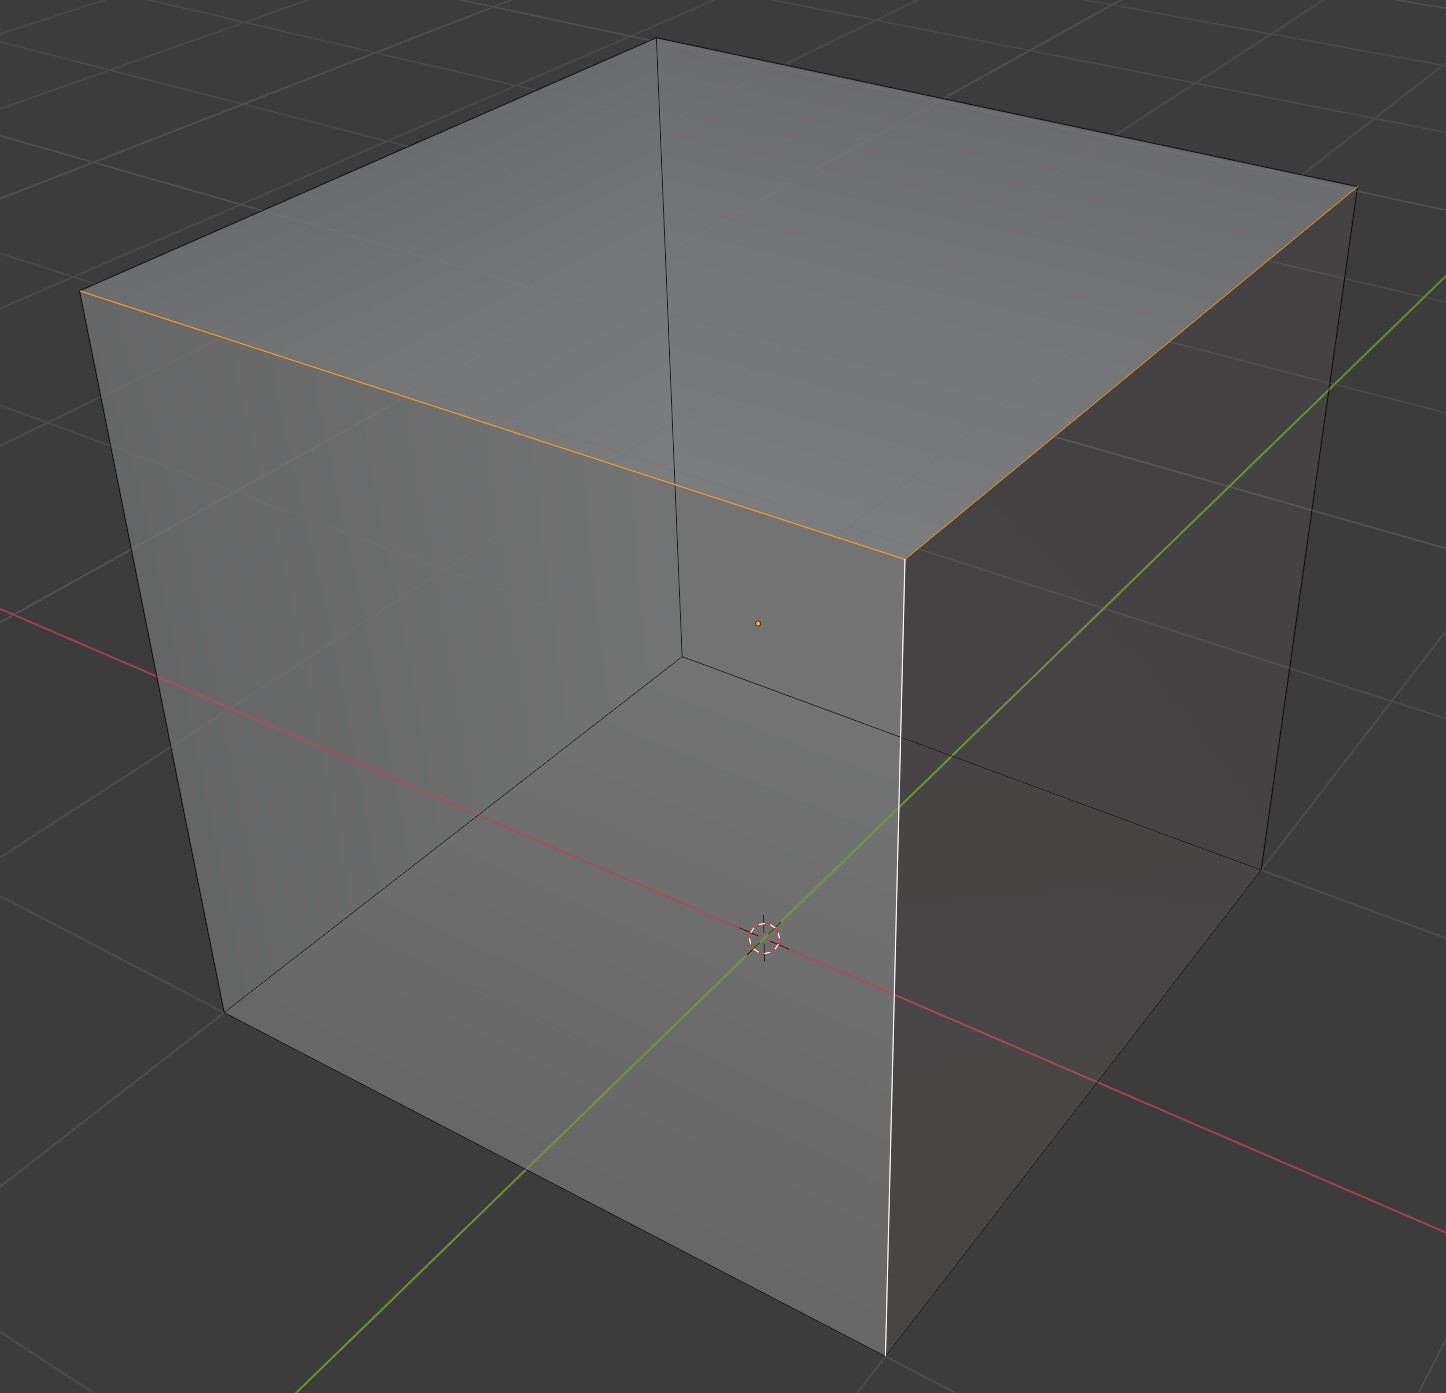
In all three examples, we are going to make a bevel on three edges of a corner.
DUPLICATE VERTICES
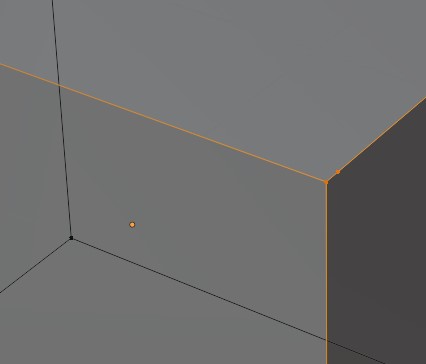
Let’s say you bevel and see something like this:
You may have more than one vertex close together or even on top of each other (e.g, if you moved a vertex and snapped it to another vertex).
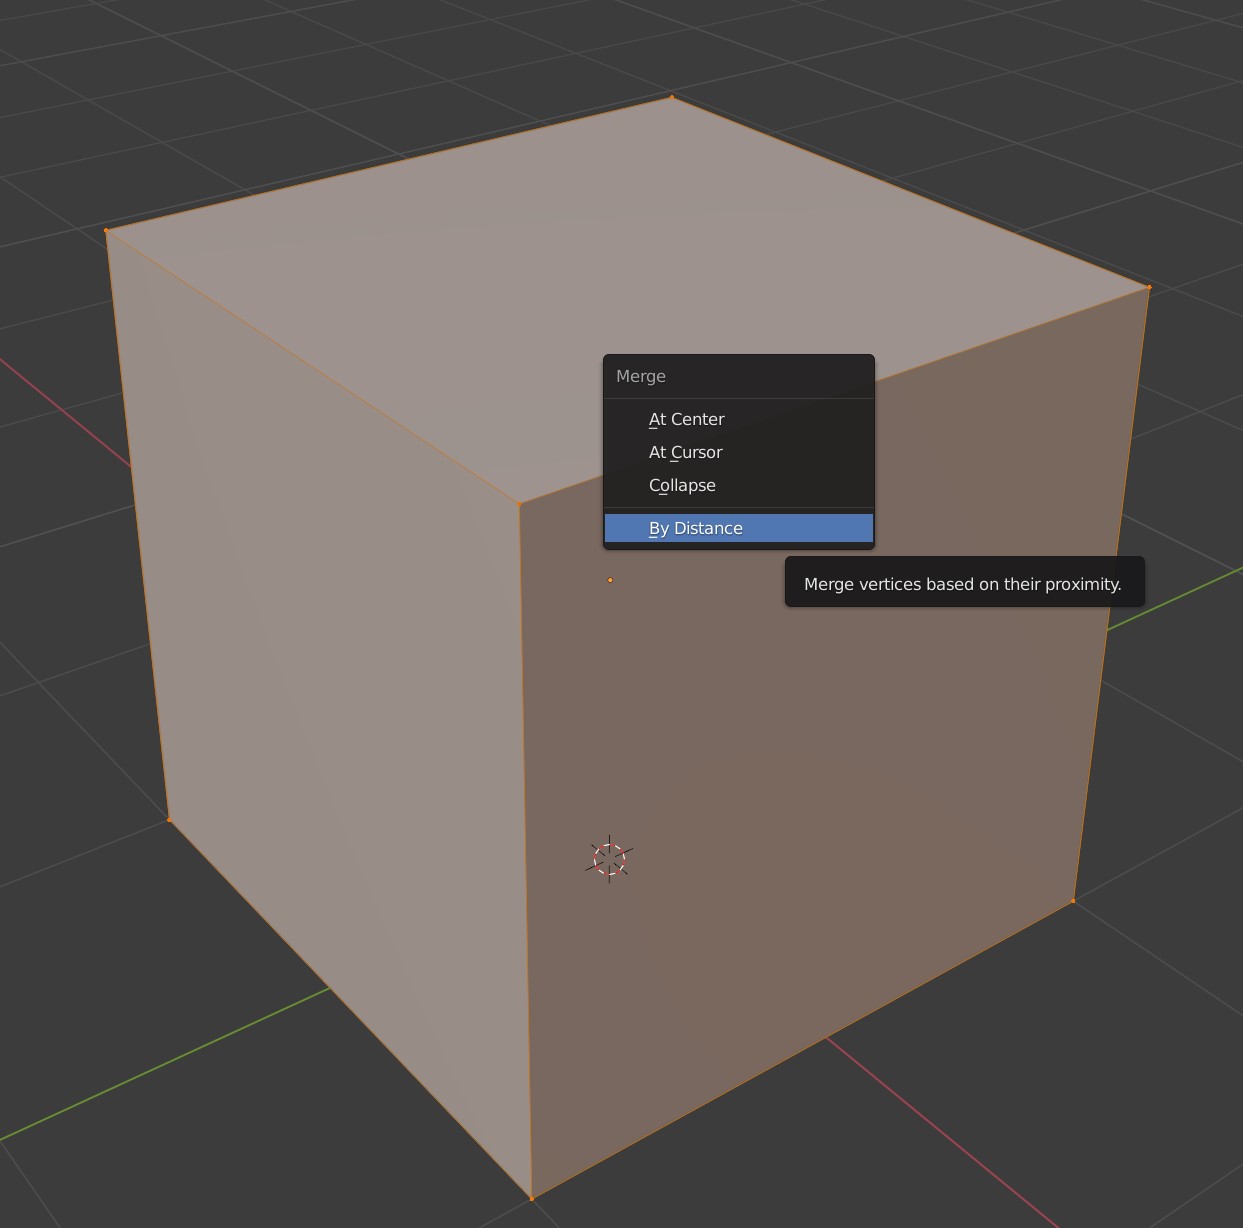
To correct this problem, in Edit mode, hit A to select all elements in the mesh (it does not matter if you are in vertex, edge or face select mode). Press M (to Merge) and select by Distance.
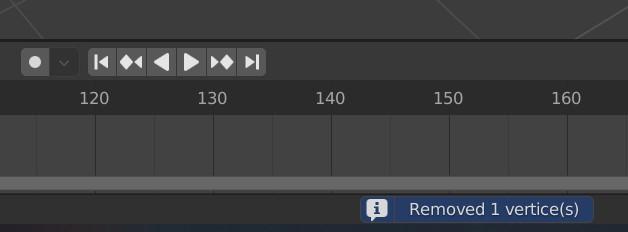
Blender will display the number of vertices removed at the bottom of the screen.
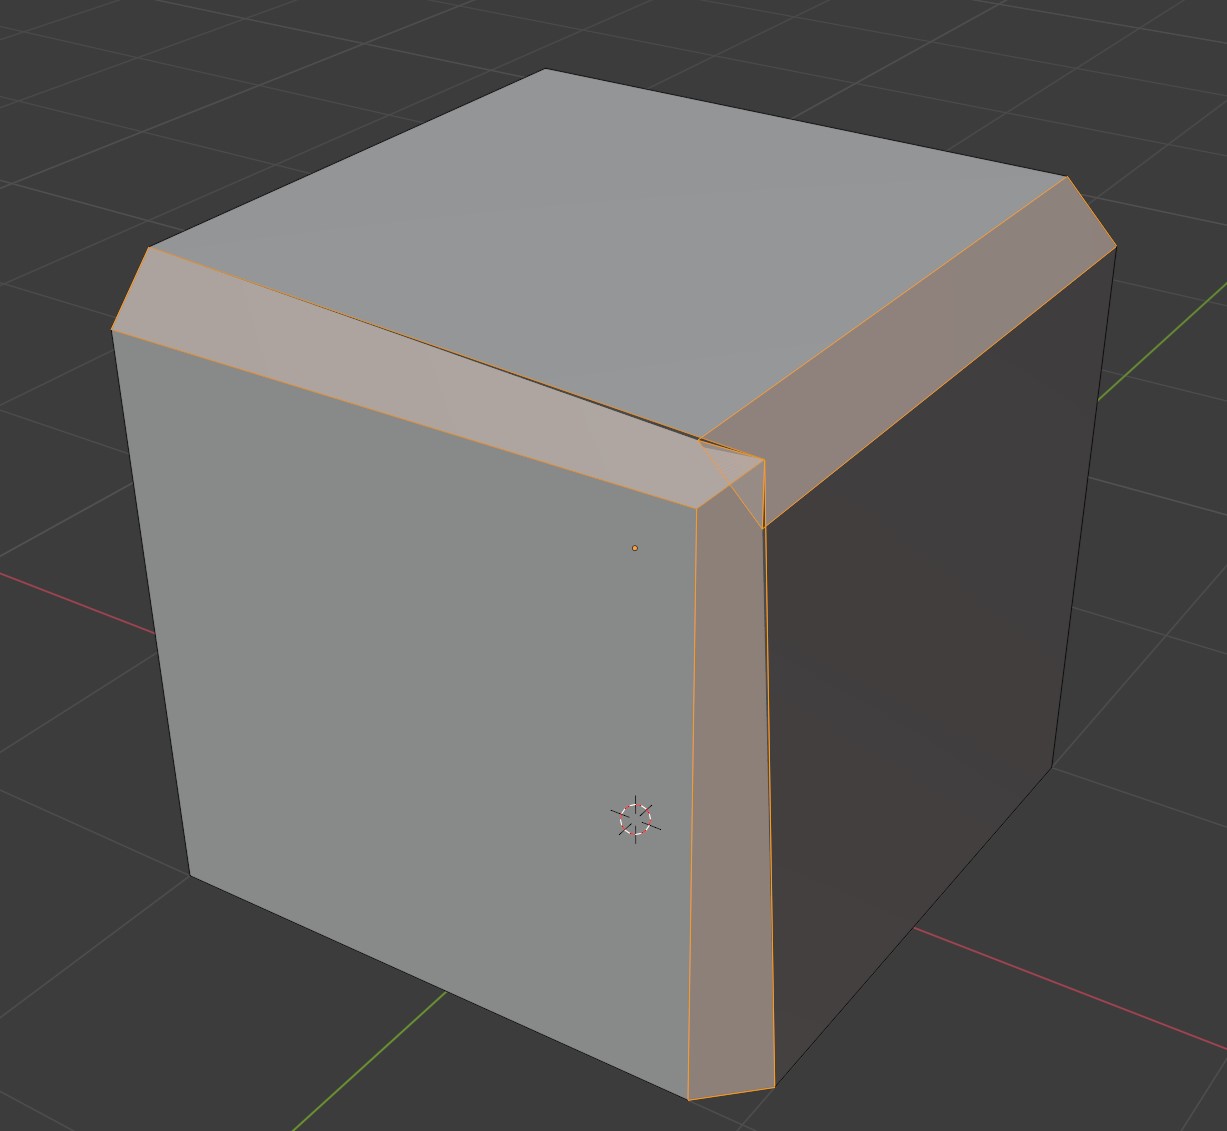
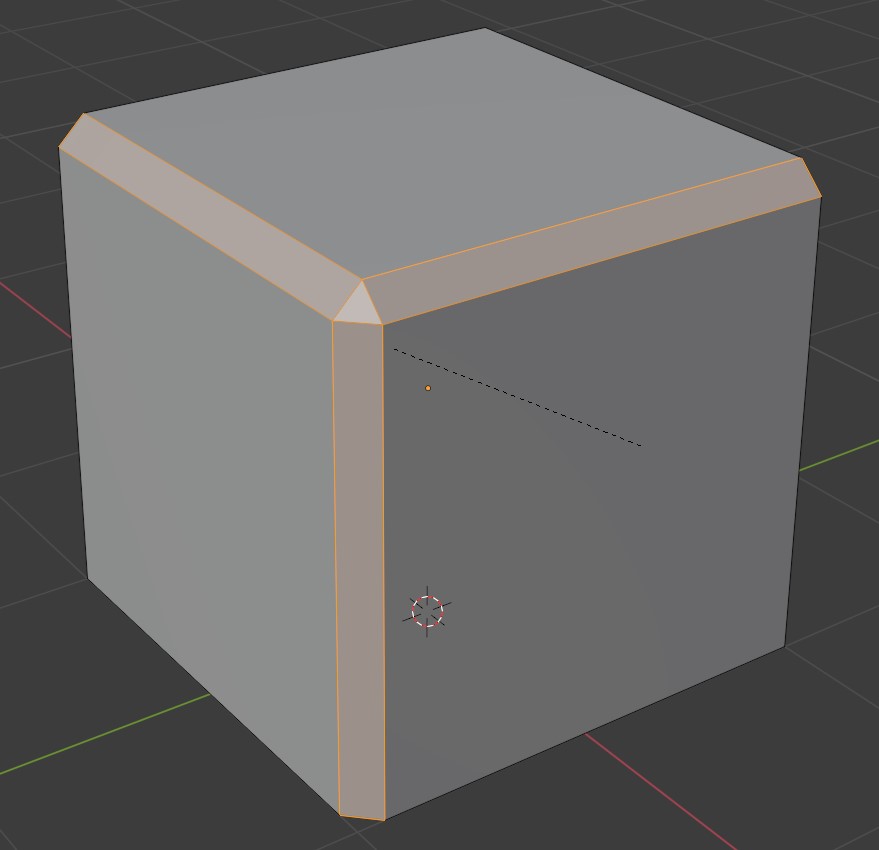
Bevel the edges again to view your success.
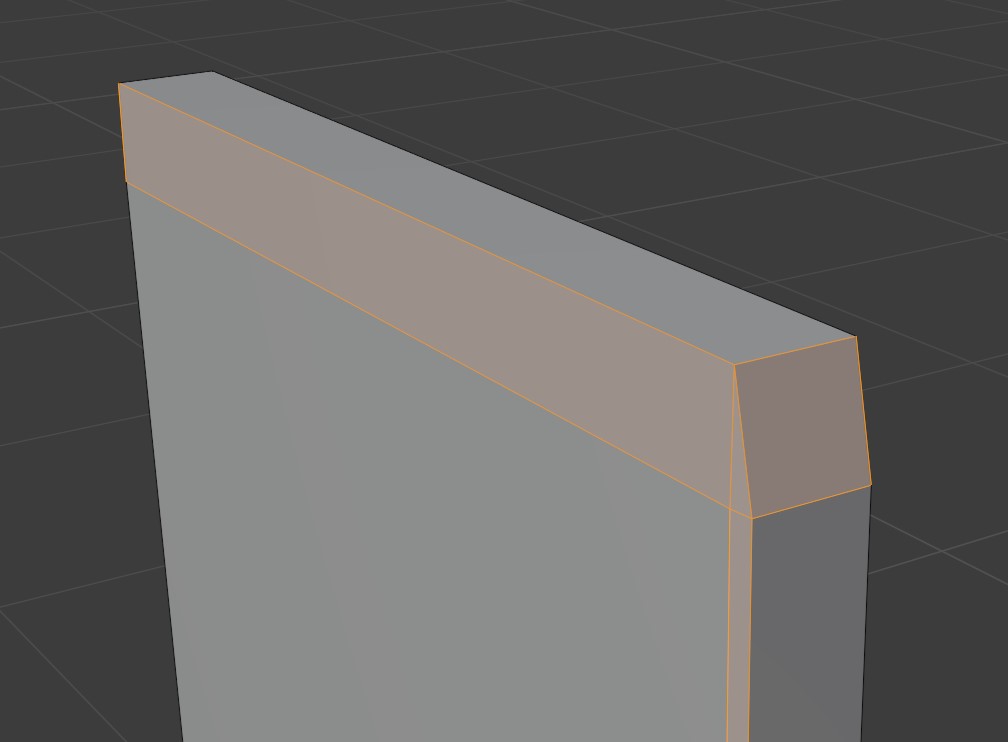
APPLY SCALE
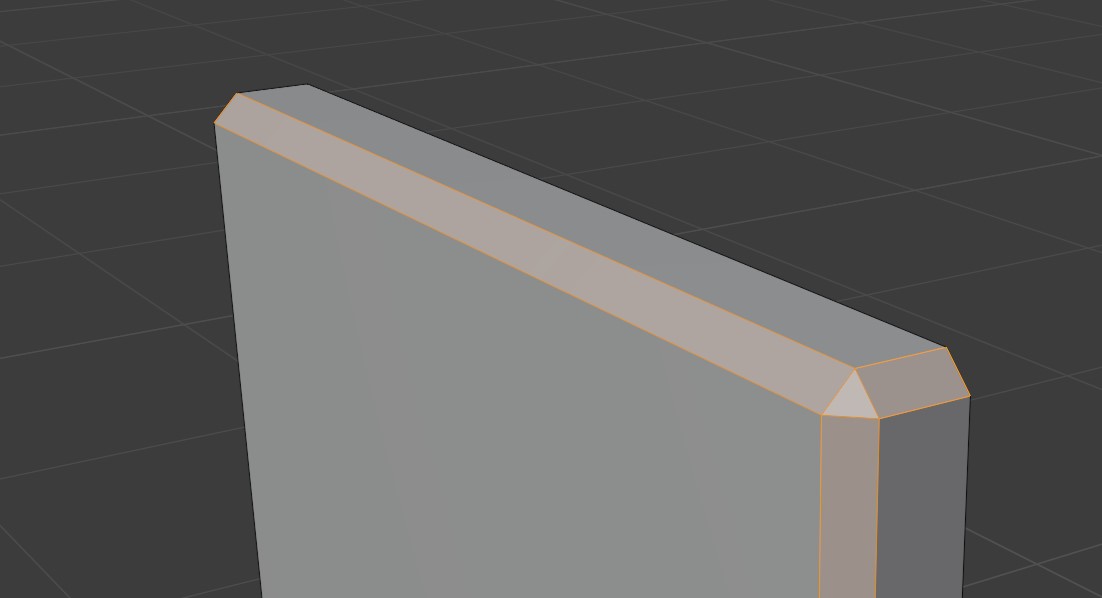
In this example, you may see something like this at your corner when applying a bevel.
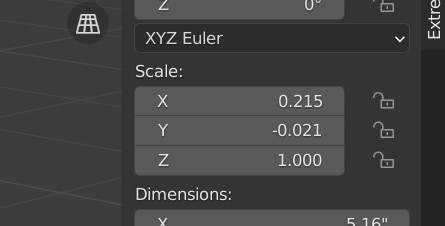
Tab back to Object Mode and press N to view the Sidebar. Look in the Item tab to see the Transform settings. Specifically, look at the Scale section. If all three axes are not 1.000, then you have a problem.
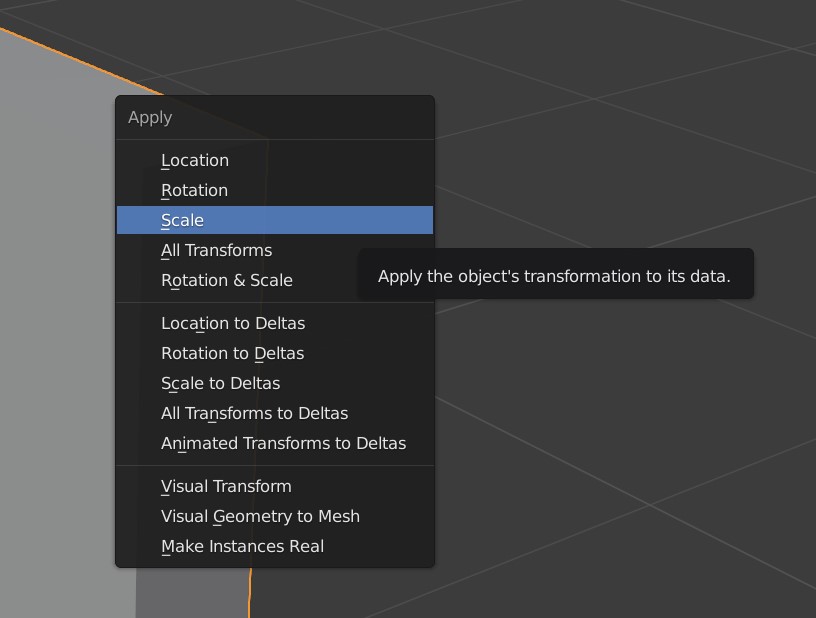
Select your object and press Ctrl-A to pop up the Apply menu. Select Scale, and the scale values are reset to values of 1.000.
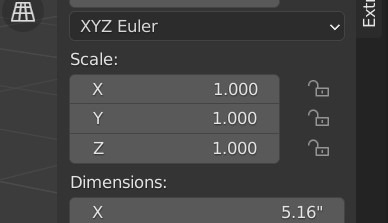 Tab back to Edit mode, apply a bevel to your edges and view your success.
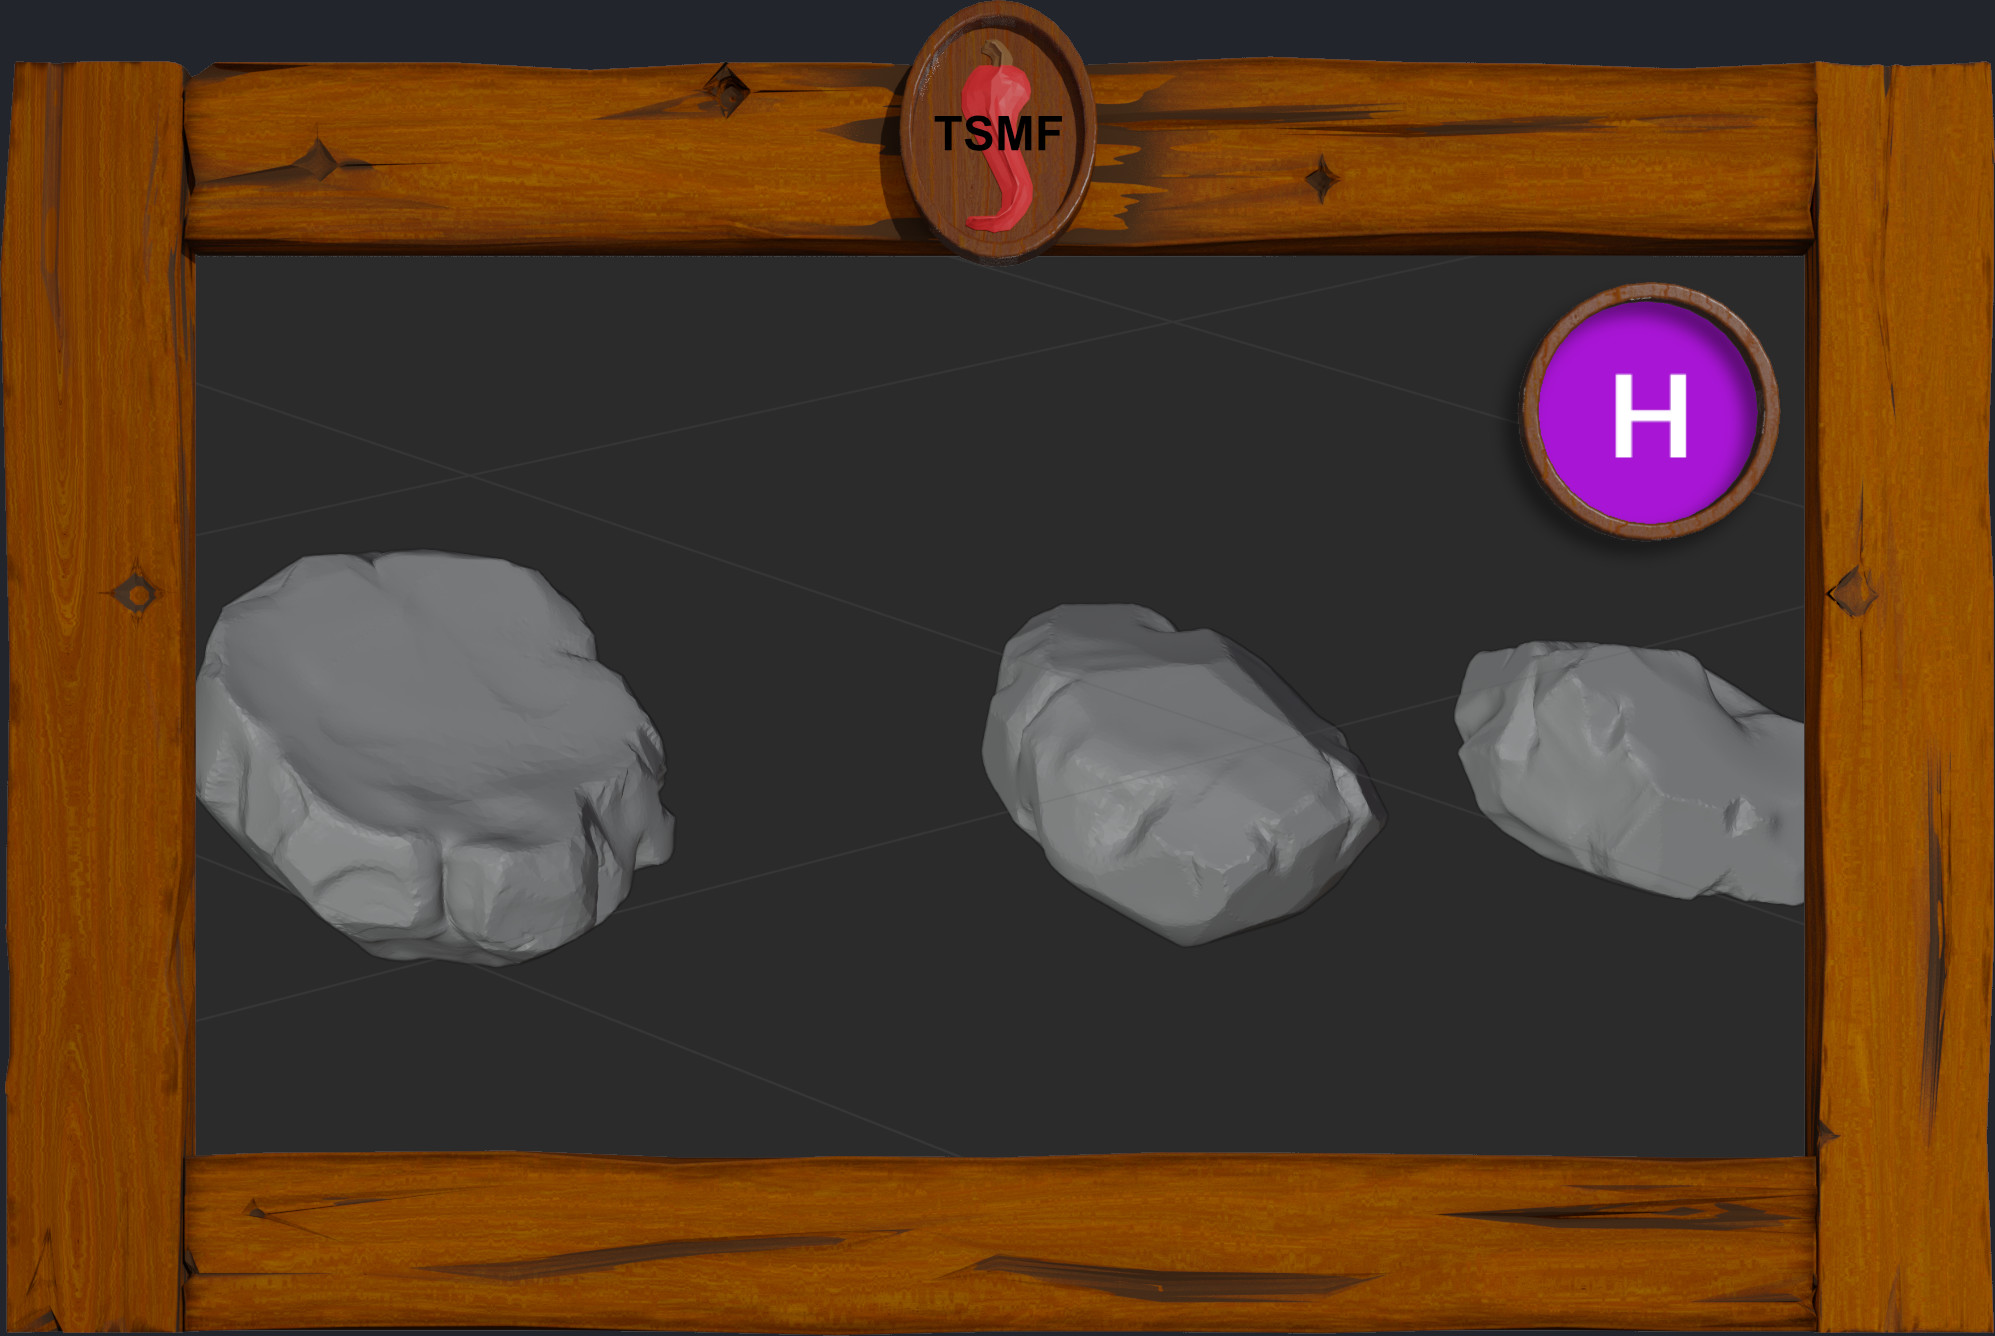
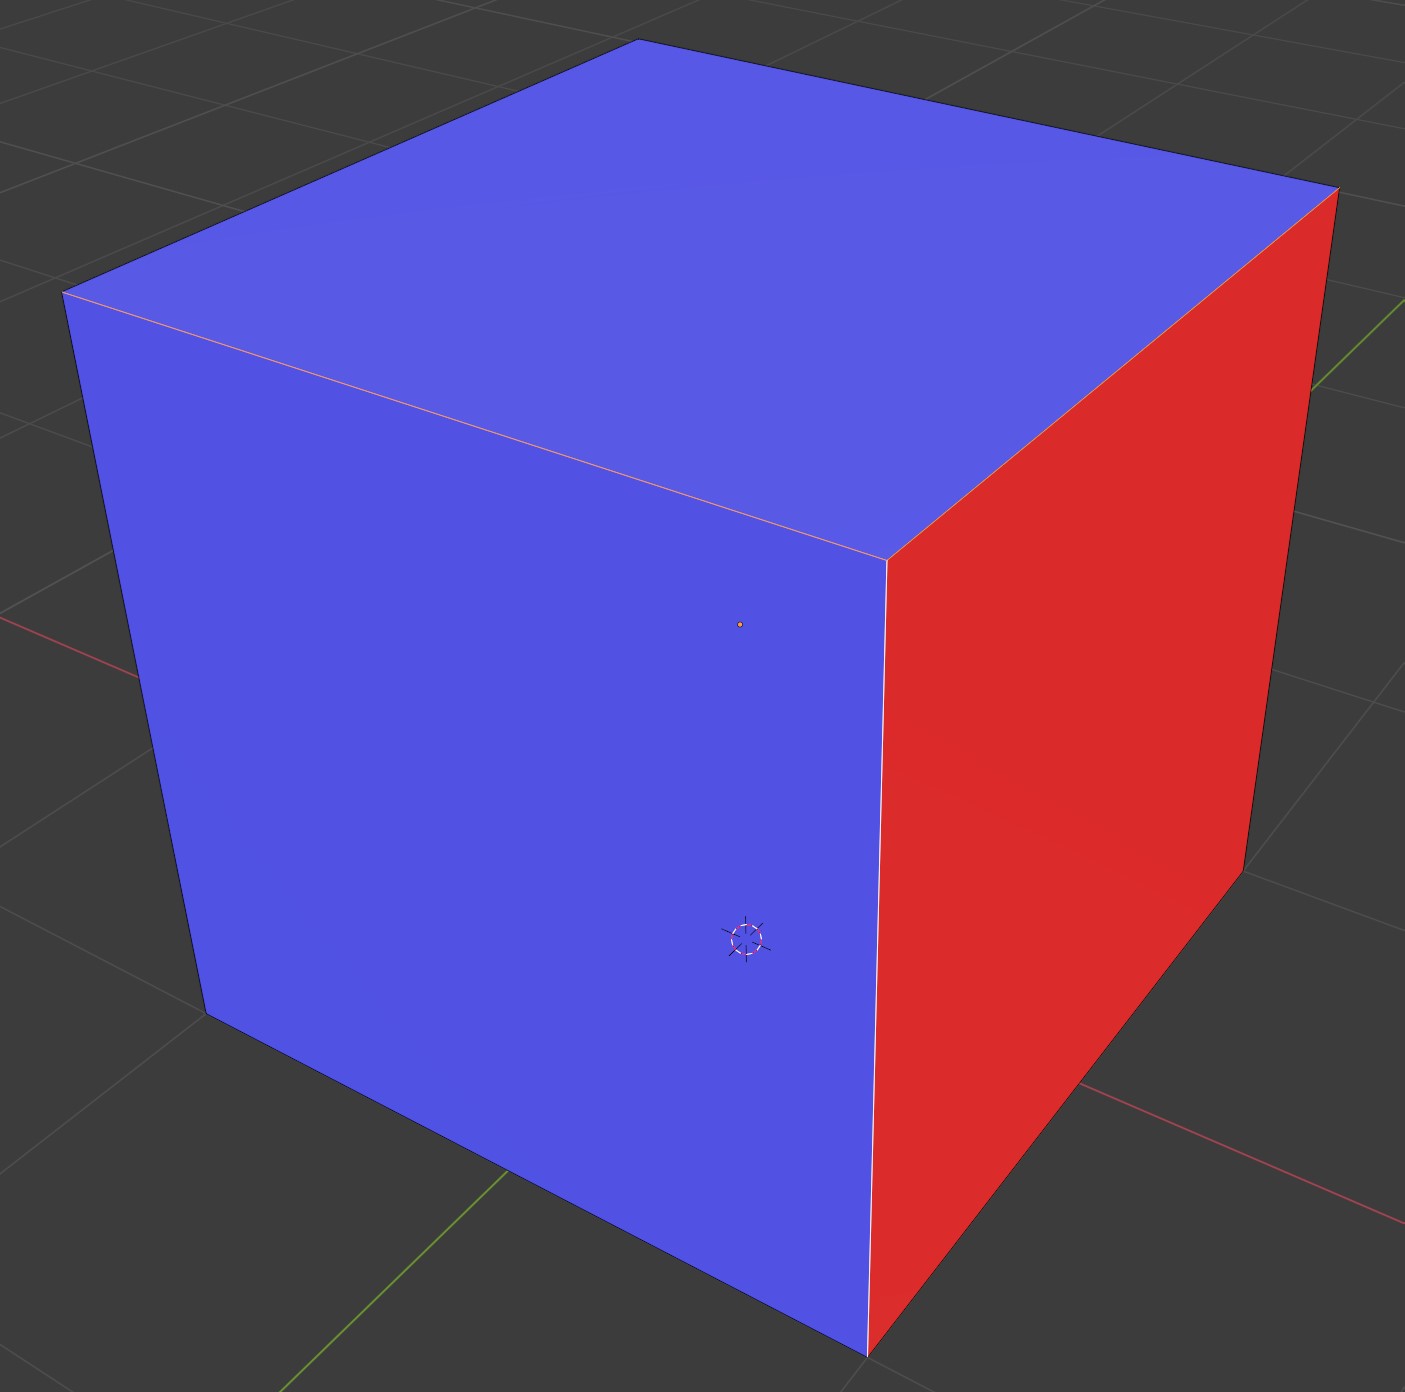
FLIP NORMALS
Now, if you get a dissatisfying bevel like this…
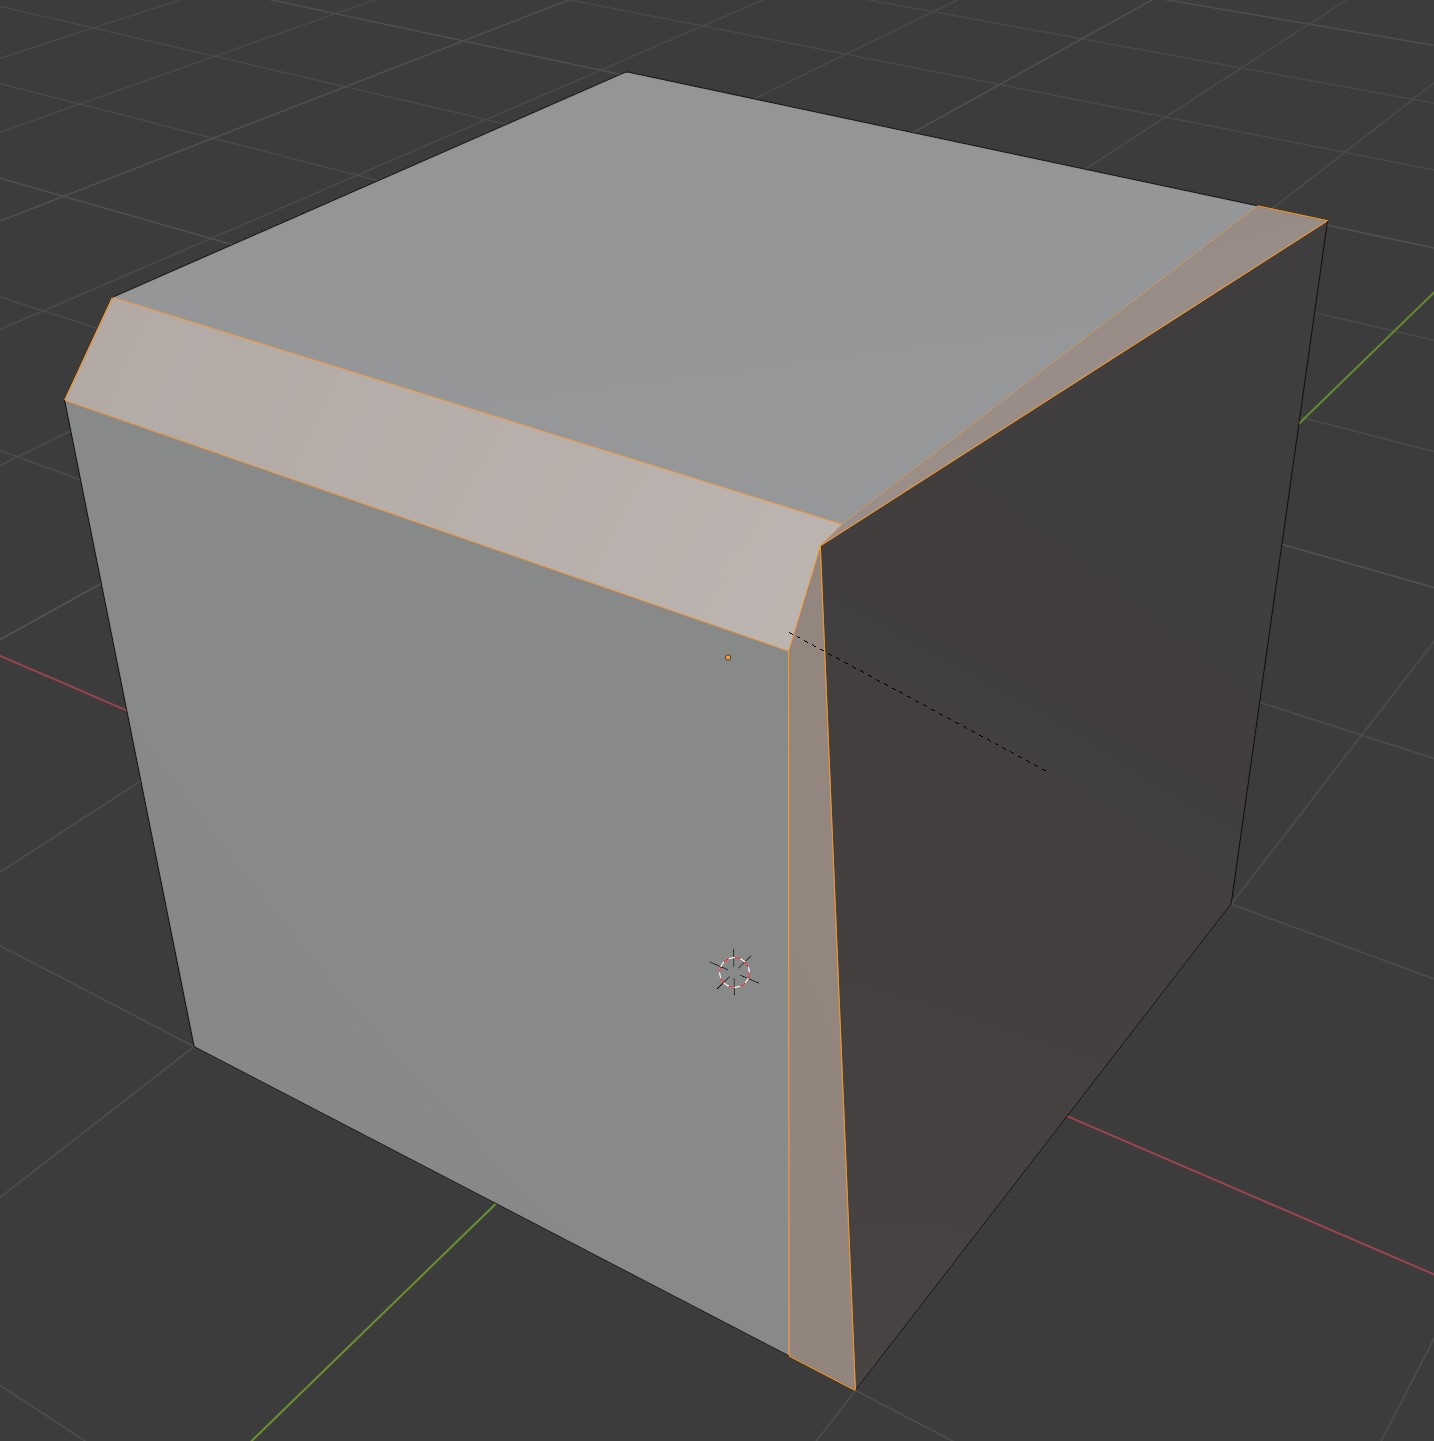
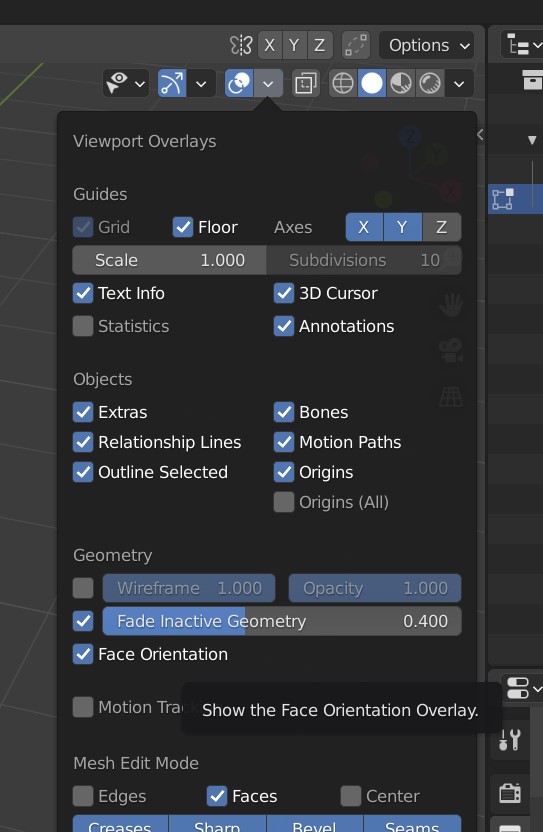
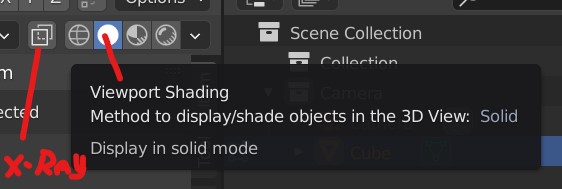
We need to check that all normals are pointing in an outward direction. Pull down the Viewport Overlays menu and check the Face Orientation box. You should be using Viewport Shading with X-ray toggled off.
All blue faces are pointing correctly outward. If you see red, that face is pointing inward and needs to be flipped to point outward like the rest of the faces.
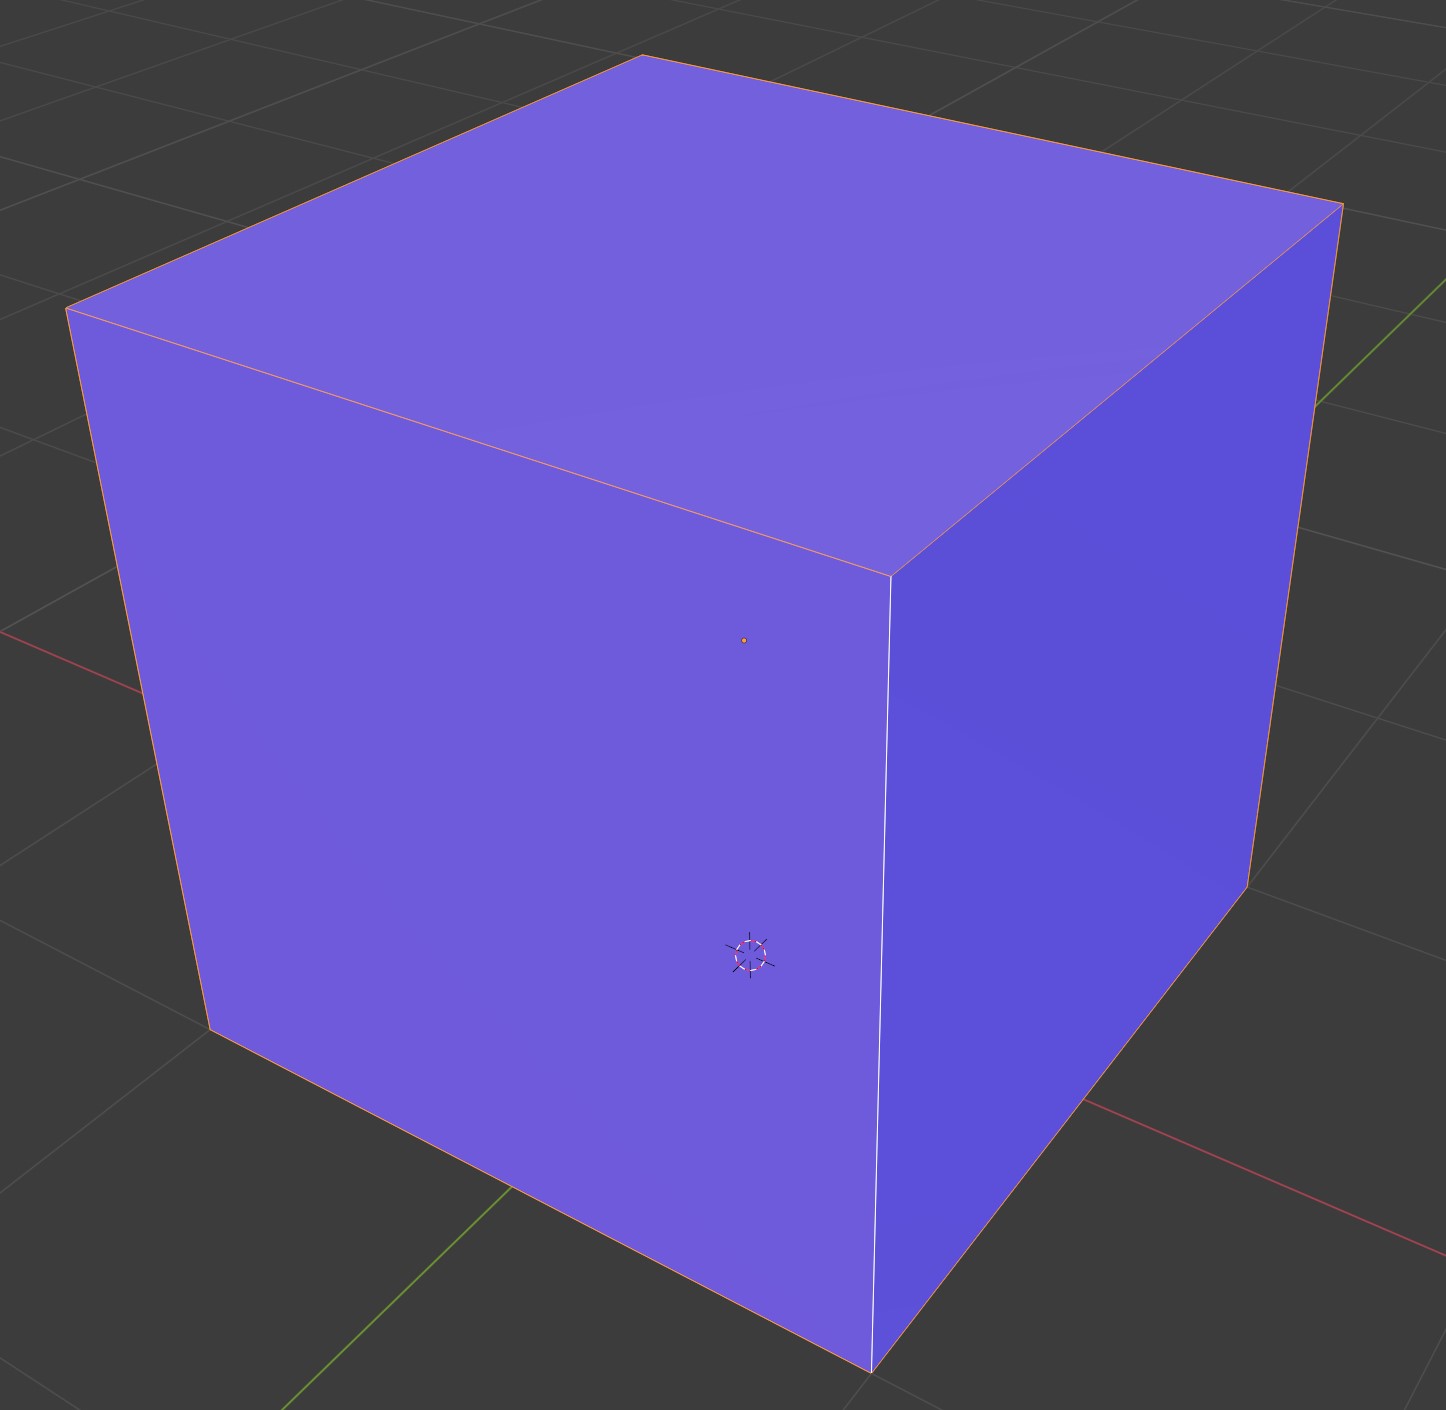
Press A to select all. Either press Alt-N to get the Normals menu (or get there from the pull-down Mesh menu). Select Recalculate Outside (note, while this should work most of the time, you can also select individual red faces and select the Flip option to change the normal direction manually).

All normals should now be pointing in the same outward direction, as indicated with all blue faces.
Bevel those edges and view your success!
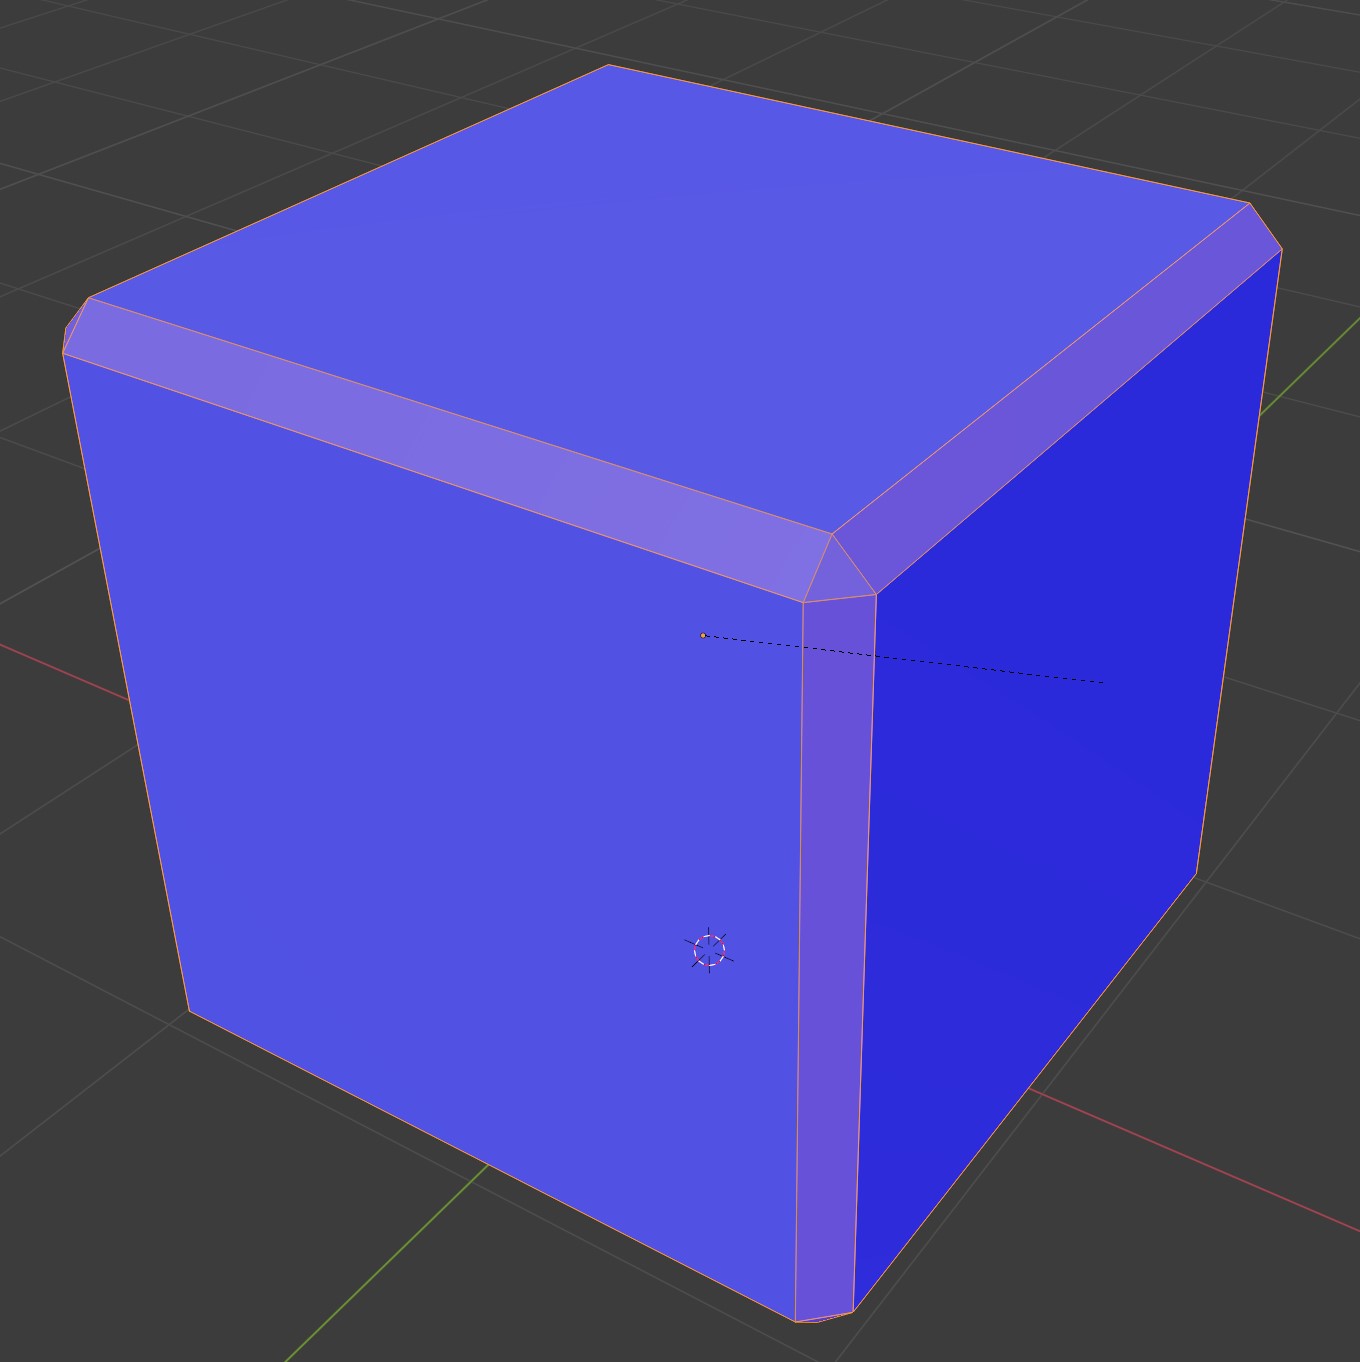
End Bevel


Kent has been using a Blender model of The Spice Vendor’s House concept artwork to setup our project. Have you wondered how this was created and how it aligns to the artwork with near spot-on accuracy? A free open source program called fSpy was the tool that is responsible for the great start to our project.
fSpy is a standalone software application that uses a technique called Camera Matching in order to calculate camera data. Given an image, the user assigns parallel lines in the image that converge into vanishing points. These vanishing points can be located either inside or outside of the image. Visualize that you are standing between two straight railroad tracks. Looking toward the horizon you see that two parallel tracks appear to converge in the far distance - that would be a vanishing point. The software takes this information and estimates camera parameters, such as orientation and position in 3D space. With the corresponding add-on, this information is imported into Blender giving the user the ability to match the same proportions as the reference image. The user can start blocking off elements of the image.
The concept artist, Vadim Zaitsev, created the art by first modeling it in Autodesk 3DS MAX and then added finishing details in Photoshop. The focal length of the model is 33 mm. While this is not a photo, it is still a good image to be used with fSpy as there are no lens distortions. Images with lens distortion, such as a photo taken with a fisheye lens or a stitched panoramic, would not be candidates for using fSpy.
Ingmar Franz (duerer) got a head start on our project by using fSpy to block off The Spice Vendor’s House. Below is how he setup fSpy.
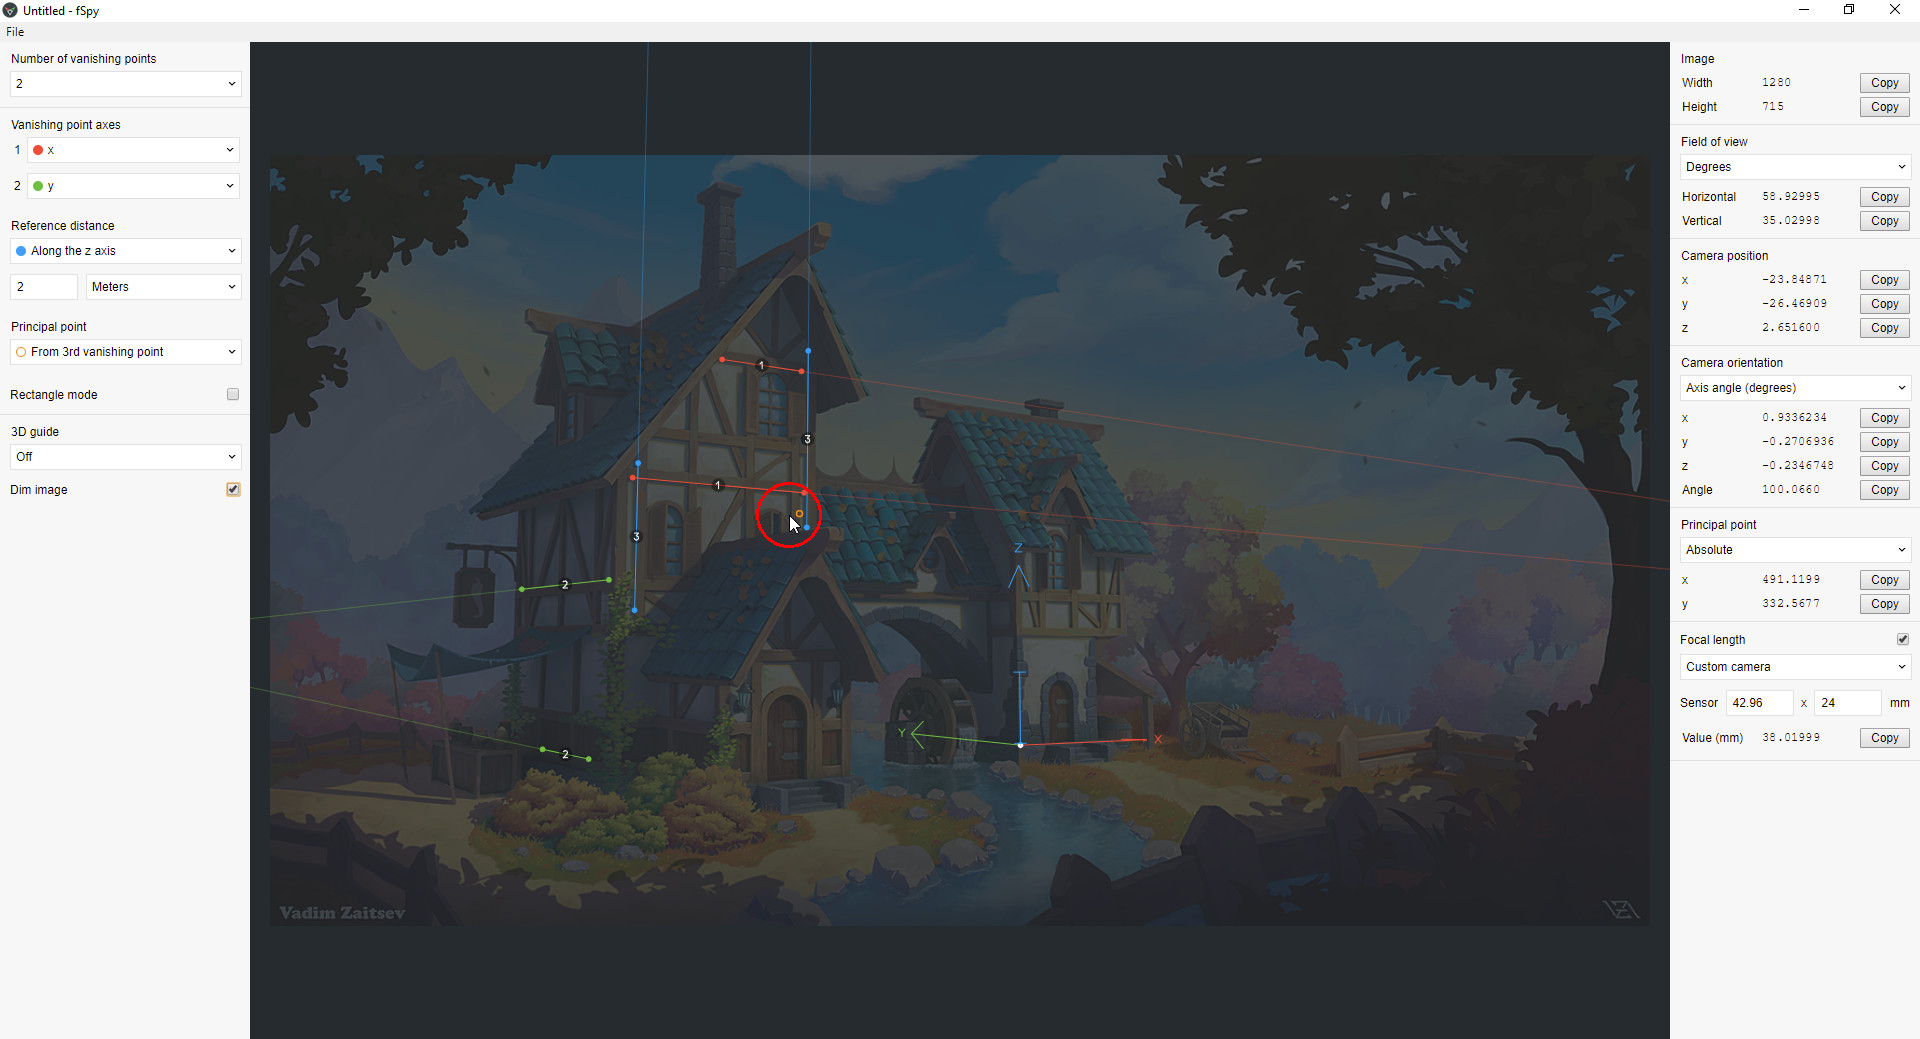
This is configured for the maximum of three vanishing points, one on the X axis (red lines), one on the Y axis (green lines) and one on the Z axis (blue lines). The handles on the ends of the lines can be positioned so that the lines are aligned with straight features in the image. These lines would be parallel on the same plane of a real world object but converge due to the so called perspective distortion, which makes an object look smaller the further away it’s positioned from the camera. Note, the more vanishing points used will produce more accurate results. For a higher precision positioning of line endpoints, press the SHIFT key to enable a magnifying glass which will refine the placement of the handle. A reference distance is established on the Z axis and set to two meters. Although, the user can freely choose any axis to be used for this scale referencing. This height is assigned to the door on the production side by the XYZ coordinate axis. Note that the blue Z line spans the vertical height of the door.
A principal point can be explicitly established. Visualize a straight ray of light going through the center of the lens of a camera. Where that ray of light hits the sensor (or film) is the principal point. Usually, this is the midpoint of the image. But it can also be established by adding a third vanishing point on the remaining axis, as it was here by selecting “From 3rd vanishing point” in the “Principal Point” dropdown menu. By adding the two blue Z lines, the small orange circle’s position is determined. A red circle annotation (added after the screenshot) has been used to more clearly identify the principal point.
The fSpy setup is then saved.
A companion add-on needs to be installed in Blender. From there, the saved fSpy file can be imported into Blender.
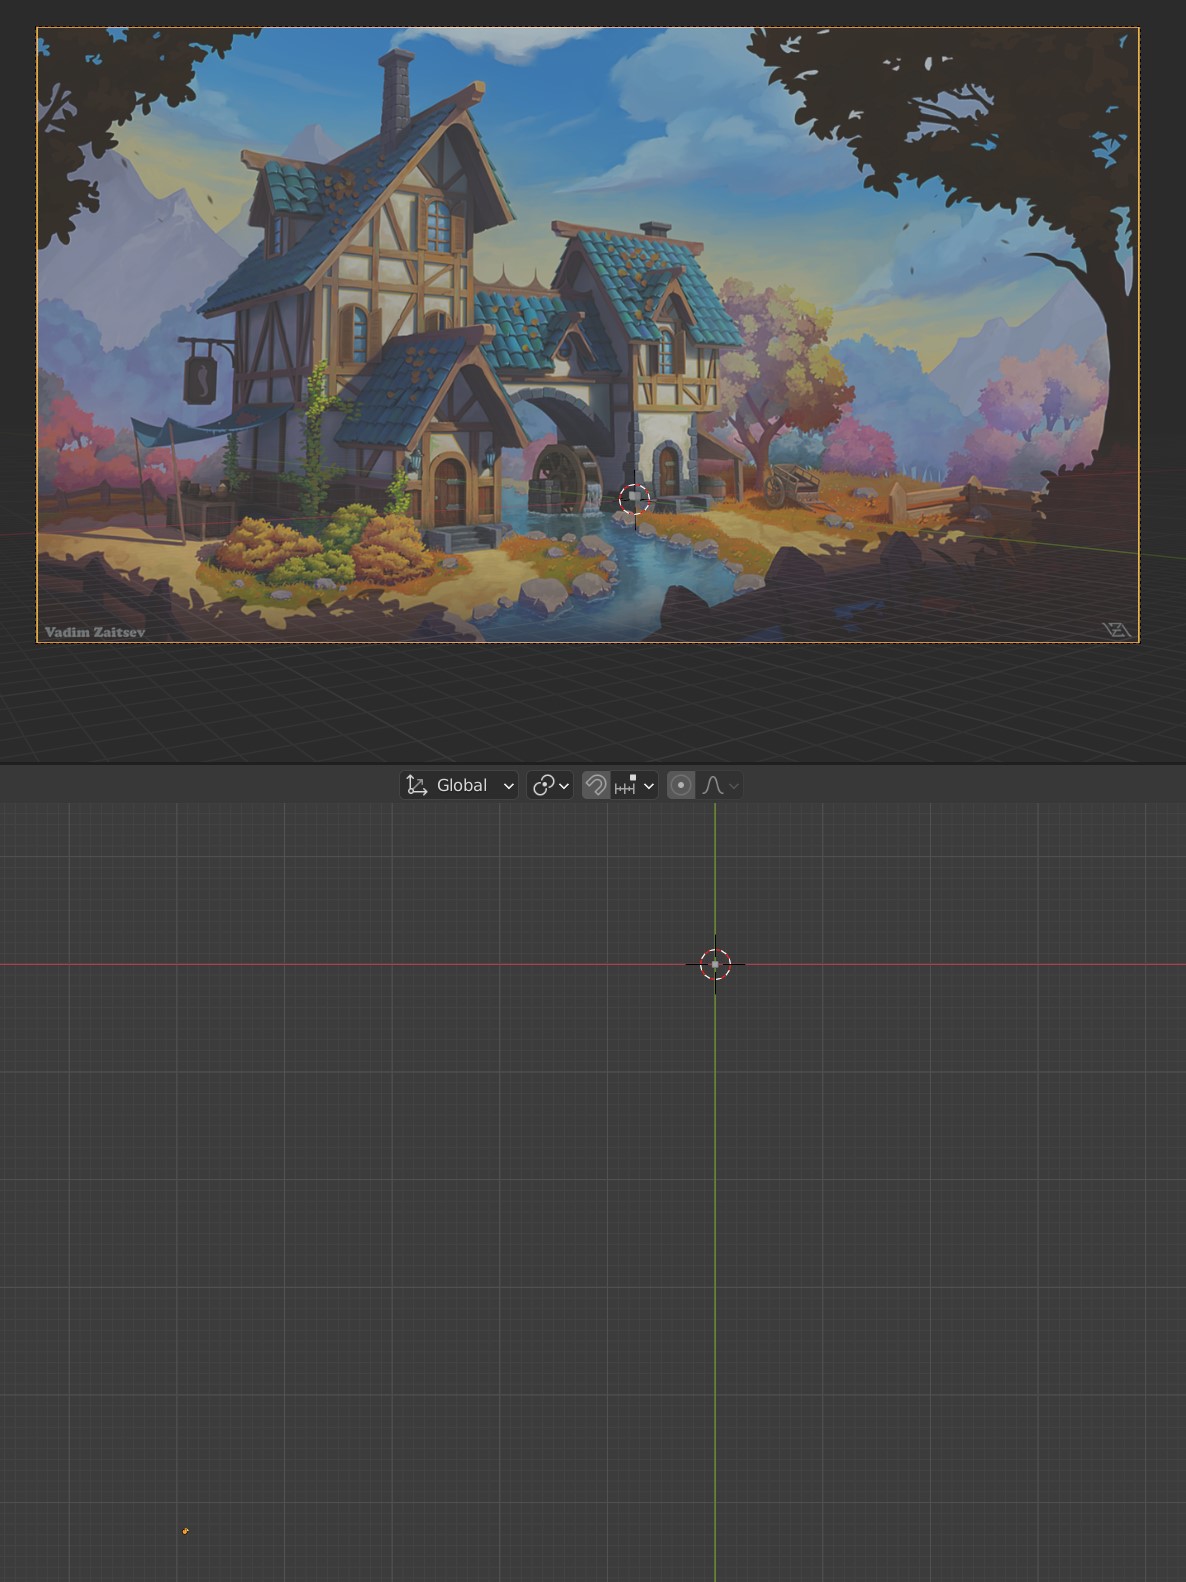
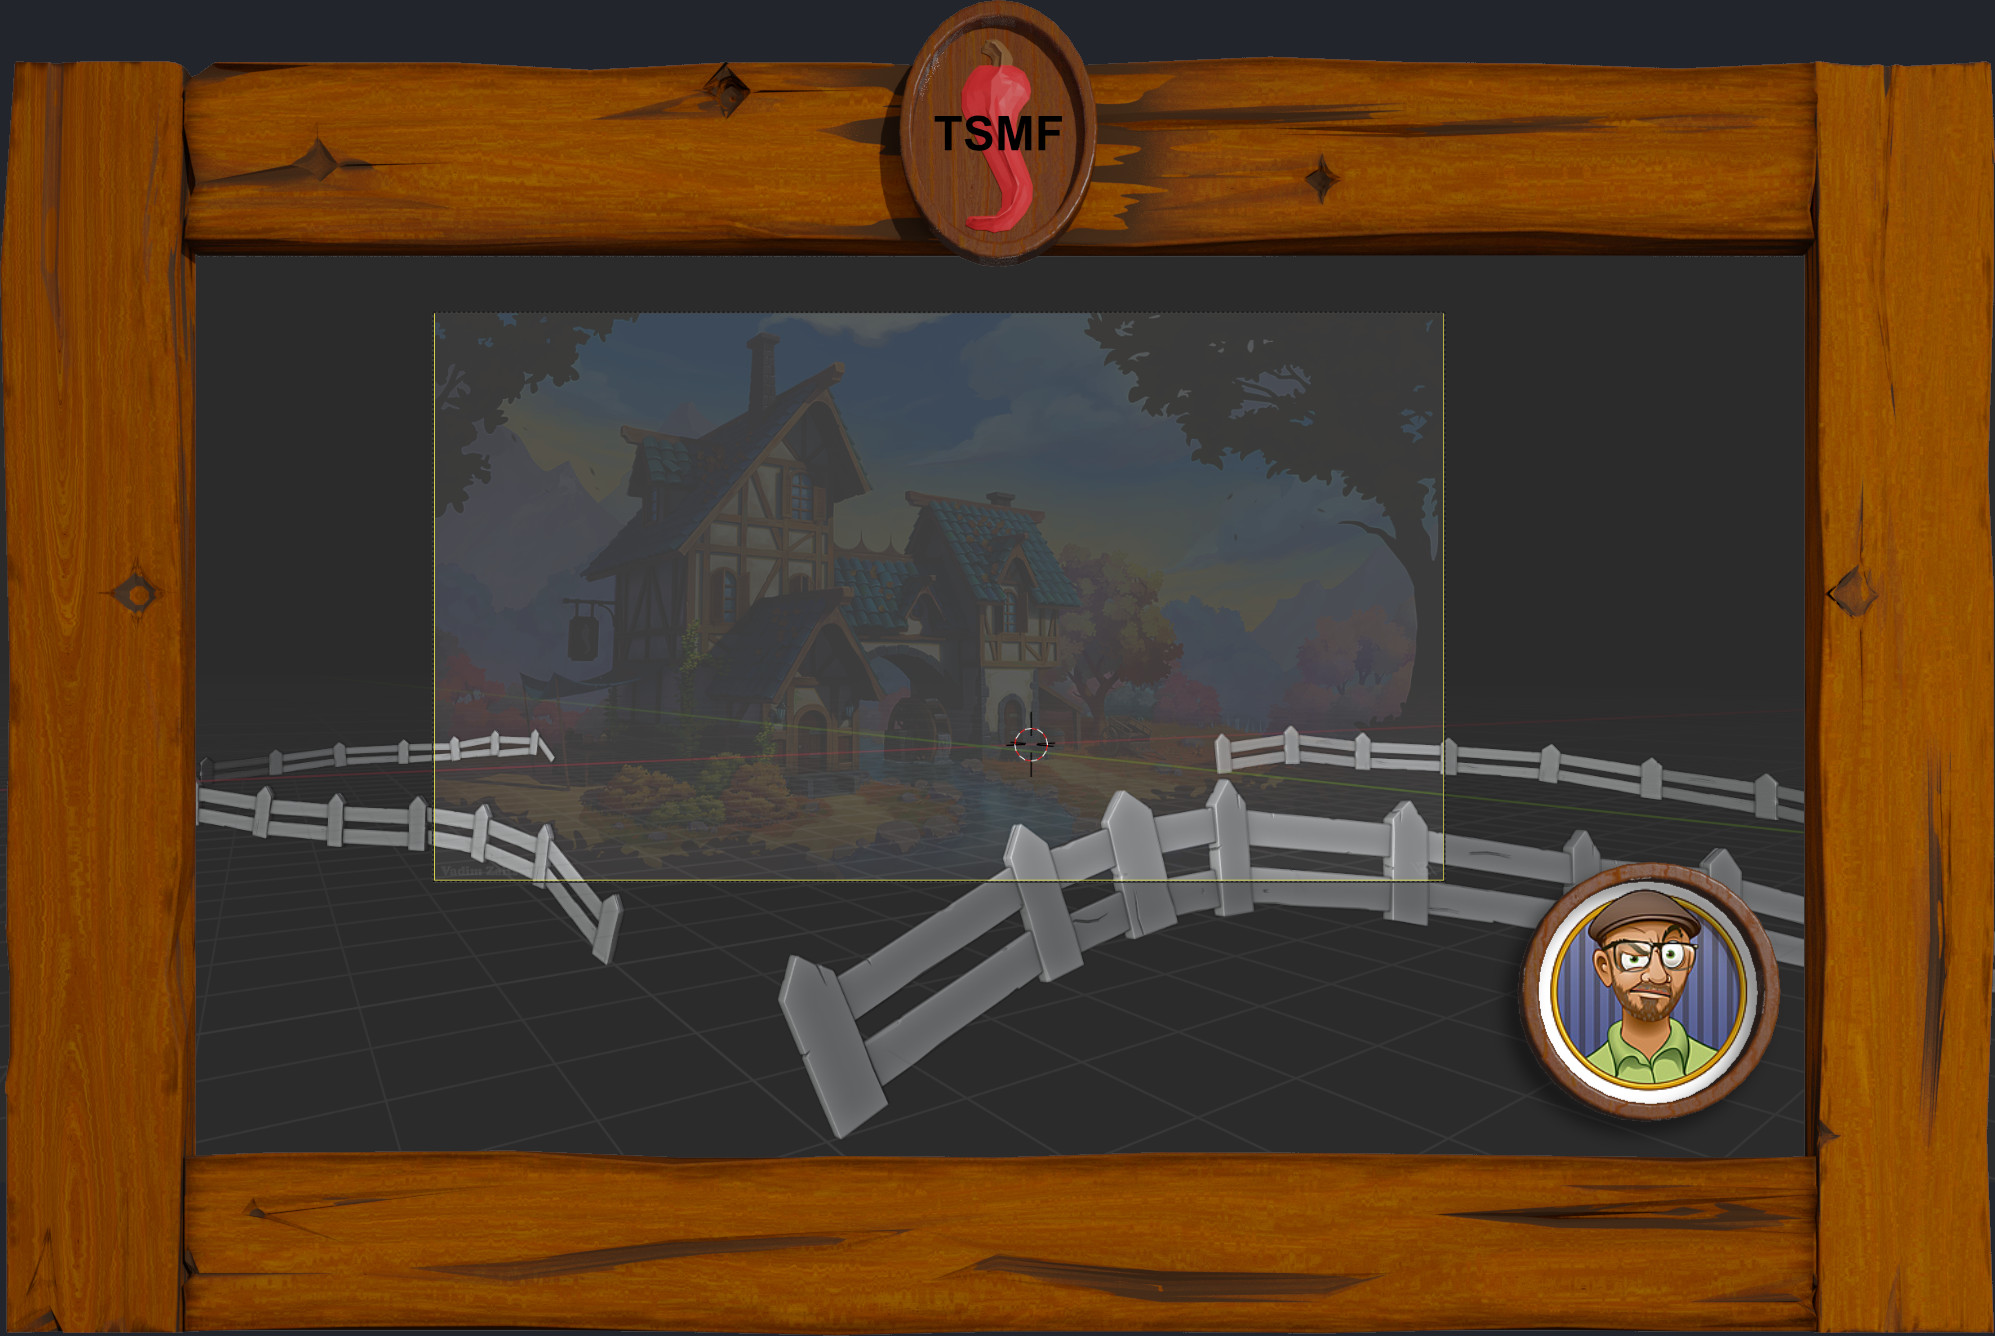
Notice in the top viewport that the world origin (located to the left of the production side’s door) is set to where the XYZ coordinate axis was established in fSpy. The camera was automatically added by the fSpy add-on; it is the orange dot in the bottom viewport.
The camera’s focal length needs to match the focal length of the original image. As mentioned previously, it is 33 mm. The fSpy program calculates this. Using the Blender fSpy add-on, the camera properties are imported automatically into Blender. Blender is now good to go.
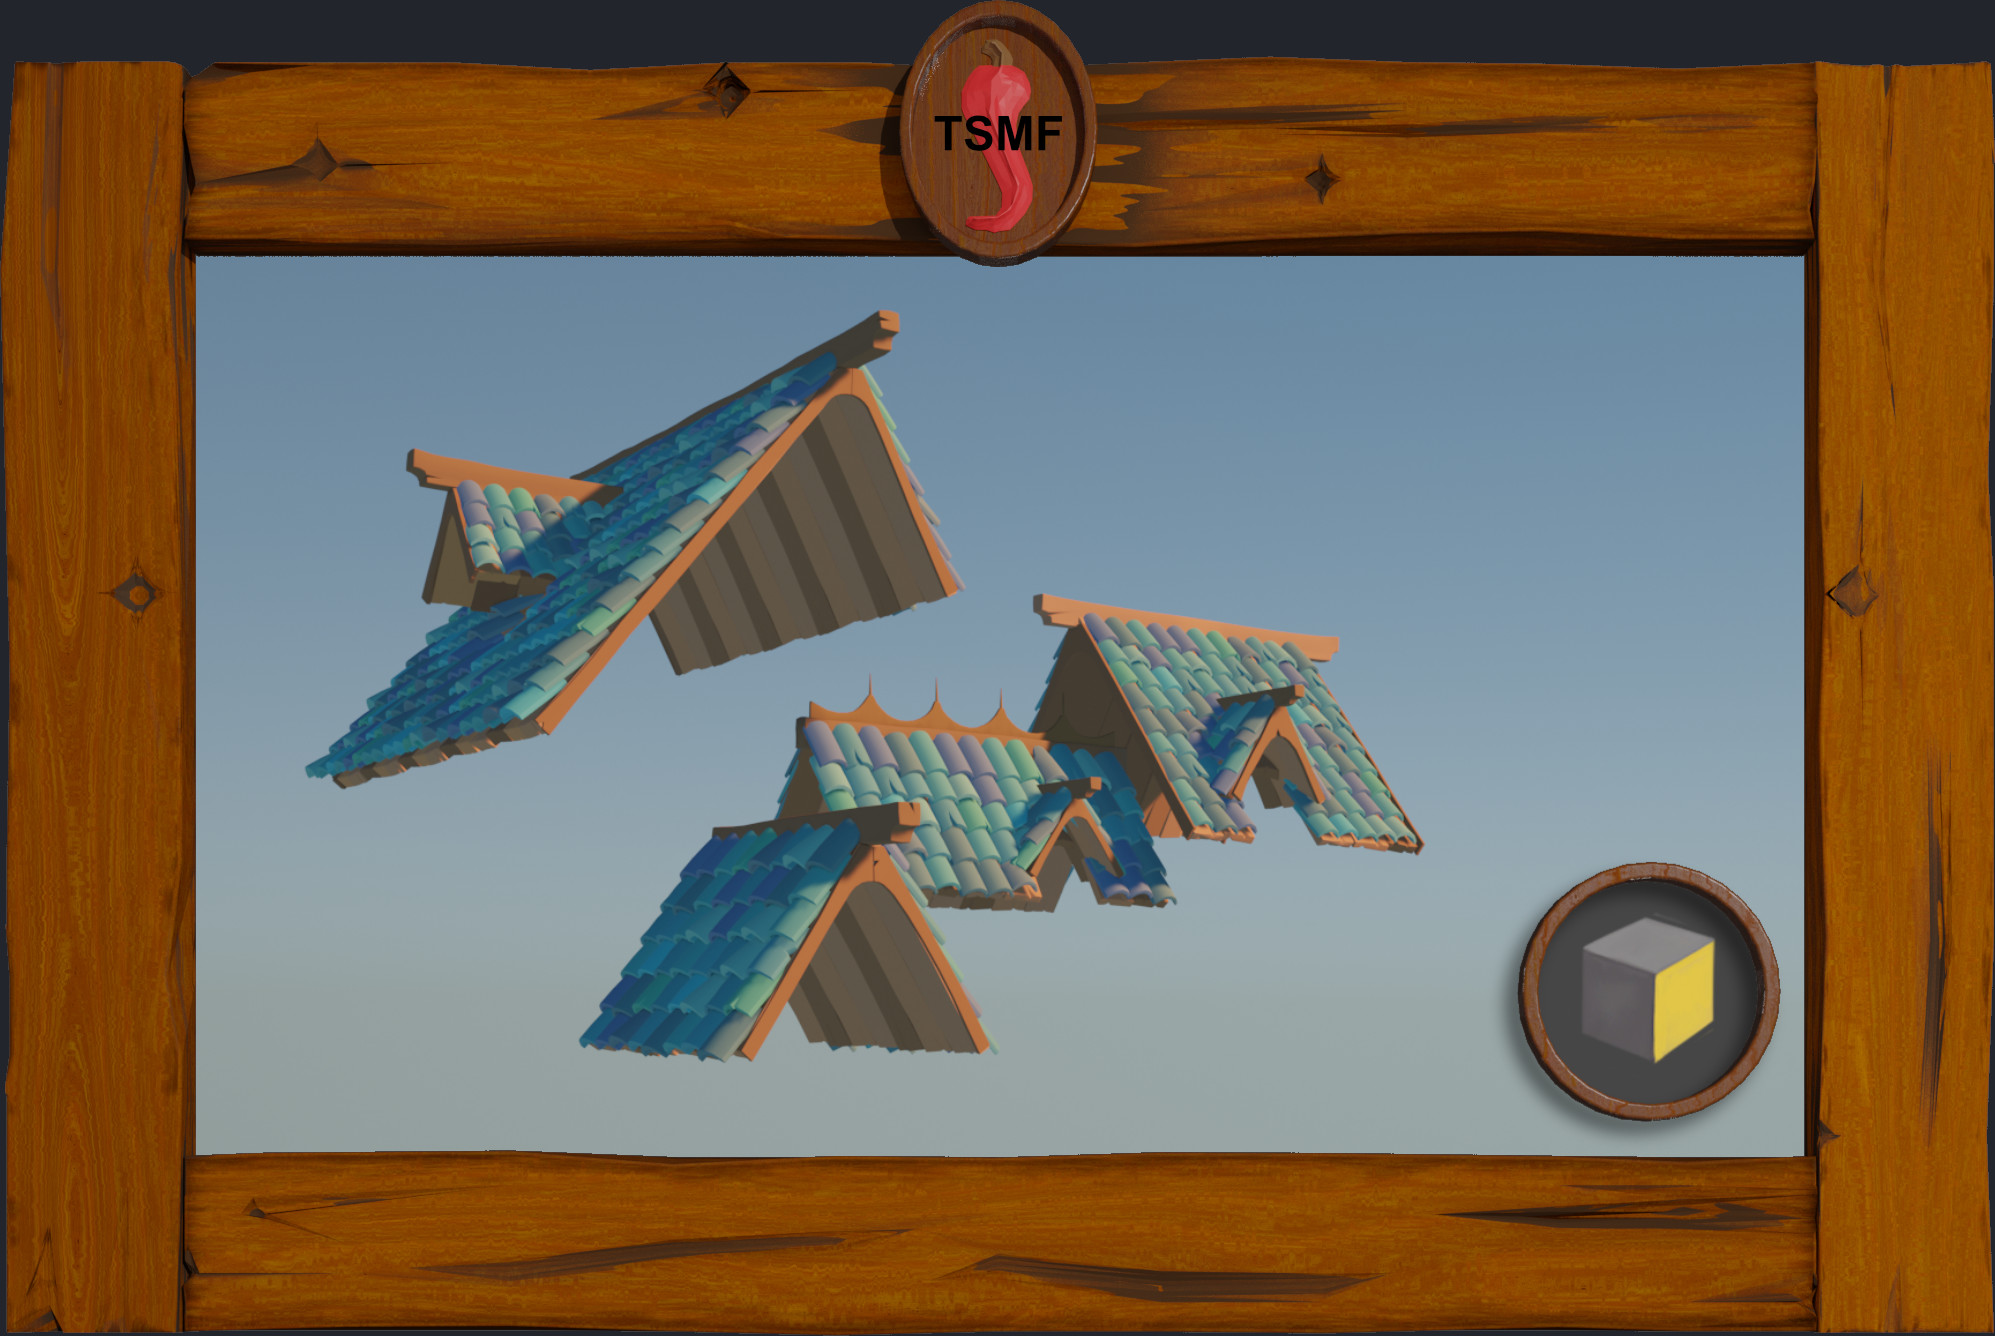
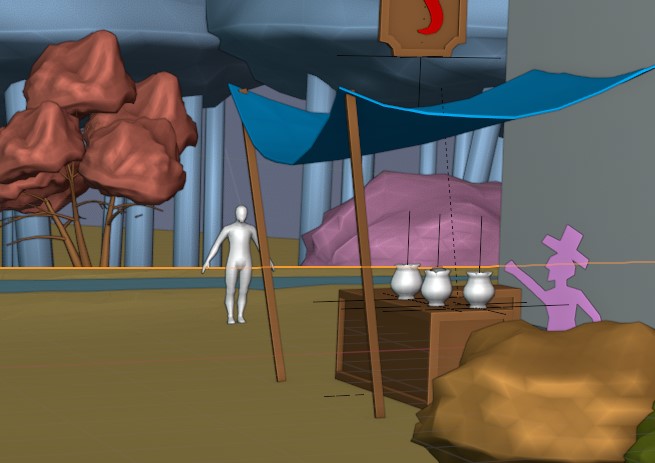
Blocking off the model can now be started. Cubes can be added, positioned, and modified to match the image’s elements.
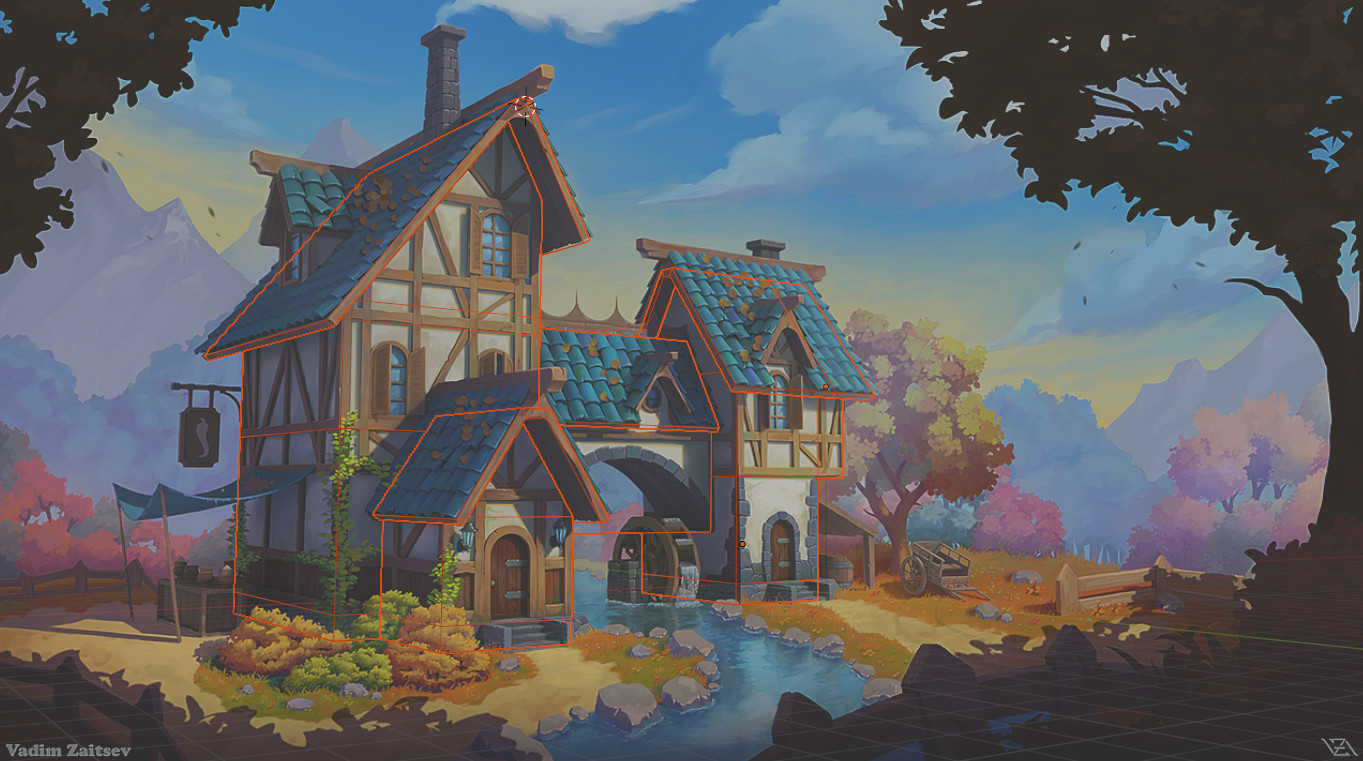
More details can be added to continue to refine the model.
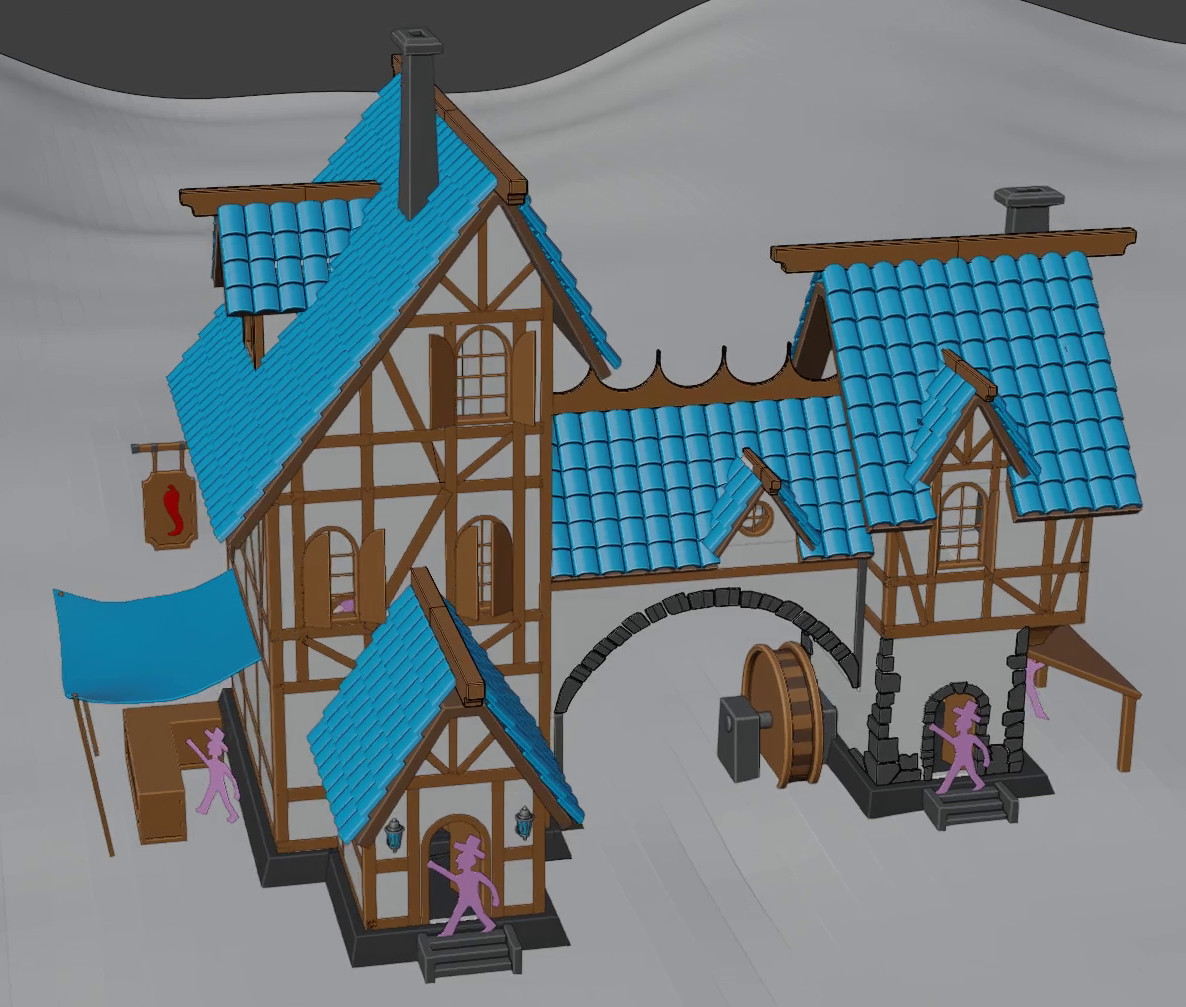
Before you get too far into adding details, make sure that the model is an accurate representation of the image. Look at a side view and see if the model is disproportionally stretched or compressed on the Y axis. Also check for Z height issues from one side of the model to the other. These types of issues could be related to setting up the vanishing points, not matching the focal length between the image and Blender camera, or even the angle that the camera is pointing toward the model. Slight changes in these parameters can result in large changes with the results. This could be an iterative process until you get satisfying results.
Having the ability to take a photo and transform it into a Blender 3D model is very powerful. fSpy can also be used to add a 3D model into a photo or perform interesting 3D camera moves in a photo, like a Ken Burns Effect. fSpy is one of those add-ons that you definitely want in your Blender toolkit.
Links:
End fSpy