See my posts for latest updates or visit the Gumroad page for more info
Hi Shawn, here's an alternative way:
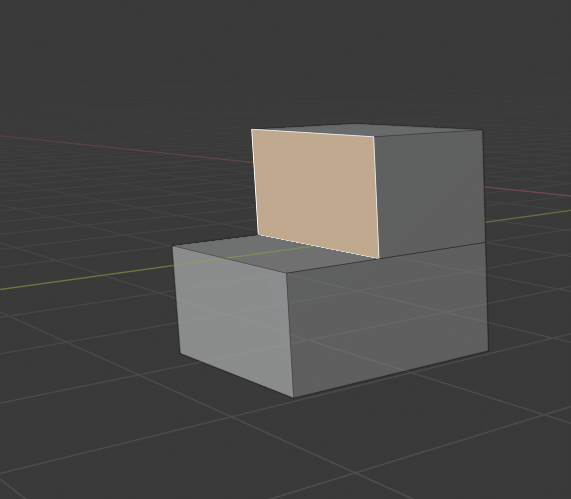
Select the two verts, like this:
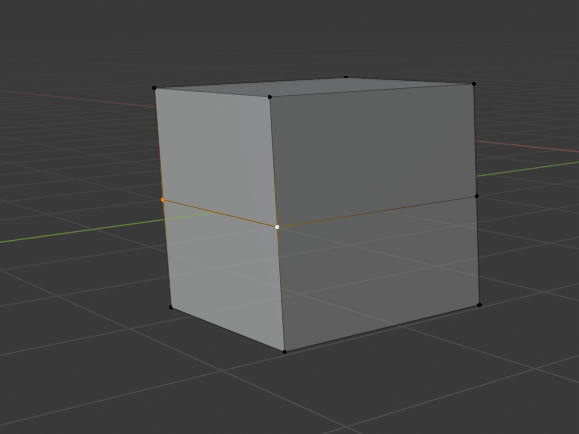
Press ALT+V and immediately Enter. (This is called Rip Fill; it makes two new vertices and fills the space between them (with a face ,in this case))
Go into Face Select Mode and select the top face:
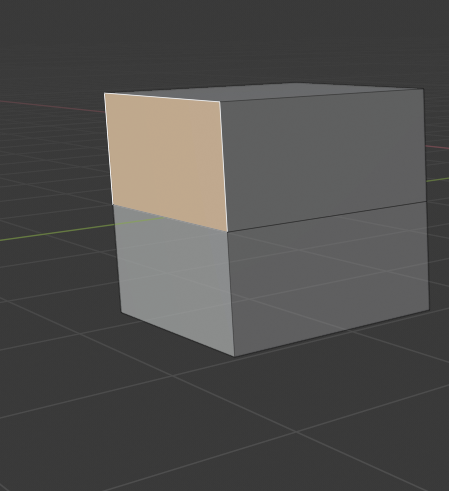
Then move the face back:
If you already have a loop cut, like you have, then it's simply a matter of ALT+M > merge by distance.
![]() spikeyxxx That is awesome! I was familiar with the rip, but rip-fill I did not know about. Thanks man.
spikeyxxx That is awesome! I was familiar with the rip, but rip-fill I did not know about. Thanks man.
The only caveat I see is there are 2 faces on the side and top when I do that (see image below). (not a big deal if I have an edge loop to move that new face back to and then merge by distance)
If there is a loop cut: I know if I extend all the back to a loop cut then the ALT + M should remove all those verts but I find that slightly strange those faces exist after the ALT + V instead of making an N-gon out of the side and top face. I guess because it 'rips & fills" in all directions/faces even if the ripped verts are in the exact same place as the original verts?
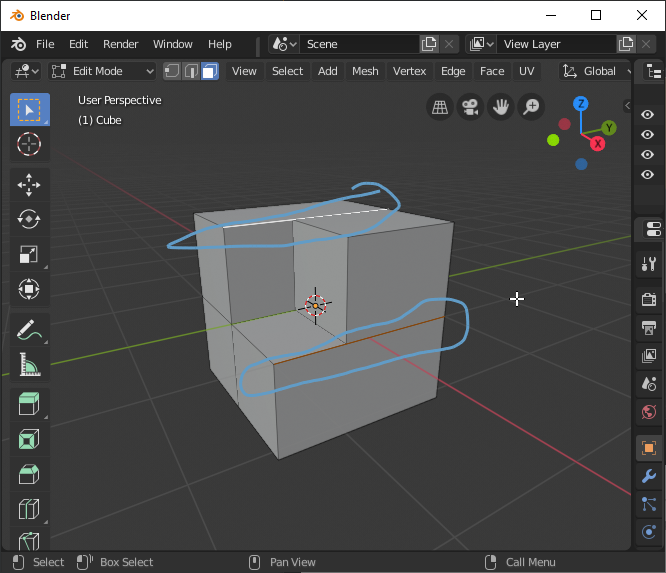 With no previously defined edge loop to go back to I get these phantom faces with no substance to them left behind.
Either way this is much quicker (as long as I plan the edge loops to merge back to in advance). Thanks spikeyxxx.
Thinking along these lines: I came across the BoxCutter and/or HardOps addon's from the blender marketplace. Does anyone have experience with these and can recommend for/against them? I'm not looking for add-ons to do everything for me or rob me of the basics but I can see where some specific add-ons help the workflow better. Perhaps I should make a separate post about it though.
![]() blanchsb I would say, go watch this recorded livestream and judge for yourself:
blanchsb I would say, go watch this recorded livestream and judge for yourself:
https://cgcookie.com/live_streams/exploring-hard-surface-modeling-with-hardops-and-boxcutter
😊
![]() blanchsb Hmm, not sure where those faces are coming from, but you can simply select them (in face select mode of course) and X > Delete Faces.
blanchsb Hmm, not sure where those faces are coming from, but you can simply select them (in face select mode of course) and X > Delete Faces.
I have HardOps myself and it is great for easy Booleans. Doesn't create nice topology though (it's still just Booleans!).
Like Miranda said, watch that live stream and maybe some of the demo's you can find on the website: https://hardops-manual.readthedocs.io/en/latest/
It's worth the money if you want to make those kind of things, but personally, I have hardly used it so far (you do get lifelong upgrades!)
ssmurfmier1985 Woah, the first 20 minutes seemed a little over my head. I will have to watch more of that later. Hard Ops looks like it would be good for hard surface modeling for sure.
I do want to come back and look at the Box Cutter one too.
![]() spikeyxxx yeah I deleted those faces and the side vertices end up becoming disonnected from everything then, weird. BUT that is only when I do that without an edge loop to move back too. I think I understand why that is happening and just work in a way that avoids that shortcoming since ALT + M doesn't fix that problem. (a knife operation and ALT + M would though I suppose)
spikeyxxx yeah I deleted those faces and the side vertices end up becoming disonnected from everything then, weird. BUT that is only when I do that without an edge loop to move back too. I think I understand why that is happening and just work in a way that avoids that shortcoming since ALT + M doesn't fix that problem. (a knife operation and ALT + M would though I suppose)
Thanks for the info about the two add-ons. I will save up for them. Bank is empty after the laptop purchase and will have to wait for a few weeks. I can live without it for now. Sounds like you do too haha.
August 22, 2019 - Day 2: Modeling Revolver - Blockout Continued
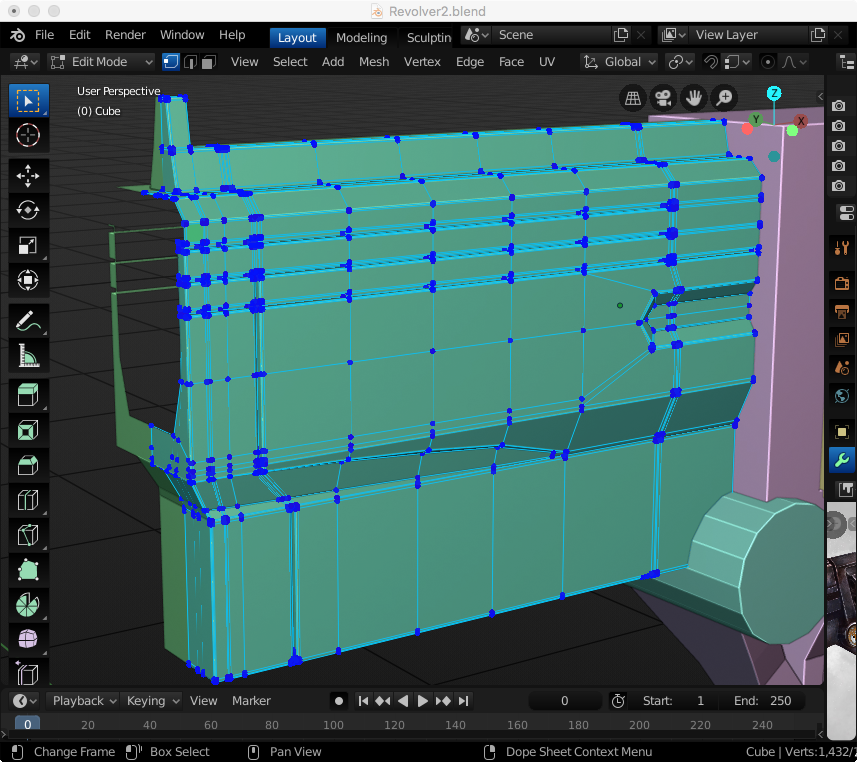
I only had time for the handle because I caught some of the live stream regarding the Hard-Ops add-on. I was above my head for the first twenty minutes. I did learn a little bit about boolean operators (familiar with them from Affinity Designer but not in a 3D sense). I might have too many verts on that back edge. I guess I will see when I make detail loops. I also like this random color looked option for each object. Makes it easier to focus.
August 23, 2019 - Day 3: Modeling Revolver - Blockout Complete & Adding Details
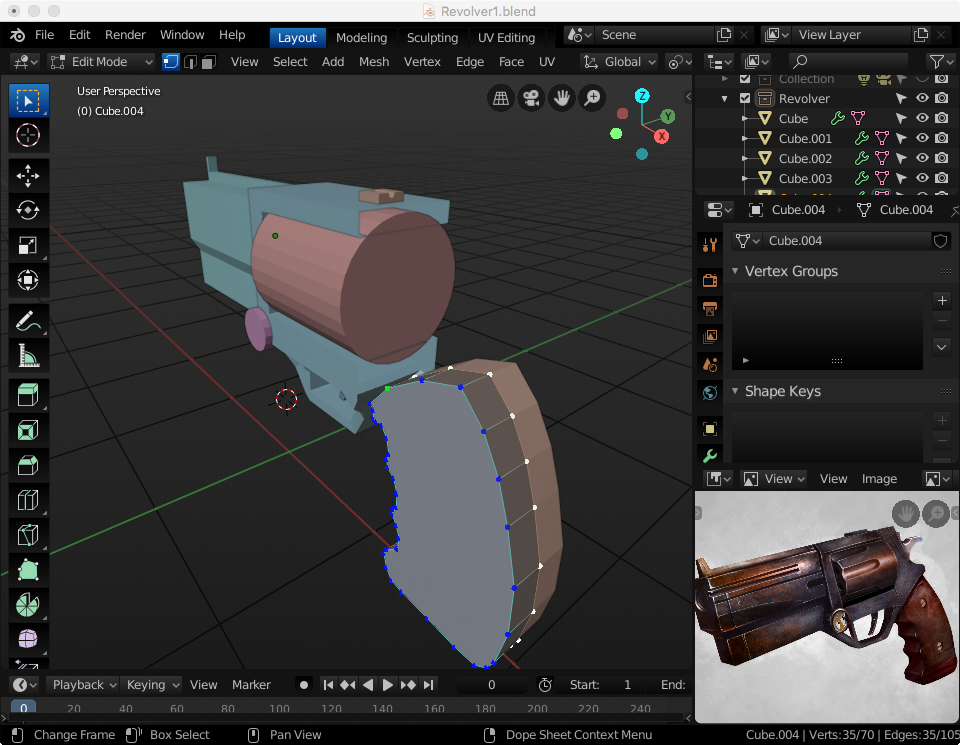
After finishing the blockout, I dove into the forward piece for details alongside the tutorial. I am getting the hang of some of the topology tricks, though I am not sure I am able to do them on the fly by myself yet. Deep breaths and it will come with time.
Question to the hardened veterans: One thing I noticed on this tutorial is that there are a lot of 'detail' edge loops near corners that are supposed help keep corners and details 'sharp' when using the subdivision surface modifier. Yet, in the Modeling a treasure chest course there was more emphasis on using the 'sharp' edge marking. Why the two different methods??? I would think that marking sharp would be less taxing on memory since there are fewer edge loops but perhaps that is incorrect? Does 'marking' an edge as 'sharp' stay with the model if it were to get exported for a game asset into Unity? Maybe someone can clarify this for me. Thanks. See reference image below:
This was a good stopping point. I will work on the front face tomorrow and transition to the rest of the body if I have time.

![]() blanchsb there are two methods of smoothing, one is using the subdivision surface modifier in conjunction with holding edges (widely used for high poly modeling and animated movies/VFX and such), one is the bevel method in conjunction with auto smooth and mark sharp (used often for hard surface modeling or modeling for games). It depends on your your type of project which is best to use. There’s a chapter in the ‘normal map modeling for games’ course that tells a bit more about it.
blanchsb there are two methods of smoothing, one is using the subdivision surface modifier in conjunction with holding edges (widely used for high poly modeling and animated movies/VFX and such), one is the bevel method in conjunction with auto smooth and mark sharp (used often for hard surface modeling or modeling for games). It depends on your your type of project which is best to use. There’s a chapter in the ‘normal map modeling for games’ course that tells a bit more about it.
Once you watch Lampels game creation courses you’ll also get more insight in how things will look inside Unity, since he covers importing in a couple of his courses :)
Hi Shawn.
A bit late, but for future use...
I've found another way to 'cut' a face back!
Enable the Addon Mesh: Edit Mesh Tools.
With the face selected, go to Face Tools and select Push/Pull Faces:
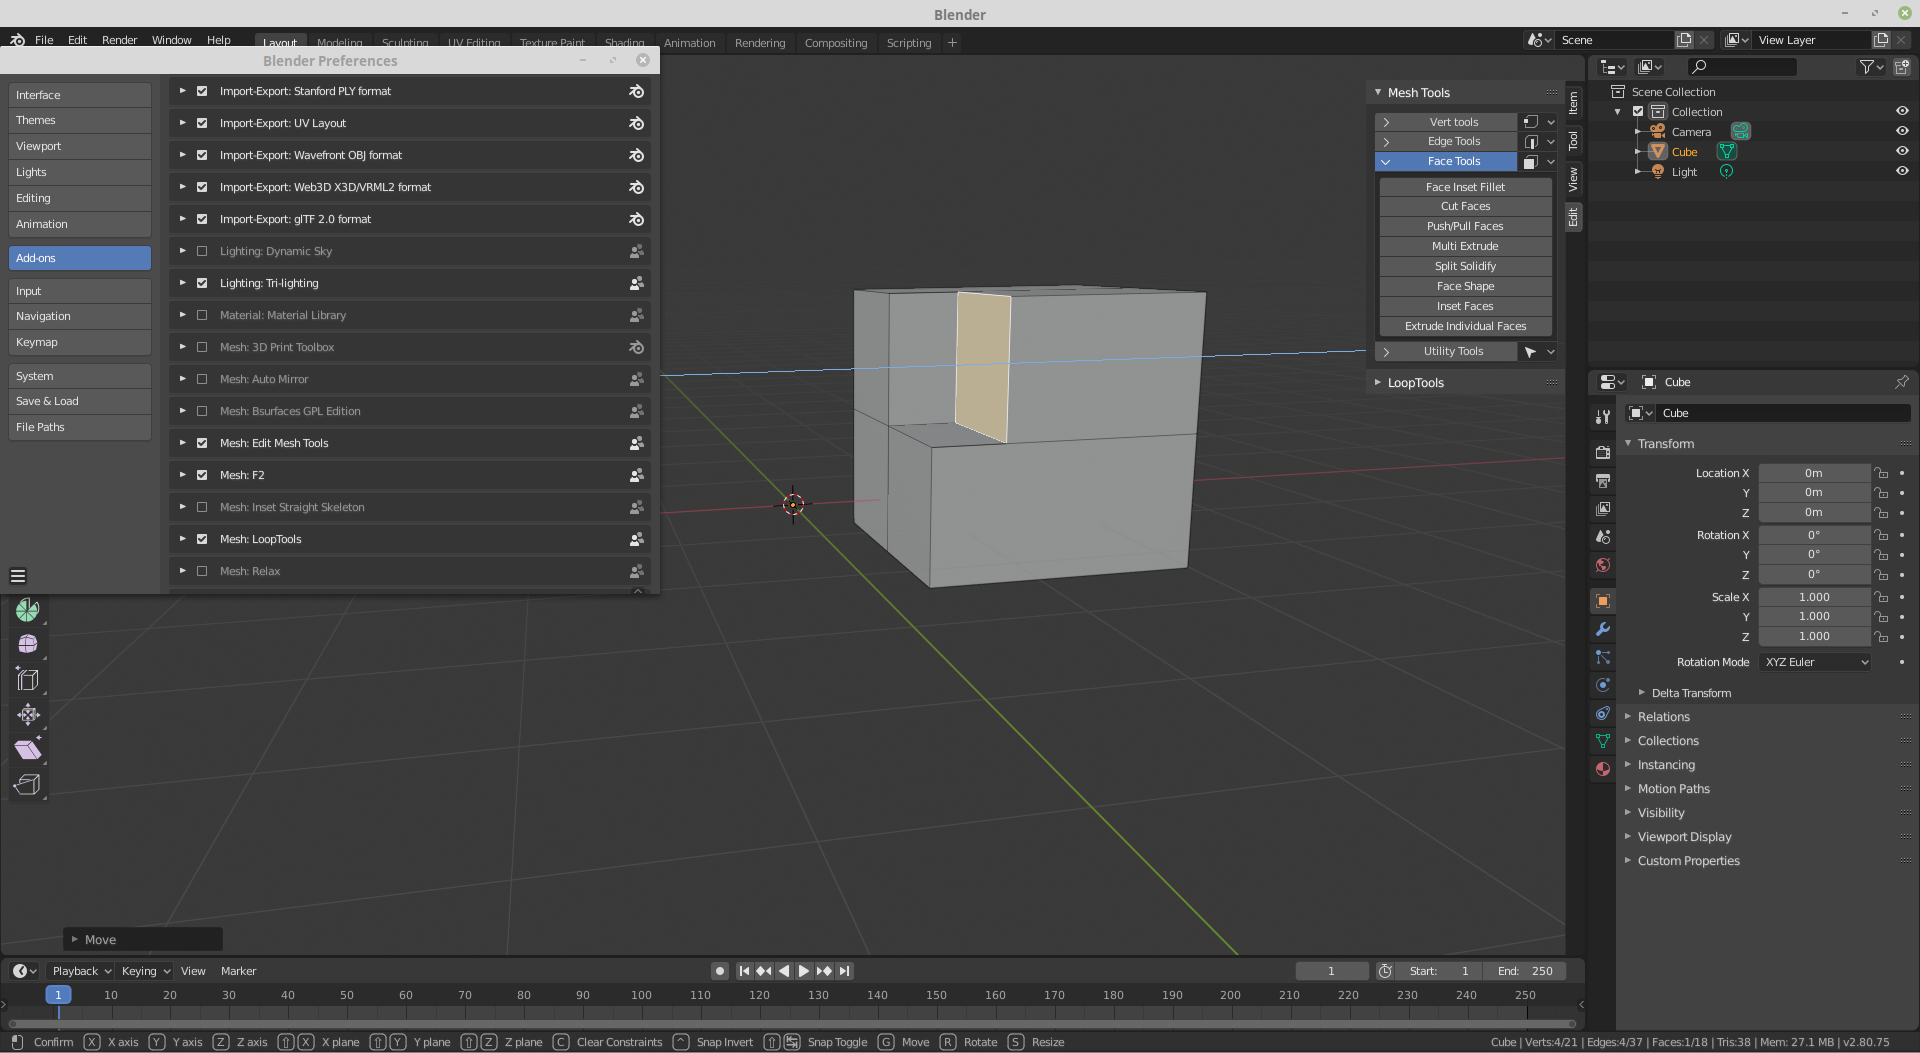
This does exactly what you wanted, without creating unwanted geometry;)
![]() spikeyxxx Perfect!!! Spikeyxxx for the win!
spikeyxxx Perfect!!! Spikeyxxx for the win!
ssmurfmier1985 interesting.....I figured the bevel method would be the way to go. I’ll look into the game creation series and normal maps once I get through this set of training. Thanks.
![]() spikeyxxx Wow! That Mesh Edit Tools is amazing!
spikeyxxx Wow! That Mesh Edit Tools is amazing!
Pushing an pulling faces has never been so easy! Reminds me of my days working in SolidEdge as an engineering student.
The only limitations with the push/pull is that it seems to only do 1 face at a time. (I'm okay with that).
Also using the repeat action SHIFT + R my blender crashed on the push/pull action........ it probably is a 👾 and wasn't designed for that action. This is a powerful add-on though. So glad you mentioned that!Thanks.
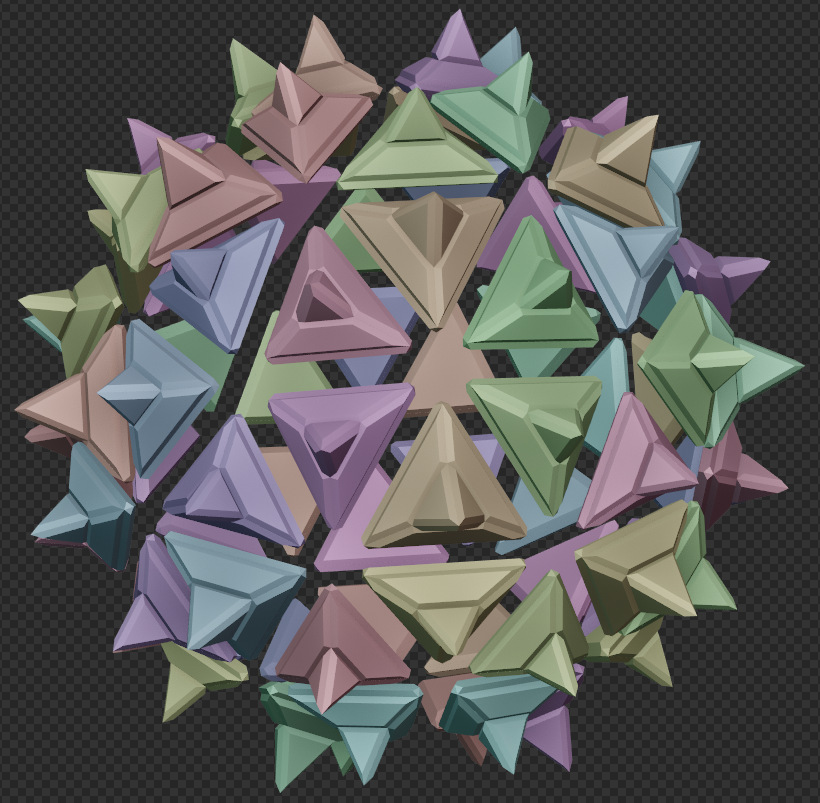
There's a lot more here too such as face shapes, split and solidify, and bevel options. As a homage: here's a Spikey Orb I was able to make with very few clicks out of an IcoSphere.
August 24, 2019 - Day 4: Modeling Revolver - Adding Details continued
Revolver is looking a lot cooler. I had some fun using the Mesh Edit Tools add-on especially for the cross-hair. I am beginning to understand the detail loops workflow better but I need more practice on joining circles into the middle of objects. Once I have edge loops established between both sets of meshes it doesn't seem to hard to join them together. I am getting close to completion on this training.....

![]() blanchsb Glad it's helpful!
blanchsb Glad it's helpful!
I just 'found' this addon yesterday (I did a fresh install of my OS and all my software and then I had to change my Preferences and stumbled upon this addon and thought, let's give this a try and see what it does...).
And yes, SHIFT+R crashes Blender...(probably should mention that to the developer, there is a nice 'report a bug' button where the addon is...)
Thanks for the orb!
![]() blanchsb How did you highlight the edges? Is it a viewport setting?
blanchsb How did you highlight the edges? Is it a viewport setting?
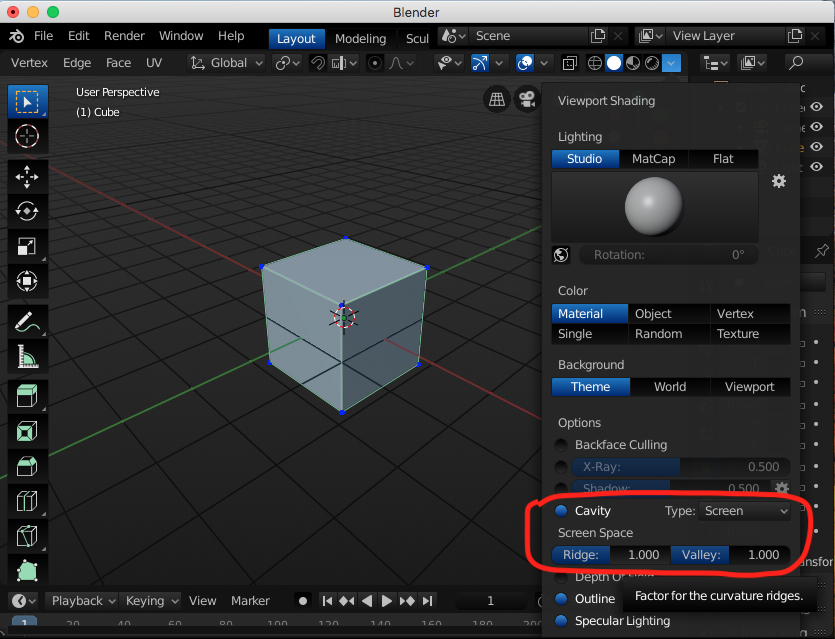
![]() williamatics My guess is turning on the ‘cavity’ option on the viewport overlays, which acts like AO and highlights the edges. You can set those to ‘screen’ or ‘world’, each has its own look. I typically use the world setting.
williamatics My guess is turning on the ‘cavity’ option on the viewport overlays, which acts like AO and highlights the edges. You can set those to ‘screen’ or ‘world’, each has its own look. I typically use the world setting.
ssmurfmier1985 Miranda said it best. Although I am fond of the 'Screen' type of Cavity detection.
![]() williamatics It's all found in the Viewport Shading Menu in the Header. The cavity feature is by far one of my favorite little nuggets in blender 2.8. I like it so much I wish it was native to the Eevee shader. You can also adjust the exterior edge and internal edge width settings using a slider bar (say you want more pronounced outer edges but less pronounced inner edges).
williamatics It's all found in the Viewport Shading Menu in the Header. The cavity feature is by far one of my favorite little nuggets in blender 2.8. I like it so much I wish it was native to the Eevee shader. You can also adjust the exterior edge and internal edge width settings using a slider bar (say you want more pronounced outer edges but less pronounced inner edges).
One cool thing is that you can technically render in the Workbench (LookDev) mode and send out quick renders with that enabled.
One question I have is: What do Specular Lighting and Depth of Field exactly do? I have toggled them various times and I don't seem to see anything different.
August 24, 2019 - Day 4: Modeling Revolver - Adding Details: Handle
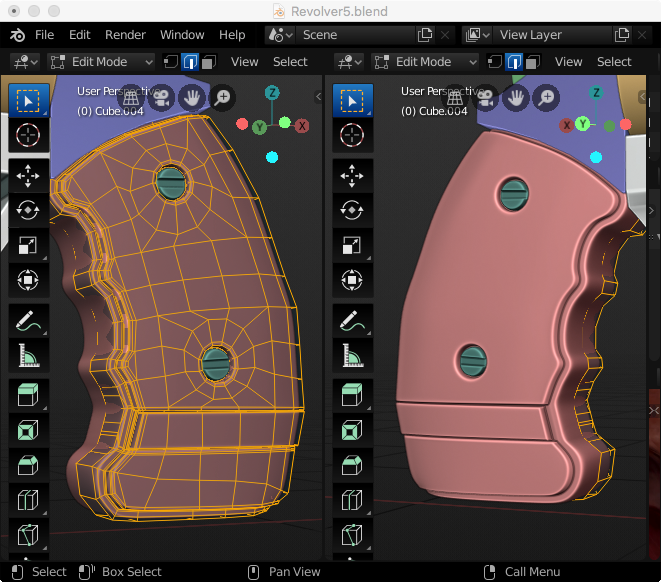
Wow! The hande extrusion section was a lot more rough for me than the tutorial. Somehow I ended up with a couple extra faces on the lower strap extrusion and it took a decent amount of work to flatten it even with the Loop Tools Add-On. But I am glad I had it handy or it would have been worse and I would have started the handle exercise all over again.
The screws taught me that sometimes it is better to extrude some faces as opposed to 'cutting' other faces back. Extruding the outer flat-head round part to make the flat-head slot was much easier than cutting the flat-head slot, mainly because I had already made the screw head somewhat rounded so cutting faces back proved to be troublesome. The tutorial training saved the day there.
New shortcut keys learned today as well: F9 (context menu for last action), and Ctrl + Spacebare for toggle full screen. Huzzah! Also I kinda like seeing one side in edit mode and the other in object mode.
August 25, 2019 - Day 5: Modeling Revolver - Completion
I finished the tutorial and tried the hammer on my own without watching first. It turned out decent I think!
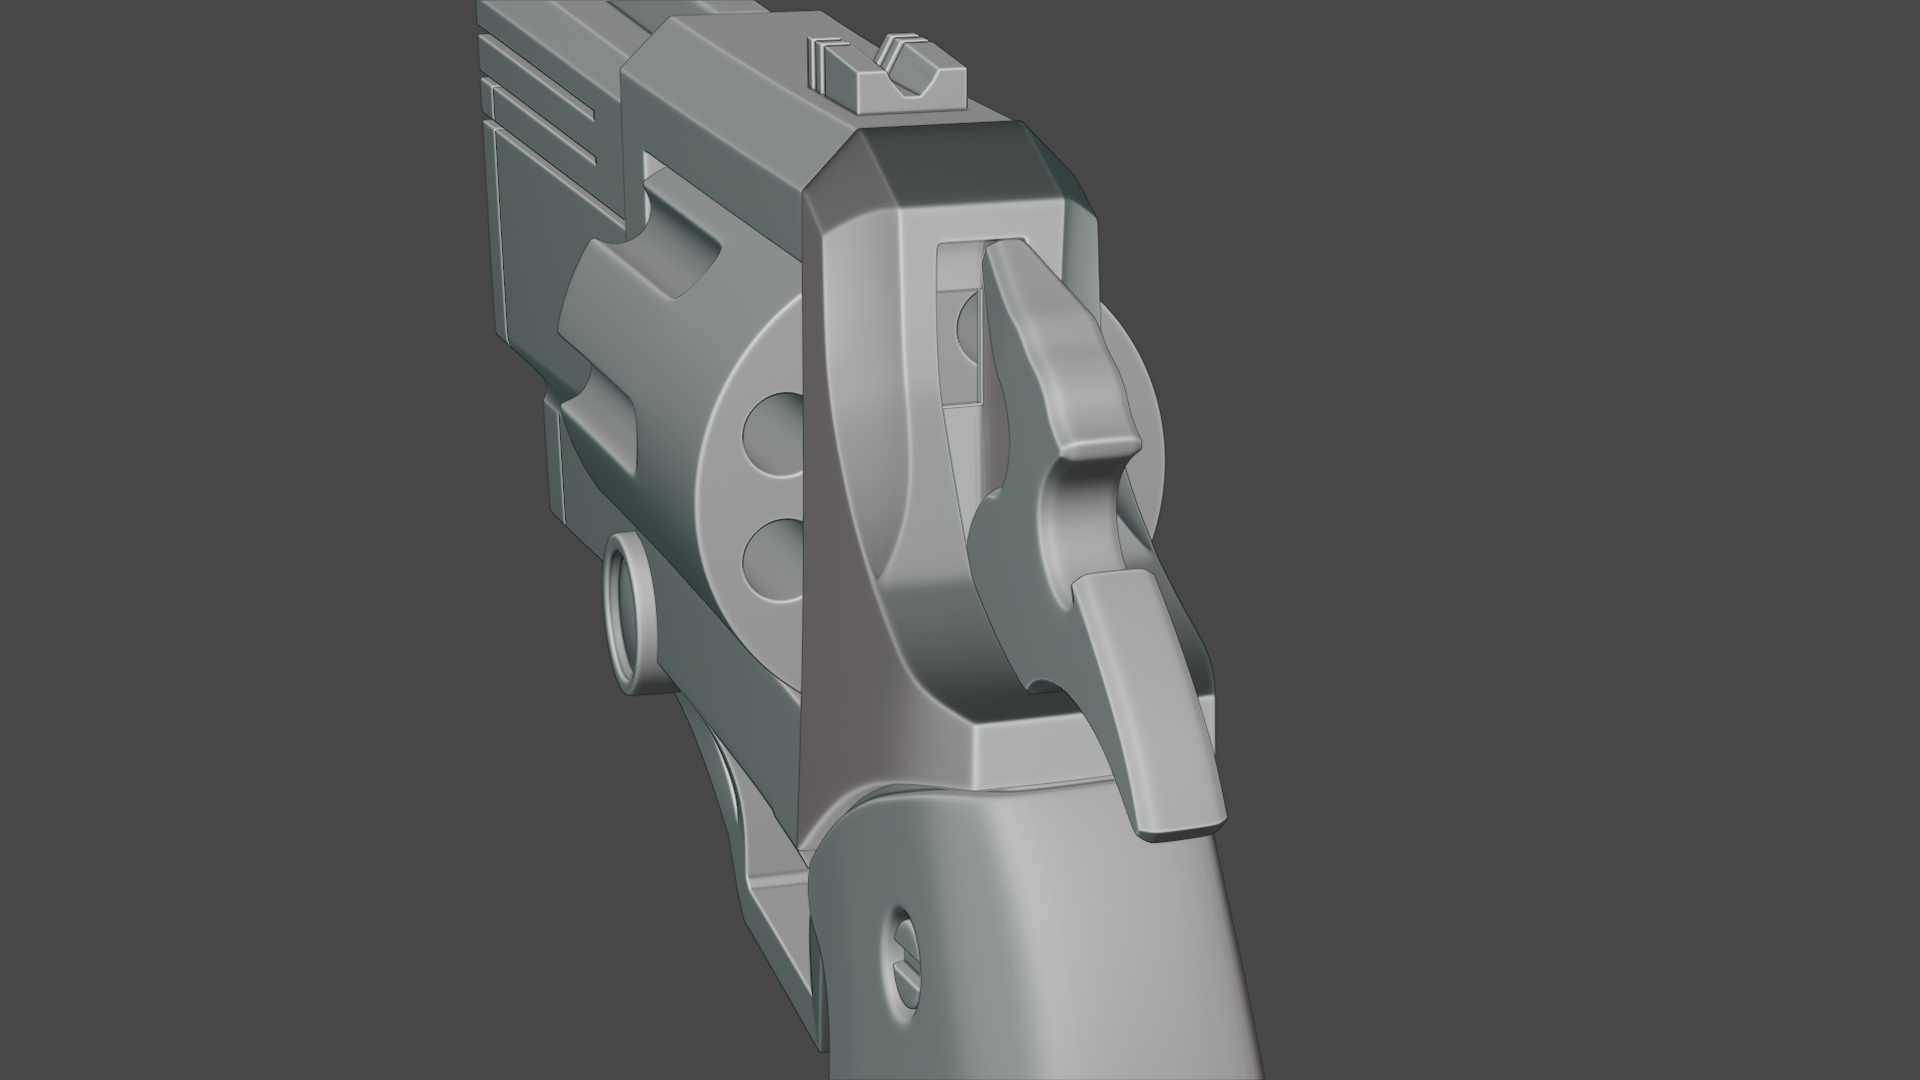
Here's the overall look after completing the back end.

Then as a celebration I added a lattice modifier to all of the gun parts and made it look just a tad more stylized and added some stylized shading. I am happy I took this course because my detail loop modeling skills took a nice boost.

Next steps from here: I will begin working on my game character gun. (Much more simple of a concept hopefully). Details to come....
Shooter Gun is what my son Owen affectionately called my pistol I just finished. So we're gonna roll with that for the first game asset creation.
Inspiration Context: My ultimate goal (one day in a far off future time) is to create a turn-based strategy game with silly-yet lovable characters. Simple mechanics. So I drafted up my first teams for the game 2+ years ago and they have been burning a hole in my soul telling me to complete them.
Shooter-Gun Backstory: First team up is the WarHogz. A group of zany pig (and not so pig) characters. The first of which that I drew up and also created in 3D was Pot Belly Porker. He is my avatar on this site after all. Well now it is time to do him some justice and make his 'shooter gun'. Then following this it will be appropriate to move onto Hambo's Bacon8r Inifite-Cyclical Pump Action Shotty.
Reference #1: Initial Image for artistic reference: Shooter Gun is wielded by Pot Belly Porker on the top left.
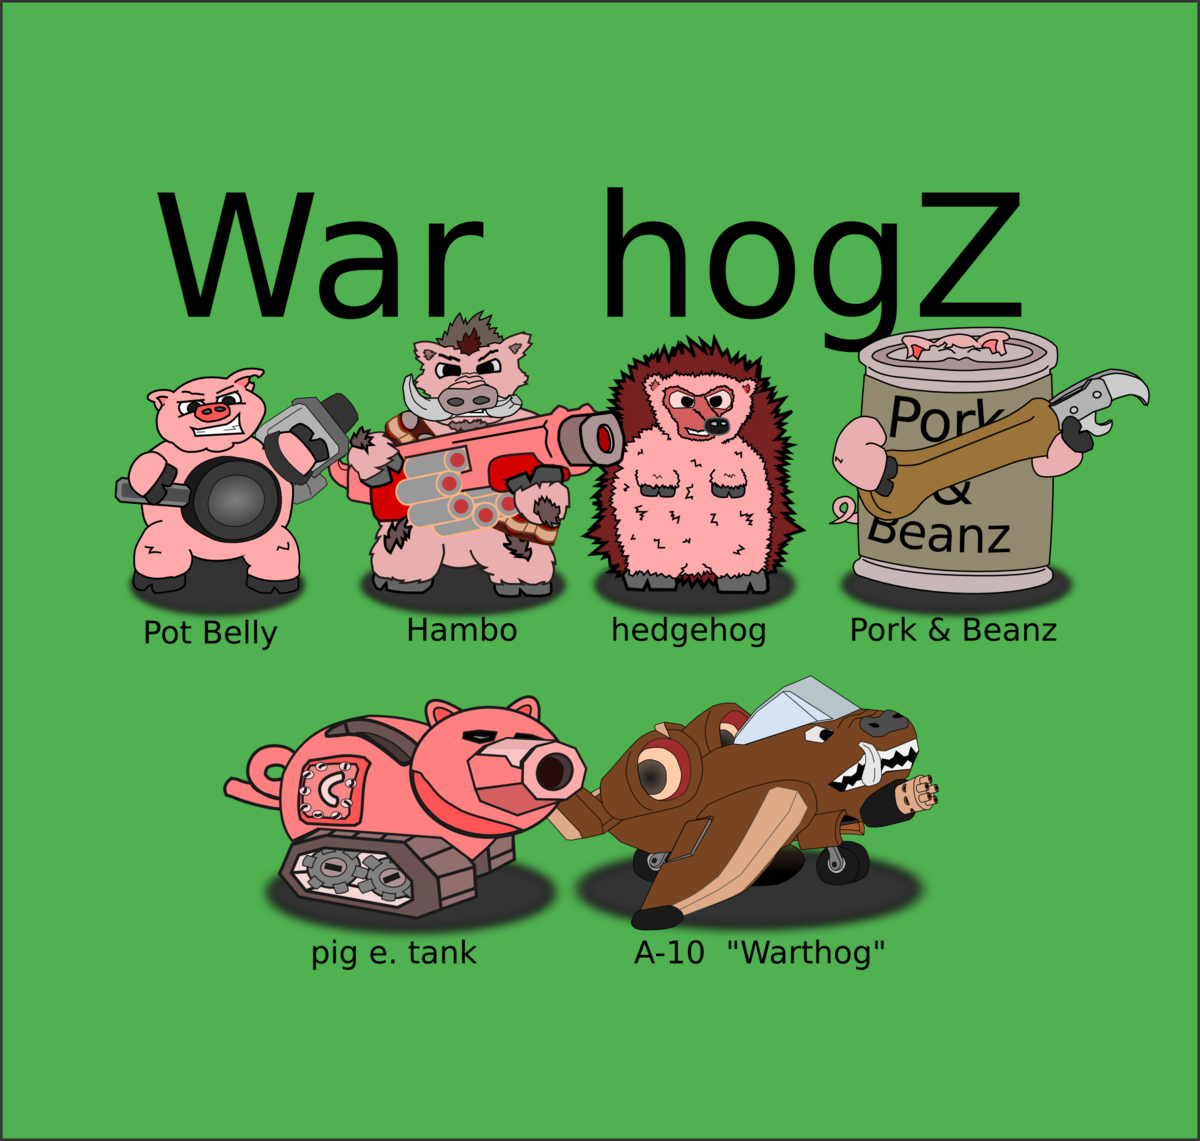 First thoughts are: "hmmm..... yeah but kinda basic and blocky, but a good first pass. I like the shape of the barrel and the strap, the rest can be improved upon."
Reference #2: Pot Belly Porker in 3D. (WIP for better modeling days to come). He doesn't have all the proportions 100% yet but he's close. It is required that shooter gun strap onto Porker's arm/hoof. Keeps it silly and zany when he fires because there is no trigger for this thing.
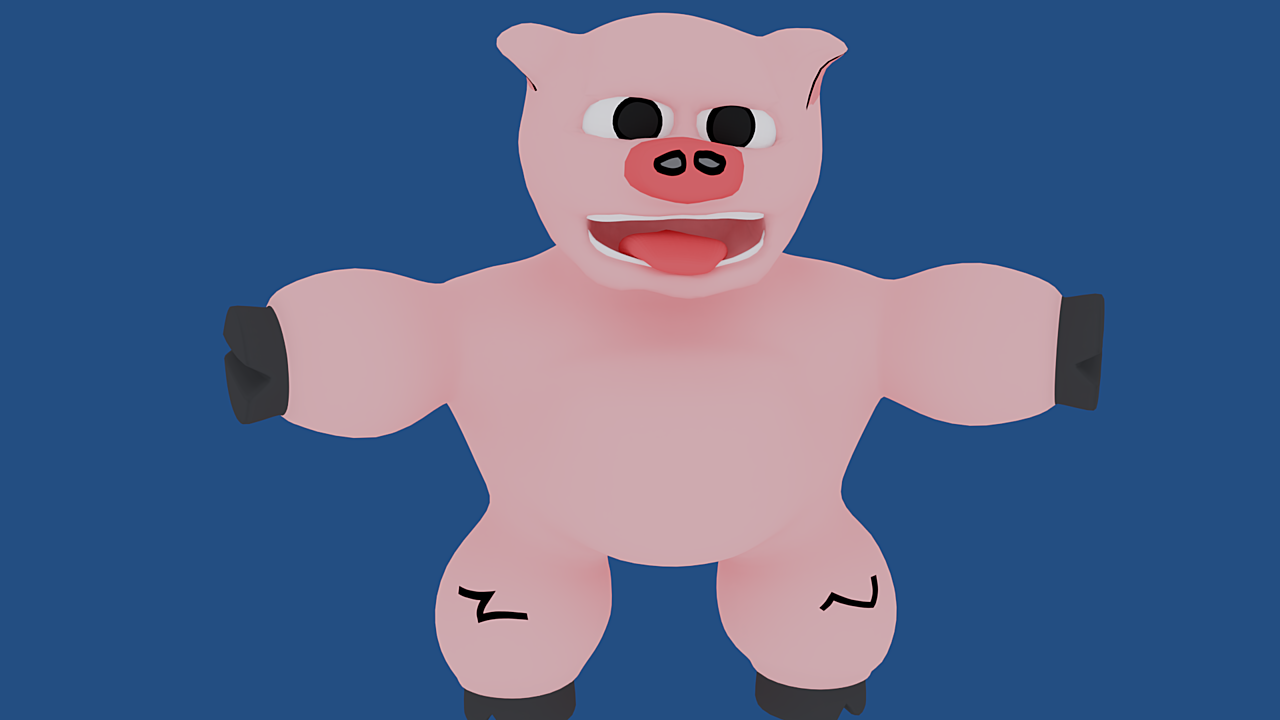 Requirement to make shooter gun be strapped to hoof/arm
Reference #3 & 4: Blaster Styles to pull inspiration from. I will also add a requirement to have a site reticle for 'aiming'.
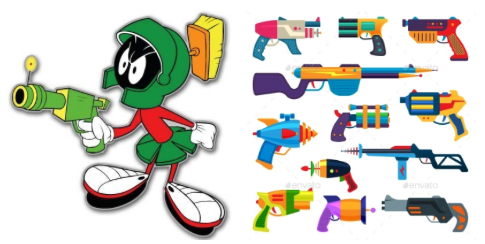 Simple yet Stylized - but no trigger
That's it for requirements and inspiration for now. Time to get blendin. Any additional reference or ideas are definitely welcome.
Overview of requirements:
Stylized look
Simple
Needs a strap
Site Reticle
No Trigger
Lo-Poly style (optional but desired)