
Blender 3.6 LTS has just been released, and it has some significant performance improvements as well as some important new features that you’re not going to want to live without.
In this article, we're going to overview those for you to help keep you up to speed on Blender Development.
- User Interface Changes
- Modeling Updates
- UV Editing Improvements
- Assets and Overrides
- Nodes and Physics
- Animation and Rigging
- Cycles Rendering
- Compositing
- Importing and Exporting
- Scripting
_____
User Interface
Let’s talk about the UI changes first. There’s nothing wildly different in this version, but as usual, Blender is continuing to get a little cleaner and more intuitive with every update.
Tabs in the Properties editor show the name of the tab immediately on hover, which should help new users find the right one more quickly.

The Open Recent menu now includes 20 items rather than 10, which is great for all those people who have a lot of unfinished projects lying around. No idea who would need that though… *cough* me *cough*. 😅
I might regret telling everyone this, but did you know that Blender supports basic emojis? It now also supports all 31 new ones included in Unicode 15. So, if you really want to name your objects with the jellyfish or shaky face emoji, only your own conscience can stop you now.
The color picker popup no longer gets cut off if it’s too close to the edge of the screen, thank heavens. And by heavens I suppose I mean Harley the UI developer.
The Alt-click hotkey for changing the properties of multiple objects at once now works for string properties such as the object’s name. You just have to make sure that Alt is held down when you hit Enter to confirm.
In Blender 3.6, whole menus or sub-menus can be added to your Q hotkey quick favorites, which makes things much easier to organize.

The Outliner can now filter by Grease Pencil objects.
More context menus now open with the last used item highlighted.
UI lists now have a hover highlight.
Operator confirmations can now be disabled by turning off the Confirm property for that shortcut in the keymap settings. This was recently a hotly requested feature on Twitter for the X to delete hotkey, and it’s cool to see how fast it made it in as an available option for any relevant hotkey.
Files in the File Browser can now be dragged and dropped by grabbing their name and not just their icon. Escape or right-clicking now cancels drag-and-drop operations.
A new External menu in the File Browser’s context menu lets you find, open, and edit the file with your OS defaults.

Also new in Blender for Windows is auto-focusing on whichever window is hovered over and copying and pasting images to and from the Image Editor. You’ll need to copy and paste via the Image menu since the Ctrl+C and Ctrl+V hotkey is not set for the Image Editor by default. However, you can do that pretty quickly by right clicking and assigning the hotkey yourself - don’t forget to save your preferences after.
On Mac, recent Blender files are now shown in the Dock context menu and in App Expose, and double-clicking a blend file will now always load even if Blender loses focus while launching.
Modeling Updates
When editing text objects, you can now click to place the cursor, click and drag to highlight, and double-click to highlight a word.
It’s SO much easier than before where you had to navigate it like the python console.
Other text improvements include changing the text style for the whole selection rather than just at the cursor, To Uppercase and To Lowercase supporting more languages, and two new operators for moving the text cursor to the beginning or the end of the text. It may seem like a small set of updates, but if you regularly work with text in Blender, you’ll know that this alone will be worth upgrading for!

The Proportional Editing size can now be set manually in the Proportional Editing popover, so if the circle is too big or too small to see you can check this setting without doing a lot of scrolling.
The position of the text in the Ruler tool is a bit smarter and no longer gets in the way while working.
Some mesh data is now shared between copies of objects, resulting in an overall memory usage reduction of at least 25% with large geometries.
The mesh conversion that happens under the hood while working with shape keys, UVs, selection history, multires objects, and other mesh operations has been multithreaded and is now up to 50% faster. The speedup is most noticeable for meshes that have lots of attributes.
Calculating split normals, such as when using Auto Smooth or custom normals, now uses less memory and is up to 80% faster.
The Subdivision Surface modifier is now significantly faster for dense meshes with no loose vertices since previously those had to be checked for separately.
Drawing selection in the viewport for curve Edit mode is now about 4x faster for curve selection and 18x faster for point selection. This will come in handy when working with Blender’s new hair system!
There are no new sculpting features for this release, but a new VDM Brush Baker add-on is now included in Blender and can be used to easily transform a mesh into a vertex displacement map for use in sculpting, shading, or the displacement modifier.
A new Retopology overlay option in Edit Mode allows you to see your low poly mesh on top of your high poly sculpt.

There’s also an entirely new transform orientation in Blender 3.6 called Parent, which passes along the local orientation of the parent object or bone. This is a seemingly small change but is incredibly useful and intuitive!
UV Editing
One of the most exciting updates for Blender 3.6 is the massive UV packing improvement that some of us have been hoping for years. The new packing algorithm finally easily handles concave shapes and holes, and there are new options for the rotation, pinned islands, and overlapping islands.
It’s so, SO much better than before.

Sphere and Cylinder UV projection can now optionally respect seams.
The UV Select Similar operator has new Face options for Similar Winding (which means flipped or not) and Similar Object.
Lastly, reading UV map data for displaying in the viewport is now up to 3x faster.
Assets and Overrides
Asset tooltips in the Asset Browser now show the full name and asset description, and the Clear Asset operator in the Asset Browser now works on all selected assets instead of just the active ones.
Asset Libraries can now use a relative path when linking assets, which is perfect for working out of shared cloud folders.
Resyncing library overrides is now a bit smarter and should result in fewer issues when data is missing.
It’s not a part of the release, but it is worth noting that a new official asset pack of human base meshes is available to download from blender.org and is well worth having in your asset browser.

Nodes and Physics
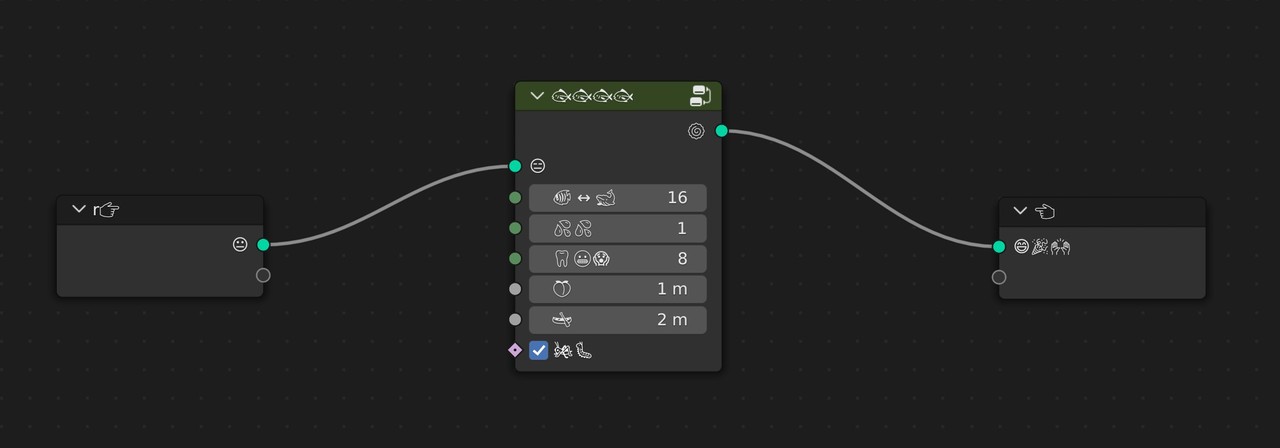
The other big news of this release is that Geometry Nodes now support simulations!
To use it, add a Simulation Zone, which includes a Simulation Input and a Simulation Output. Every change you make inside the Simulation Zone gets compounded every frame, meaning that rotating the geometry by 5 degrees will rotate it 5 additional degrees every frame.
The concept itself is fairly simple but can create fairly complex behaviors when using fields to control the effect. The simulation's results can be cached or baked, controlled by a new Simulation Nodes panel in the Physics Properties and visualized in the timeline.
A new Index of Nearest node returns the index of the closest "non-self" element.
The Mesh to Volume node now generates a proper OpenVDB fog volume rather than a converted SDF, which is a nice enhancement, but do be aware that old files using this node will not look the same when rendered in Blender 3.6.
Creating new input nodes via the link-drag-search feature now copies the value from the original node to the new node for convenience and to avoid recalculating the node tree.
If you’re ever unsure about what a node does, you can now use the link in the right click context menu that takes you right to its documentation.
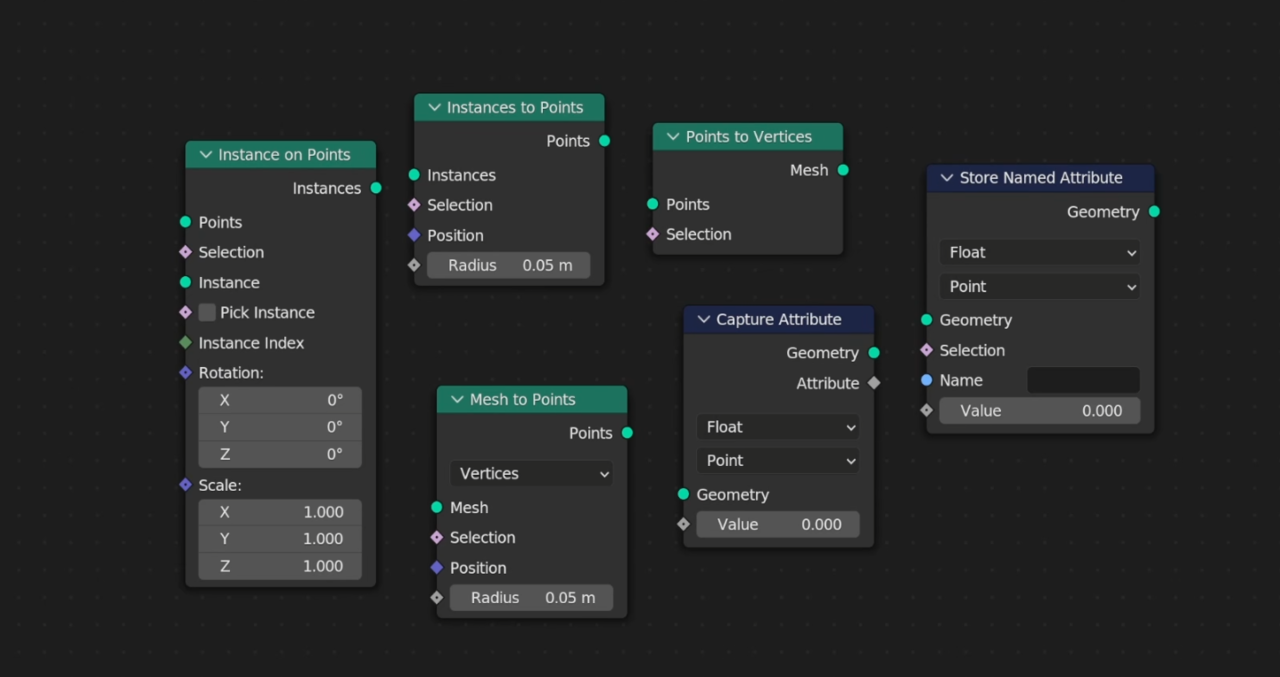
There are significant performance improvements to Geometry Nodes in this update as well. Implicit sharing of data between geometry copies can improve the memory usage of the copy by up to 25%.
Skipping creating copies when converting geometry makes the Instance on Points, Instances to Points, Points to Vertices, Mesh to Points, Capture Attribute, and Store Named Attribute nodes at least 10x faster.
Using many primitive nodes, which is what most procedural modeling is based on, is also much faster thanks to the fact that they don’t have to be checked for loose edges and their bounding boxes are pre-calculated.
Last but not least, the Mesh to Curve node is about 10% faster during animation playback, and the Curve to Mesh node got a small speed boost of a few milliseconds as well when working with a high number of curves.
Animation and Rigging
Blender 3.6 includes some nice quality-of-life updates for animators!
Blur, Average, and Smear tools are now available in Grease Pencil Weight Paint mode.
⚠Hotkey Alert! There are some new shortcuts in the Graph Editor:
- Alt + S is the new shortcut for smoothing operators
- Alt +D is the new shortcut for blending operators
- Ctrl + LMB on a channel now toggles selection
- Alt + MMB on a channel to frame its curve
Navigating animation curves in the graph editor is now much easier thanks to the new hotkey Alt Middle Mouse Button while hovering over the channel list. Frame Selected is now also in the right click context menu. It would be pretty sweet to have the option to do this automatically when selecting channels, but I won’t get ahead of myself. This will already be a great time saver.
Inverse Kinematics is a very technical topic, especially if you switch an armature’s IK solver type to iTaSC, but the short version of it is that iTaSC is newer, flashier, and intended to better handle constraints. In Blender 3.6, the solver no longer requires the root bone to be at the object origin, making it usable in many more scenarios.
In Weight Paint mode, you can now grow and shrink the selection like in Edit Mode.
The scene’s duration can now be added to the Status Bar in its right click menu. The timecode follows what you have set in Preferences under Animation and Timeline.
The Copy Global Transform add-on, which you should enable if you haven’t already because switching parents or spaces can be a bit of a headache otherwise, now has the option to paste the mirrored version of a transform. That’s a great addition!
The dashed lines that tell you which armature bones are connected can now be drawn from the head of the child to either the head or the parent's tail. This can make for a much cleaner display in some situations.

Drivers have a new variable option called Context Property, which allows you to get a value from the current scene or view layer. This is a pretty big deal, because it means you can get the transforms of things like the active camera.
The Only Show Selected Curve Keyframes and Use High Quality Display view options for the graph editor have been moved to Preferences in the Animation section.
The Key menu in the Graph Editor is now much cleaner thanks to moving the options related to channels into a Channels menu and grouping more things into sub-menus.
A new Gaussian Smooth operator in the Graph Editor is the new and improved method of smoothing animation data. It has more options, is independent of keyframe density, and handles spikes a bit more predictably.
The insert keyframe menu in the Graph Editor has a new option only to add the keyframe to the active curve.
Pasting keyframes in the graph editor now comes with new offset options.
Channels in the Dope Sheet can now be pinned.
The Dope Sheet and Timeline no longer let you scroll to infinity and lose your keyframes. Hopefully, this makes it to the NLA Editor as well.
The NLA Editor has been cleaned up a bit, though. Most excitingly, strips can now be dragged through other strips so that you don’t have to do that weird up-and-over maneuver.
Cycles Rendering
There are no big new rendering features in this release, but we received many performance improvements!
Light trees, introduced in the last release, now use less memory and can compile about 10x faster.
Loading dense meshes is now about 5x faster, loading mesh attributes is up to 10x faster, loading UV maps is up to 60x faster, loading point clouds is up to 9x faster, and loading curves is up to 10x faster. That’s incredible!
AMD GPU rendering on Windows now uses hardware ray-tracing acceleration with HIP RT, which speeds things up significantly but has some trouble rendering hair shadows and motion blur. AMD GPUs also now support light trees, which is a feature that came to NVIDIA users in the last release.
Intel CPUs and Intel Arc GPUs get hardware ray-tracing as well using Embree 4. Your first time using this with AO or Bevel nodes will cause a large recompilation which can take several minutes. 7
On Apple Silicon GPUs using Metal, the new NanoVDB support reduces memory usage of large volumes.
OSL, the scripting language for creating custom shader nodes, can now create more surfaces from the MaterialX library.
The Glass shader is now more physically accurate at higher roughness levels.
Compositing
The real-time Viewport Compositor is much closer to matching the features of the classic compositor now that it supports 13 more essential compositing nodes: Convert Color Space, Plane Track Deform, Denoise, Stabilize 2D, Mask, Corner Pin, Texture, ID Mask, Map UV, Fog Glow Glare, Displace, Z Combine, and Anti-Aliasing. It also now supports Bicubic Interpolation, repetition along an axis, and Multi-layer EXR images.
A new Transparent render pass for Eevee can be used to adjust alpha blended surfaces in the compositor.
Import and Export
The PLY importer and exporter has been rewritten in C++, which makes it about 4x-30x faster than the previous Python version. It also added better support for importing point clouds with vertex colors, importing files with non-standard line endings, importing models that use “tristrips” elements instead of faces, exporting multiple objects, exporting loose edges and vertices, exporting UV maps, and more.
The USD importer now supports multiple primitive paths and no longer creates duplicate shader nodes. The USD exporter now better handles USD Preview Surface materials, additional root transforms, curves, and hair.
Exporting meshes with FBX is now about twice as fast, and importing meshes can be up to 45x faster for heavy scenes with no animation.
Blender used to have a 3DS format importer and exporter and that’s now been brought back by popular demand. Just to clarify, it’s for working with 3DS Max (not the Nintendo 3DS, but I respect anyone still using either).
Scripting
Custom float properties now have sub-types, and can be set to display as a temperature, power, distance, time, angle, factor, percent, pixel, or plain data.
You can now add multiple script directories in Preferences, meaning that you can now load in addons from multiple folders on your computer.
It’s also important to note that changes have been made to the mesh, f-curve, script directories, and various other parts of the Blender API, so not all add-ons will automatically work with Blender 3.6, though most shouldn’t have any issues.
Ready to Upgrade?
Head over to the download page on blender.org to try it for yourself. Happy Blending!
- Read more about Blender versioning and release schedule
- Understanding Blender's hardware requirements
- How to make money with Blender