Ok jumping into class a bit late, but here we are
Following the Chest tutorial with the class.
Homework Submission Week 1 & 2
WIP : modeled the chest, and added a few decorations, did the UV mapping and started painting the metal.
I have not painted the woods,or highlighted the edges and indentations yet, but seems cavity is doing a nice job there
images taken from the view-port shading with flat lighting and textures, but with cavity on, I turn it off for for one of the views in the second image.
not sure if will follow the chest tutorial to do the cavity detection as in the tutorial or go full hand painted yet.

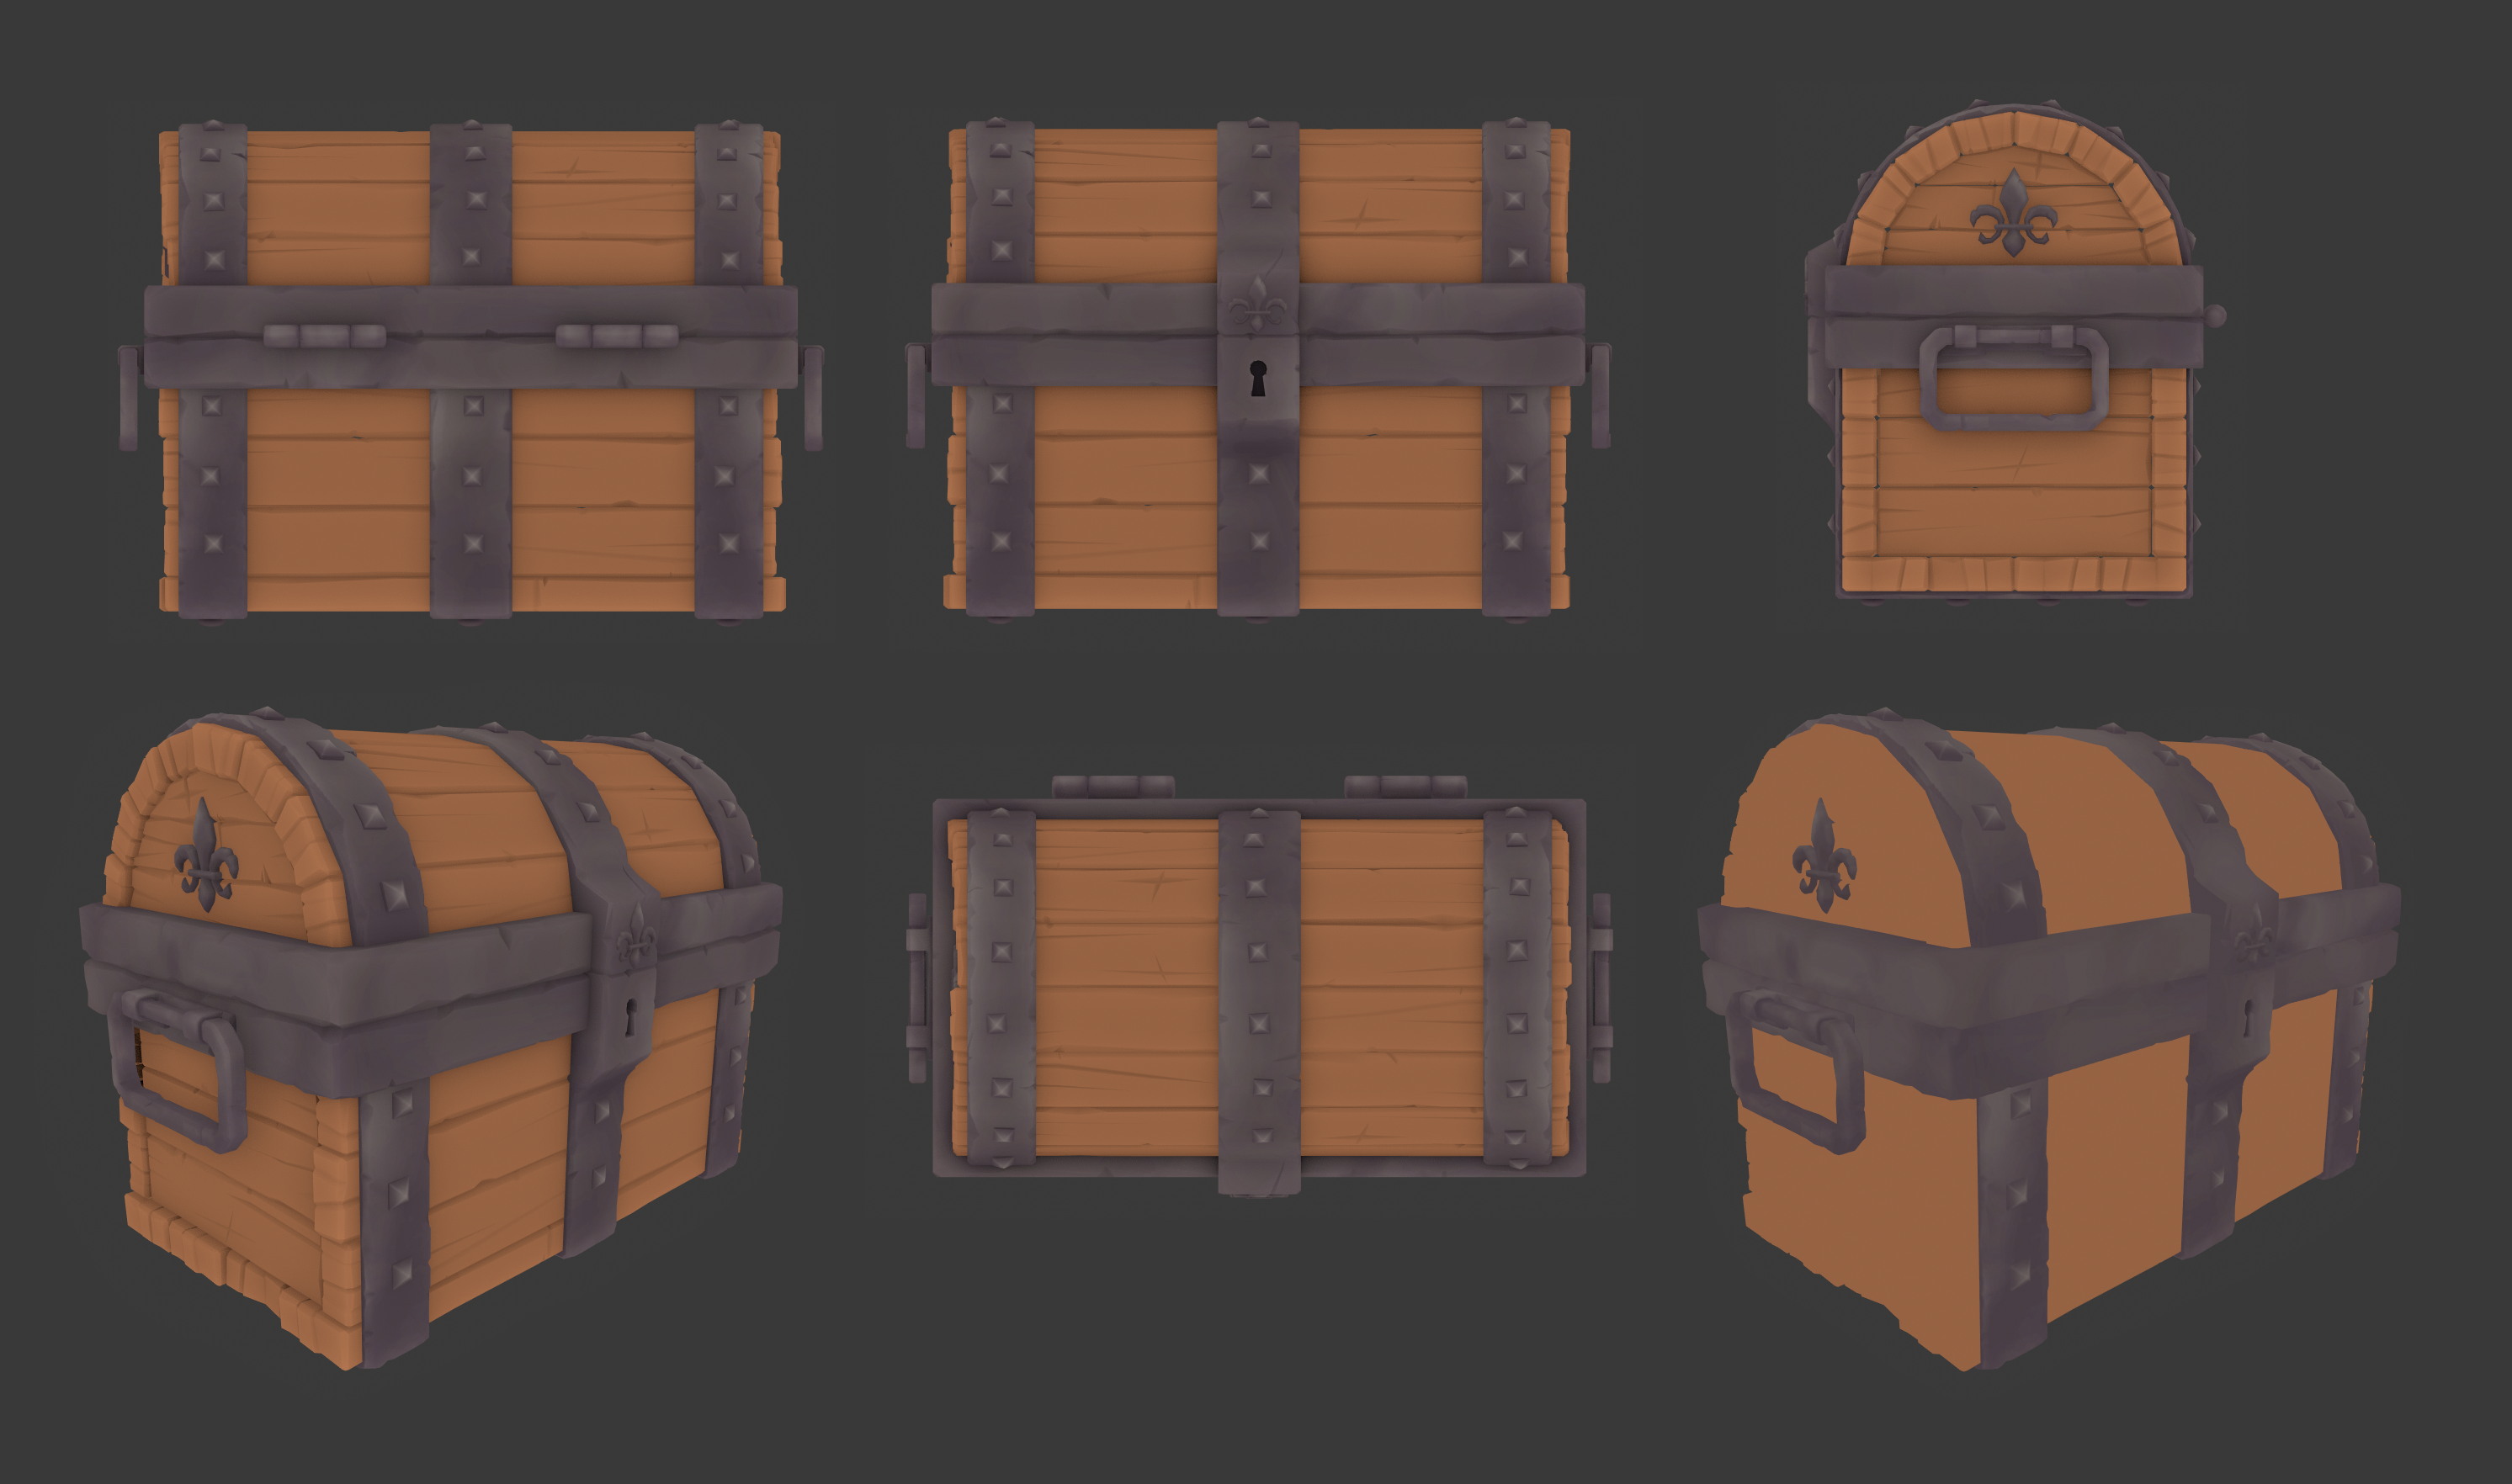
Homework Submission Week 1
Homework Submission Week 2
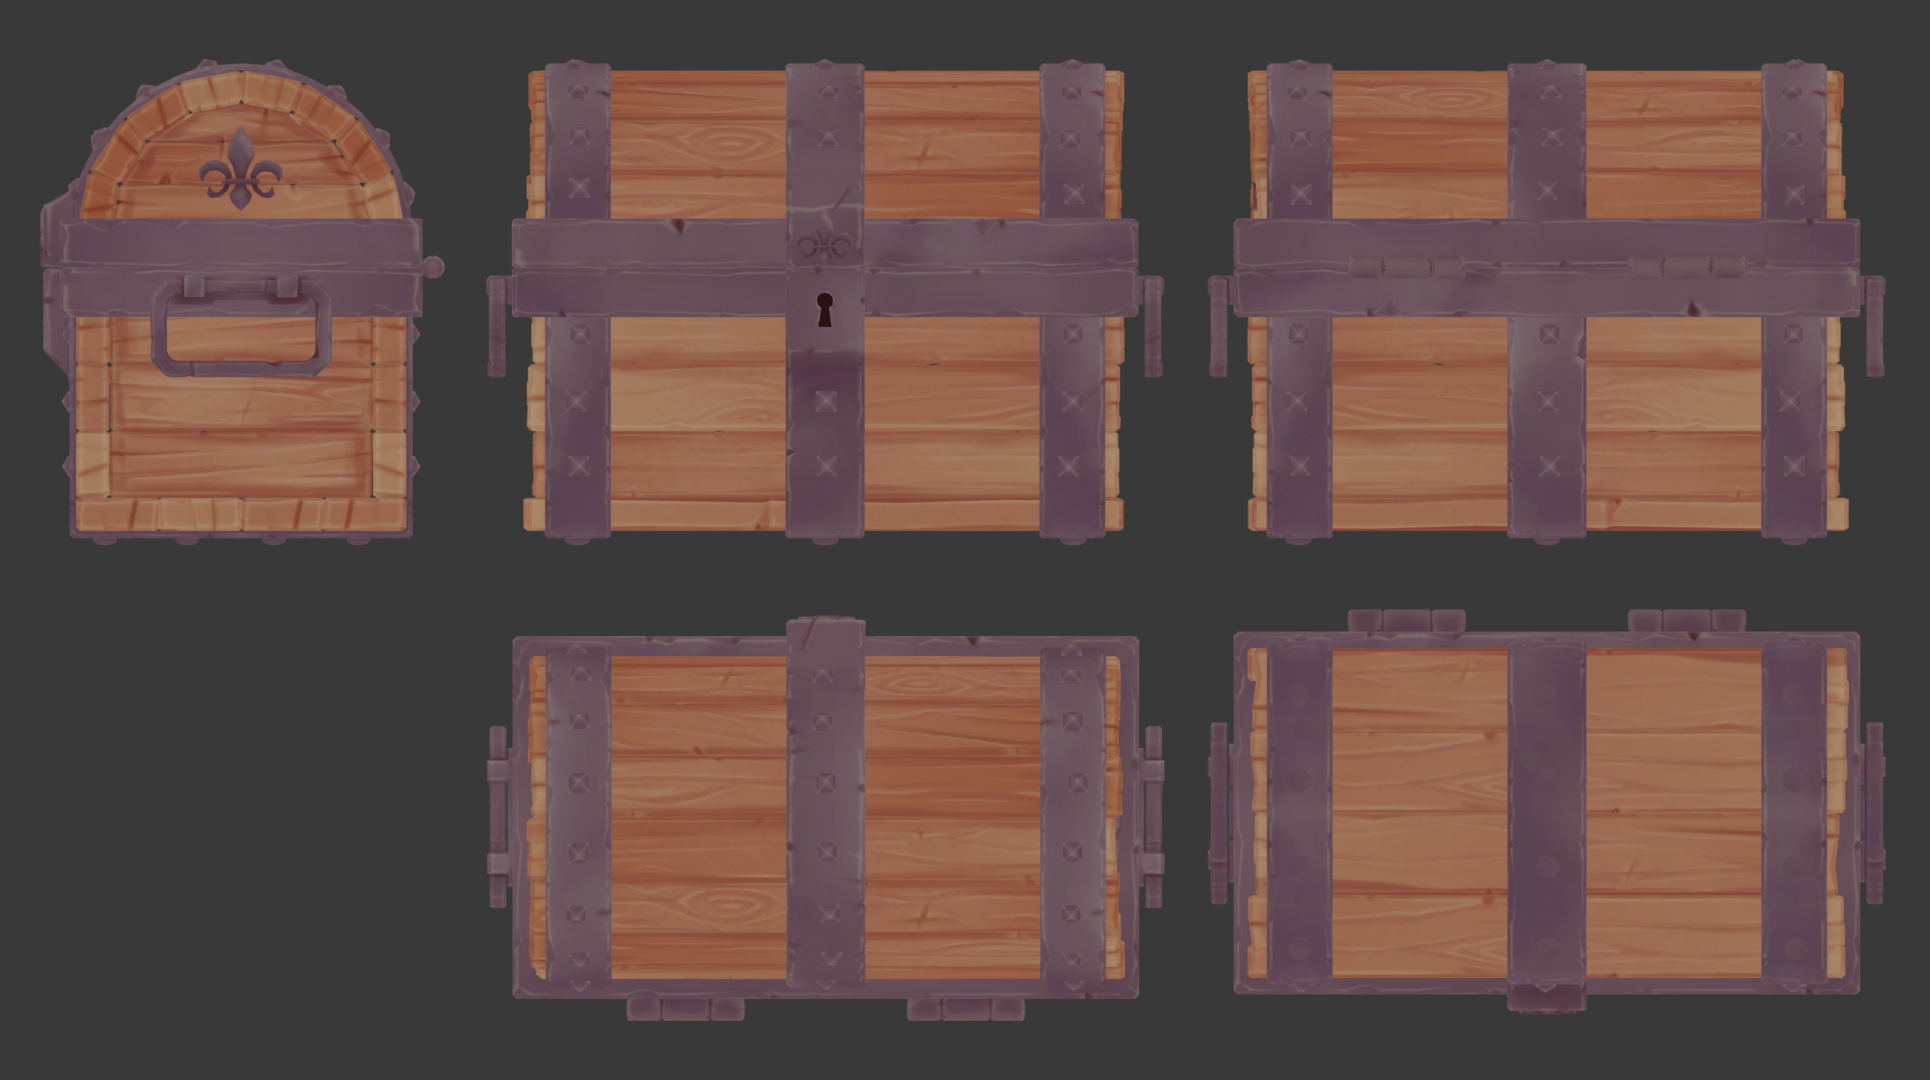
Ok ended up applying edge detection and hand painting a pattern on the wood
for the edge detection I went a bit different, instead of using dirty vertex color, I used the pointiness and the AO nodes in cycles, I still had to use a subdivision on the geometry to get good results, for this set it to simple instead of camul clark, got a couple artifacts in some rounded parts of the hinges but was minimal, paint it over off the map later.
Also the AO node has a useful option to ignore other elements so baking was quick.
then was to combine the maps with the hand painting to get the edges
I could not bake the AO between part so I hand painted with a darker tone on some parts of the planks as to try to fake it.
Finally I just used a simple emission material, and in cicles used the AO node again to get a result more similar to the ones that cavities gave me on the viewport.
views of the chest from different angles in isometric using EEVEE emissive shader.
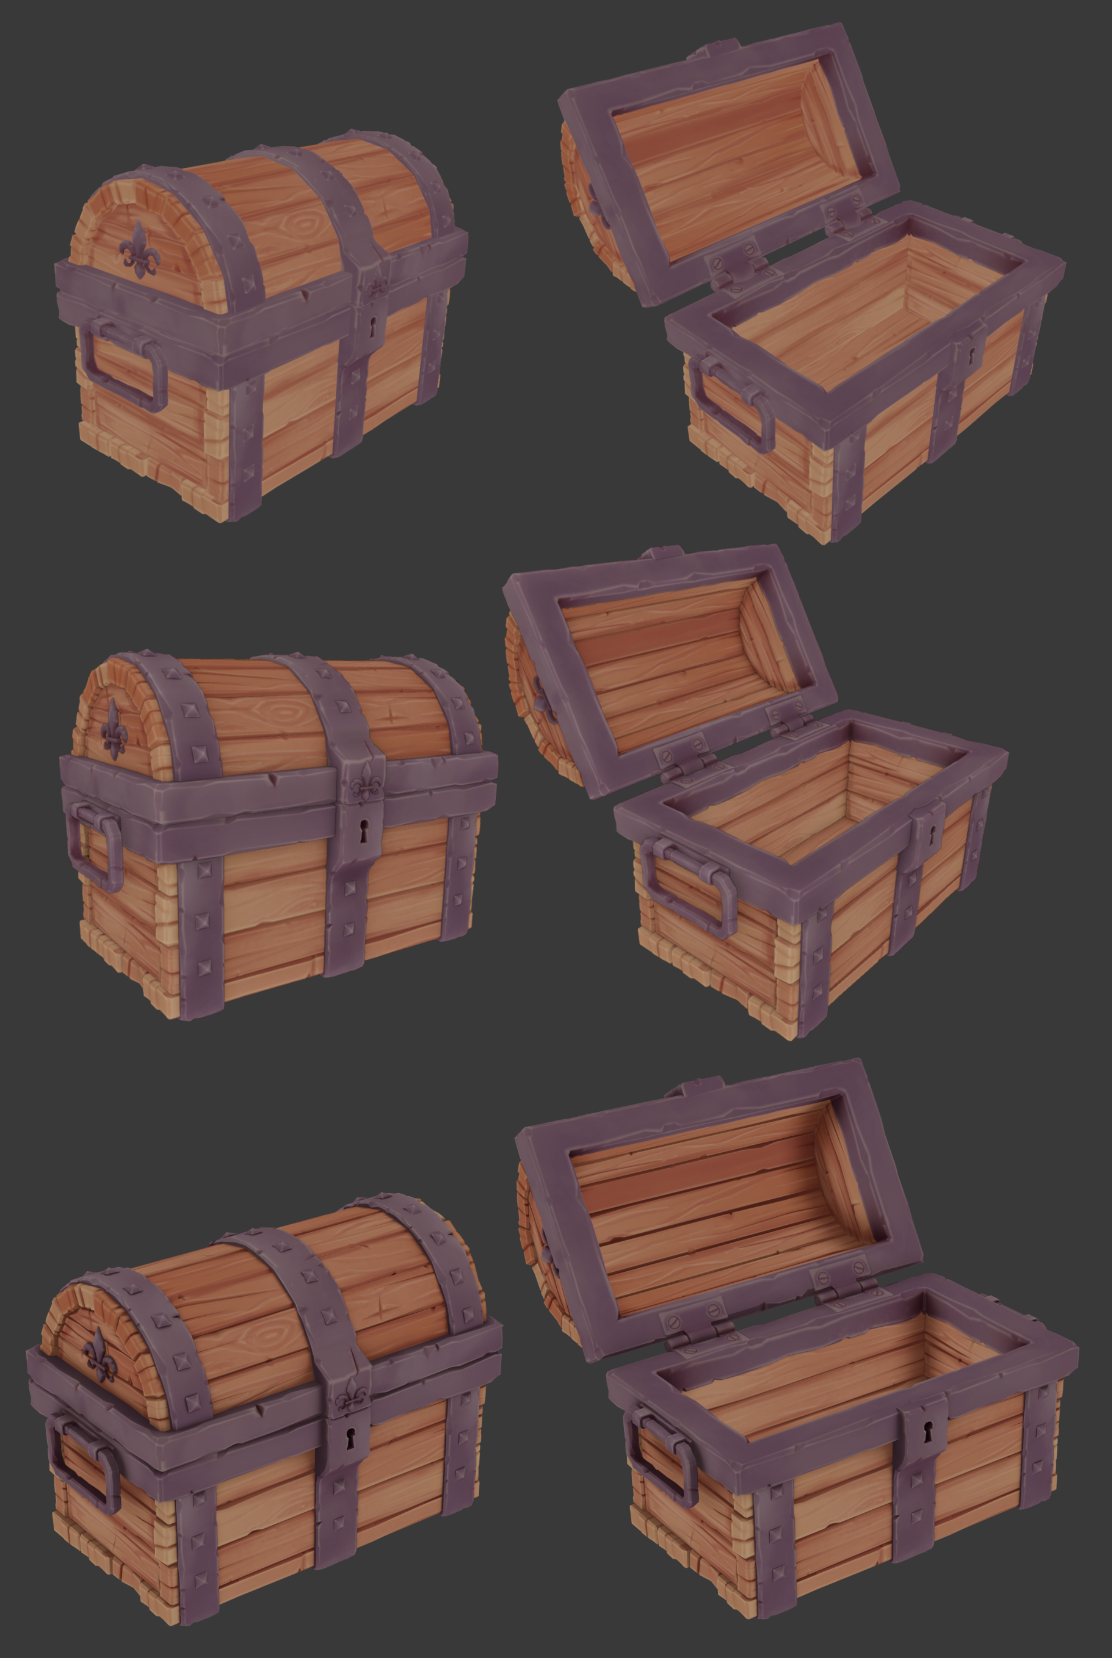
Comparison renders: first row EEVEE emissive material; second row viewport on flat texture with cavity on; third row cycles with AO node adjusted on with a color ramp changing the black with a dark hue
![]() n647 I also like the edges of the planks/boards - lot's of uneven roughed up wood :)
n647 I also like the edges of the planks/boards - lot's of uneven roughed up wood :)
@drgnclw thanks, I always try to add some hue shift if possible, I should probably touch up the contrast a bit there, as you mention, may be good idea to separate the wood and metal material for that so may leave it for next week even if I keep the hand painted look with the emission shader.
Ok started working on making more of a scene.
I m so far using what I already had from the chest to create a floor and a barrel
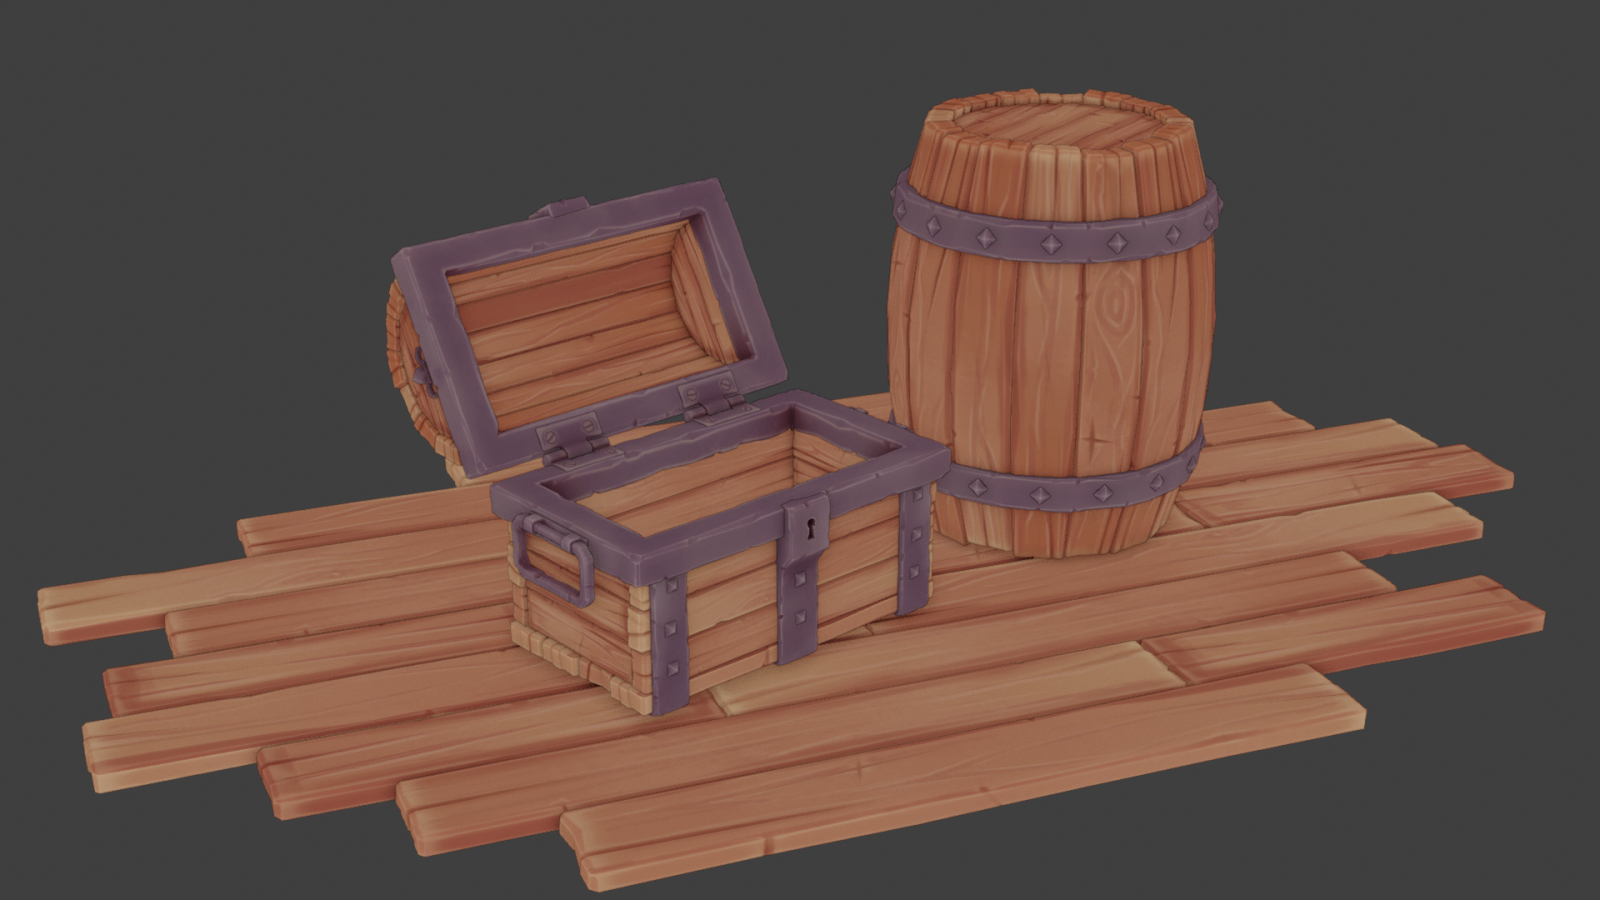
viewport render using flat shading and cavity.
For the floor planks I used bottom and side planks of the chest, and for the barrel, I grab the lid of chest, used half of it to create 1/4 of the barrel circumference, and the side of the lid, to make the cap of the barrel.
to get the shape I scaled the side planks and used a simple deform modifier.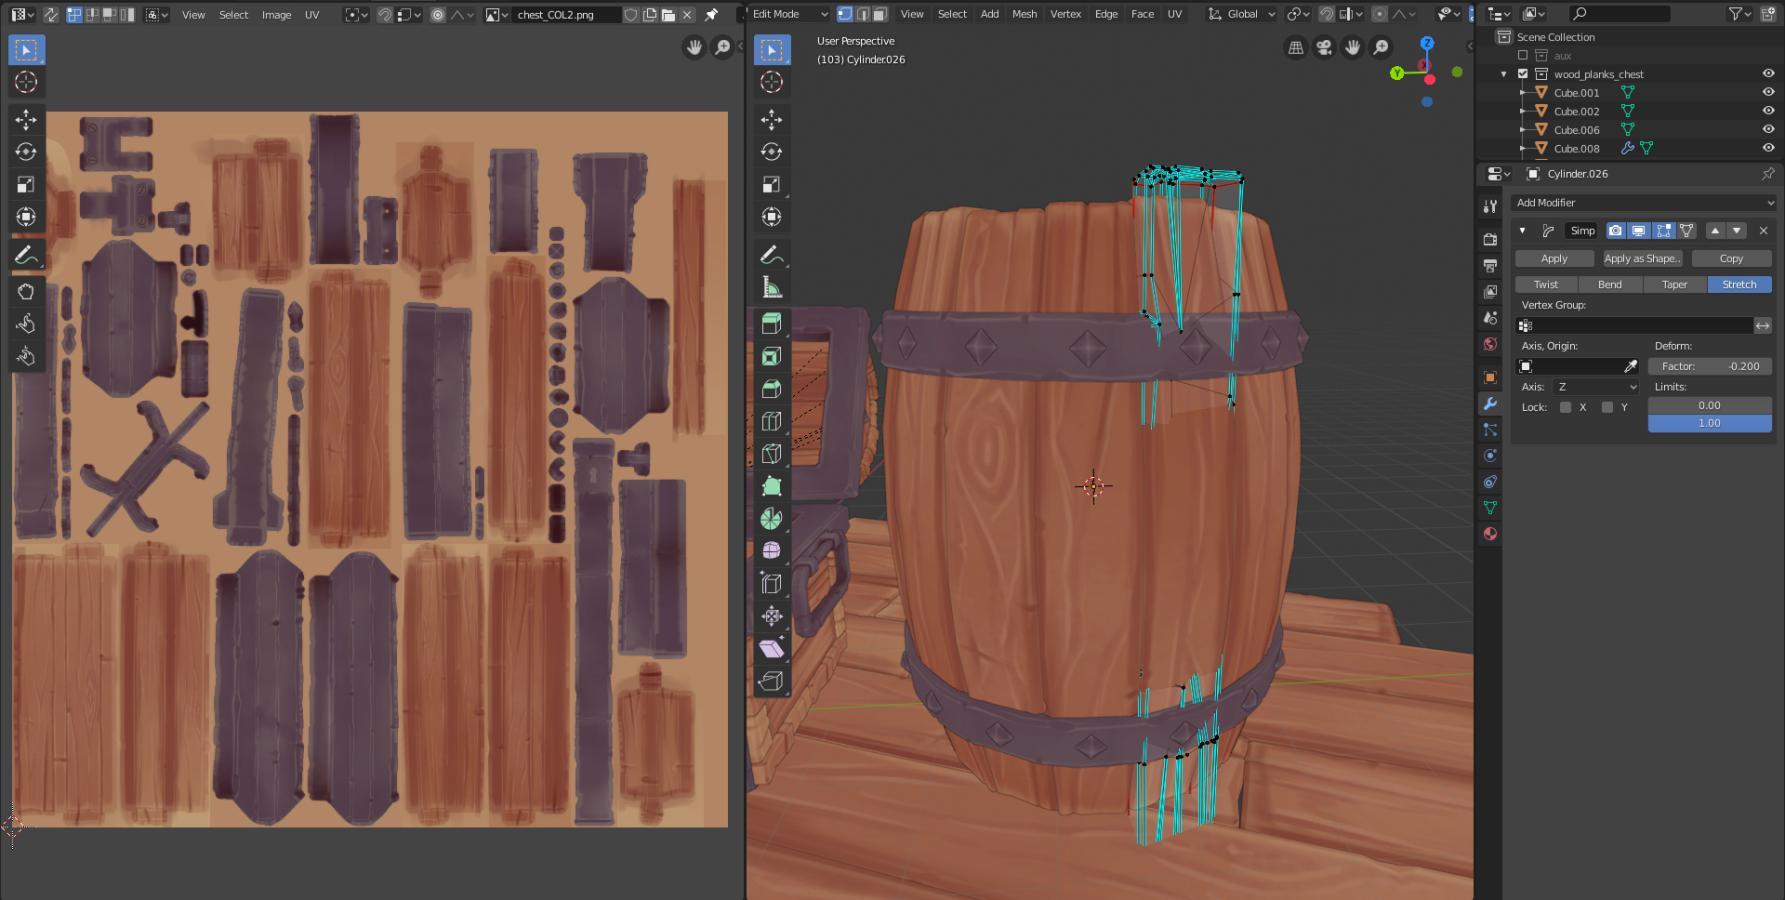
barrel side plank modifier set up
for the ring around the barrel I cut a piece of the chest metal rim, and then used a simple deform modifier - bend to convert it into 1/4 of a ring, and then with mirror and array I more or less built the ring and stitch the 4 parts together
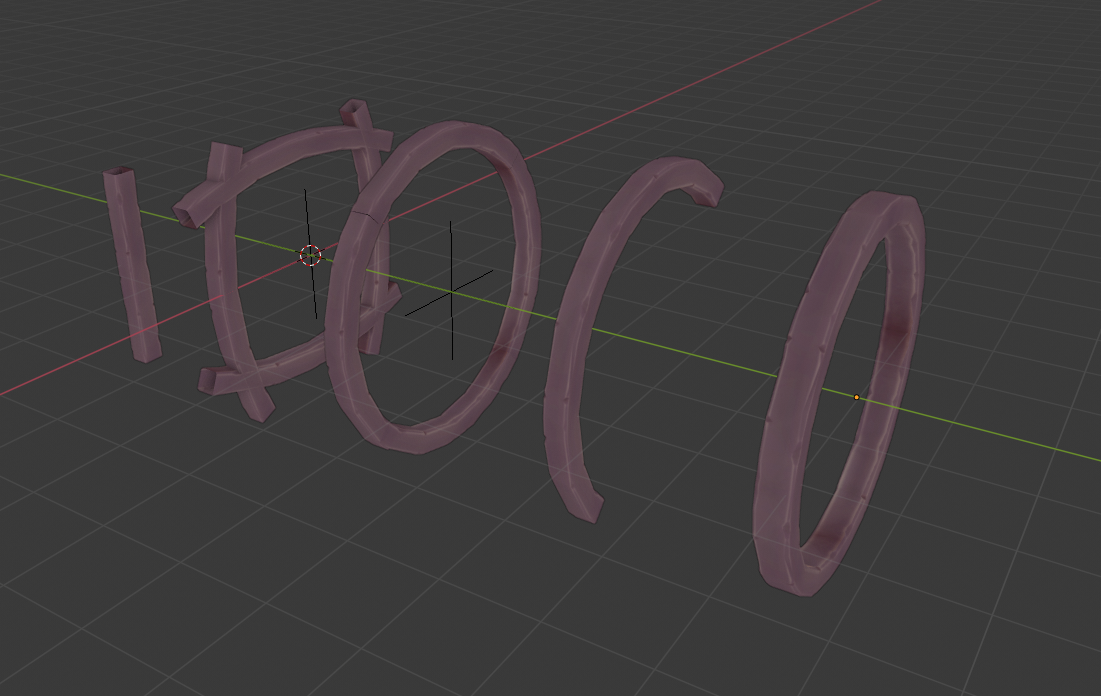
Process to create the ring from a cut piece of the chest metal rim
then used a couple modifiers to adjust it better to the barrel and mirror to the bottom

final modifier set up for the rings
![]() n647 looking good!! Awesome to have you back in class, you always make such cool things :)
n647 looking good!! Awesome to have you back in class, you always make such cool things :)
ssmurfmier1985 Thanks, is nice to follow these classes to have a bit more structure and short term goals
![]() n647 Dude that whole chest looks really good, the wood feels buttery smooth in some way, very pleasing to the eye, and kinda makes you hungry. I love it.
n647 Dude that whole chest looks really good, the wood feels buttery smooth in some way, very pleasing to the eye, and kinda makes you hungry. I love it.
![]() n647 That's such a clever use of modifiers and reuse of your pieces to make that barrel. I like how warm the colors are!
n647 That's such a clever use of modifiers and reuse of your pieces to make that barrel. I like how warm the colors are!
![]() n647 Welcome back to class! You sure know how to make an entrance 🤩
n647 Welcome back to class! You sure know how to make an entrance 🤩
Your chest is gorgeous. A truly exquisite example of the treasure chest and barrel projects. I love LOVE the wood knots you included in the wood textures. Also the fleur-de-lis detail is lovely. Texture quality is fantastic...it's all just beautiful.
You've earned an A for week 1 and an A+ for week 2 both for the quality of the work and for sharing insight into your workflow. The way you re-used pieces to achieve the whole object is very clever. Nice job!
I know this whole scene will look amazing shaded and lit 🤤
![]() n647 Beautiful work! I wish I had made the chest. :-) The details like the fleur-de-lis, hinges, and handles look perfect.
n647 Beautiful work! I wish I had made the chest. :-) The details like the fleur-de-lis, hinges, and handles look perfect.
Thank you all for the nice comments, I m happy you liked the little extra details here and there, hope the little WIP and description of the process was clear too.
@theluthier Thanks, I was looking into the chest tutorials for a while so this was the perfect chance to jump in, hope the little insights are useful to someone.
Was also looking into using some simple deform on the floor planks to slightly warp them and create a bit more variation