Ok jumping into class a bit late, but here we are
Following the Chest tutorial with the class.
Homework Submission Week 1 & 2
Started working on the materials, set up the metal and some compositing for the render
Added little speckles to the metal and the hammered like effect, but used the blur we saw at the end of the class to soften this a little
still deciding on the HDRM and maybe add some lighting
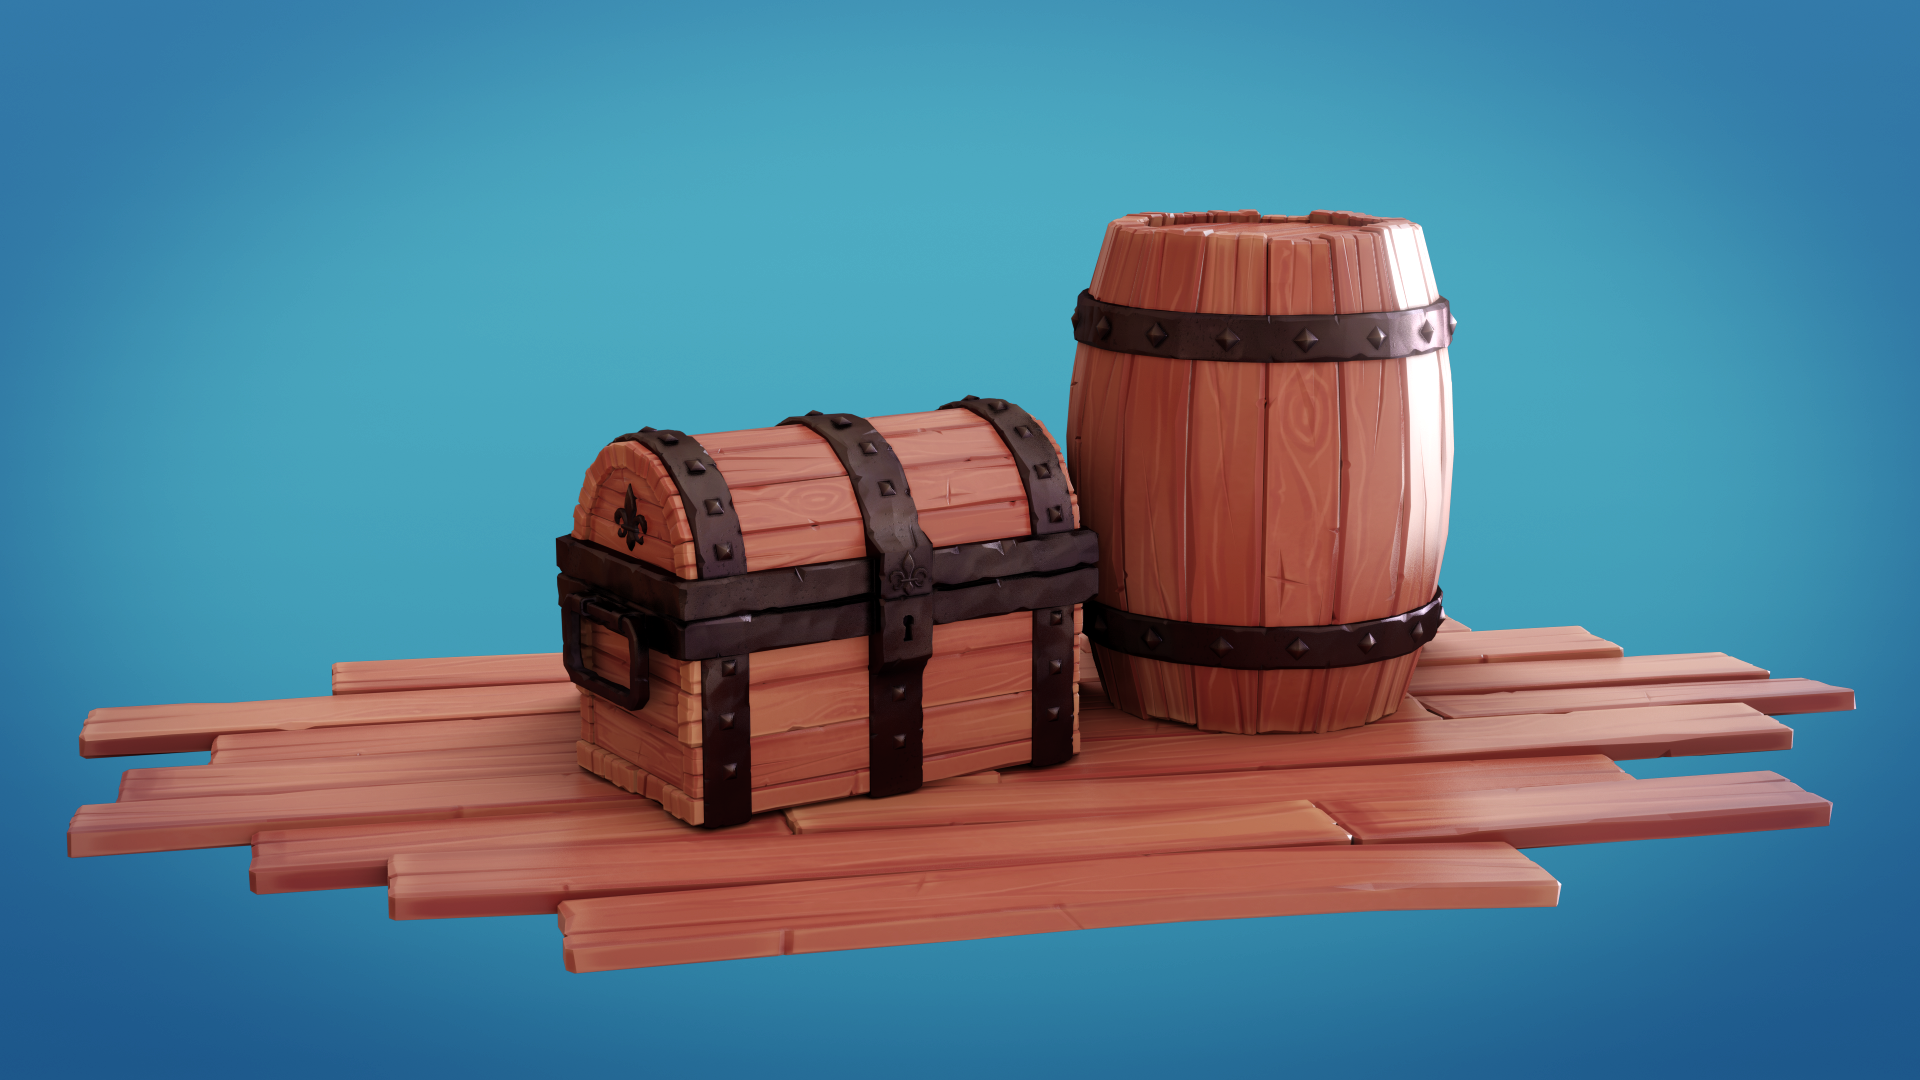
Worked the wood material now, since I had a per element AO map that highlighted the crevices, I used that to add to the bump map too.
And as I read in another topic, I went for a fireplace HDMR with a orange light and added a spotlight on the back with a slightly blue tint to get some rim light and make like is light from a window or door

![]() n647 good stuff, i'd change the floorplanks color bit more darker than the chest and barrel. Kent's Chest course goes through this setup perfectly.
n647 good stuff, i'd change the floorplanks color bit more darker than the chest and barrel. Kent's Chest course goes through this setup perfectly.
![]() silentheart00 Thanks, well everyone seems to be quite busy, thanks for stooping by and checking out
silentheart00 Thanks, well everyone seems to be quite busy, thanks for stooping by and checking out
![]() louhikarme Thanks, yea I just finished watching, and did some adjustments, also was rendering with the wrong HDRMI
louhikarme Thanks, yea I just finished watching, and did some adjustments, also was rendering with the wrong HDRMI
Well here we go, changed the floor material and put the right HDRI and the spotlight for the rimlight
also added some bloom and
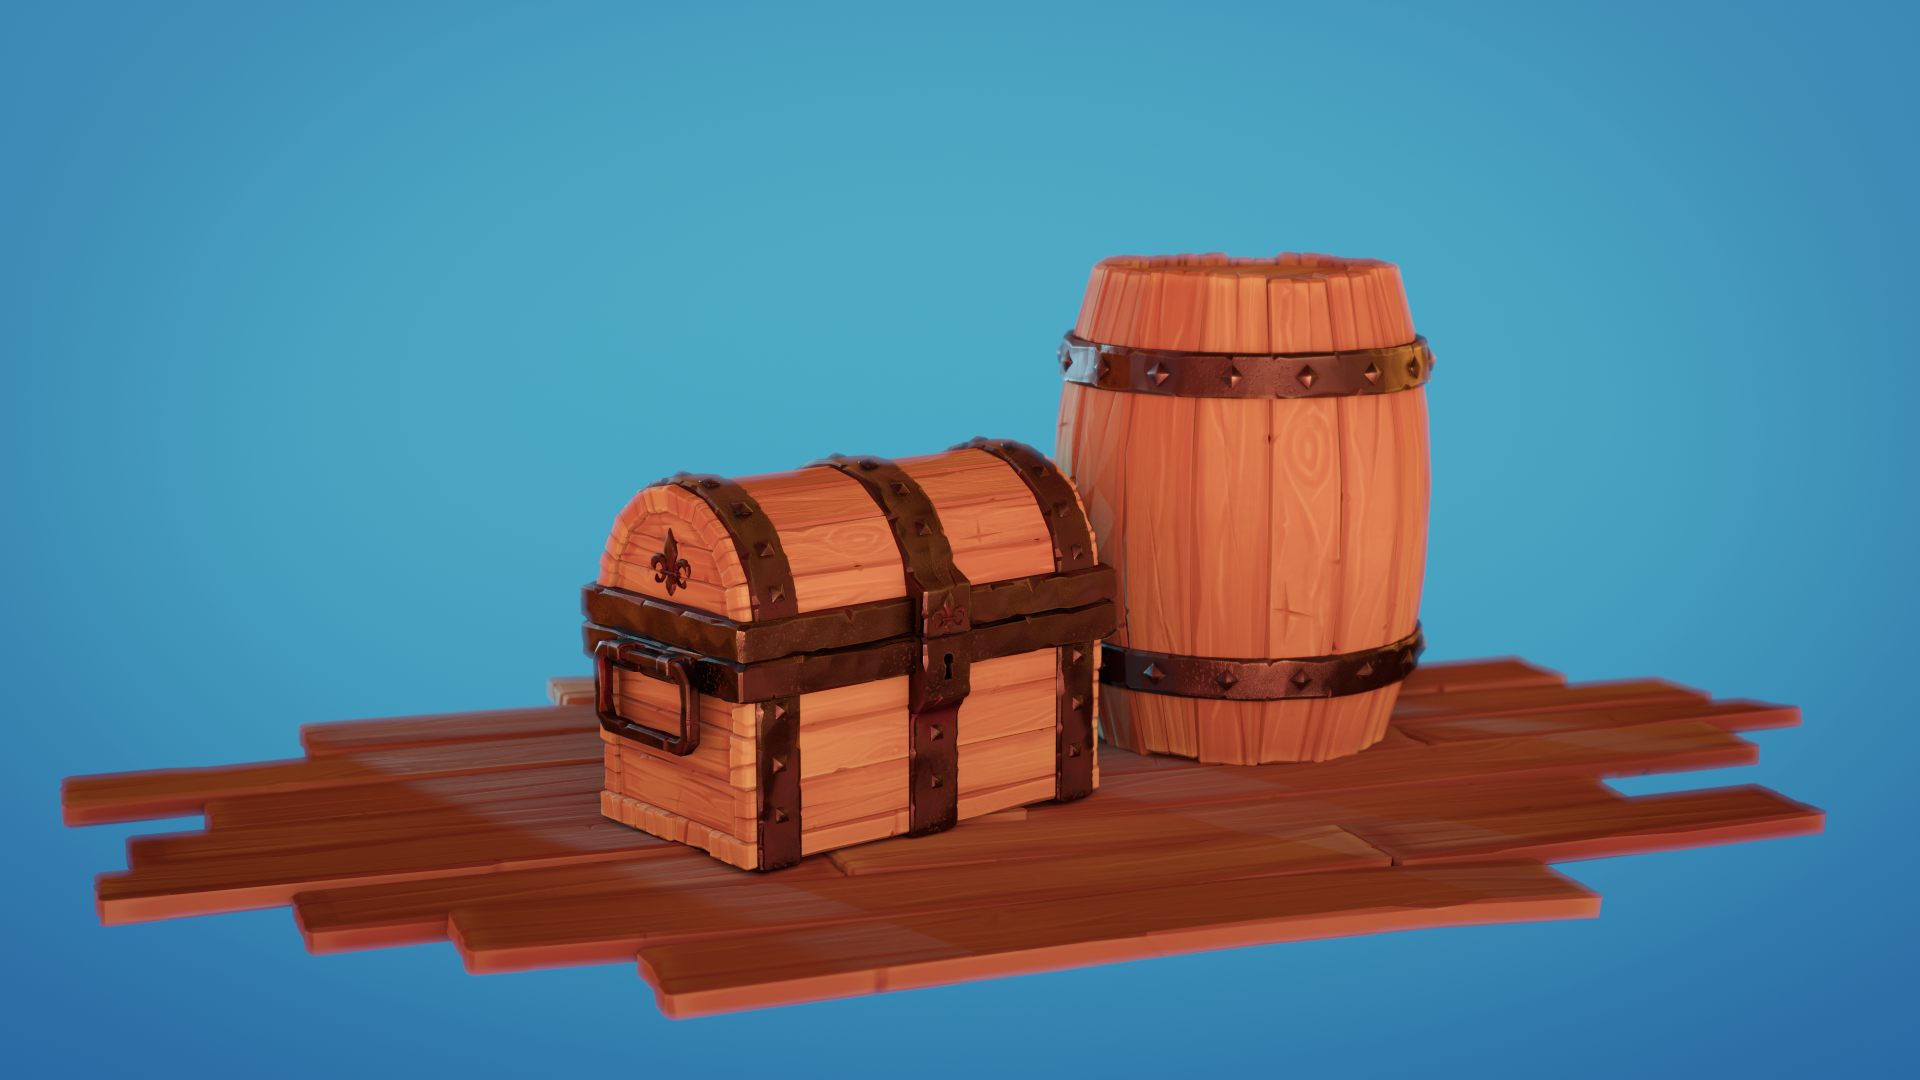
Also made a second render with a more dark and less saturated HDRI
Maybe should up the saturation a bit on the second one
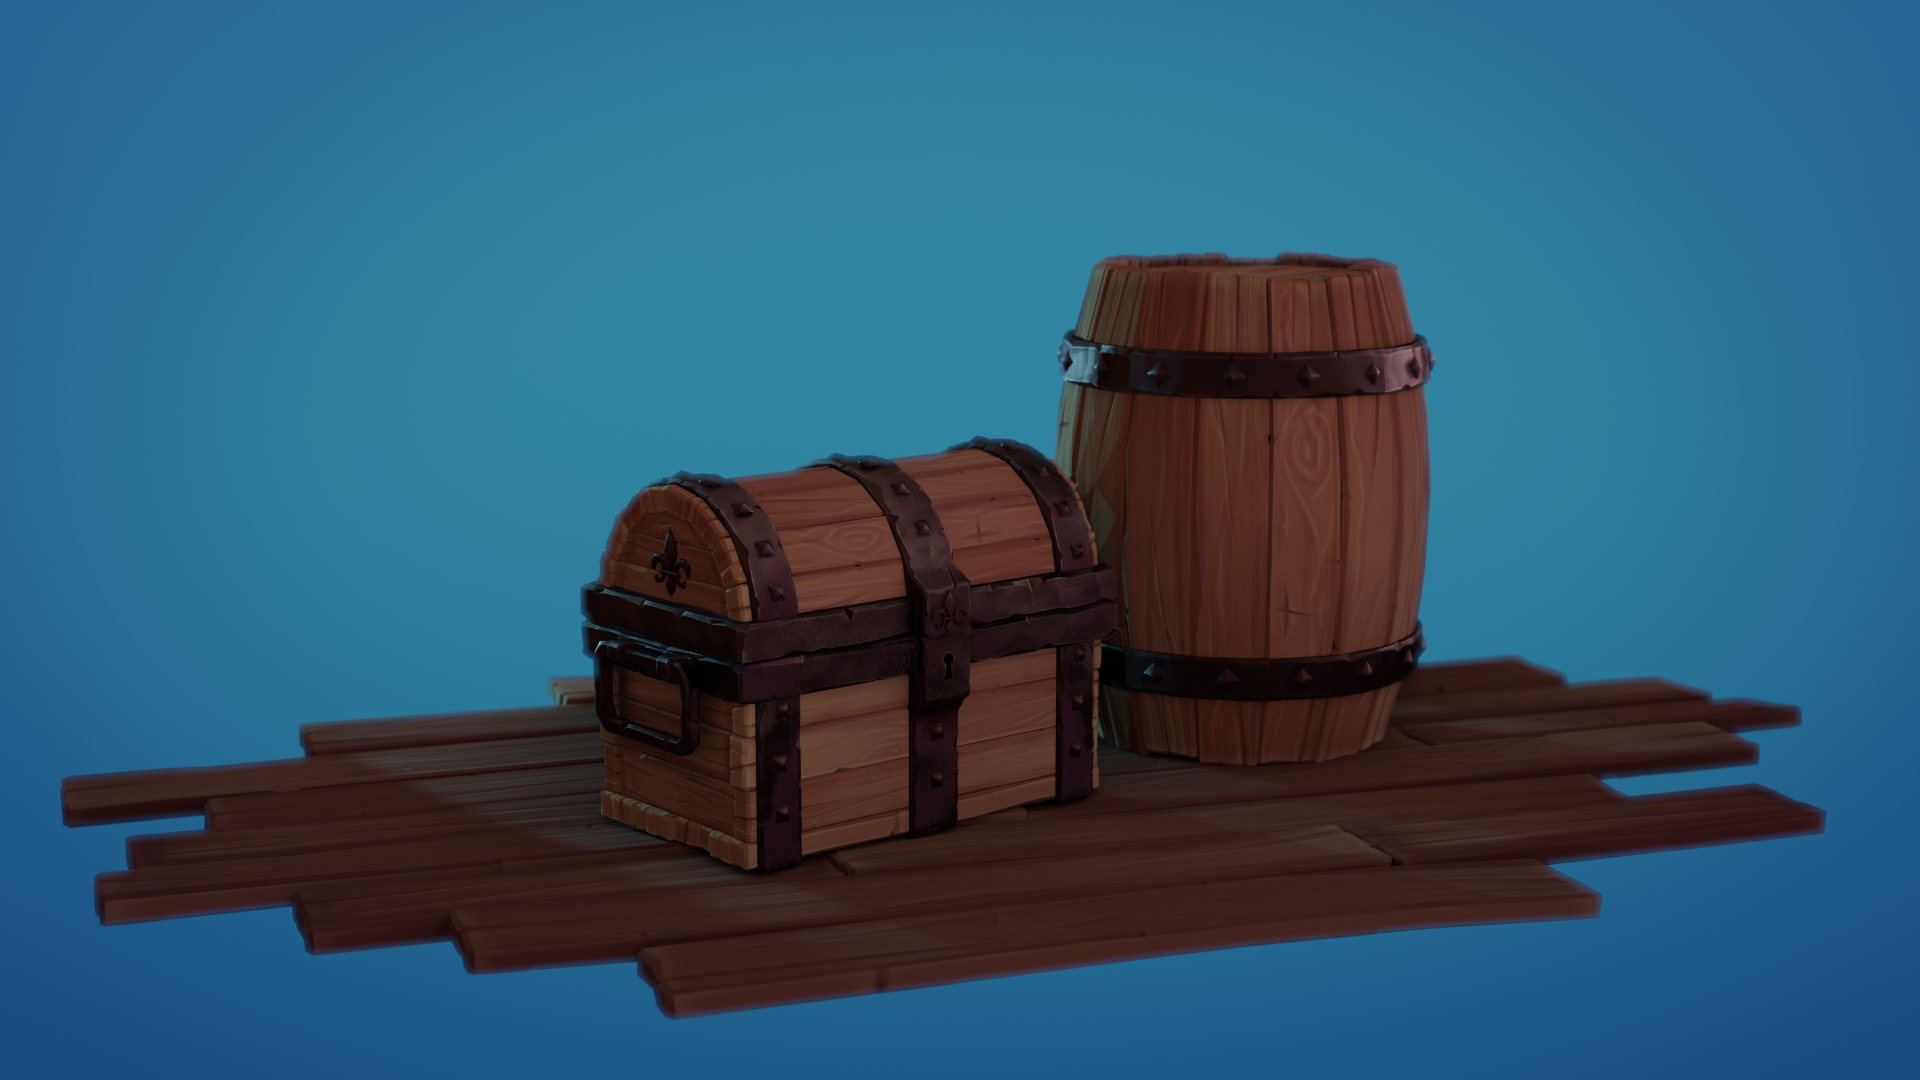
![]() n647 Personally, I think the higher saturation really helps to sell this as a stylized piece. Do what you will with it; it is yours, after all.
n647 Personally, I think the higher saturation really helps to sell this as a stylized piece. Do what you will with it; it is yours, after all.
Homework Submission Week 3
Ok I decided to go with the second HDRI and add a point light on front for the warm light
Also added a lattice to the chest to give it a few curves, but apply as a shape key, so I could dial the deformation later, or could be used for a animation, also made most coins silver with a few gold ones
Lastly I added the coins inside with a simulation, made the coins a static object for this you have to apply visual transformation, also coins falling trough, I solve that by increasing the physics steps where collisions are calculated, this is on scene > Rigid body world, and then increase the step per seconds and solver iterations.
with that think I will call it done here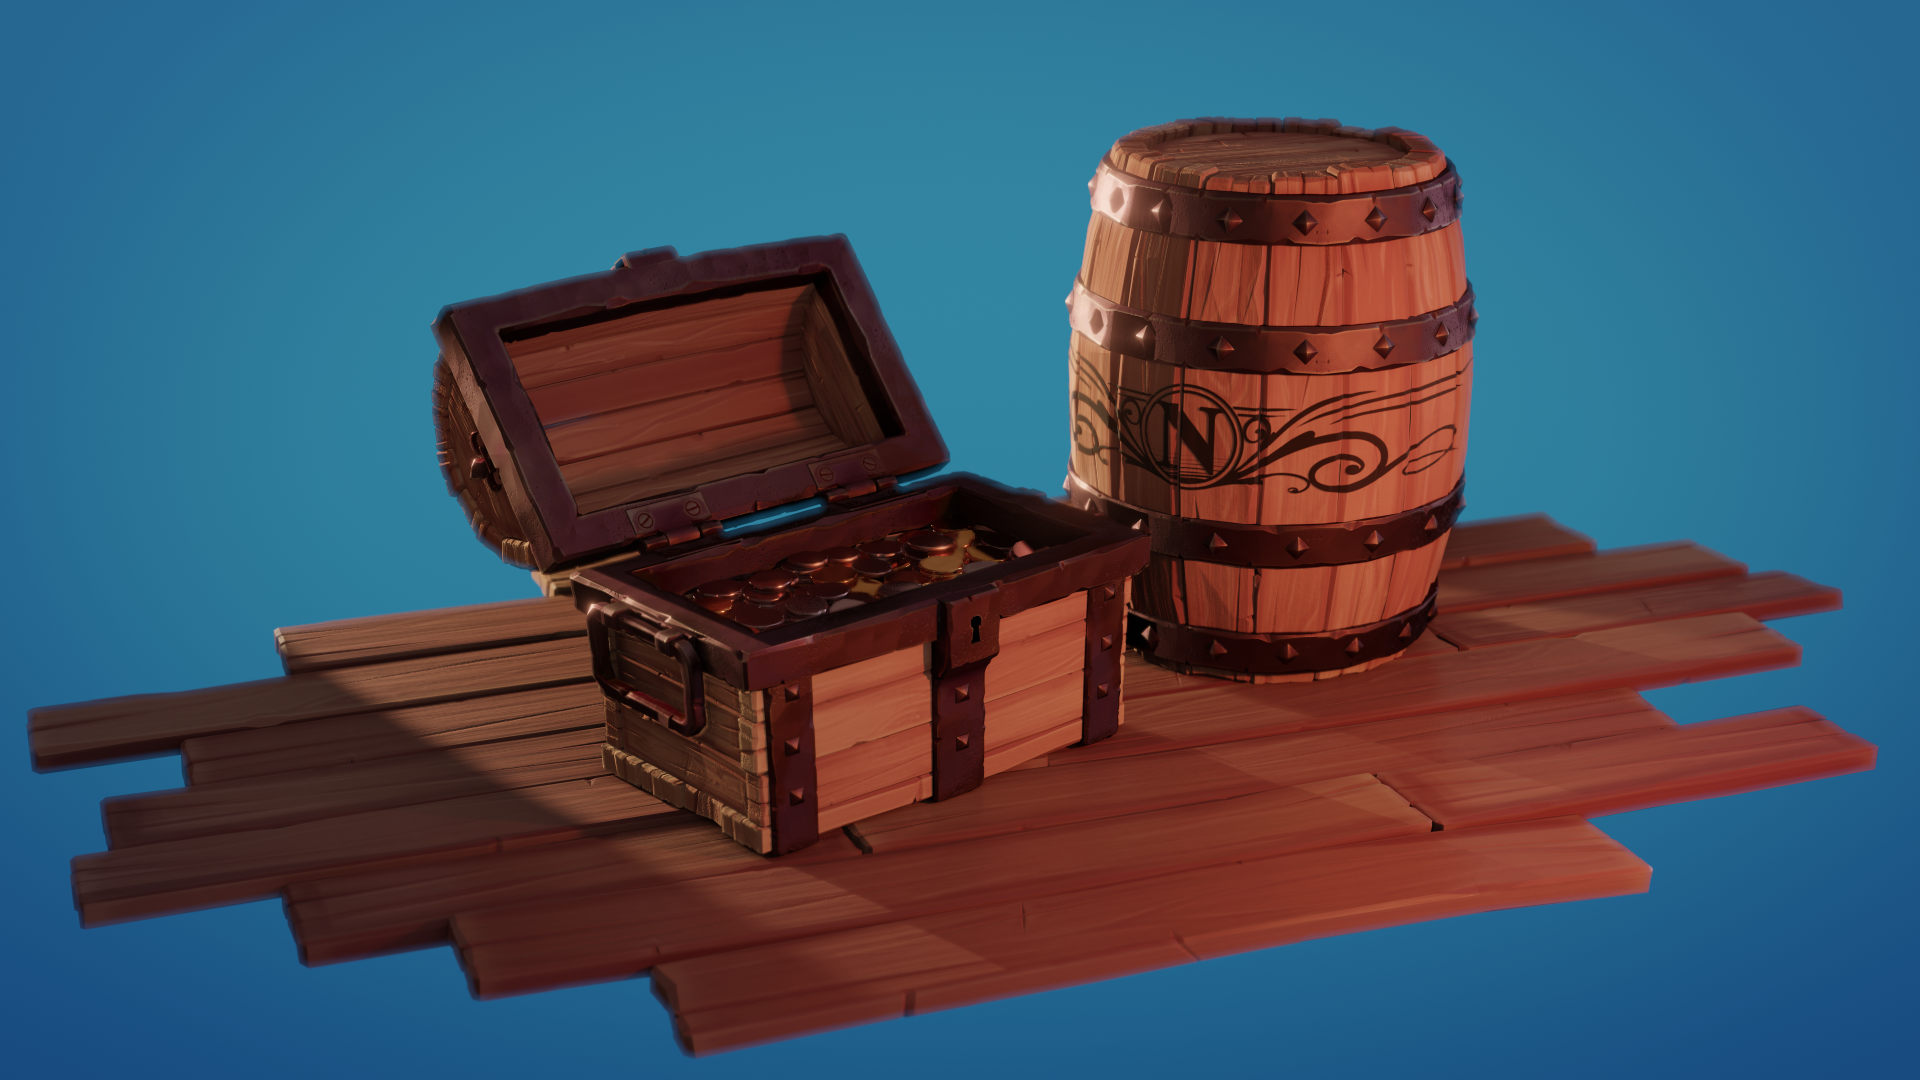
*edit: added the logo decal on the barrel
Ok so I decided to go a bit further with the homework.
Decal
I added a decal logo to the barrel, for this I draw the logo with a alpha and used add image as a plane
then subdivided by hand a bit to get even squares and more geometry and used the following set up for the decal.
the simple deform was important to get it to the right shape before the shrink wrap
Note for the transparent shader to work I had to go to material settings blend mode and change it to alpha hashed, or Alpha Blend

Logo used for the decal
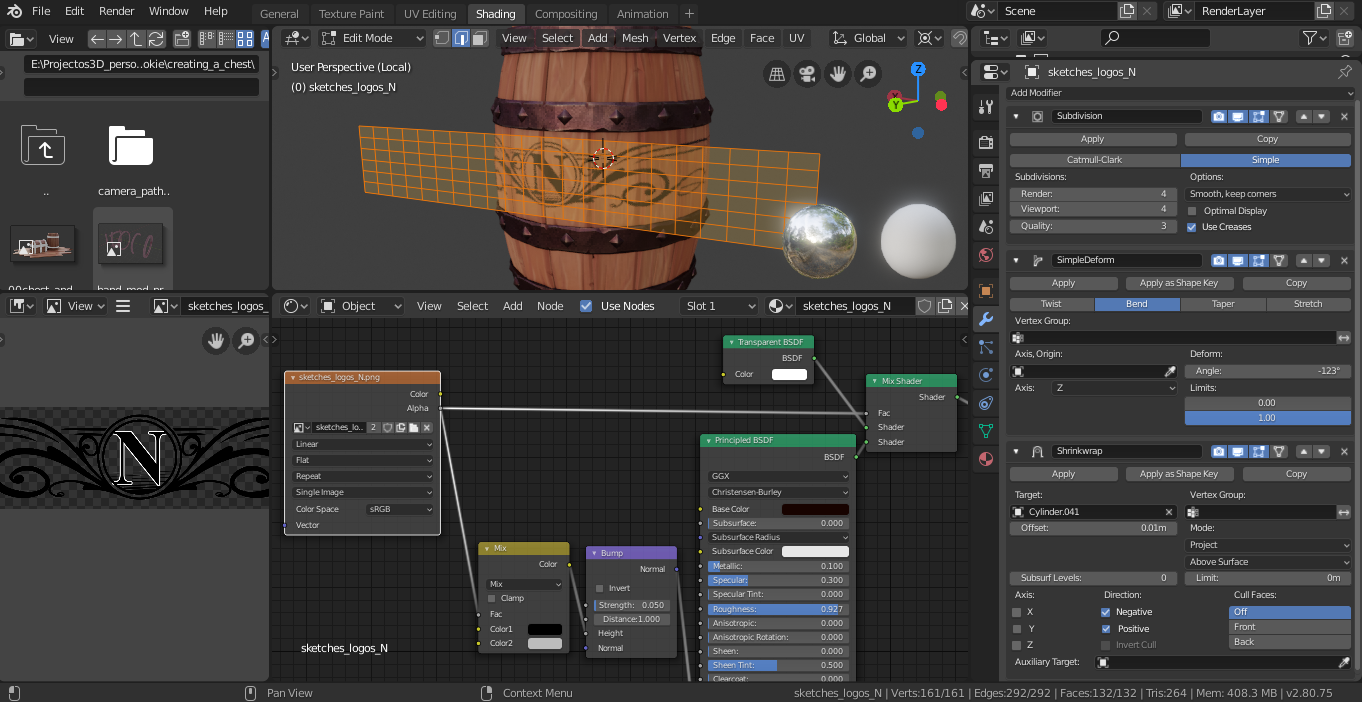
Decal set up
Camera animation
After that I went to do a simple animation, mostly to better present the work, for this I had to check how to have the camera follow a path, and the chest lid to open
I created a path with a curve between the initial and final position I wanted the camera then adjusted the path
found this tutorial for how to animate along a curve to control the camera speed: https://www.youtube.com/watch?v=HsOSDYTsG7o
and added a constraint to the camera so would maintain its focus on a empty I had positioned in the front of the chest, the same I used for the depth of field, is important I had to set the camera focus constrain AFTER the follow path for it to work
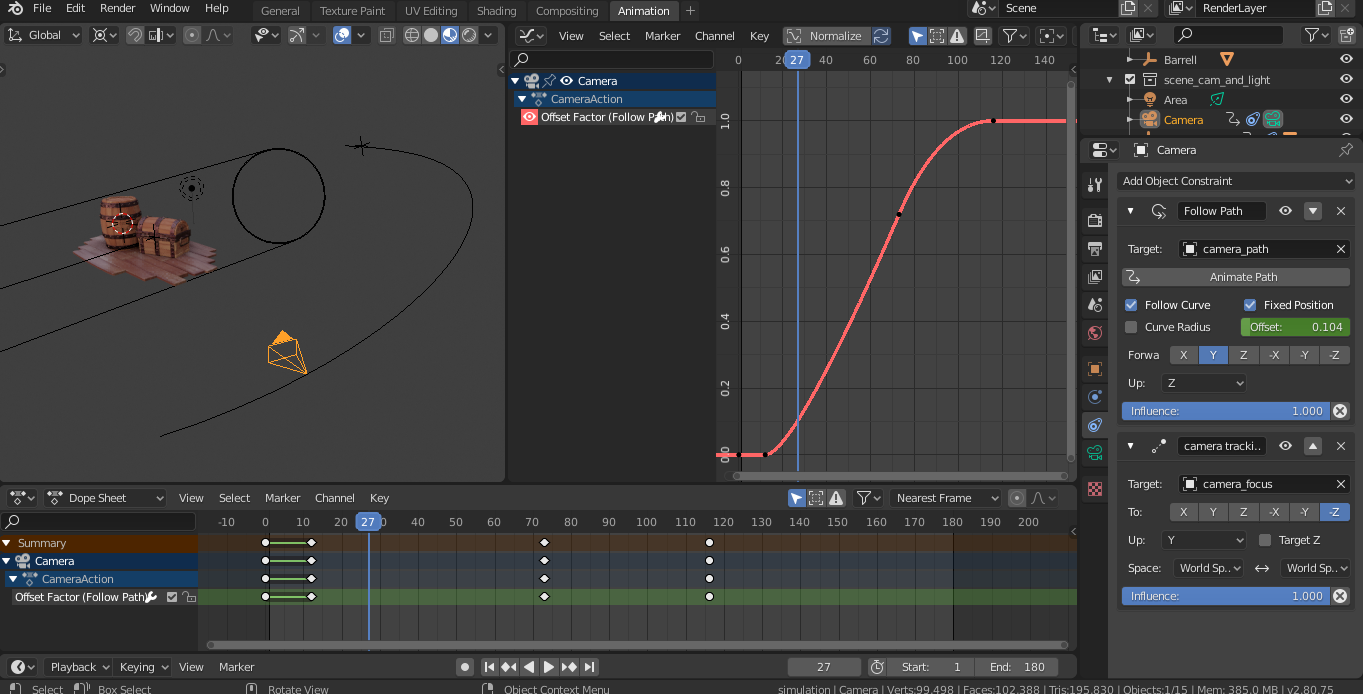
camera constrains set up, you animate the position with the offset, and use curves in the graph editor to control the speed of the movement, also set the interpolation to bezier to have a moth transition of the camera from still to moving to still
Chest animation
Finally added a small transformation to the lid using a empty, with rotation in the Y axis, and used the graph editor to make it open from smooth to a sharp stop

Chest lid graph and set up
And finally this was the result,rendered on EEVEE
![]() n647 You finished strong! I love the addition of the logo decal. Very nice touch. The turn-around animation too - it's a great way to see how the materials interact with light.
n647 You finished strong! I love the addition of the logo decal. Very nice touch. The turn-around animation too - it's a great way to see how the materials interact with light.
The wood is a little too diffuse imo, but that could just be my preference. I always find surfaces more interesting with a little bit of reflectivity. Regardless you'd done good work and have earned an A. Thanks for sharing your workflow and insight as well👏
@theluthier Thanks, I felt it was missing some detail there so worked the decal based on victorian logos to go with the fleur de liz and the topic.
The turnaround was mostly a way to learn how to use the camera better and show the hinges too, see how the light played with the materials was a nice bonus
As for the wood, I may have gone a bit too subtle, thanks for the input.