![]() shiennar perfect proportions :) fun little scene, can’t wait to see it come to life with some color!
shiennar perfect proportions :) fun little scene, can’t wait to see it come to life with some color!
![]() shiennar That looks like a fun scene Kat. It's like when Bilbo went away. My dear Bagginses and Boffins, Tooks and Brandybucks.
shiennar That looks like a fun scene Kat. It's like when Bilbo went away. My dear Bagginses and Boffins, Tooks and Brandybucks.

![]() shiennar So good to see you in class again! Being your 3rd time taking this class, I certainly appreciate you sharing your experience and knowledge with everyone. Your WIP posts are like a mini tutorial!
shiennar So good to see you in class again! Being your 3rd time taking this class, I certainly appreciate you sharing your experience and knowledge with everyone. Your WIP posts are like a mini tutorial!
For the quality of your modeling and insight shared, you've earned another A+. I can't wait to see how this scene progresses!
![]() shiennar Thanks for sharing your progress, I have bookmarked this post yesterday . For me its a definitely a Tutorial ,going to try and test some of your tricks .
shiennar Thanks for sharing your progress, I have bookmarked this post yesterday . For me its a definitely a Tutorial ,going to try and test some of your tricks .
Love your work!
![]() avirozenboim Thanks, I'm glad you found it helpful. :-) It also helped me improve, because I had to think more about the technique I wanted to use and test it several times before I wrote about it. So we both learned in the process, which is as it should be, I think.
avirozenboim Thanks, I'm glad you found it helpful. :-) It also helped me improve, because I had to think more about the technique I wanted to use and test it several times before I wrote about it. So we both learned in the process, which is as it should be, I think.
![]() dostovel I didn't think about it when I was creating the scene, but now that you mention it... My subconscious love for Tolkien must have got the better of me. :-)
dostovel I didn't think about it when I was creating the scene, but now that you mention it... My subconscious love for Tolkien must have got the better of me. :-)
![]() shiennar That is interesting, making trees from metaballs.. Never has seen that, thanks.
shiennar That is interesting, making trees from metaballs.. Never has seen that, thanks.
Also that you decided to participate, you are a great resource with your experience, it is pleasure to read the how to's in the thread
WIP 7: Scene setup
Alright, time to get cracking (finally). Before I start working on the UVs, I thought I'd share my scene setup. I've been struggling a bit with this ever since collections replaced the layer system. Now, don't get me wrong, I think the collections are great (and more powerful than the layer system, for sure) but there comes a time when a lass wants to see the most bizarre combinations of items she's created - and the collections need a touch more work before they do what she wants.
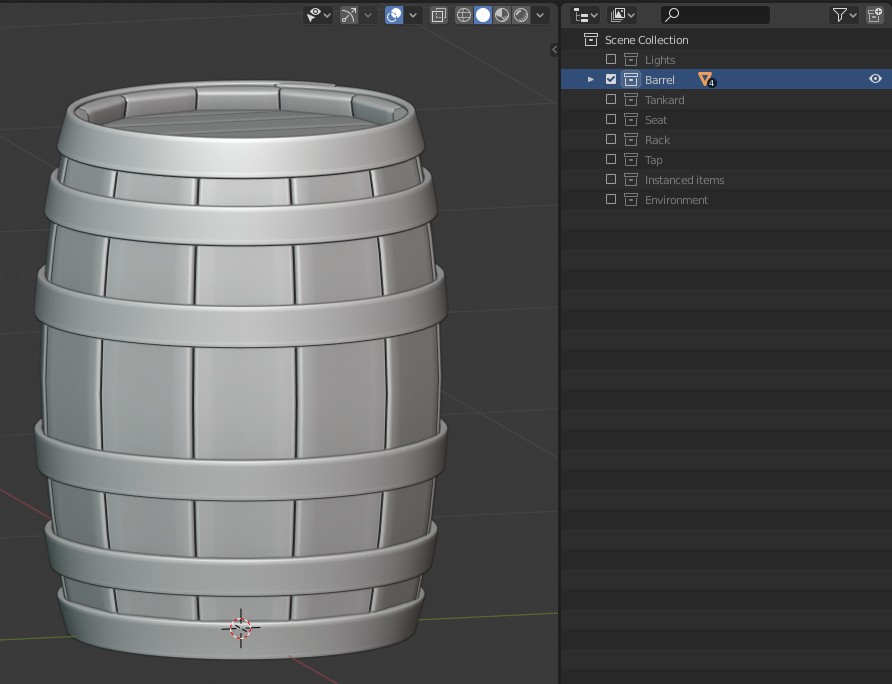
This time, I thought ahead and I created each major object on its own and then populated the scene with its instances. The "template" object is hidden, the instances are not. So when I I want to see everything that will eventually be rendered, I enable the "Instanced items" and "Environment" collections (aka grass, trees... you get the idea), and I see my full scene without clutter. Or I can isolate any of the template objects and work on its UVs. I can also toggle the lights and camera on and off quite easily. Here is the collections tree:
WIP 8: Reworks (cause I'm a lazy UV unwrapper)
My first victim was the barrel stave. If you remember, I originally created it mirrored on Z, with the individual parts separated and thickness added with the Solidify modifier. Both of the modifiers had to be applied if I wanted to achieve any reasonable texturing later, so I ended up with 12 pieces that all needed the same seam treatment. But I'm lazy (and I had to fix some mesh artifacts anyway), so I marked the seams on one piece, deleted the rest, added an empty object to the stave origin location and added an array with 12 copies and object offset.
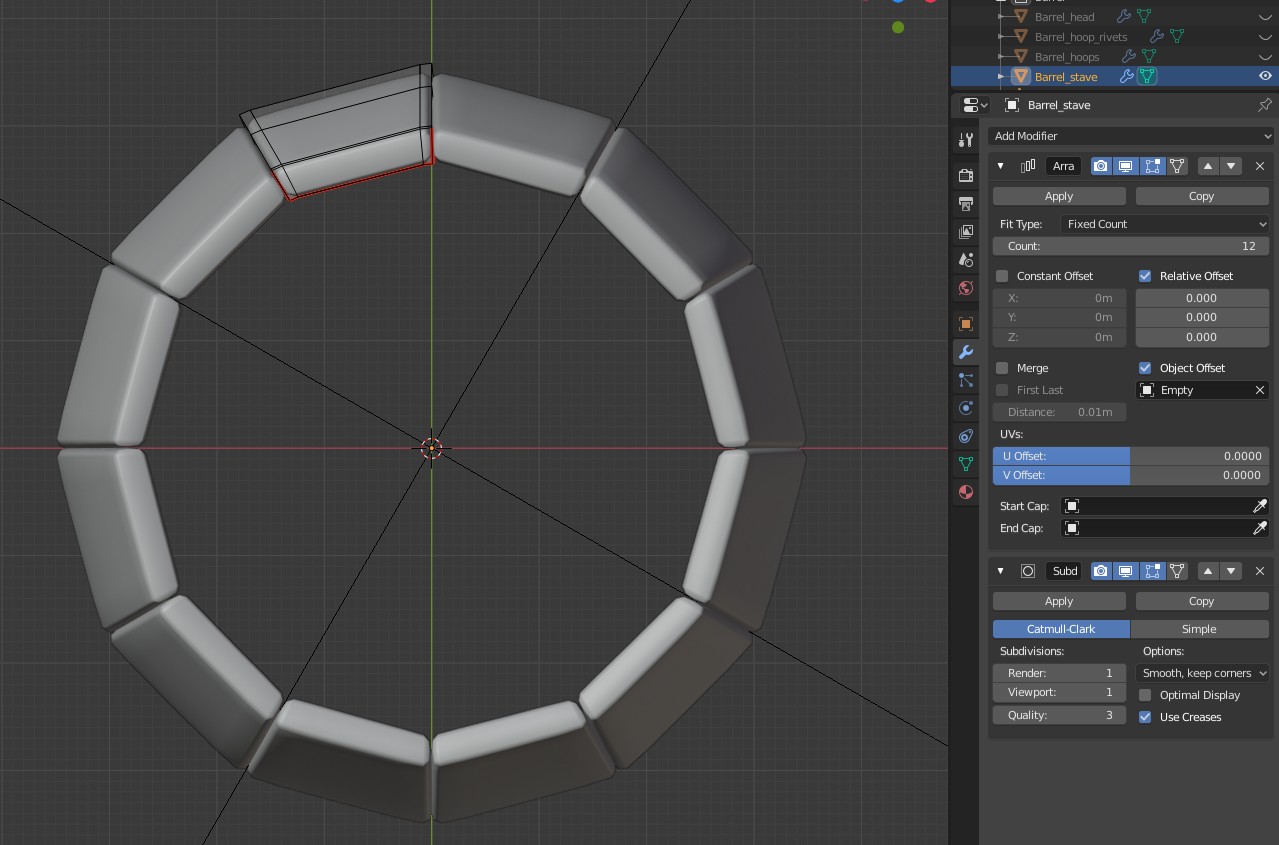
One apply later and all the pieces have the same seams and fairly nice UV map.
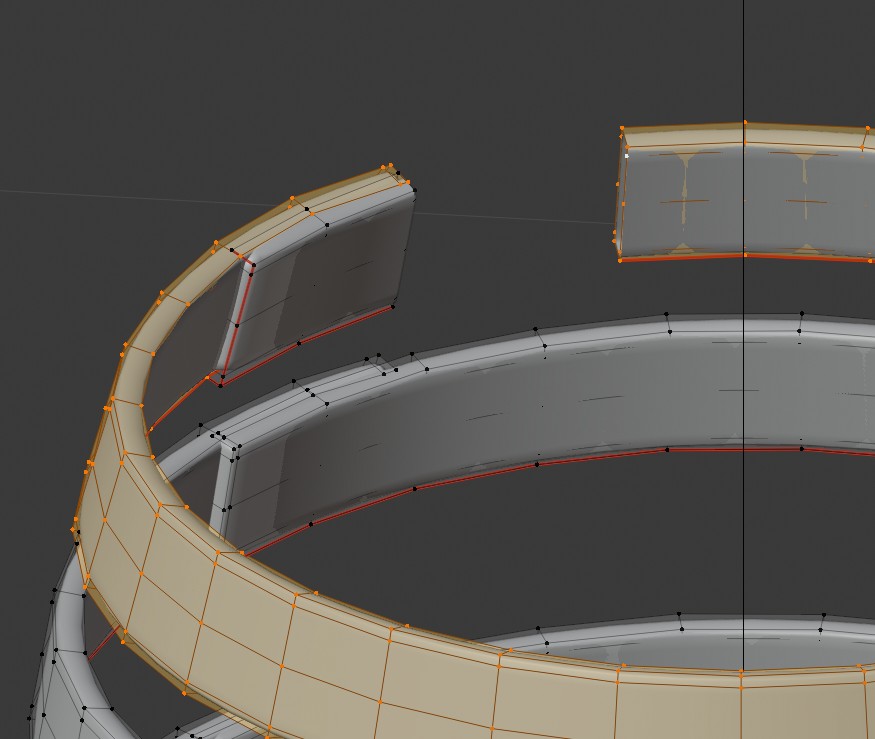
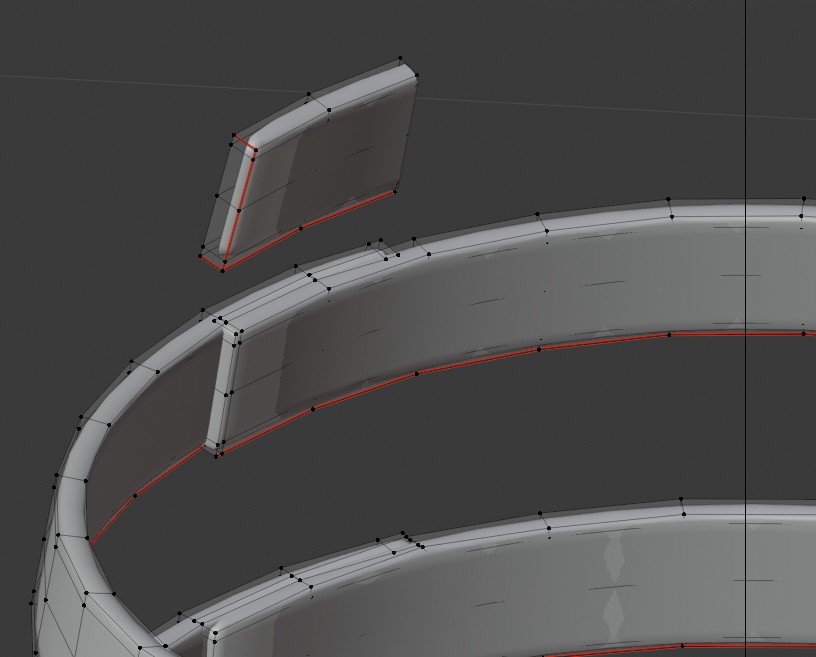
Next part was the hoops. With Solidify applied, I ended up with the welded parts overlapping visually. That doesn't make for an easy edge selection, so I used a little trick. In vertex mode, I hid (with H) one vertical loop. I selected the rest of the hoop and hid it as well, leaving me with just the end I needed to seam-ify. Not the fastest way to work, but slightly less stressful :-)
 |
 |
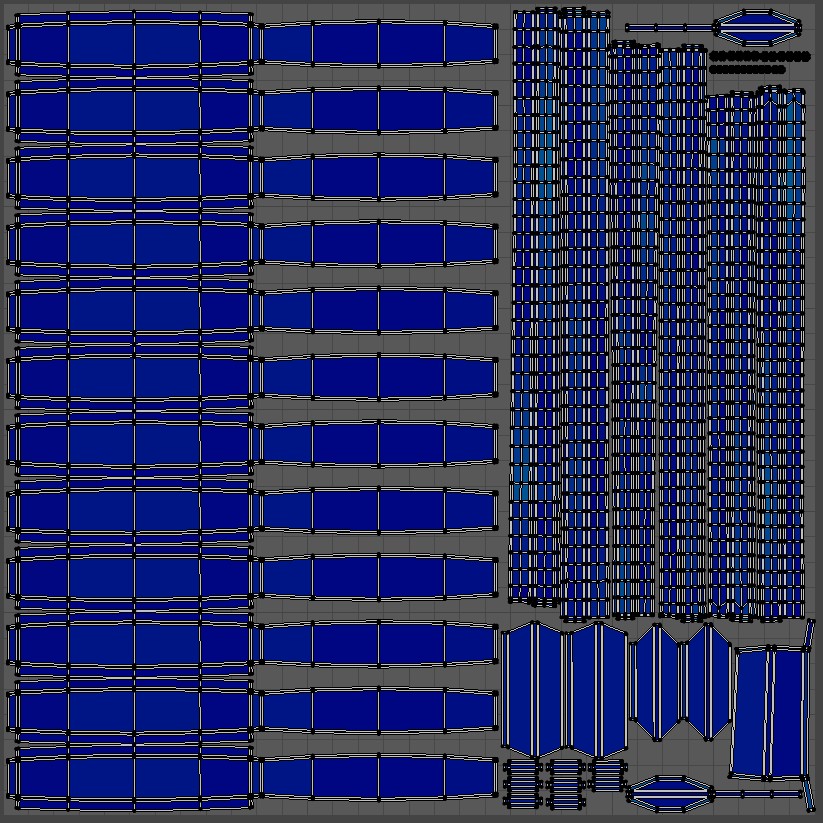
WIP 9: Barrel UVs
A few manual adjustments were needed, but I managed to lay out all the barrel parts in one UV space. I wanted to have this one separately, so I could add the most detail (which is why I tried to use all the available space). I'll create another texture set for the remaining instanced assets, and another one for the environment filler.
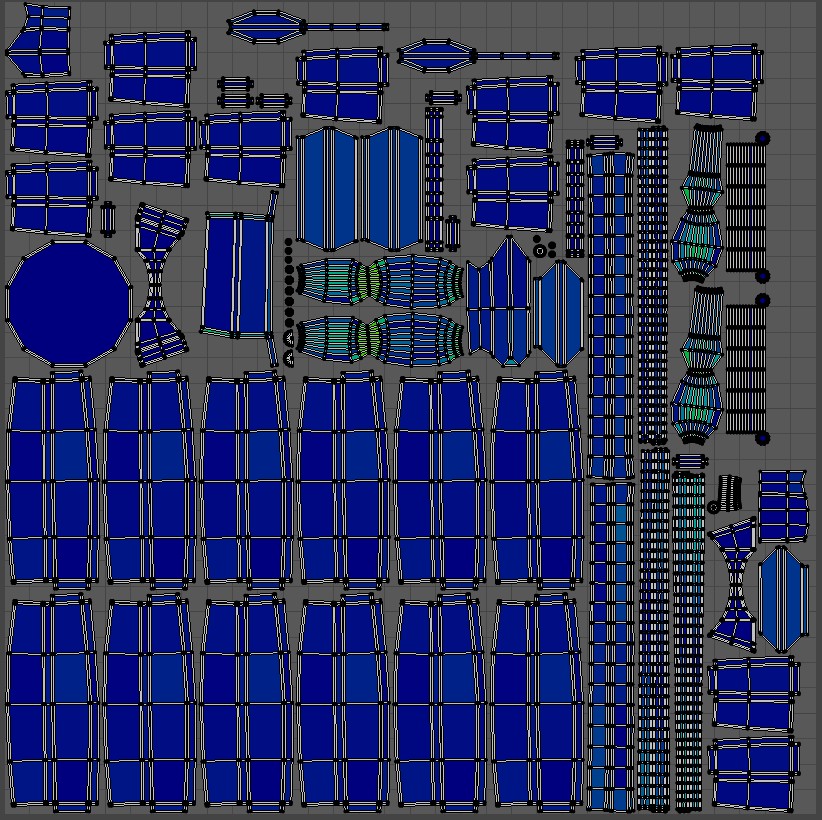
WIP 10: Remaining UVs
I created the remaining 2 sets, one for instanced objects and one for the environmental assets. With the instanced objects it was mainly repeating the steps from the barrel UVS, with the notable exception of the seats. Those were parented to an empty, which had active transformations. When I tried to do the array trick, it didn't work properly, because the parent transformations kicked in. I tried to apply rotation/scale, but it didn't propagate to the children, so I ended up separating the seats' stave, working the array magic and then re-parenting the stave.
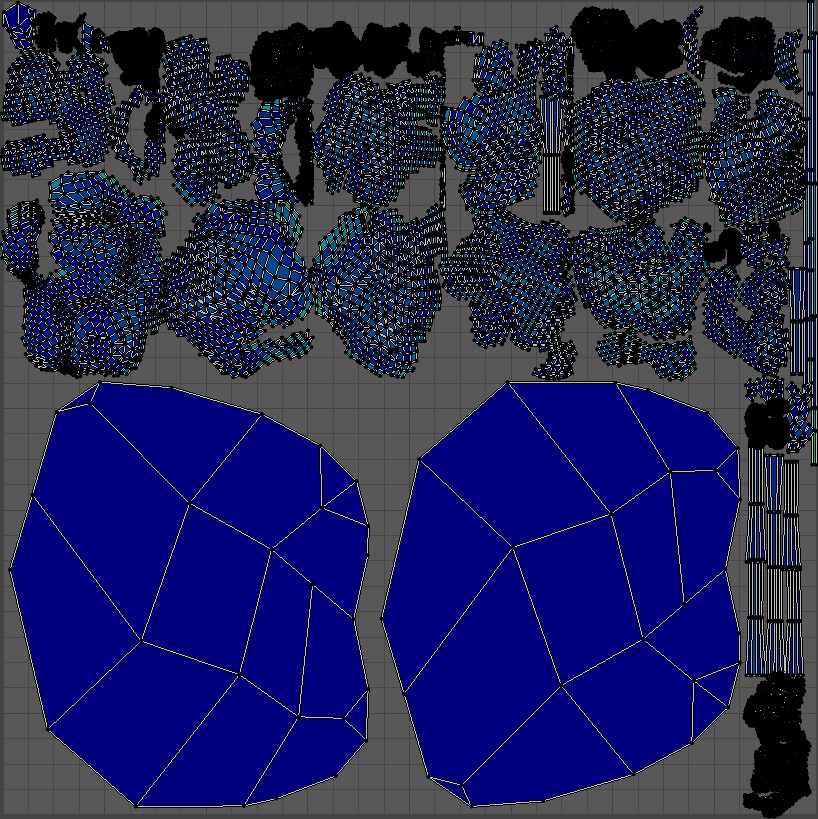
With the environmental assets I had to go for the Smart UVs option, because the generated meshes were far from seam-friendly. I prefer not to use this UV option, because I had some troubles with it in the past, but it seemed to be the only option here.
Tomorrow I'll move on to the texturing part.
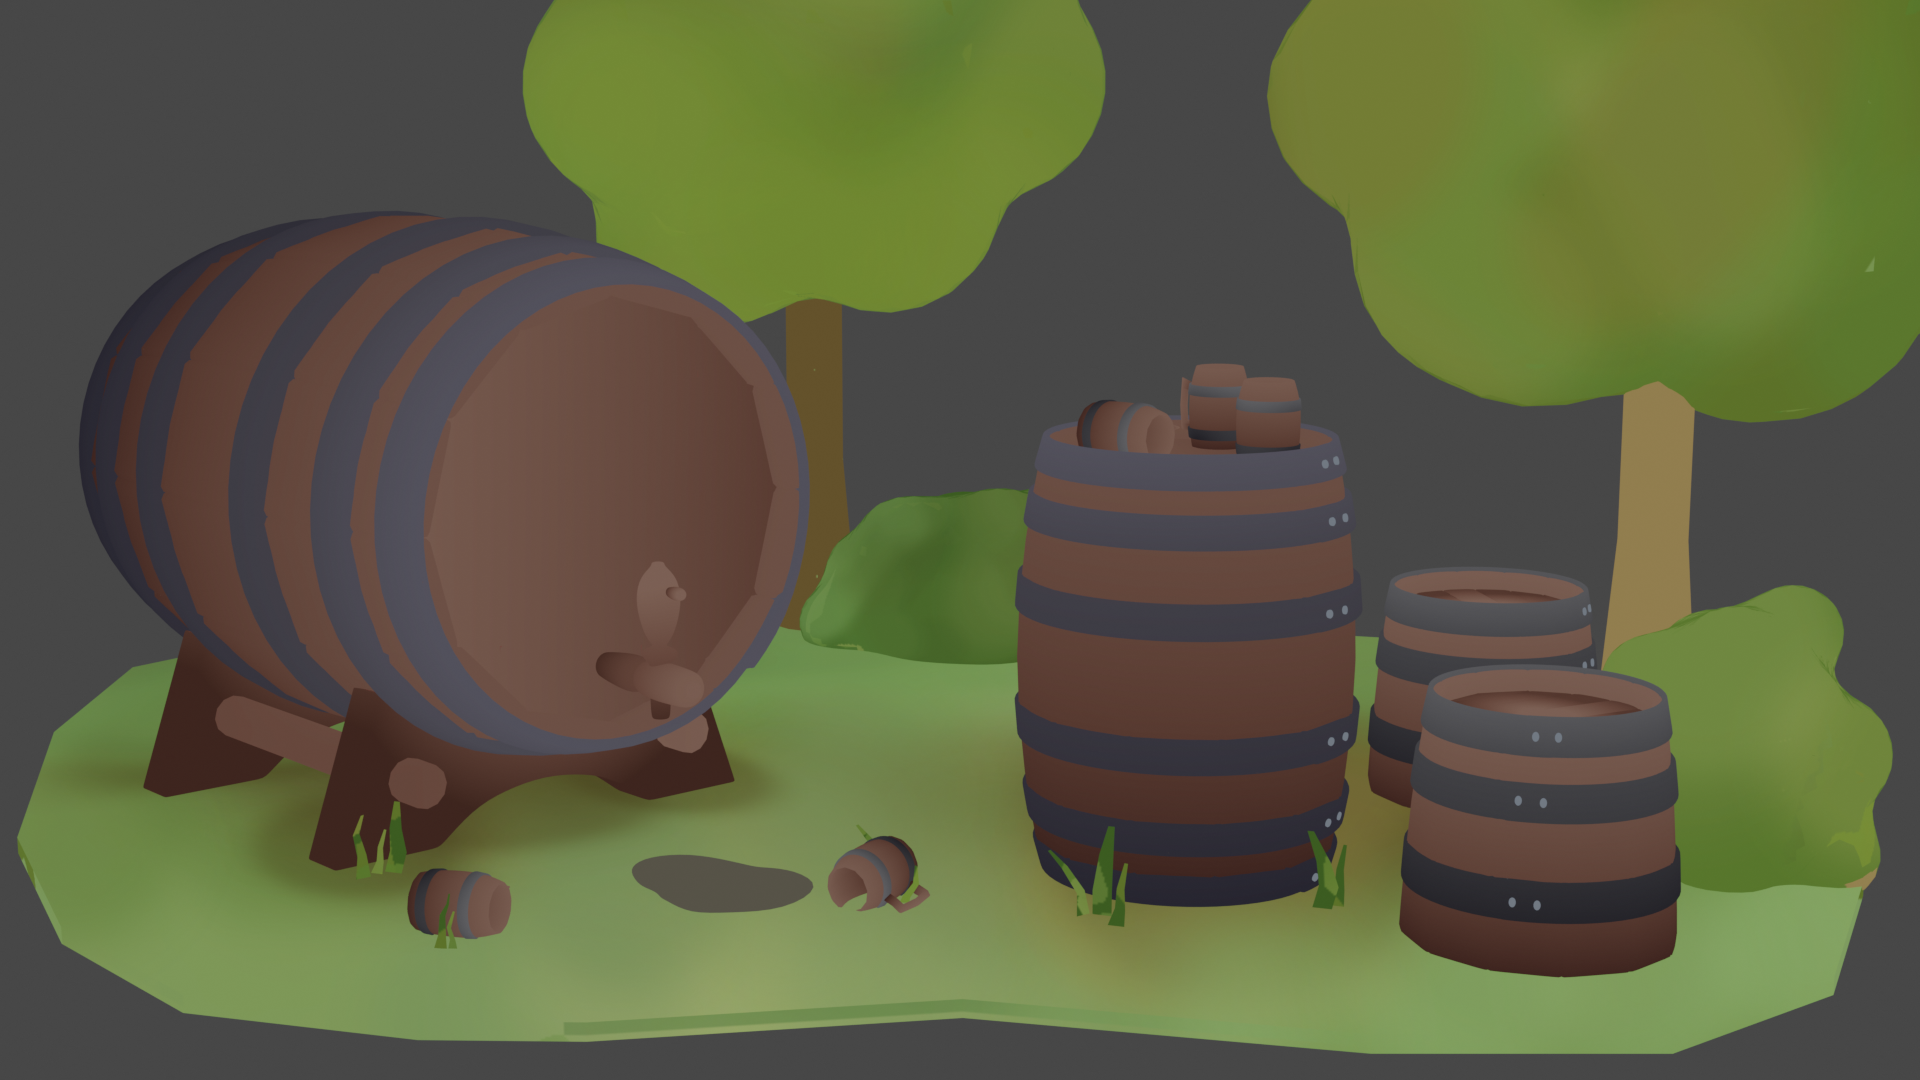
WIP 11: Early colours
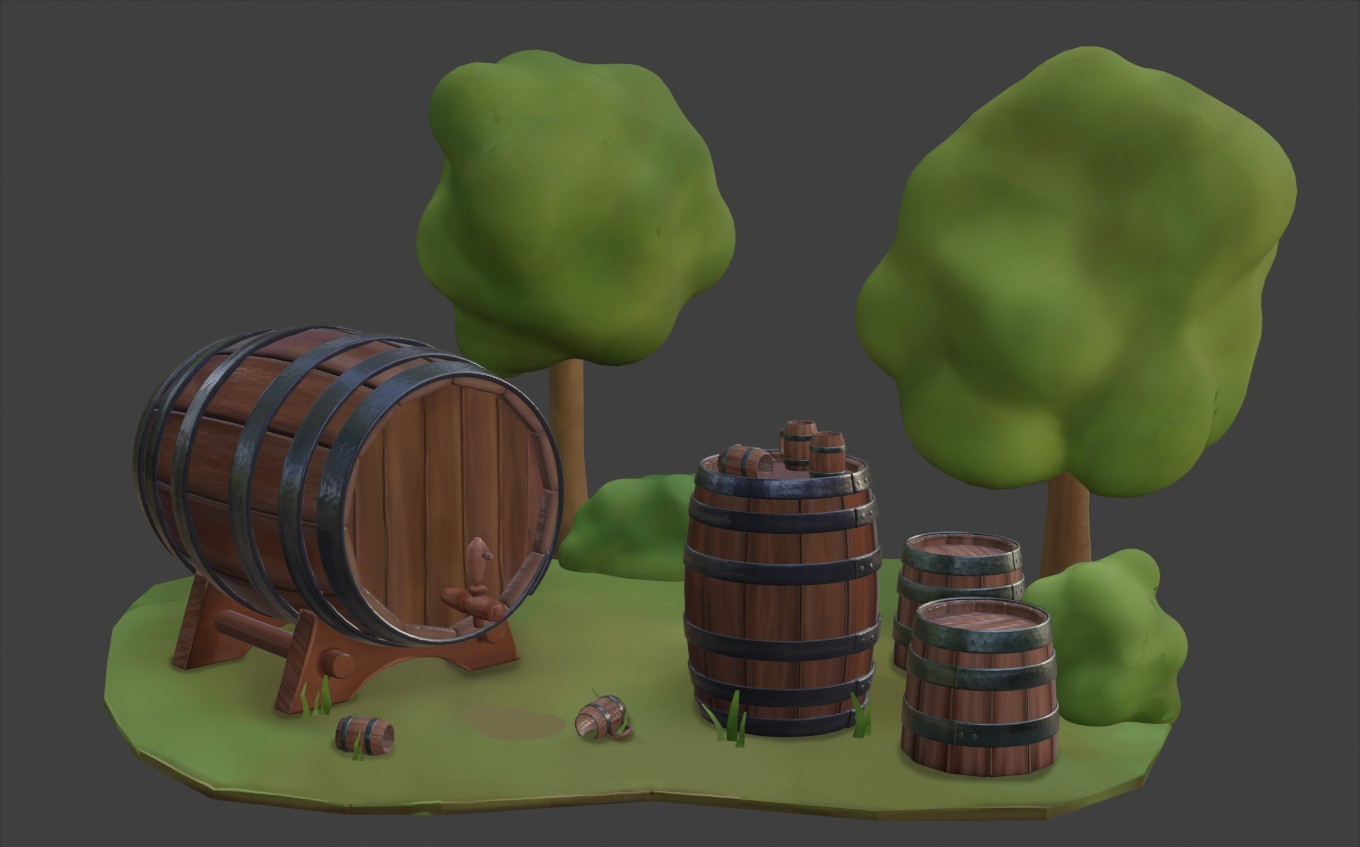
I like to start with colour blocking to get a better idea of which colours work best in the scene. But I found out that solid colour blocks throw me off a bit, because they are too far from the final look, so I tend to use gradients. Here I went for a simple dark-middle-light colour scheme, mostly linear (with the exception of the top parts of the seats, where the radial type made more sense). I also quickly painted the environment, to get a more natural look. Now onto the details. (I don't have much time left, so the next post will probably have to be my final.)
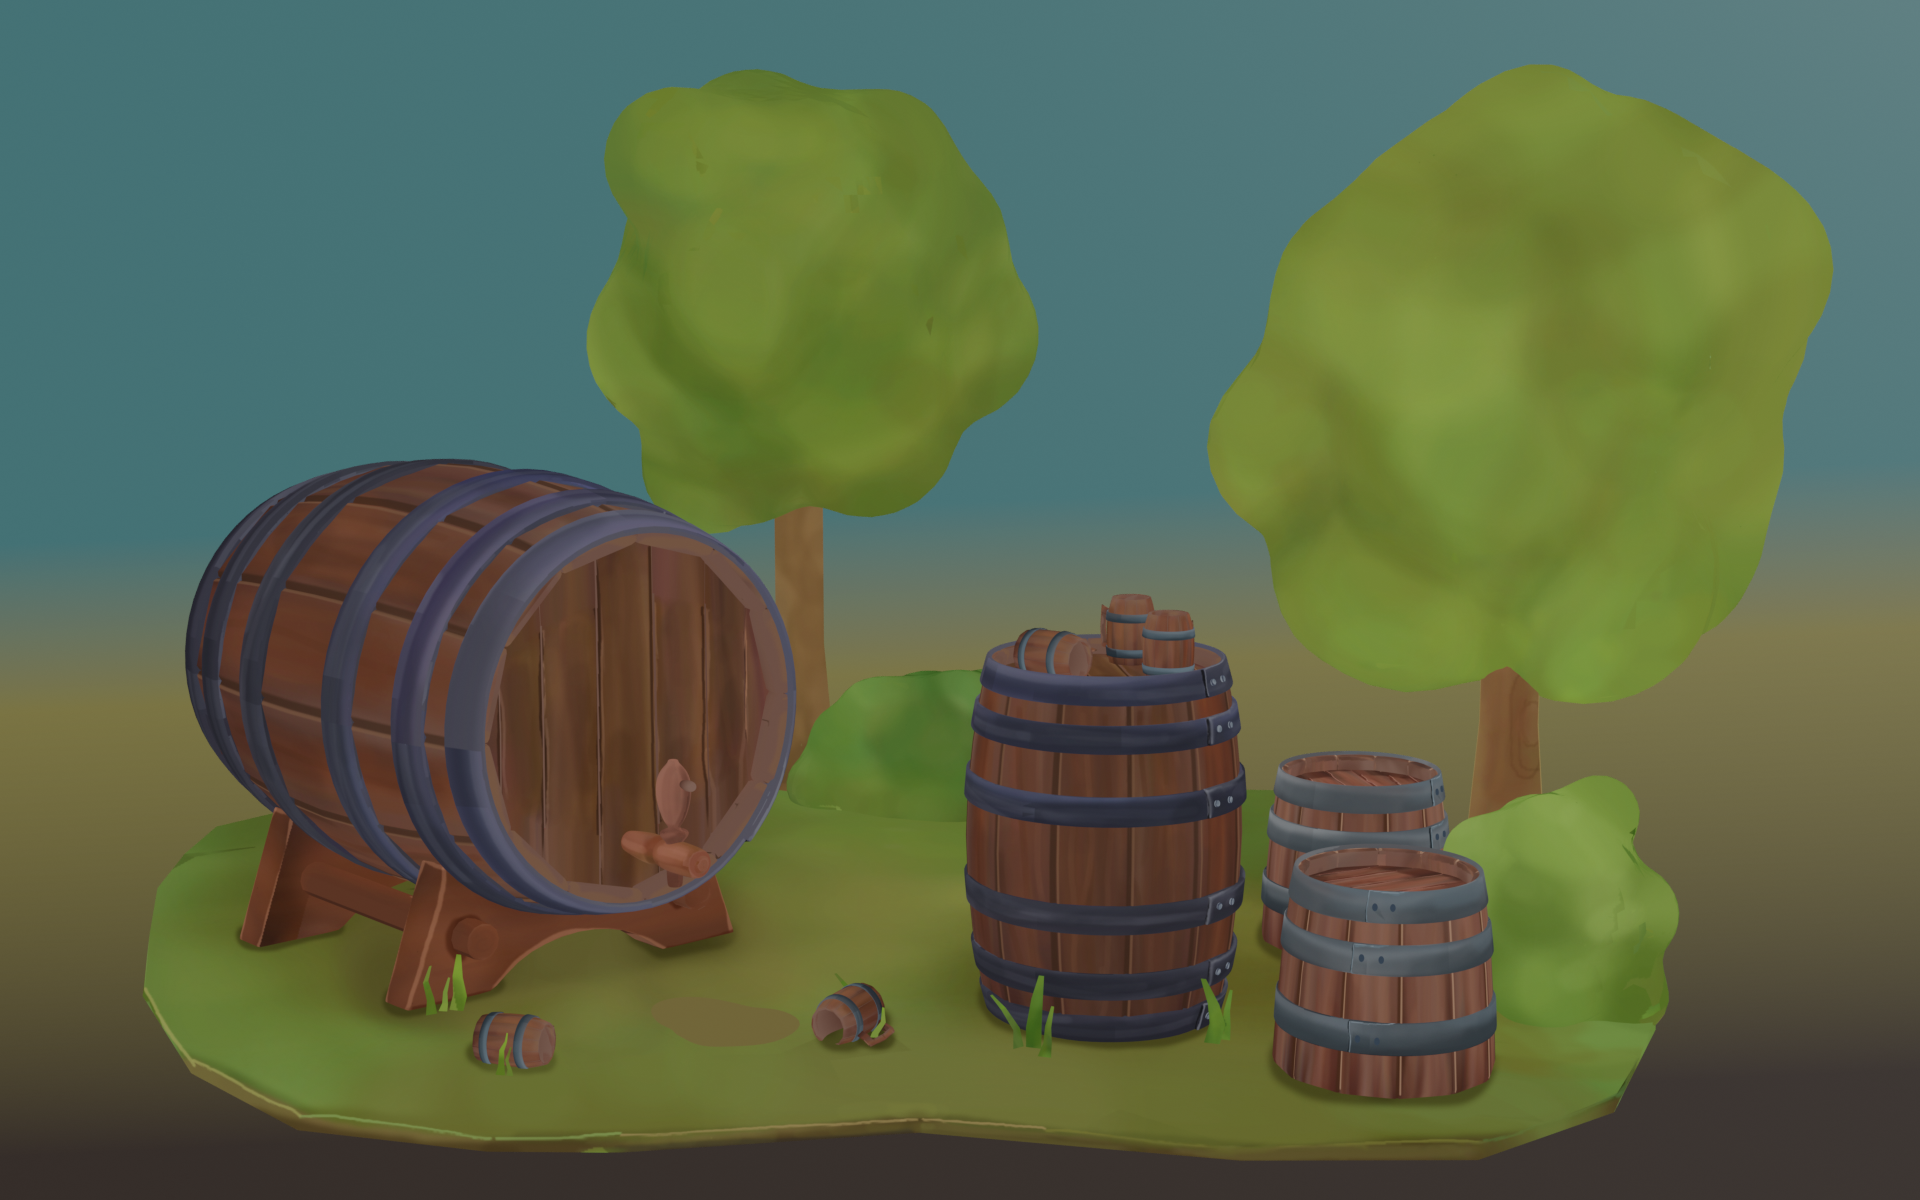
Homework submission - Week 2
The time is up and this is what I was able to come up with. I created two versions: one rendered, with the colour information only, and the other in Look dev with Matcap (texture) and cavities highlighted. To make the background show up in Look dev I had to bake it into a texture. It was originally created as a quick gradient texture. I plugged the nodes into the Principled shader, added a new node for an image texture, and with it selected and Baking option set to Diffuse (influence only Colour), I baked the information into a proper texture, which then showed up in Look Dev mode.
![]() shiennar Ooo yes, excellent texture work here, Kate. All of a sudden I get a distinct *feel* and style for this scene. I like seeing your first-pass at the texture that highlights the broad gradients. You probably know I'm a big believer in gradients like that 😊
shiennar Ooo yes, excellent texture work here, Kate. All of a sudden I get a distinct *feel* and style for this scene. I like seeing your first-pass at the texture that highlights the broad gradients. You probably know I'm a big believer in gradients like that 😊
The only note I want to offer regards the trees and bushes To me there's a pretty big difference between the detail level of the buckets and barrels compared to the trees/bushes. I'm wishing there was something to better establish that the blobby shapes are leafy. To sell the shapes more that way perhaps you could add to a splotchy pattern to suggest leaves like this:
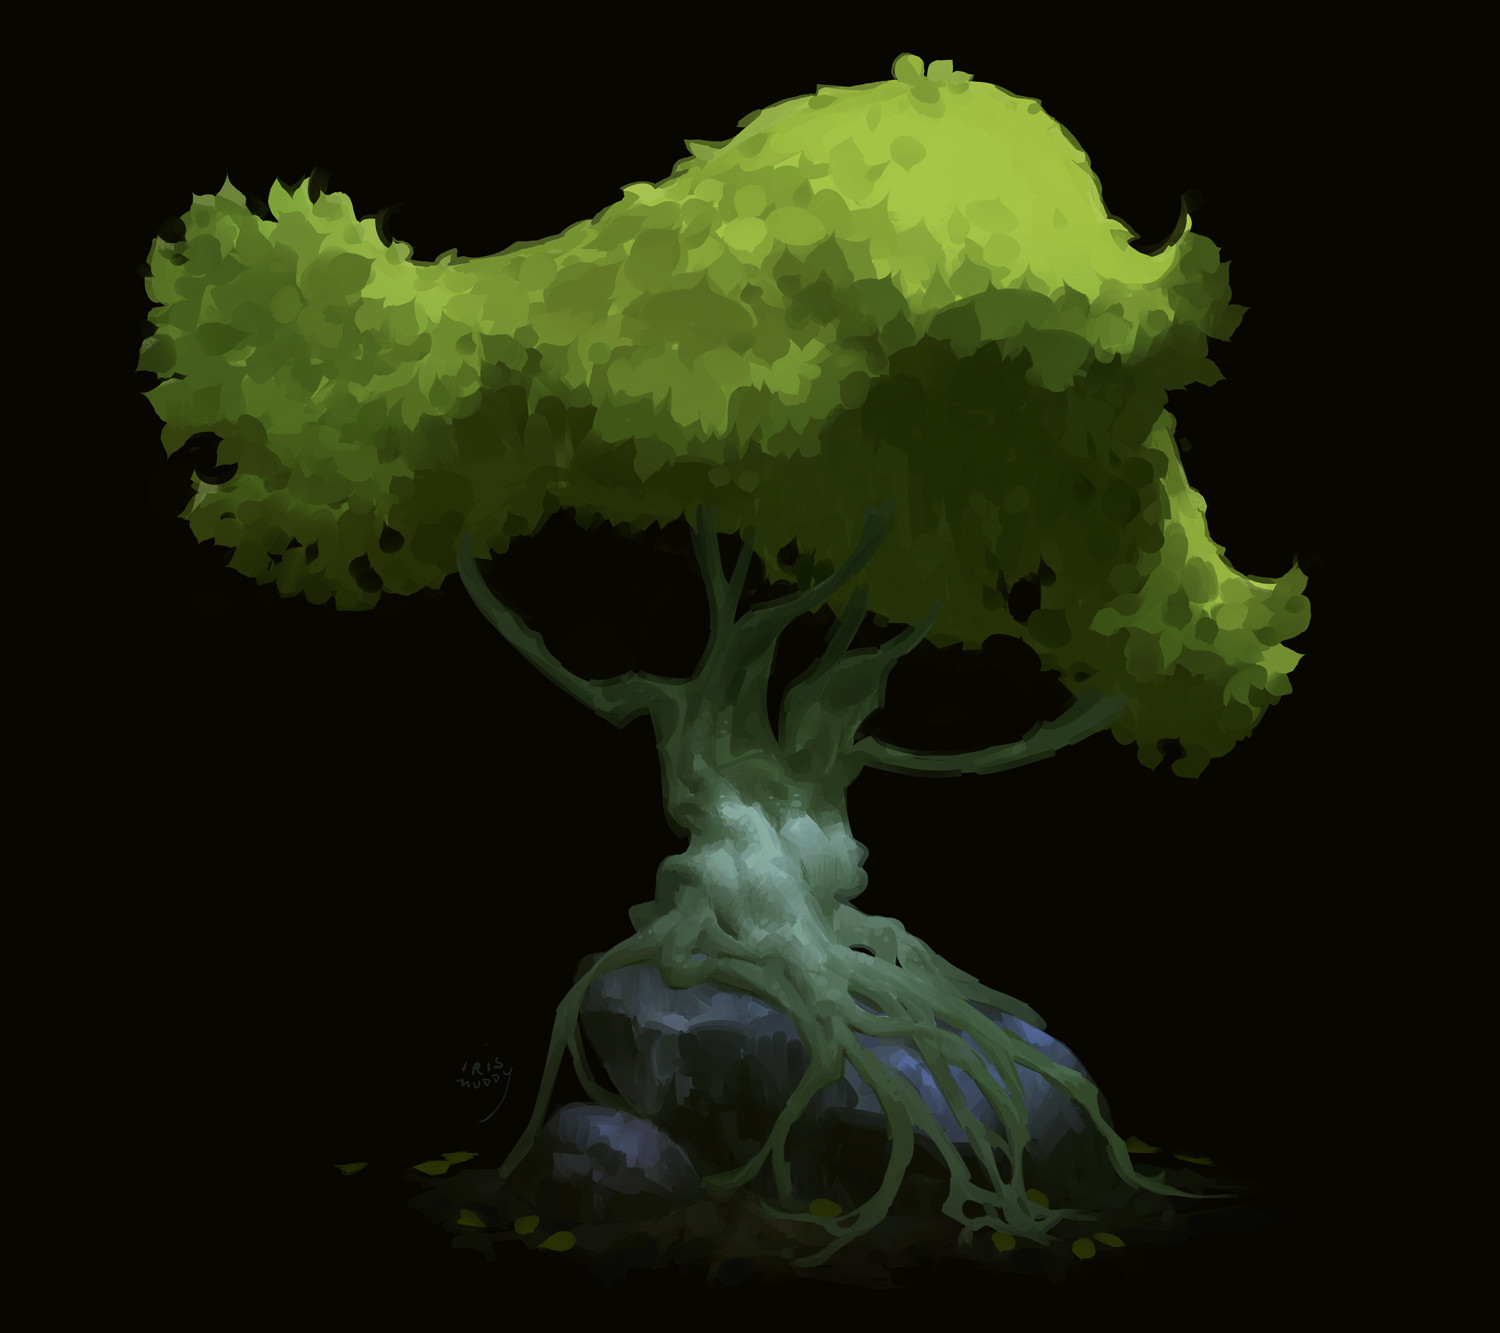
I know the trees are extra and supplemental, but I think some kind of detail to feel more leafy would help unite the scene together as a whole.
Anyway, you've definitely earned an A+ this week! You always do good work 👍
@theluthier Thank you. :-) Yes, you are right, the trees definitely need more detail. I'll see what I can do in the final render...
![]() shiennar Need some mythological creatures and Bacchus prancing about.
shiennar Need some mythological creatures and Bacchus prancing about.
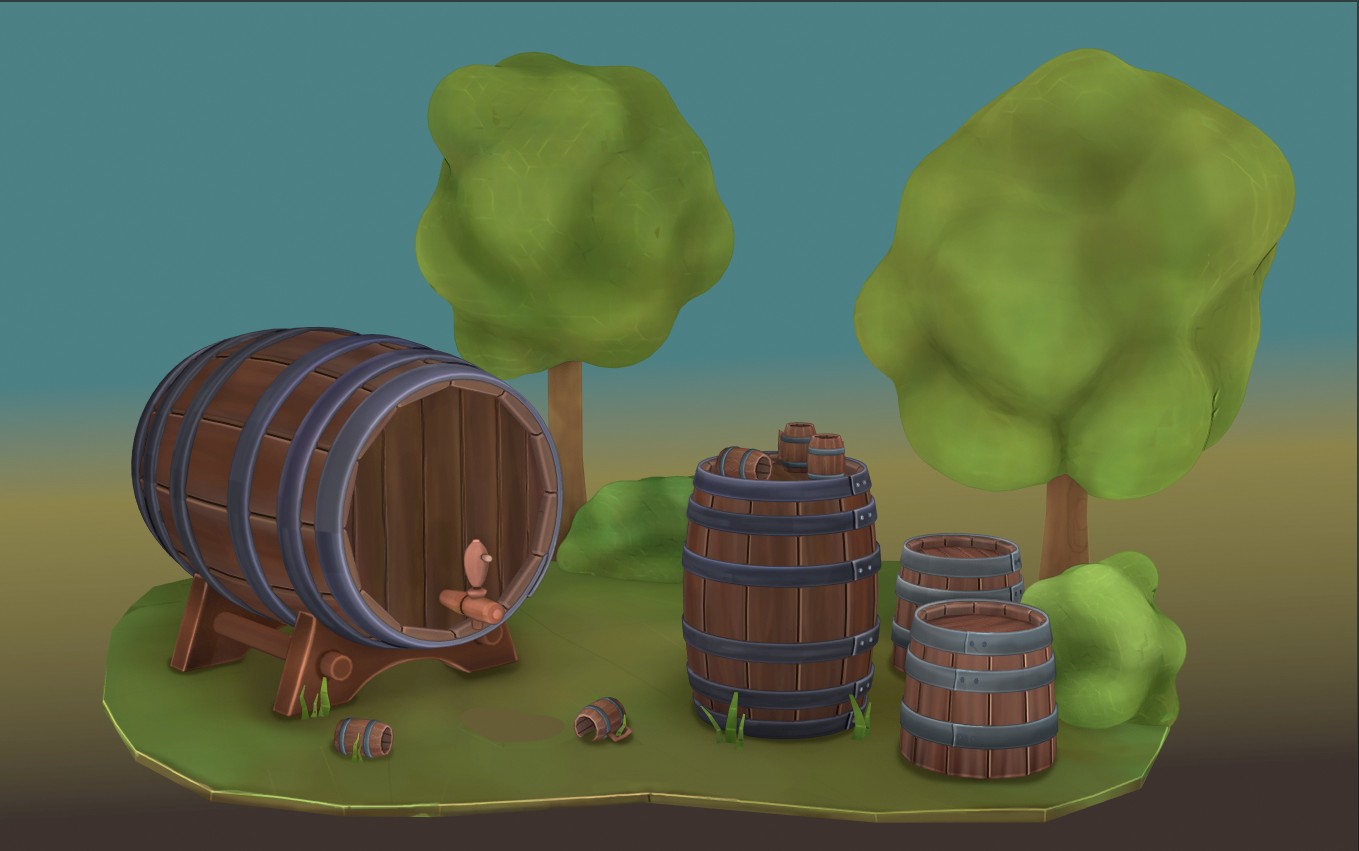
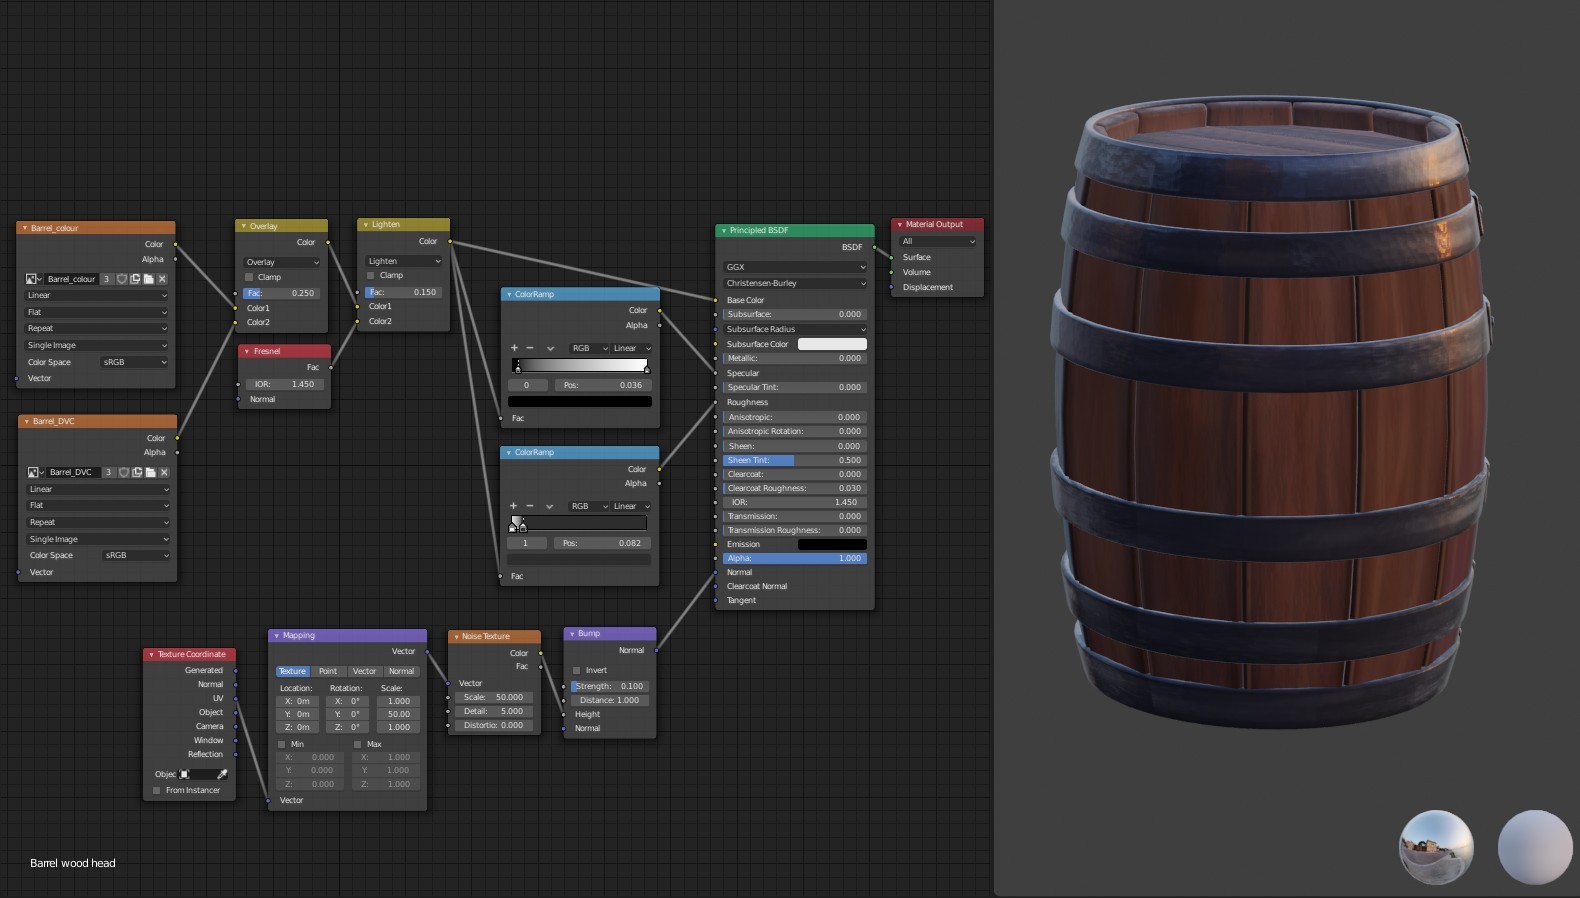
WIP 12: Wood and metal materials
Not too much to mention in this update, because I mostly followed the techniques demonstrated in chapter 2 and 3. I did invert my dirty vertex information and I used a few more procedural effects, but that's about it. I ended up with more materials than I anticipated because the UVs weren't rotated consistently. So the stretched noise that worked well on the stave was cutting across the boards on top. That's definitely something I should keep an eye on in the future.
WIP 13: Scene progression
This is what the materials currently look like in the scene (in LookDev). I'm going to try and add more detail to the environment.