I guess the polite thing would be to introduce myself? My name is Dieter and I'm 35 y/o, living in Belgium with my wife and 2 kids..
I currently work at a large printing company where I'm in charge of manipulating the images for newspapers and magazines (add/remove people, change shirt color, add backgrounds, that sort of thing)... I've been doing that for about 13 years now..
I started with blender about a week ago, when I subscribed to the site, but have had (some) experience in 3DsMax when growing up.. (nothing fancy or professional, just a hobby, never even got to UV mapping and all) But after getting married and having kids that was all pushed back and eventually I haven't touched a 3D model in about 10 years :(
I've had a rough couple of years where I went to some dark periods, and now I just want to do something for myself again, hence subscribing to the site.. I want to pickup 3D/digital painting again, so thank you for the opportunity!
So on with the assignment:
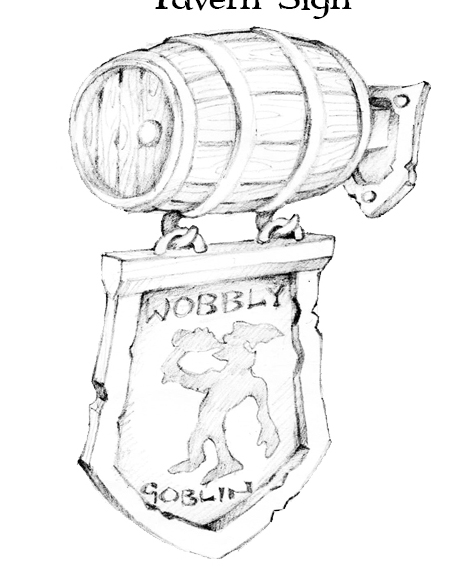
I thought there would have been a lot of swords being modeled so I went with the other objects, and tried to combine the barrel and the sign. Eventually I settled on a tavern sign, because I could incorporate the barrel in the design, really pushing myself..
I even found the perfect concept art on the internet:
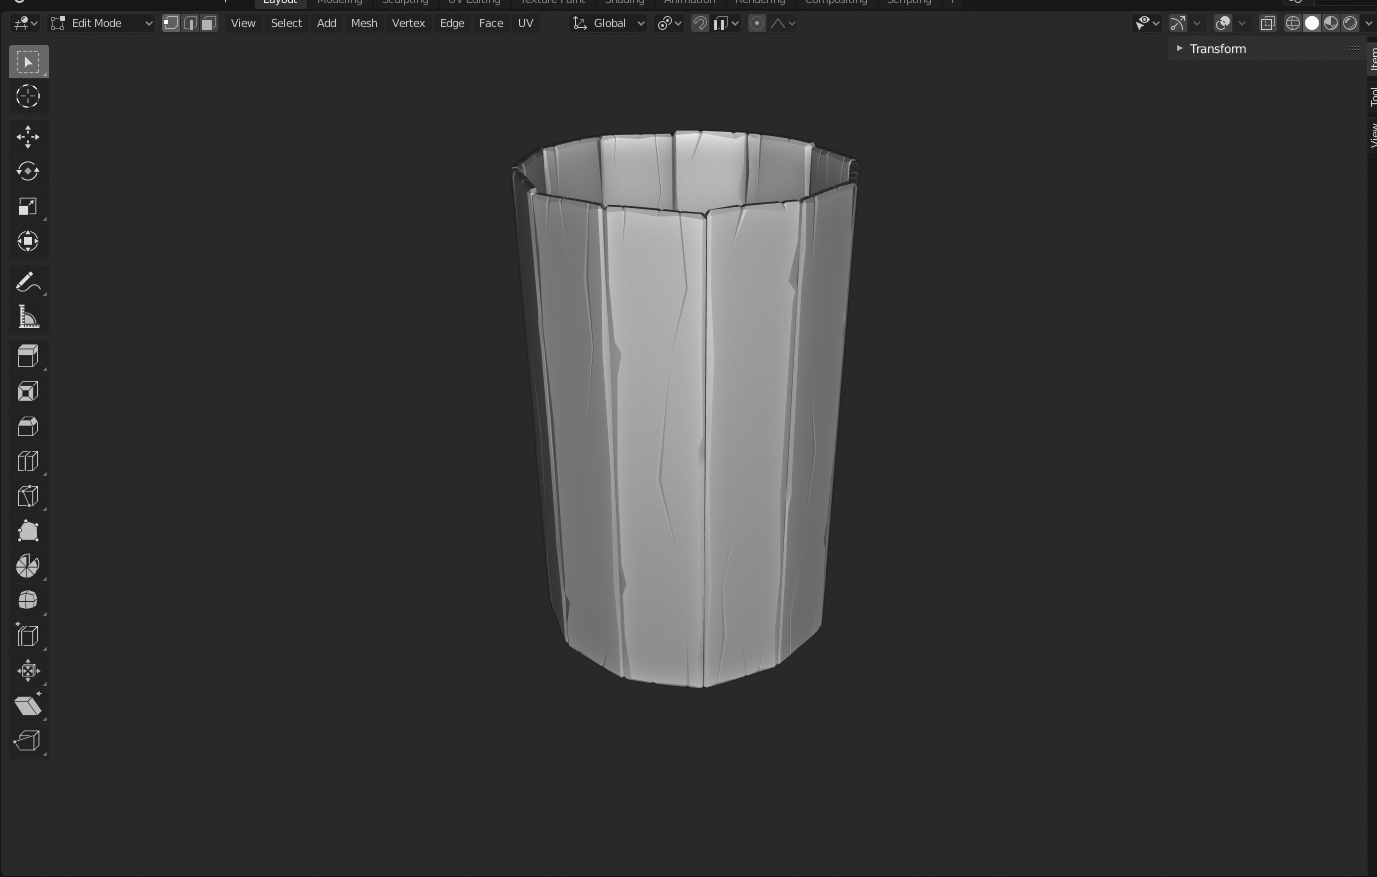
I started working on the barrel first:
- created a 12-side cilinder (without the caps) and extruded the edges inward, I thought it would look better if I had tapered planks instead of straight.. but thinking back I could have spared the trouble and just used box shaped ones..
- deleted all segments except 4, which I seperated into their own pieces (akin the lid of the chest in the tutorial) and added the detail in the wood just like Kent showed
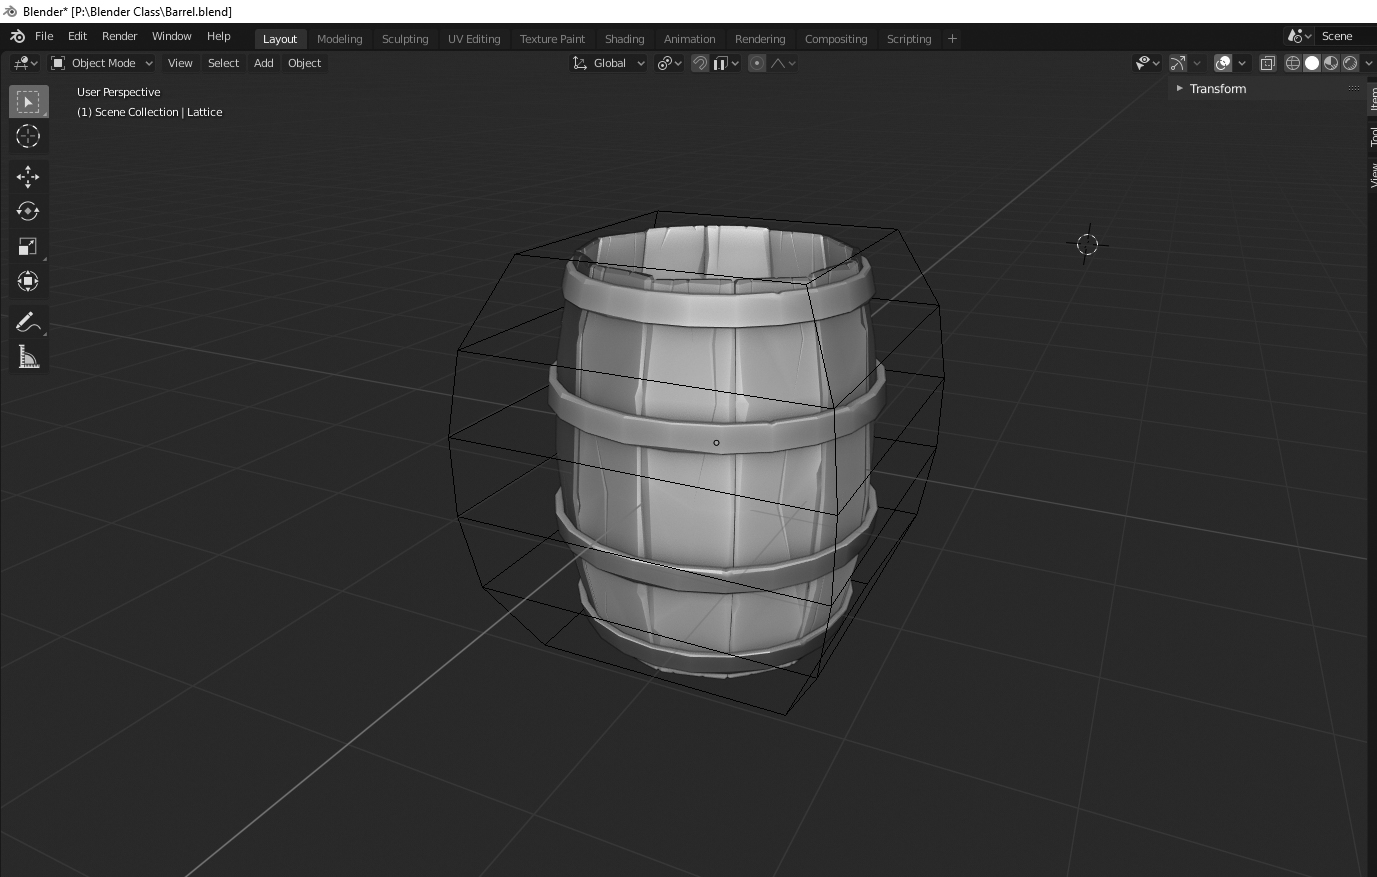
- duplicated the and rotated the planks 30° 3 times so I had a round shape like an oil drum
- since I still had the dimensions of the cylinder, I could easily create the metal rings around it, this time extruding outward, and add the dings and dents.. I created 1 ring and then copied it (linked) 3 times and rotating it so it would be apparent..

- later, I added a Lattice object and added the modifier to both objects, creating a perfect barrel shape without having to worry about the curvature when I modeled the detail :D
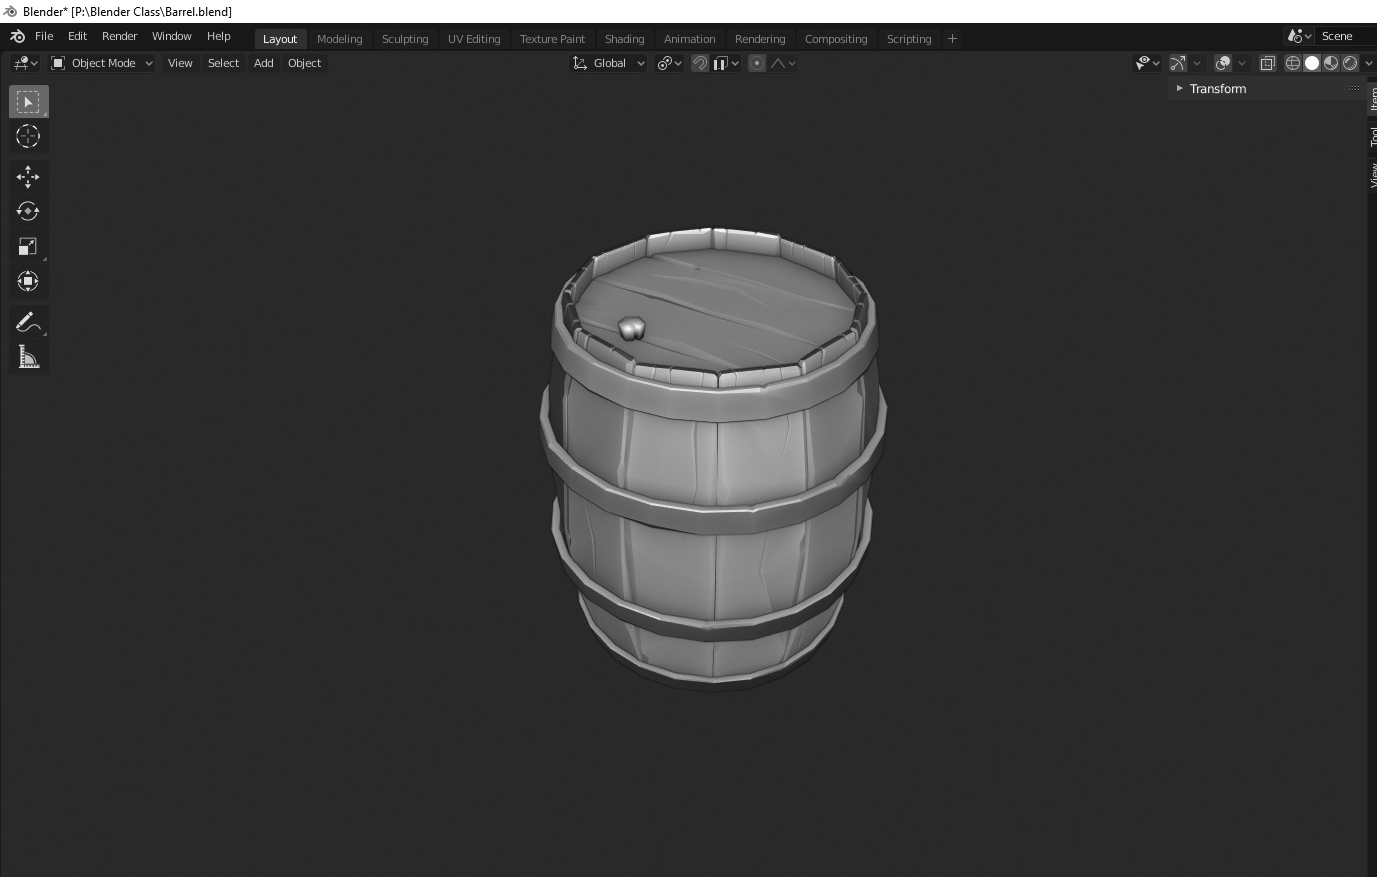
- I modelled the top and bottom (and a cork) using the same methods
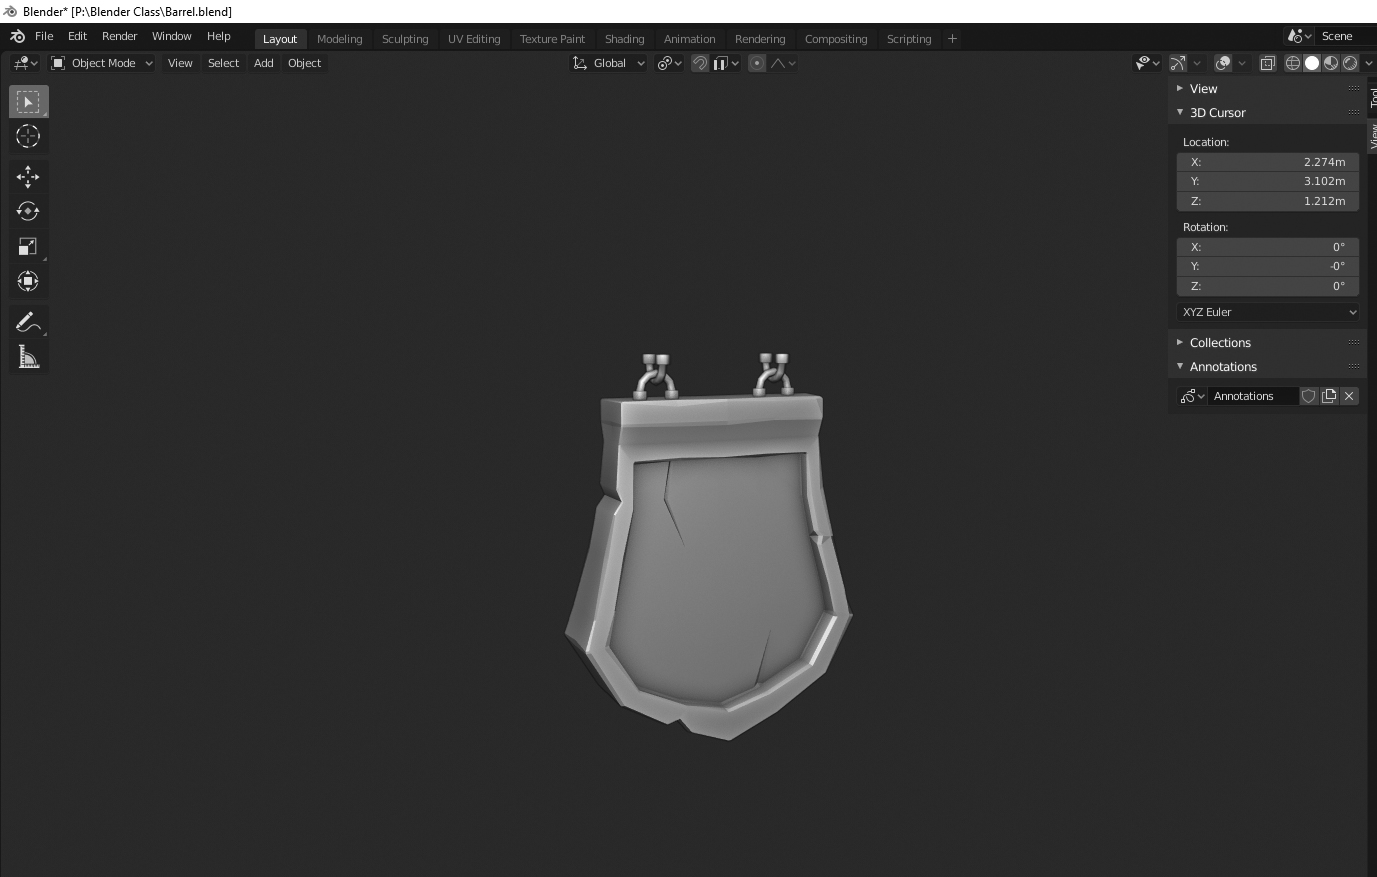
- the sign and the wall mount are modelled from a box, bevelled, then detailed and added a little latice modifier just to add character.. (I took artistic liberties with the design)
- created a copy of the complete barrel collection (didn't know how to group objects) in case I wanted to change something later and I wouldn't have to consider rotation.
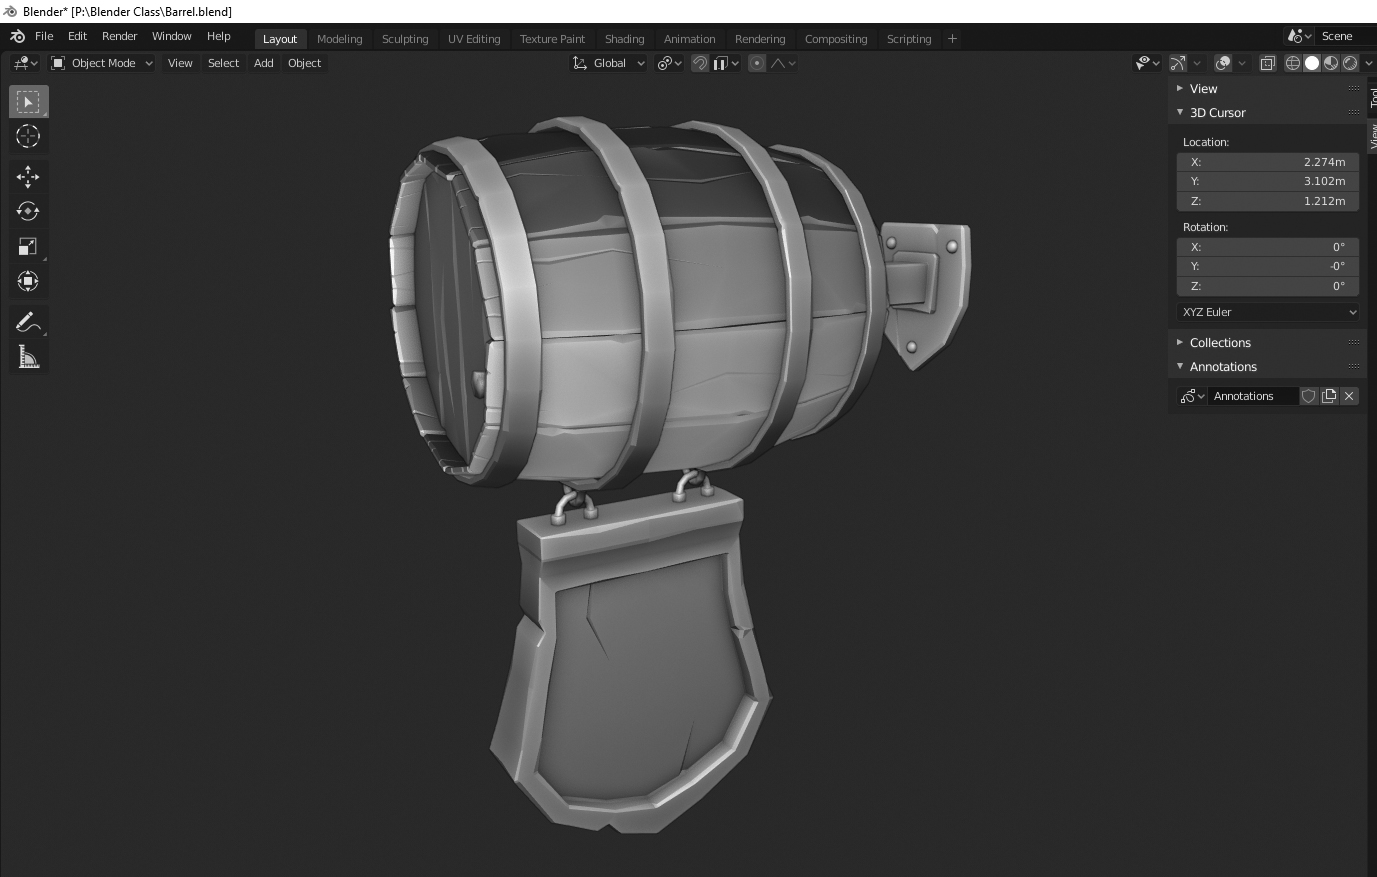
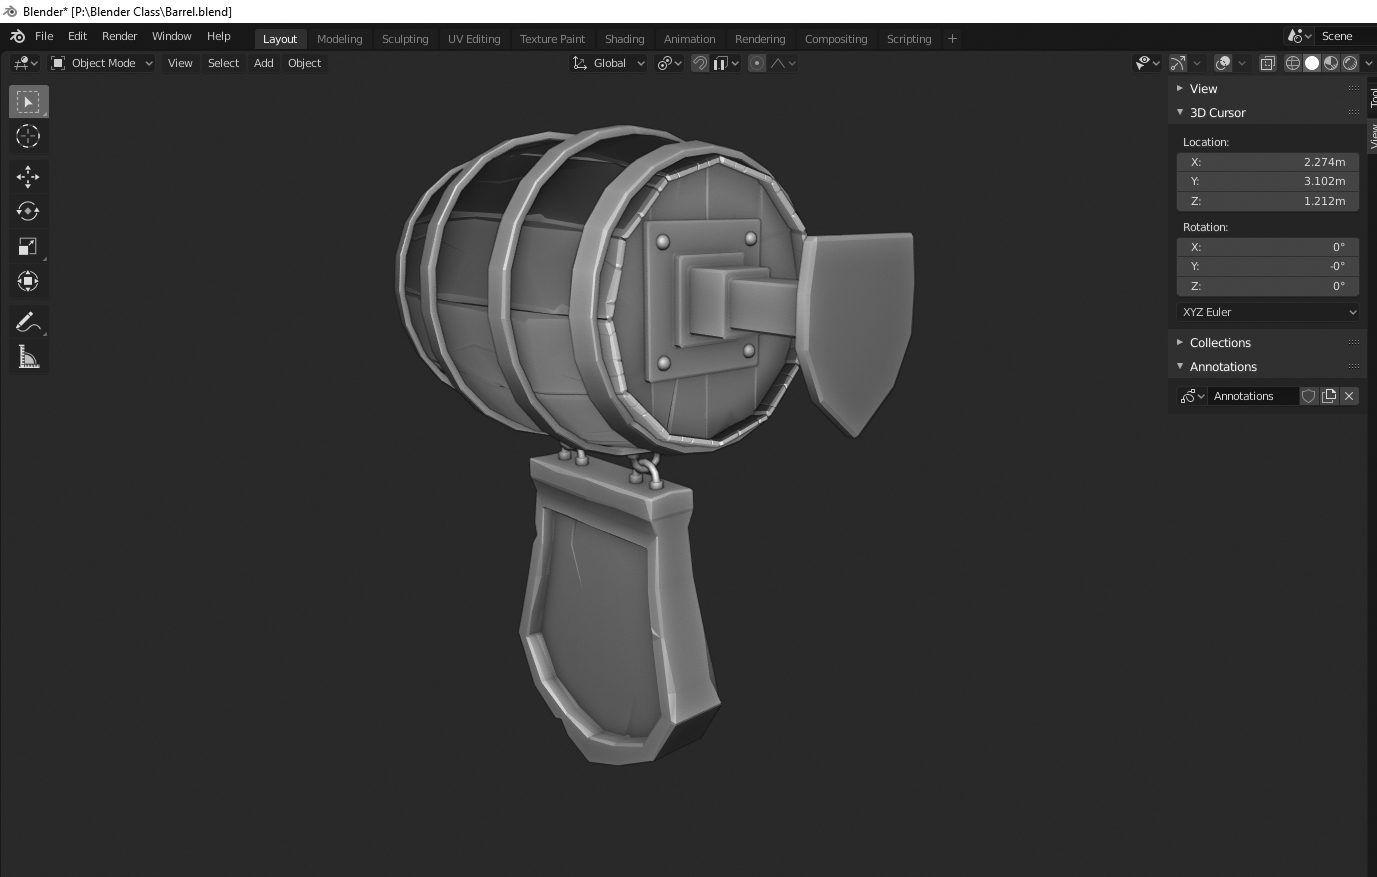
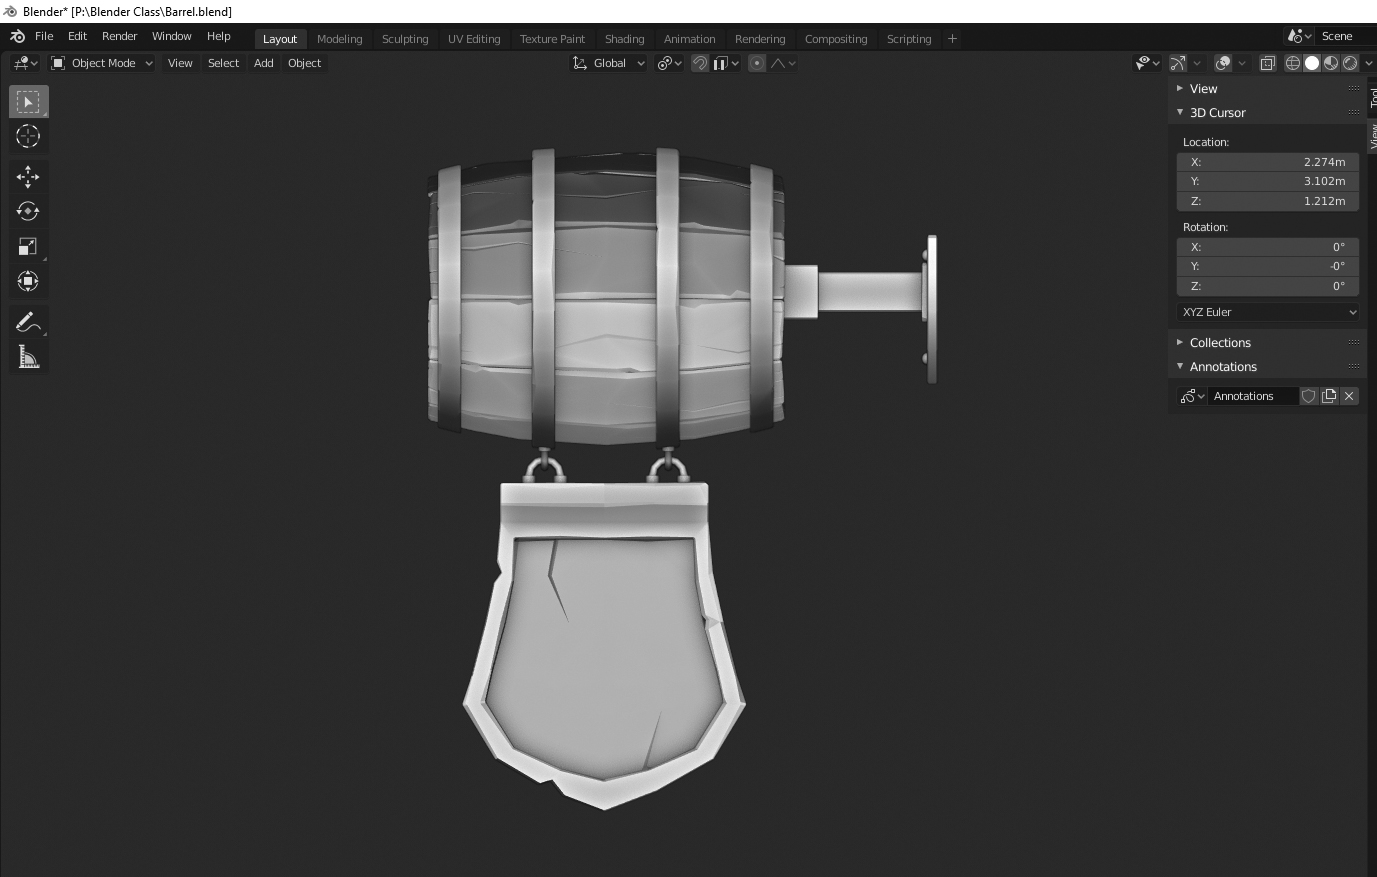
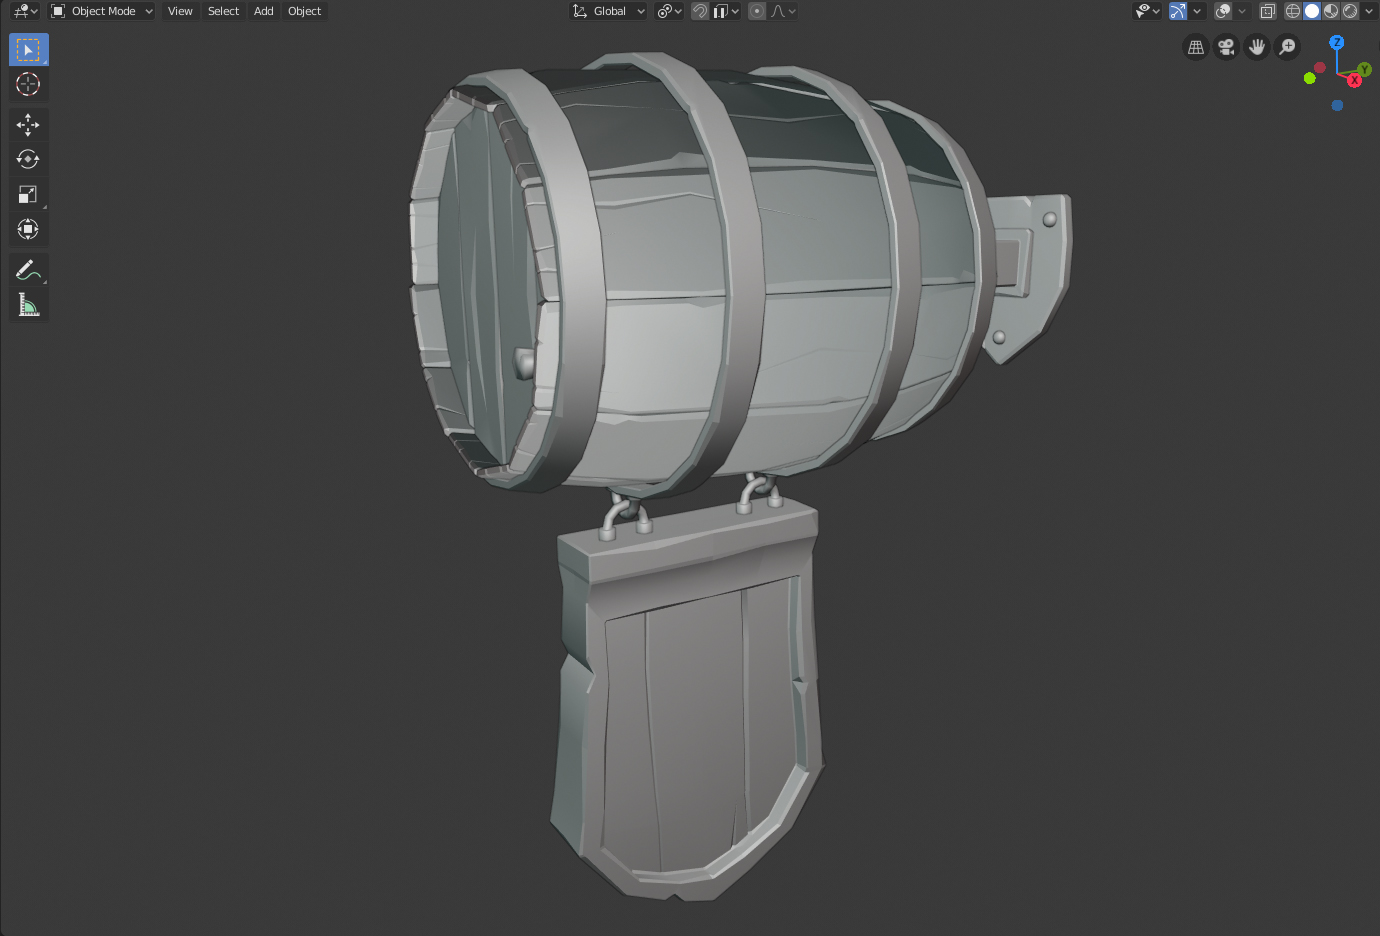
- constructed the "final" model by moving and rotating the pieces:
Unfortunately I'm going on a holiday august 10th for 2 weeks (no access to Blender, probably even no electricity) so I might not be able to finish the entire assignment (sorry Kent) I'm going to try and finish my homework in time using the treasure chest tutorial, I really don't want to fail..
ps: are these screenshots OK or should I render the object?
Very nice! I wouldn't wrap too much up into the grades. They're more for Kent to keep track of things and award XP at the end. But I understand the urge to do well. And hey, who says you can't continue to work on this after the class is over?
What a cool combination! You've put a lot of character in the model already, I can't wait to see what it looks like with some materials and textures!
Arguably the most unique model so far, I love it! And yeah, viewports screenshots are perfectly acceptable, though of course once you start to get to the texturing and lighting renders would make more sense then.
That's a nice concept and you execution is living up to it so far :) Screenshot are fine but if you want a clean one, go to "View" menu and select "Viewport Render Image". It'll give you a screenshot without the interface
I added a little more detail (mainly split the sign up into boards so it looks like wooden planks wedges inside a metal frame) .. Also thinned out the bottom section of the sign, thought it looked too bulky and heavy.. Guess this will be my "final" submission for week 1
Also started the UV unwrap process with the tutorials from @theluthier , actually the first one I followed a tutorial on (Blender, Max, or anything else) that actually got me to understand the where to place the seams.. so glad I took the course!
![]() dieterweireldt Love the tip to use a lattice on the barrel!! Really cool sign :)
dieterweireldt Love the tip to use a lattice on the barrel!! Really cool sign :)
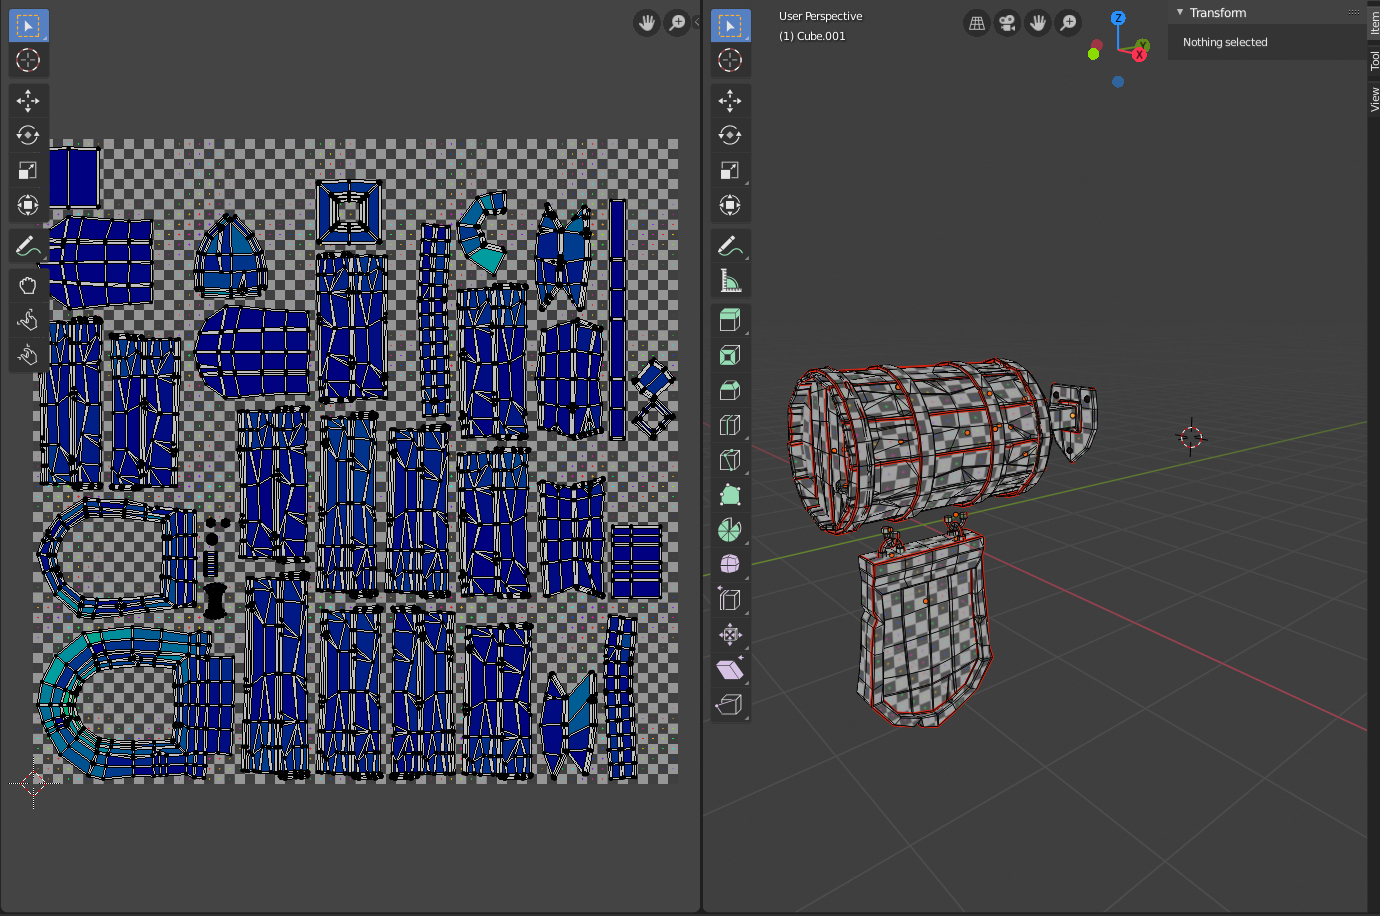
soooooooo, I had some free time (put the kids in front of the tv :D) and had a change to start the UV unwrap process.. Never done it before so pointers would be appreciated:
I did try to seperate the pieces that have completely different materials (like where the metal of the sign goes into the wooden sign itself) Was that a good or bad decision?
sorry if I'm cutting ahead, but I wanted to get done by the time I go on holiday next week
![]() dieterweireldt Doesn't look too bad to me, but then again, I am no expert when it comes to UV Unwrapping;)
dieterweireldt Doesn't look too bad to me, but then again, I am no expert when it comes to UV Unwrapping;)
I am used to using procedural textures, so this is going to be a great exercise for me!
Great concept and your model looks really nice :) I look forward to seeing this textured and rendered!
Sorry I'm a couple days late to this thread. I LOVE what I'm seeing ![]() dieterweireldt! The style in your barrel is 👍👍. I'm also a huge fan of combining the barrel and sign.
dieterweireldt! The style in your barrel is 👍👍. I'm also a huge fan of combining the barrel and sign.
Thanks for sharing a bit about yourself. I truly enjoy getting glimpses like that; where 3D fits for you.
I've had a rough couple of years where I went to some dark periods, and now I just want to do something for myself again
I relate to this a lot. A couple years ago I went though some straits myself and found that personal projects (3D and other) were pivotal for breaking up the clouds.
I'm going on a holiday august 10th for 2 weeks (no access to Blender, probably even no electricity) so I might not be able to finish the entire assignment (sorry Kent)
No worries. Do what you can in the time you have and enjoy the holiday! Even after the class ends this thread will still be here where you're welcome to continue posting.
Keep up the good work!
Thank you for displaying the workflow with screen shots. Very helpful and informative.
I've worked with modifiers, too. But your approach seems even more effective to me.
I like the combination with the shield, very stylish.
I think to separate the parts with different materials for the UV map is a good idea. And it is alway a good idea to use the place effective with less empty space but some room between the object (seems) and to have uniform surfaces without stretch . So it looks good for me.
It depends on how you want to texture and how you want to use the model later on.
Thats my way for the decisions of unwrapping. I have already used several UV maps or put parts on top of each other etc..
However, I have little experience with texture painting and which uv is most useful there.
Have a nice holiday
![]() dieterweireldt Something is strange with your barrel that I only just now noticed, like the normals are facing the wrong direction. That's my gut feeling, anyway.
dieterweireldt Something is strange with your barrel that I only just now noticed, like the normals are facing the wrong direction. That's my gut feeling, anyway.
I'm not the greatest with UVs myself, something I need to review, as well. Hopefully Kent's next livestream will clear some things up.
![]() silentheart00 Actually I think that's just the Viewport shading.
silentheart00 Actually I think that's just the Viewport shading.
But to check that, go to the Overlays Dropdown Menu and under Geometry select Face Orientation.
That will show you very clearly if there is a Normal issue....
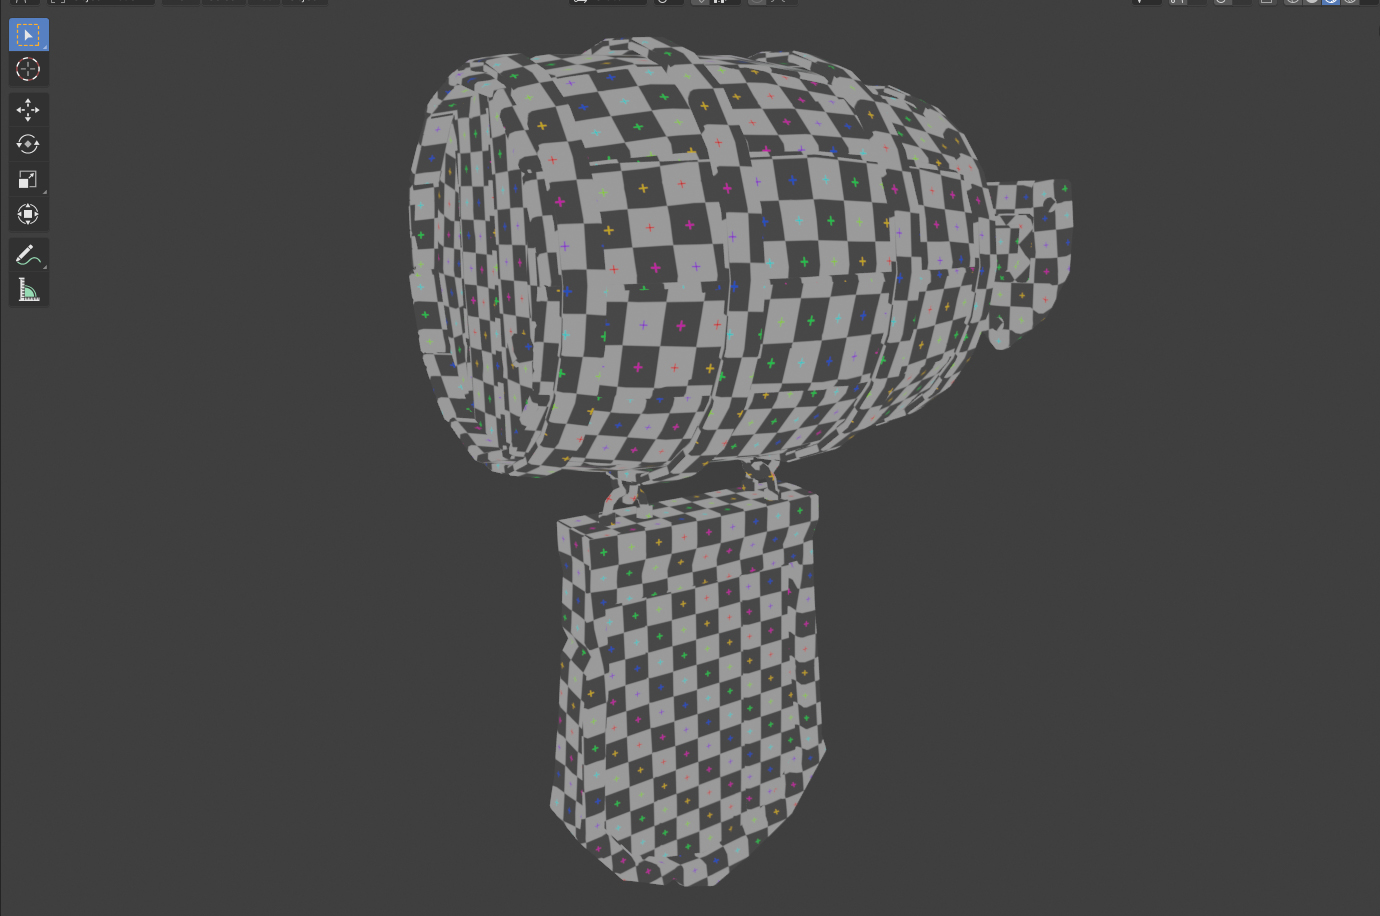
![]() silentheart00 you where completely correct :O I checked using
silentheart00 you where completely correct :O I checked using ![]() spikeyxxx 's method and everything was blue except for the barrel planks and the piece that connects the pole to the wall.. looked up online how to fix it and now everything is blue :D
spikeyxxx 's method and everything was blue except for the barrel planks and the piece that connects the pole to the wall.. looked up online how to fix it and now everything is blue :D
And now that you mention it, I do kind of notice that the curveture is wrong, like the roll inwards.. am I seeing the inside of the plank or something? Not really sure what happened, glad you noticed.. Does this affect my UV unwrap or do I have to start over?
thank you both!
![]() dieterweireldt I am not sure, is that still there after you fixed the Normals?
dieterweireldt I am not sure, is that still there after you fixed the Normals?
In that case it should be a Vertex placement issue.
But as far as I know, whatever it is, your UV map should still be ok.
![]() dieterweireldt Yep, your unwrap should still be okay. Normal directions are more for how the light interacts with your object, so the shading can give you a hint that something is out of place.
dieterweireldt Yep, your unwrap should still be okay. Normal directions are more for how the light interacts with your object, so the shading can give you a hint that something is out of place.