My homework thread for the October 2018 Class.
Week 1:
Week 2:
Week 3:
Week 4:
Nah, I don't want to feel like I'm click-baiting you to go to the gallery, so I'll hide it here. Who would go to page three, right? :-)
![]() shiennar Katerina especially likin g your lighting match exercise, there is so nice and warm atmosphere from the lighting, plus also the materials greatly support it
shiennar Katerina especially likin g your lighting match exercise, there is so nice and warm atmosphere from the lighting, plus also the materials greatly support it
![]() shiennar Once again, excellent work this week. You vehicle is notable as one of the most intentionally lit submissions. As you said, since you S&L'd the car during the June class, it seems you were freed to focus on lighting for mood and visual effect rather than simple realism. Good stuff.
shiennar Once again, excellent work this week. You vehicle is notable as one of the most intentionally lit submissions. As you said, since you S&L'd the car during the June class, it seems you were freed to focus on lighting for mood and visual effect rather than simple realism. Good stuff.
And I really like your light match. Beyond being a close match, it's interesting what you've uncovered about Eevee and Cycles node compatibility. It seems there's still a lot of work to do before Eevee is truly compatible.
Lots of good work. An A in from me 👍
PS: THANK YOU for cutting week 2's reel 🙇🏻♂️
Week 3 - Act 1 (Character lighting)
I had a lot of things to consider this week. I stumbled upon this image on ArtStation and it made me want to re-create the material procedurally in Blender. I made a professor character back in the second class, but he unfortunately isn't detailed enough to be able to pull off that look. However, I was lucky enough to find this great sculpture by Alena Dubrovina on Sketchfab, which was a pleasure to light.
I also had to decide between Eevee and Cycles. I started with Eevee but I was having really hard time creating soft shadows on the floor. I did use all kinds of probes, but they didn't help. Also, the AO and Pointiness nodes still don't work - and since they are quite important for the material, I ended up using Cycles.
In the end, I toned down the "dusty" look a lot, but I'm fairly happy with how it turned out. With that said, however, I was also staring at it for more than two days and it's quite possible I've overlooked something obvious. If you think I can improve it further, please let me know.
![]() shiennar wow this really is great. It's wonderful. I actually can't say anything to improve since it's perfect to me
shiennar wow this really is great. It's wonderful. I actually can't say anything to improve since it's perfect to me
![]() shiennar Great work! The thing coming out of his right hand kind of looks like the Blender logo.
shiennar Great work! The thing coming out of his right hand kind of looks like the Blender logo.
Week 3 - Act 2
I decided not to get defeated by Eevee's harsh shadows - and lo and behold, I won this round. Sort of. Maybe.
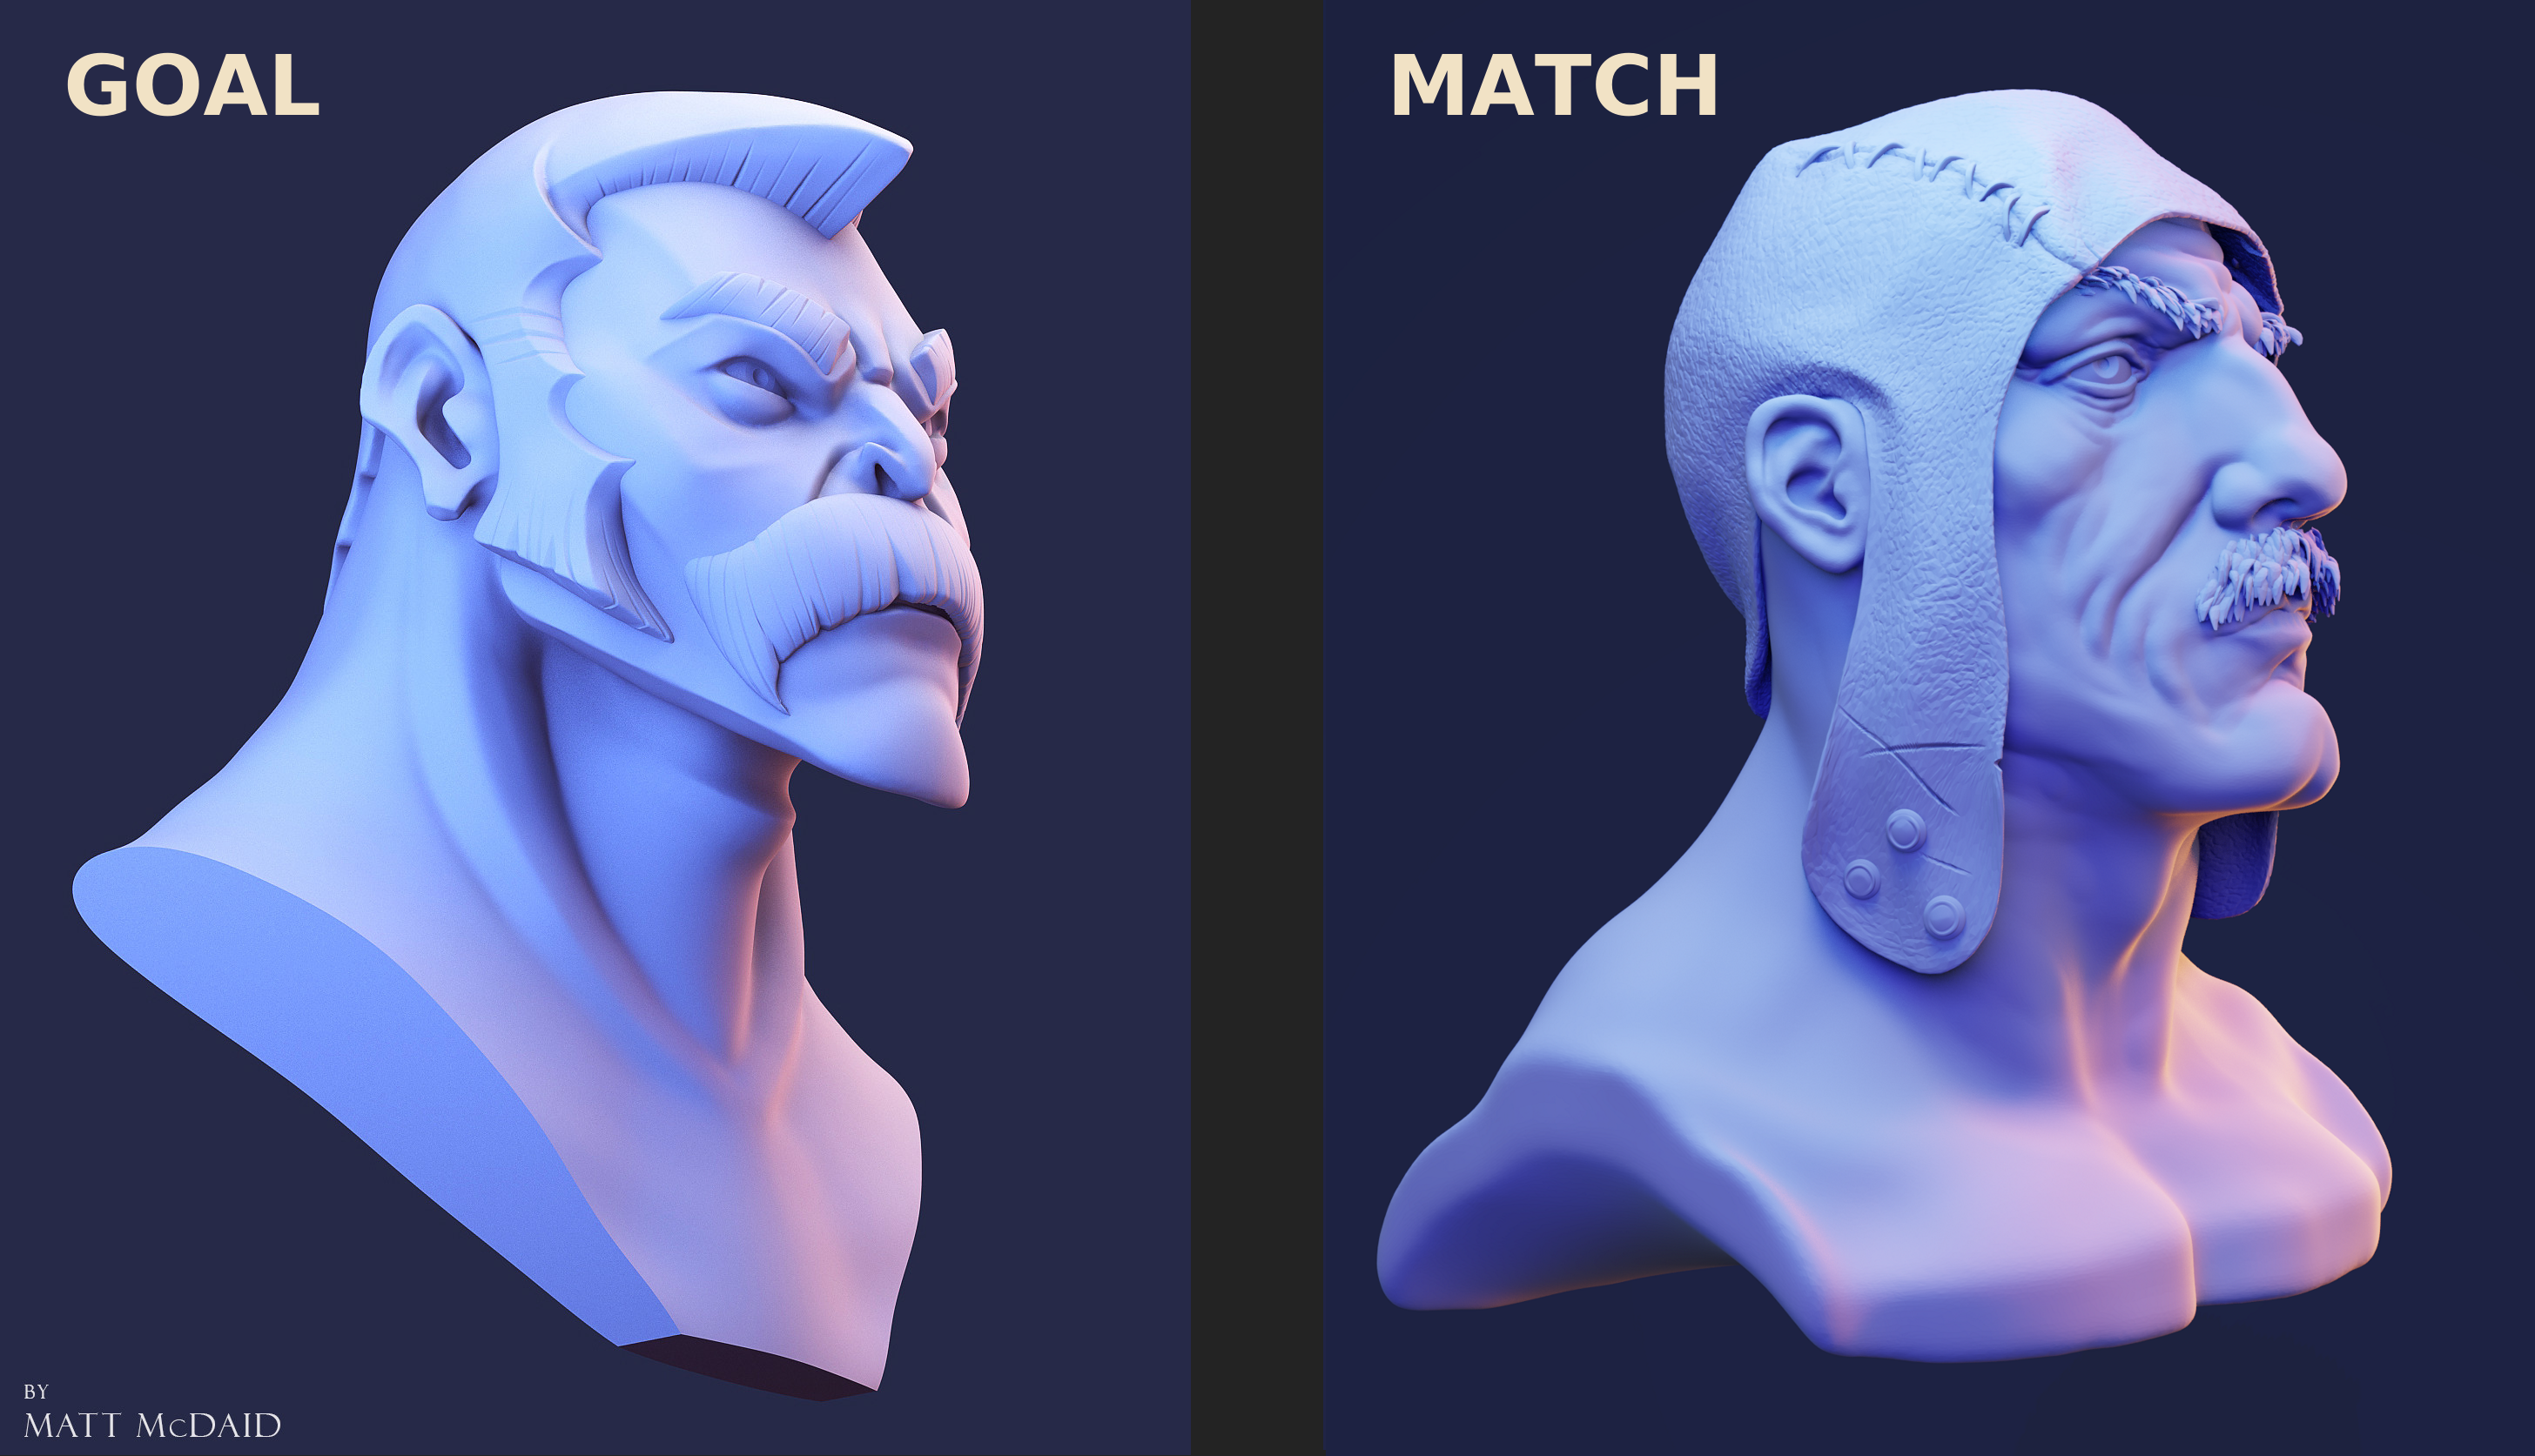
The character model I used is "Male character head" by flioink and the target image is "The Captain" by Matt McDaid. Rendered in Eevee, using an HDR, 4 area lamps, 1 point lamp. I originally had 2 probes, but they somehow made things worse, so I deleted them.
There are couple of things that are different, most notably the dark shadow under captain's chin, which is missing from my version. I *think* it's there because of captain's chiselled features. Another difference is the surface detail. The captain is very smooth, which (again, I think) makes the reflections look sharper and brighter than those on the detailed cap of the other character.
However, it can also be me not doing it right, so once again, if you have tips for me to improve it, please don't hesitate to send them my way.
EDIT: Added new version, see the post below.
![]() shiennar Very close! I think the goal image has a bit more purplish hue on the back, looks like yours is a little bit bluer (just a very tiny touch), but still extremely close. I've done them too in eevee so I know it's not easy with all those extra settings, kudos to you for trying again. The result is worth it, great job! 😄
shiennar Very close! I think the goal image has a bit more purplish hue on the back, looks like yours is a little bit bluer (just a very tiny touch), but still extremely close. I've done them too in eevee so I know it's not easy with all those extra settings, kudos to you for trying again. The result is worth it, great job! 😄
![]() shiennar Nice lighting on the character. The character match is pretty close. Good work.
shiennar Nice lighting on the character. The character match is pretty close. Good work.
![]() shiennar looking really good. amazing work agian . one thing i noticed is that at the back of youre model you have a pinkish rim light at the nape i think its called (or more a bit above it actually) but its someting really small . else its really perfectly done
shiennar looking really good. amazing work agian . one thing i noticed is that at the back of youre model you have a pinkish rim light at the nape i think its called (or more a bit above it actually) but its someting really small . else its really perfectly done
yyukinoh1989 Hmm, good call, I didn't notice that. Must be the right lamp reaching too far. I'll try to give it another go tomorrow. Thanks. :-)
![]() shiennar np at all . guess indeed that should be the issue . but even with that the lightning match looks really wow .
shiennar np at all . guess indeed that should be the issue . but even with that the lightning match looks really wow .
You sure are tallented :D
"I'll just have a quick look if I can improve this..."
[Many iterations later]
I think this is an improvement. Maybe? I can't tell anymore. I was trying to get rid of the pink area at the back of the neck, get the front of the neck closer to the original, and remove the harsh shadows from the top of his face. This is especially tricky because of the cap, but it will have to do. Also, the pink lines at the very left and bottom of his neck come from the HDR and I just didn't find a way of removing them. So, here is the comparison of what's been changed.
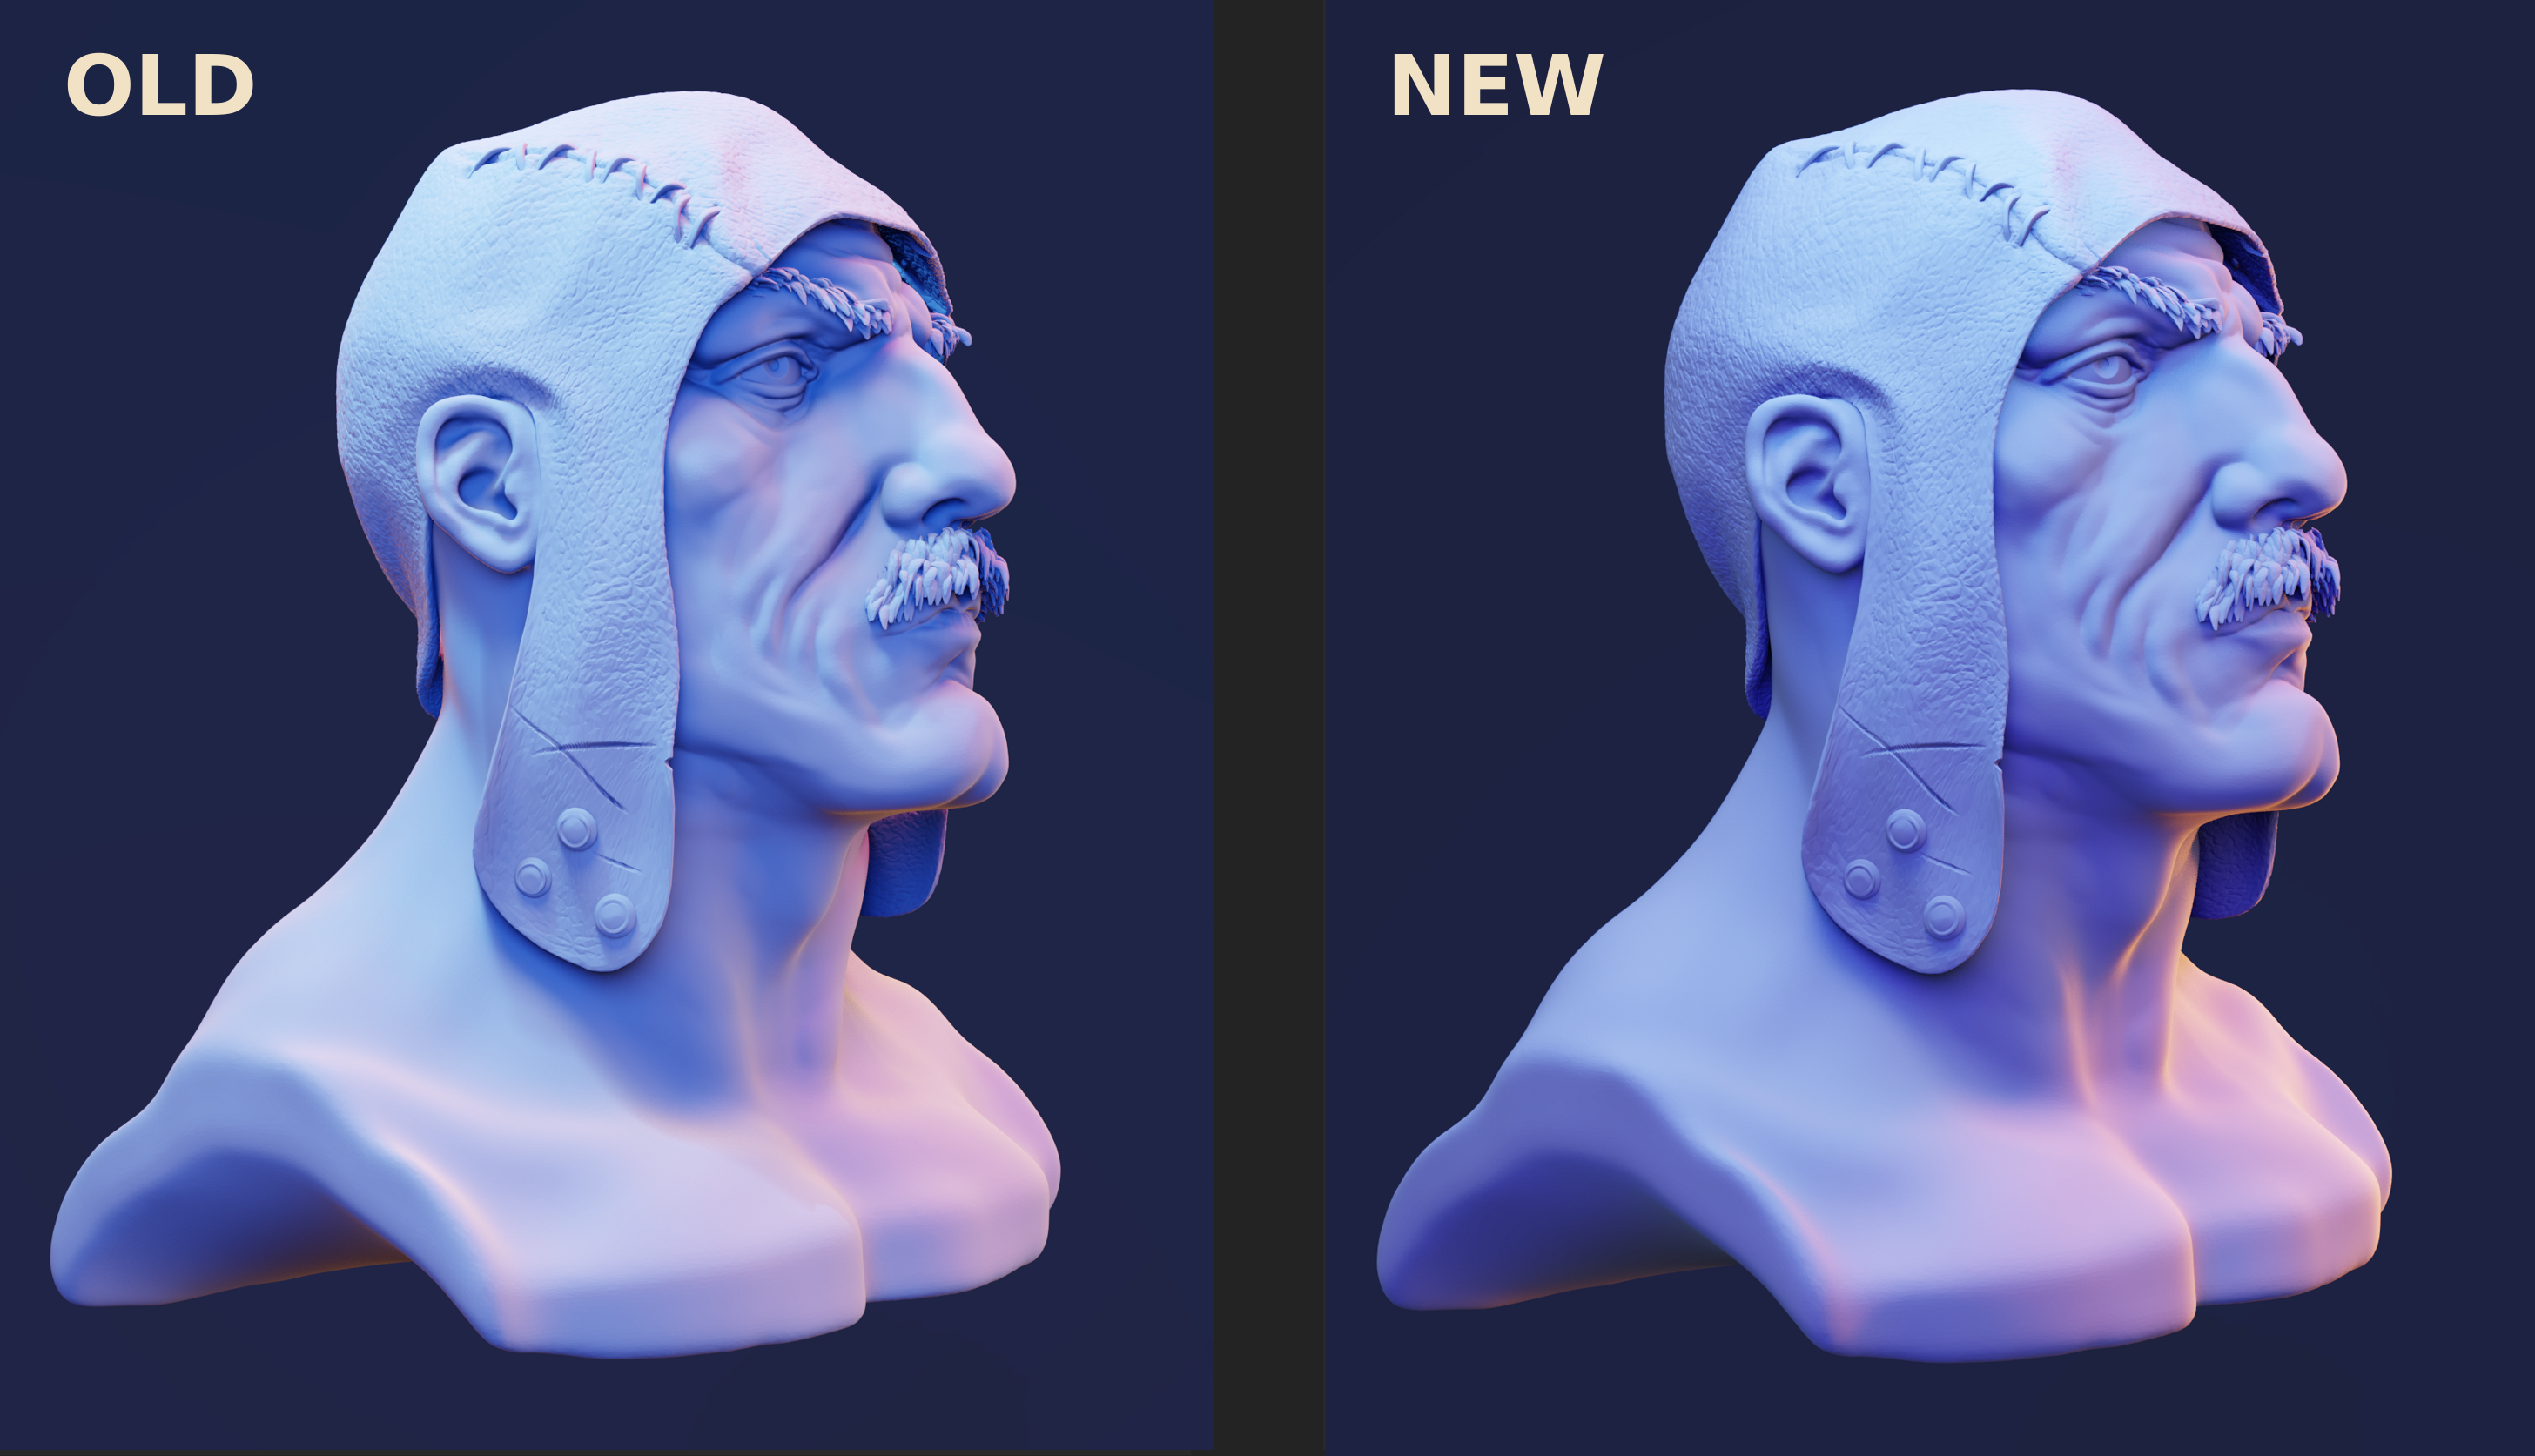
![]() shiennar Hmmm.. the Goal is more chiseled and stylized than yours, so which is better might be a little harder to judge, but I guess the new one is closer to the original. that said.. I'm debating on whether I like the extra light highlighting the cheeks on the old one or the shadows deepening in the creases in the new one.. both are appealing to me :D
shiennar Hmmm.. the Goal is more chiseled and stylized than yours, so which is better might be a little harder to judge, but I guess the new one is closer to the original. that said.. I'm debating on whether I like the extra light highlighting the cheeks on the old one or the shadows deepening in the creases in the new one.. both are appealing to me :D
![]() shiennar Fantastic work again! Both your renders this week are very strong.
shiennar Fantastic work again! Both your renders this week are very strong.
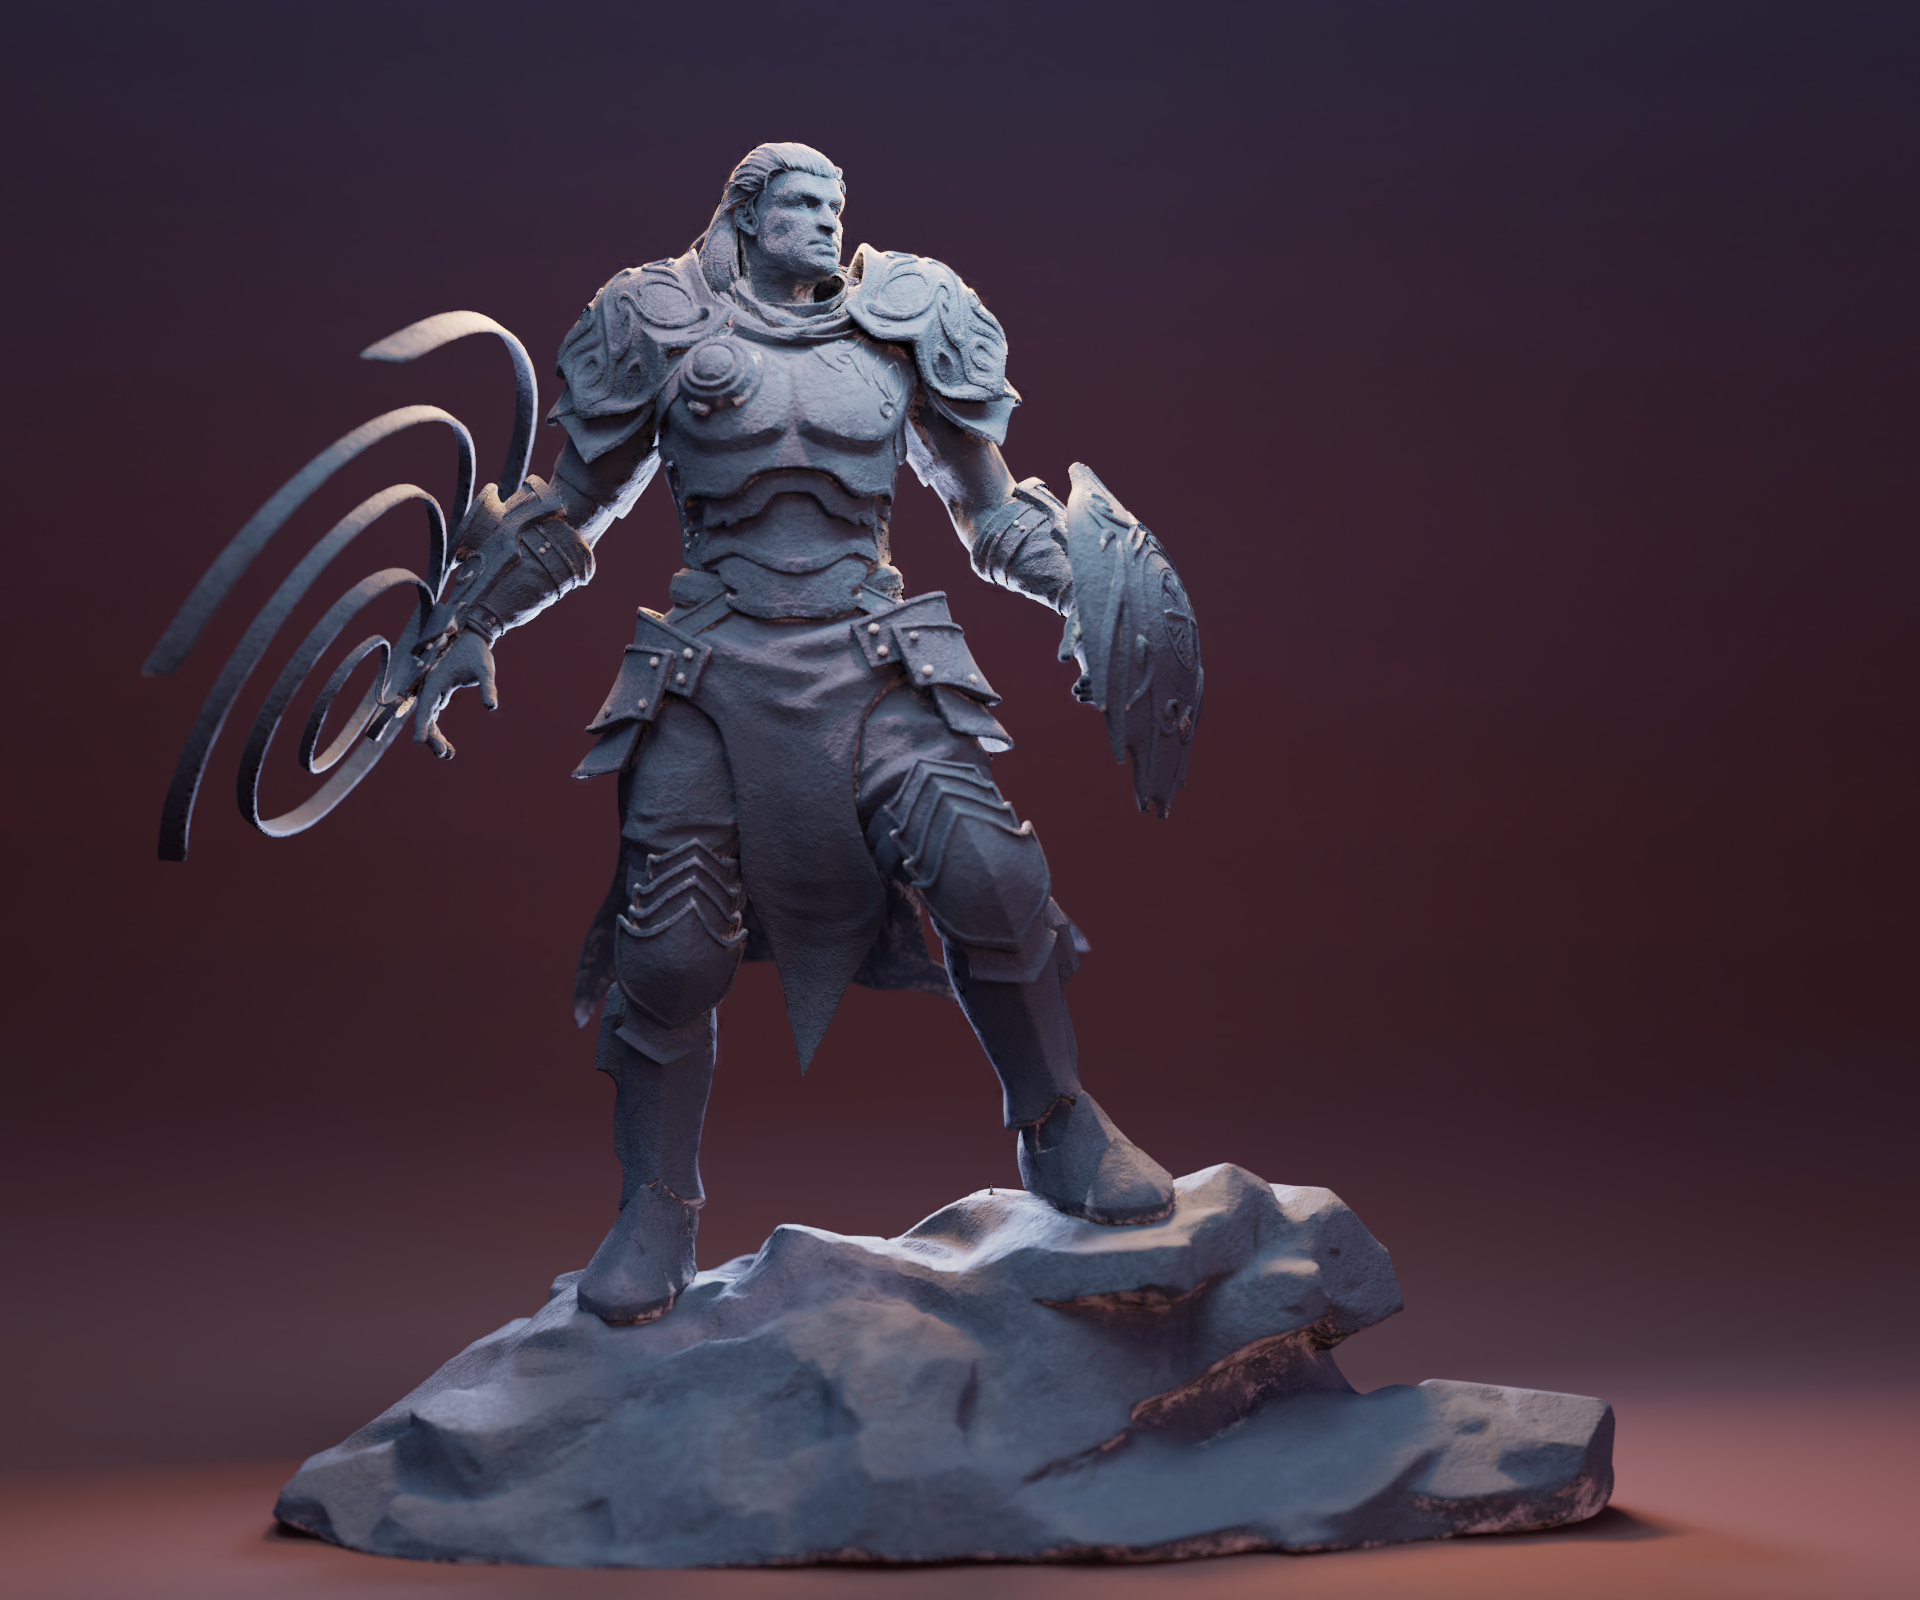
Your character has a striking rim light and a wonderful gradient of light starting brightest at the head and diminishing toward the floor. Love that. The colors are working well together as well. It's a great model-centric light setup. The only thing that kinda messes with me is the noisy/bumpy detail on the underside of the rock's crags:
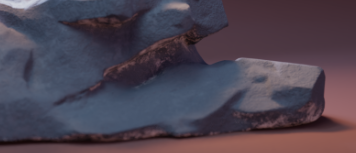
See what I mean in the brightly illuminated undersides? It kinda feels like an over-exaggerated bump. But it's also reflecting light that I can't tell where it's coming from. Anyhoo it's a small note really. The character itself is excellent: An A from me.
And your light match is dead on. Beautiful work. One of my faves this week. A+
@theluthier Thank you very much. :-) The noise is actually the grey dust material that is showing up on the rock more than it is on the body. Maybe the rock has less detailed geometry, now that I think about it, I didn't check that. I wasn't a fan of that area myself, but I didn't want to get rid of the AO dust effect completely and I couldn't figure out how to isolate the character itself.