If you're like me, as you scour the internet for inspirational 3D art, you run into some amazing CG lighting setups. You know, the ones that make you want to be better! Well why should we let them have all the fun? Why can't we give it a go?
Therefore, the challenge here is to select one of your favorite lighting examples and do your best to match it in Blender. If you don't keep a collection of your favorites, feel free to use mine. Analyze light colors, number of lights, position, etc and recreate. Use either lamps or HDRi's or both - whatever you need to get the result.
Once you select your favorite, open up one of your models (or download this posed Baker model), do your best to match the lighting and materials, and post it here. Here's my attempts:

Original by Julien Kaspar
Source render by Bruno Ortolland

Image Credit: "Lüfor"by Alexandre Aroul

Image Credit: "Super Mario" by Mark Henriksen

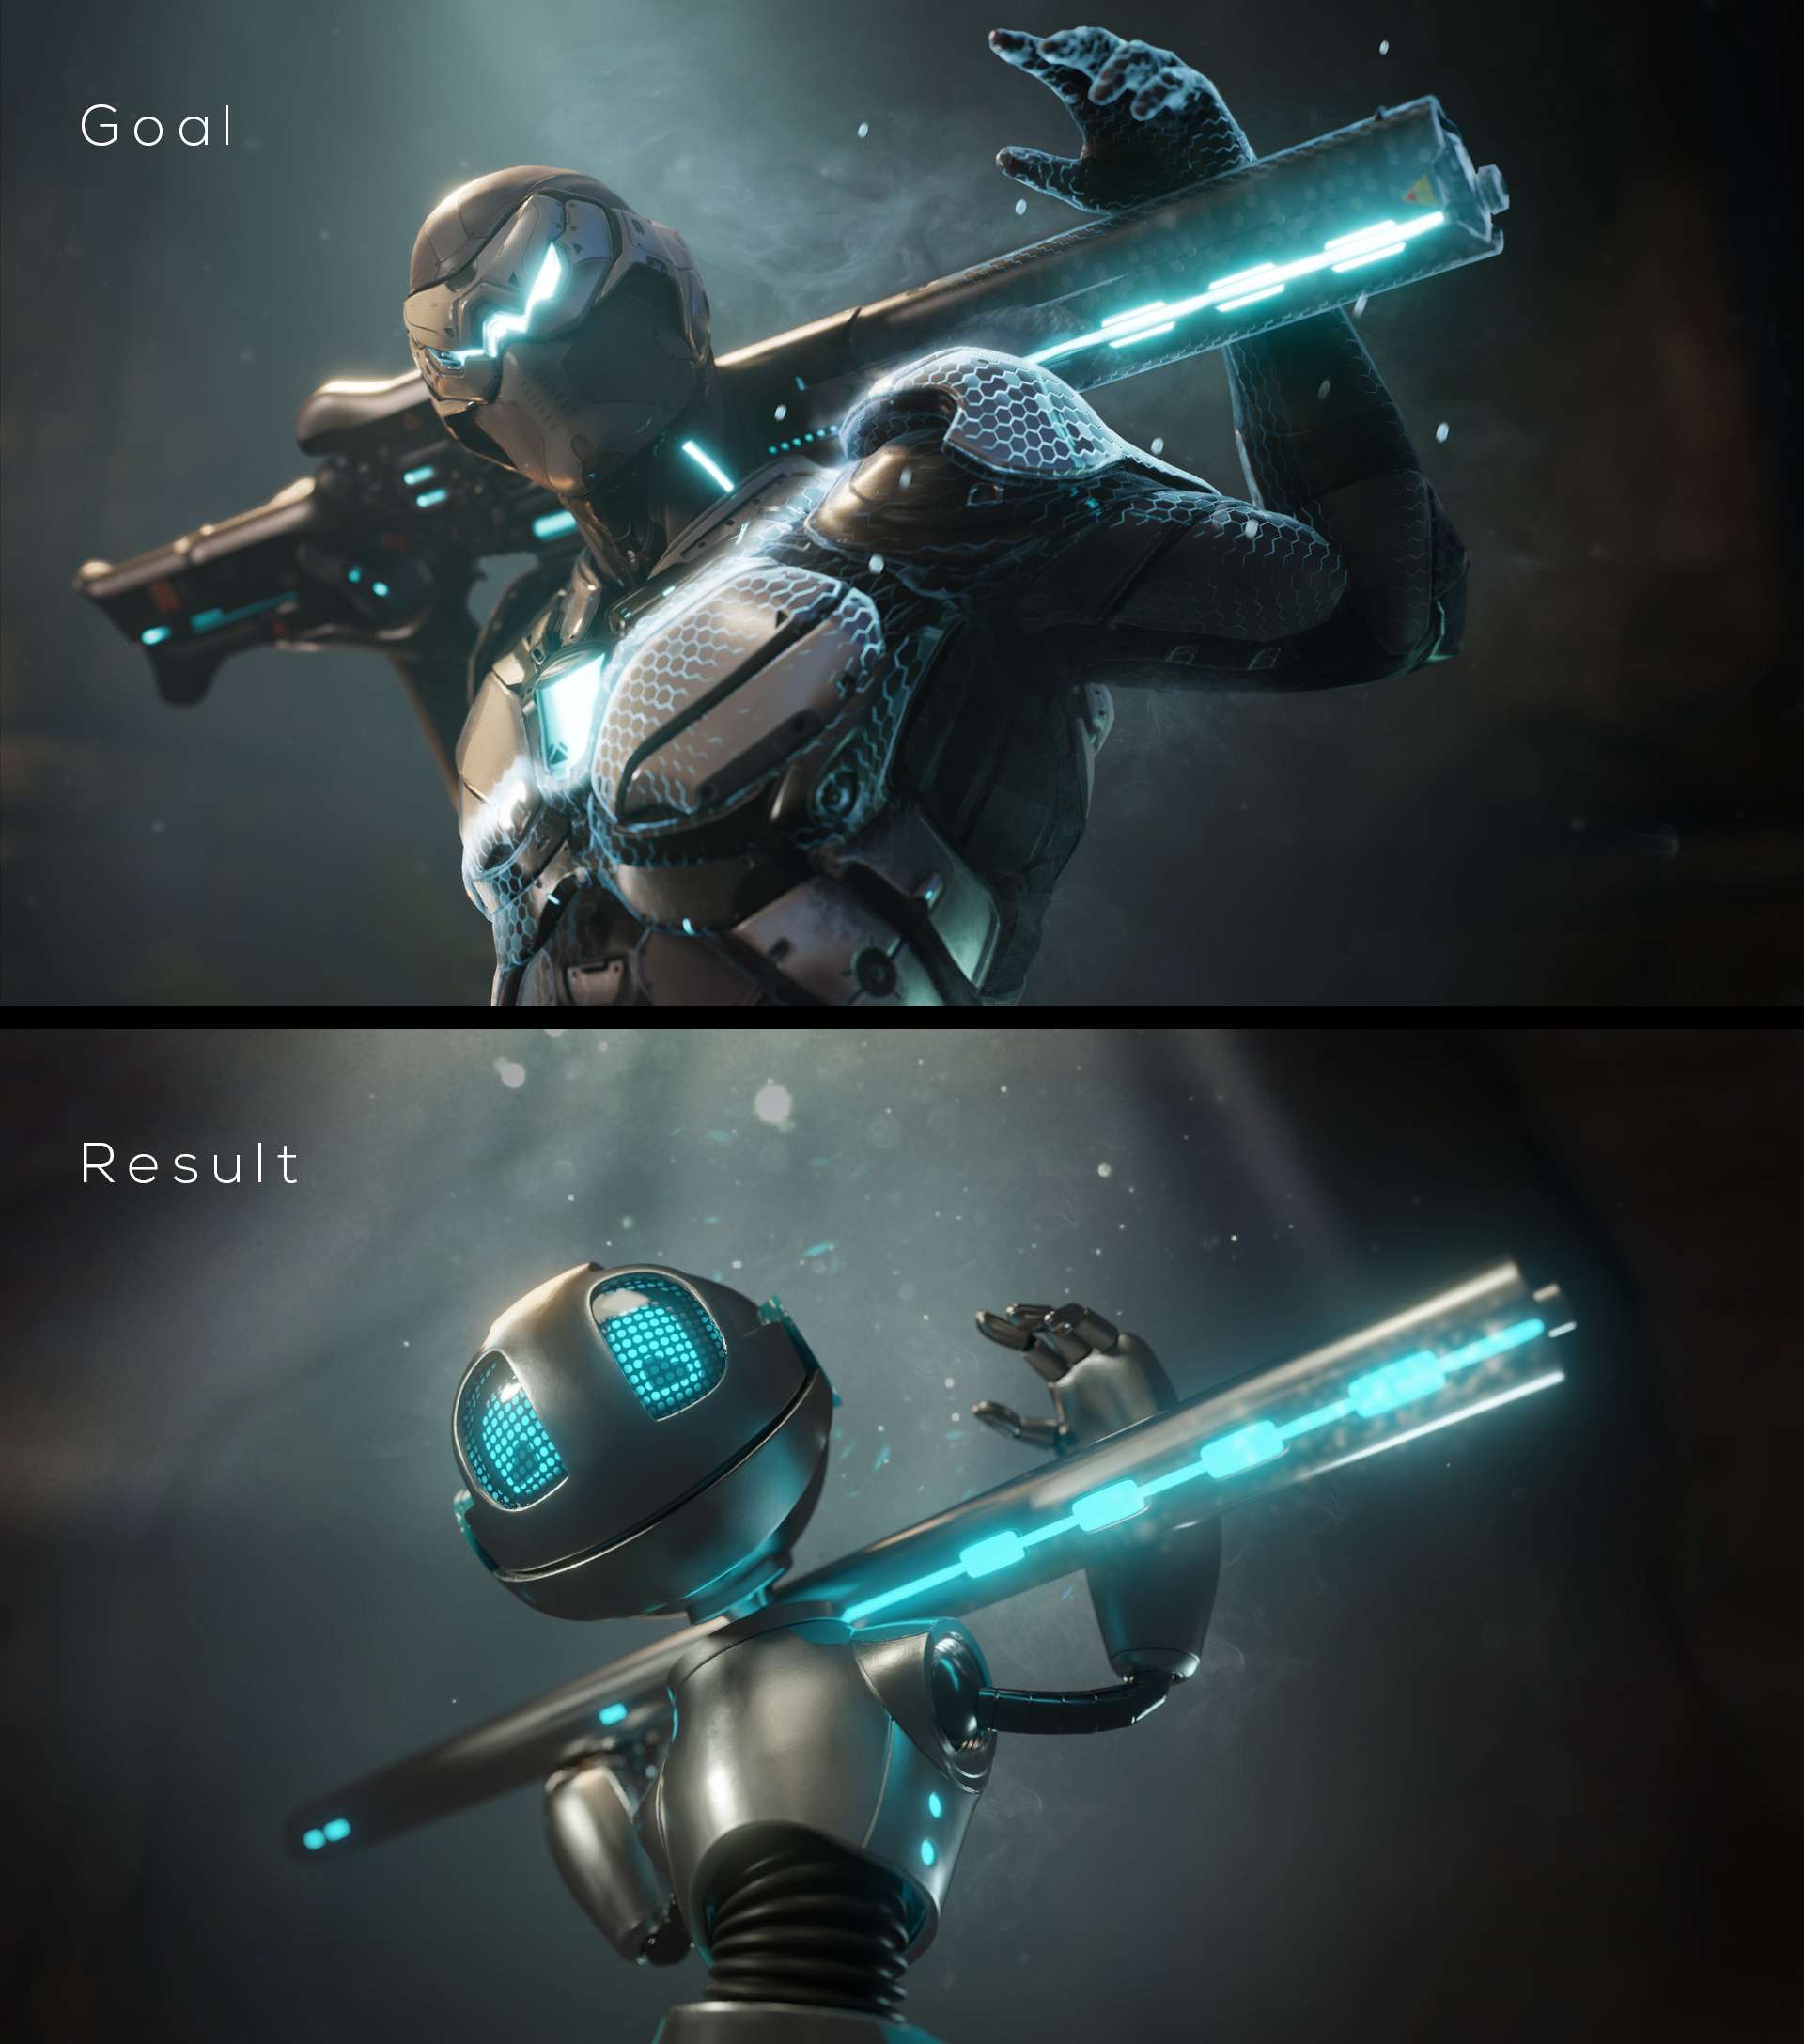
Image Credit: "Sci Fi Pilot" by binqi chen

Image Credit: "Female sculpting session 01" by Daniel Crossland

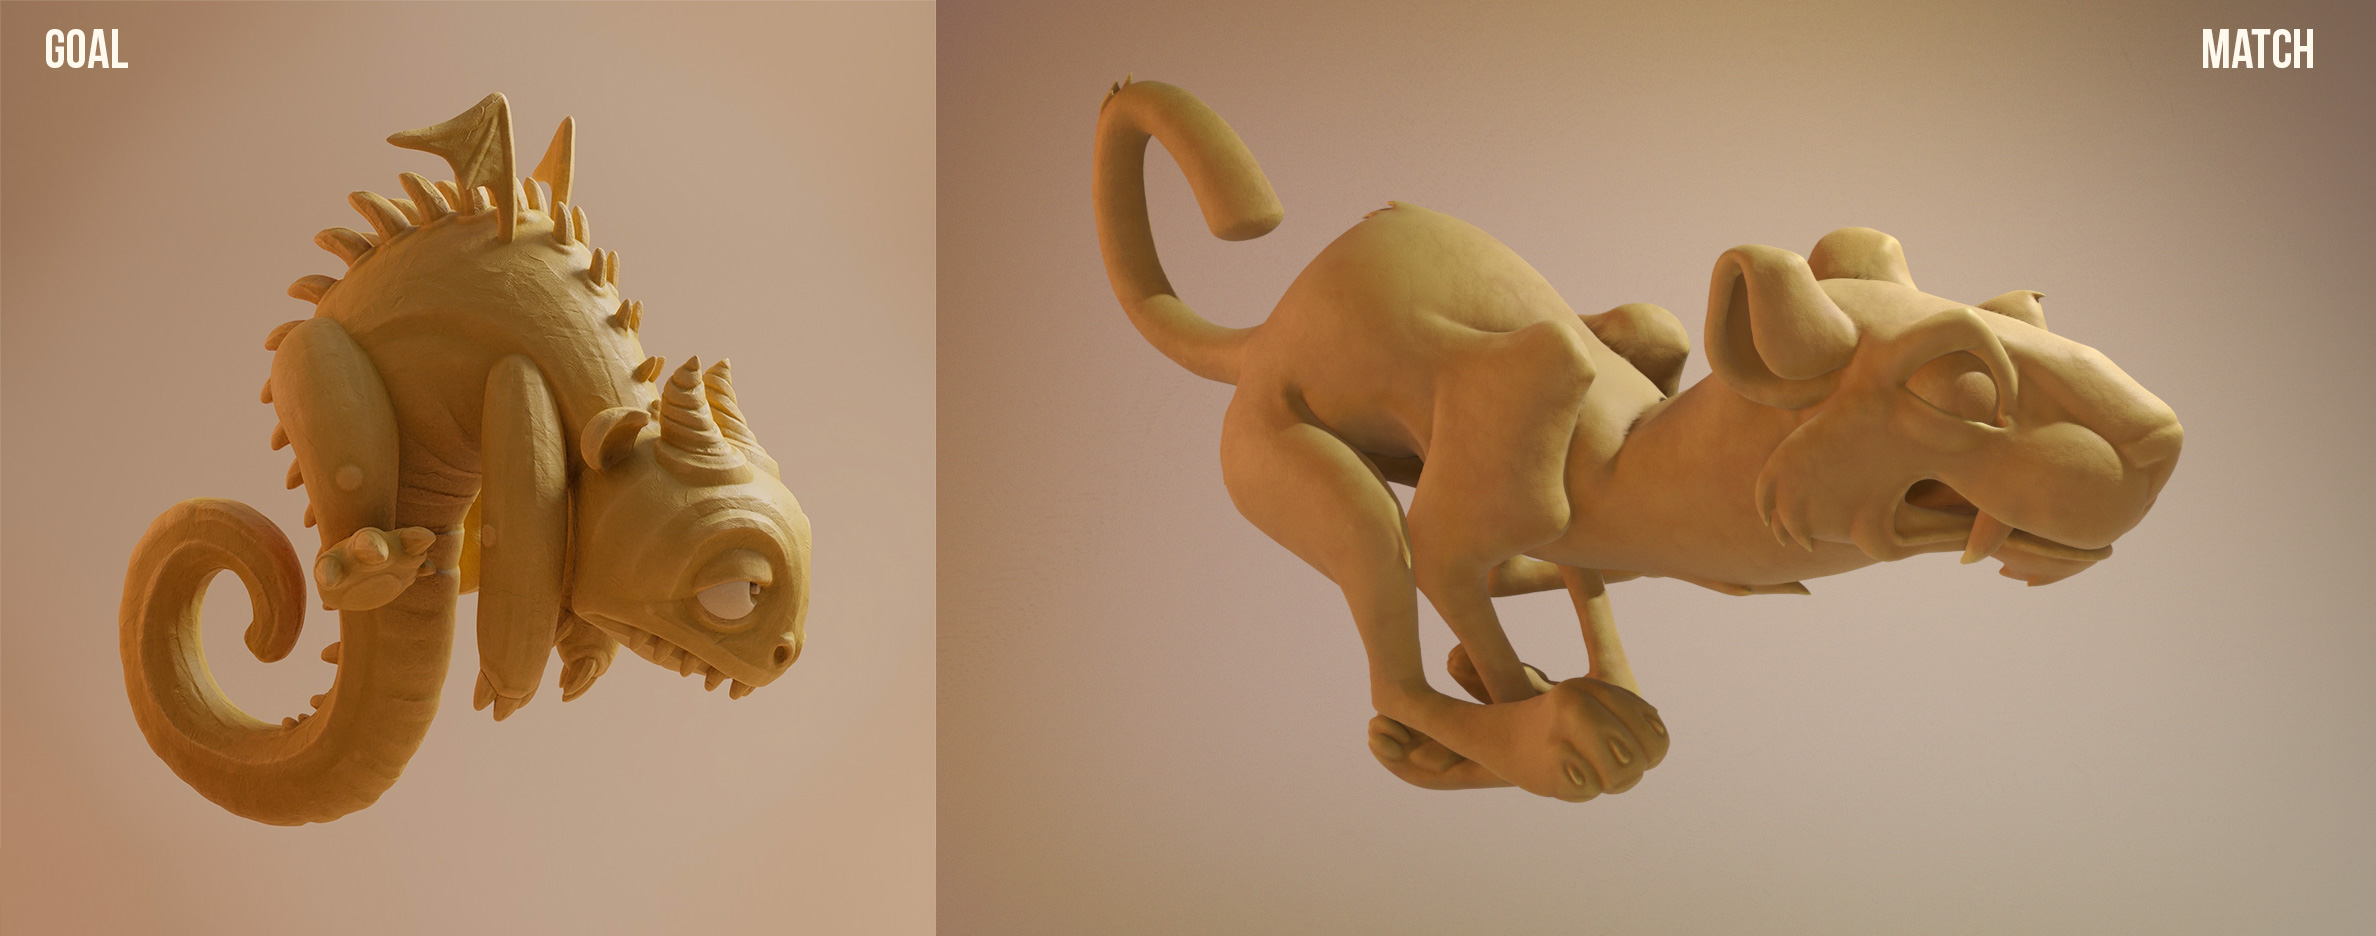
Image Credit: "Tribal Frog" by Paul Braddock

Image Credit: "Danbo in Autumn" by tomatoes
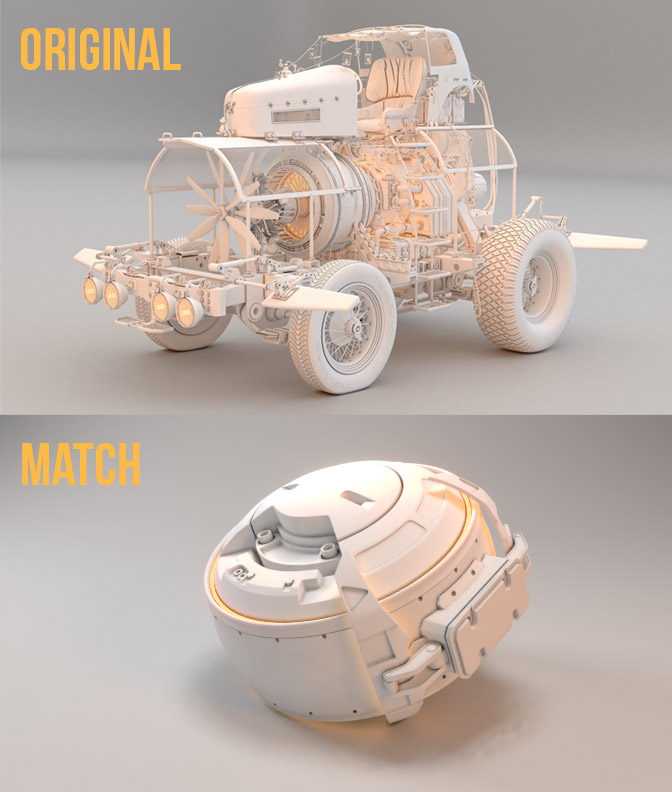
Image Credit: "The Mad Professor's Ride" by Ruairidh MacNeill
Umm....is one or more of these a render indigowarrior9? If so, I cannot tell which one and that's awesome!
Thanks for the compliments Kent..but.. these are only 4 simple photographs for model and light study purpose.
I'm currently busy modeling this little scene and then trying to light it as realistically as i can (in Cycles).
After seeing Mark Henriksen's "Super Mario" pop up on Artstation, I had to try matching his lighting:
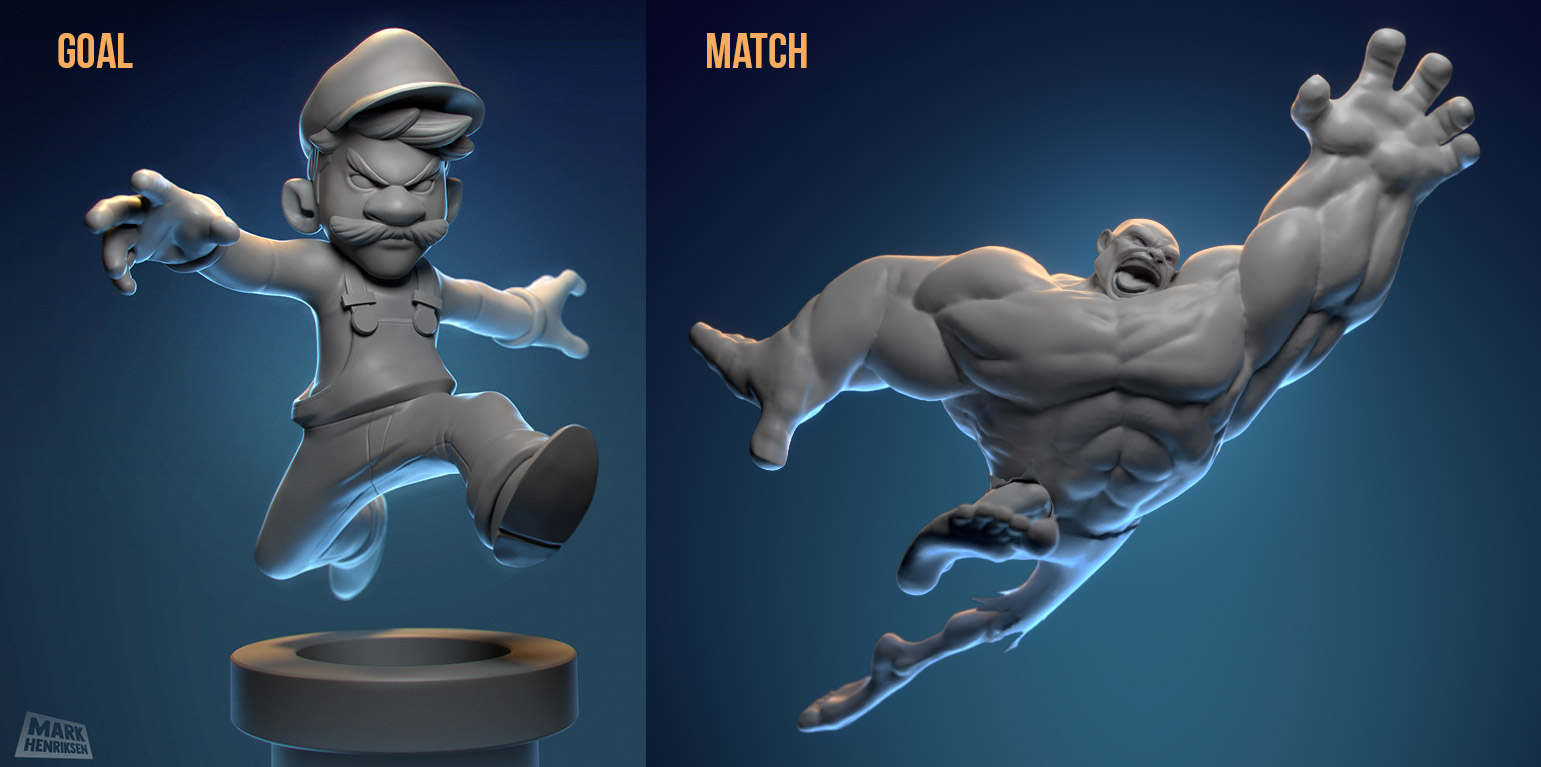
Overall it was a fairly straight-forward light positioning process with a bright blue area lamp coming from the back/bottom, a bright orange from the top/back, and a white key light coming from the top/front. But what was interesting is that Cycle's multi-bounce GI brightened the crevices too much, where Mark's crevices are stark black. So I dialed the Cycles bounces down to 1 to get closer to his dark crevices. I don't do that often...
Such a strong character setup imo. Love Mark's lighting! I'll remember this one for future characters.
Very cool. Neo was right when he told The Oracle "Choice. The problem is choice."
If from the moment you open Blender you choose that lights positions, color and intensity, you do a two hour work in 2 minutes. I find it amazing how it all comes down to decisions. And who knows, maybe even what we eat that day can influence the small choices we make throughout the whole process.
![]() dostovel Woah, getting philosophical in there - I dig it. It probably took me an hour today to mimic the lighting and fine tune the compositing. Luckily with such distinct light, it was easier than others to match; not a lot of guess work.
dostovel Woah, getting philosophical in there - I dig it. It probably took me an hour today to mimic the lighting and fine tune the compositing. Luckily with such distinct light, it was easier than others to match; not a lot of guess work.
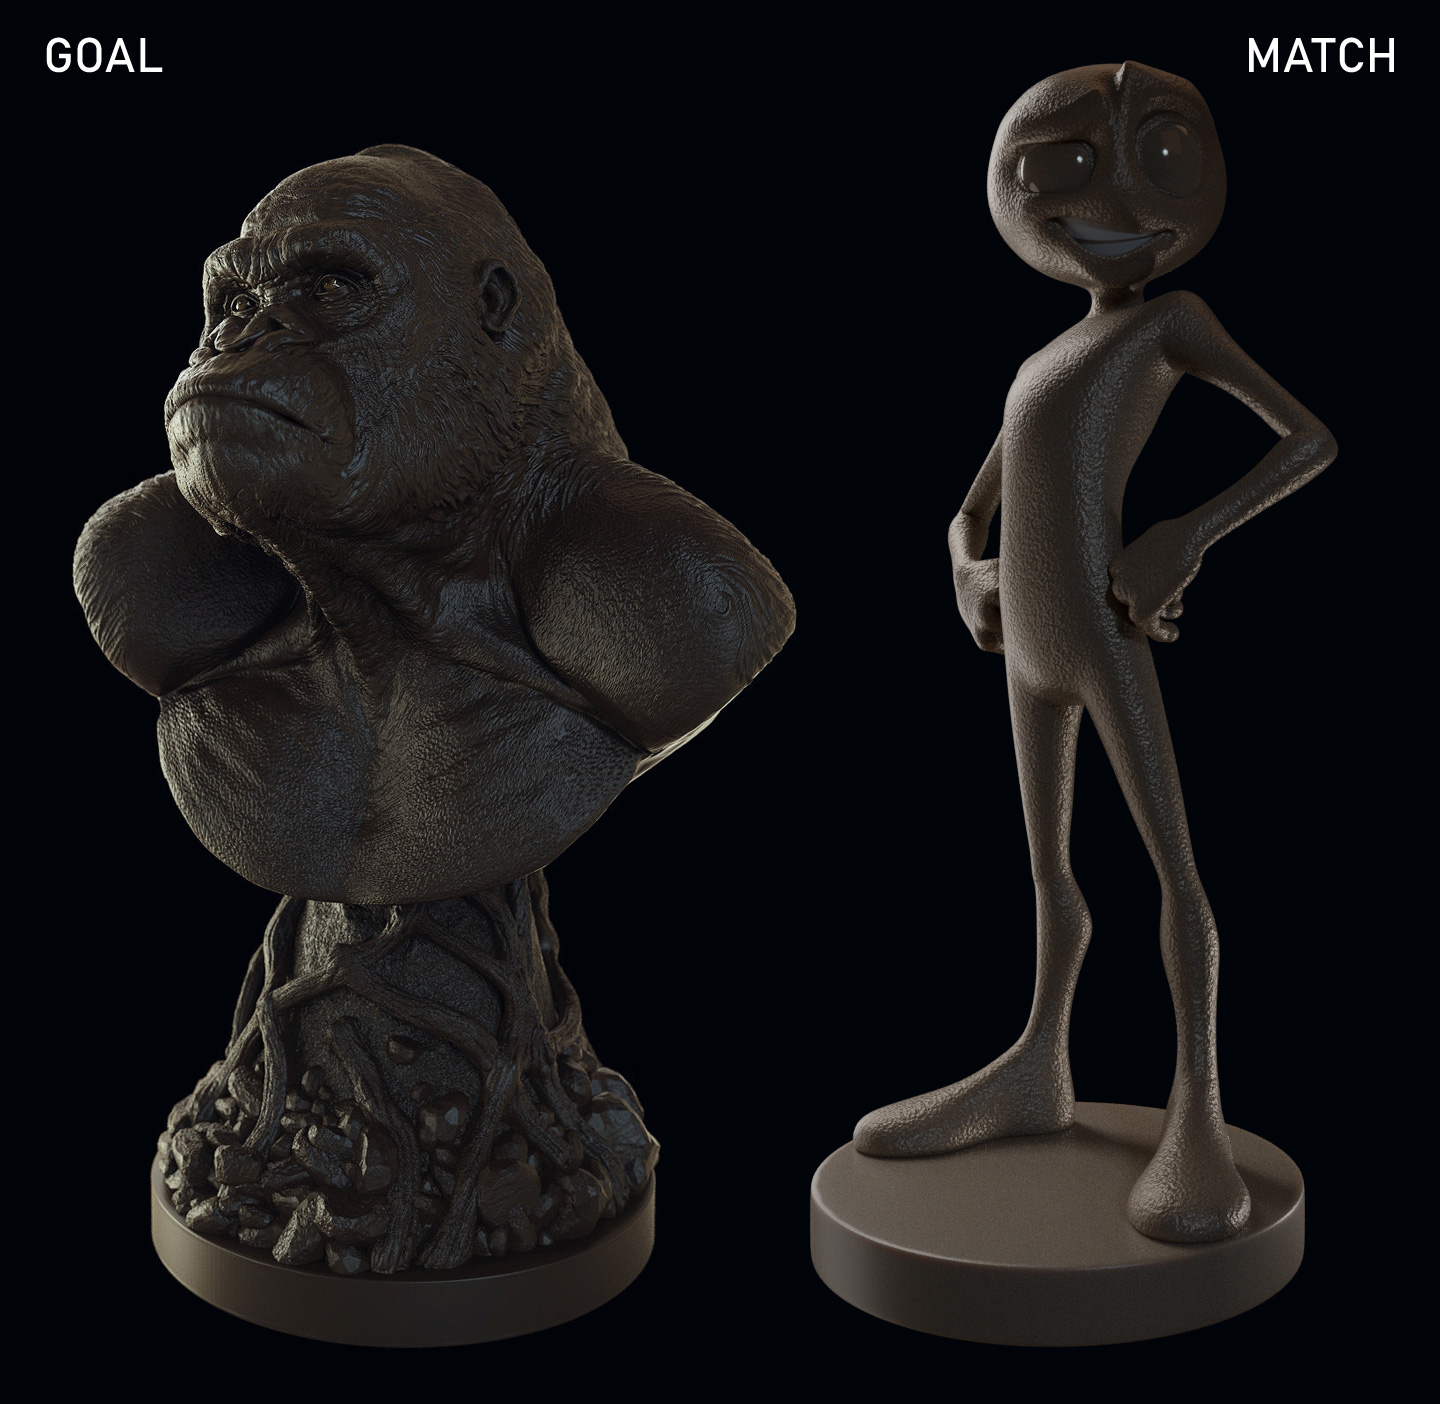
Made another one... Rivet trying to look as cool as his heroes, even thou it's like when you go to the gym for the first time, you do two reps and you swear you look as buff as Arnold.
![]() dostovel OMAR!!! That's sick, dude! You nailed it. Thanks for sharing.
dostovel OMAR!!! That's sick, dude! You nailed it. Thanks for sharing.
BTW did you miss the stream this week?!?! 😳
@theluthier Yes 😔
I missed the Elephants Dreams movie review. It was Independence Day here, holiday and stuff. But I'll take it as a big compliment that you notice it when I don't show up. 💪🏼
I've been appreciating composition more and more each time I do one of these exercise. Everytime I start fiddling around trying to match what I see, there is a point at the beginning where it looks horrible and you feel like quitting, like it's never going to look good. But you keep adding to it and the composition becomes richer and there is an instant where it starts to click, and that is the point where your mind goes "Hum, if only I had placed all those stuff there from the start, I'd finish instantly"
It's like searching for a buried treasure, you don't know where it is so you start digging, you make 27 holes and in the 28th the treasure shows up and you're like "hum, if I had dug in this spot first, I would've saved some digging." But how could you had known.
Kent's latest twit inspired me to start rendering my stuffs.
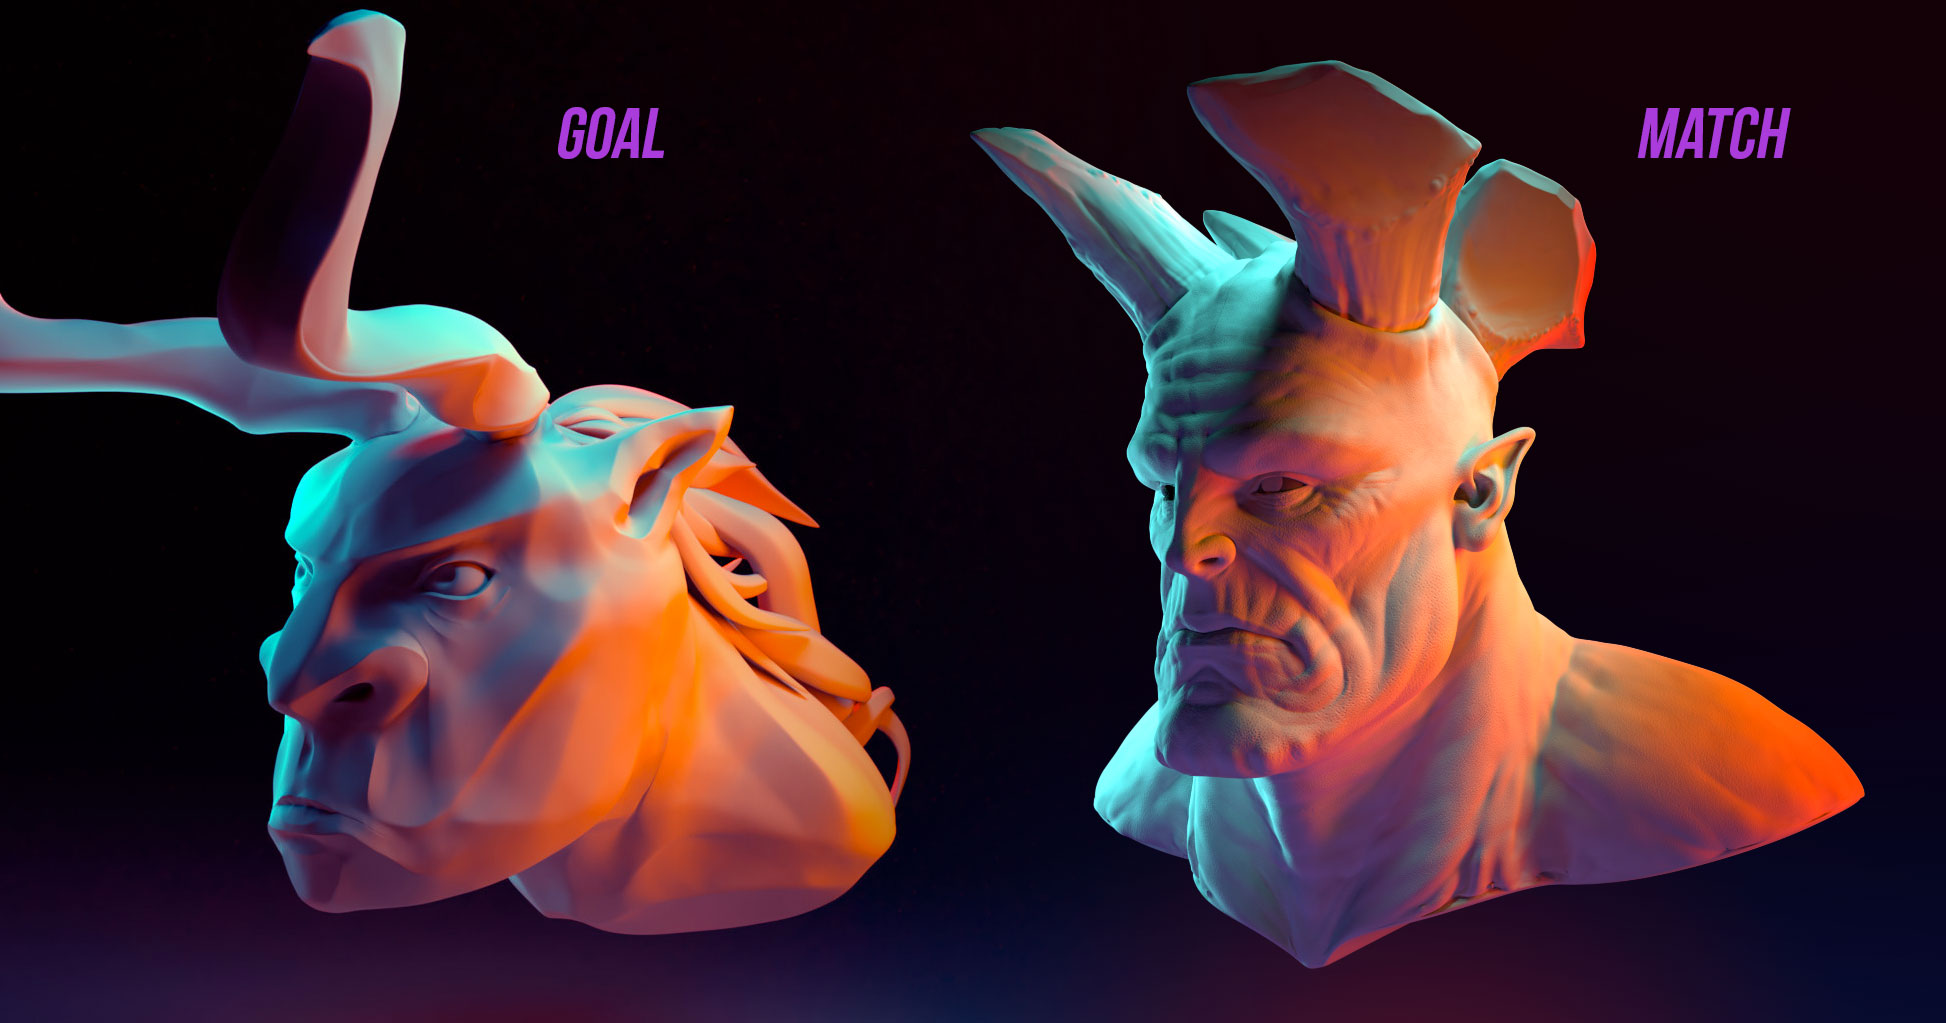
Goal:
 Result:
Welcome to the thread ![]() axelfenix! It looks like you rendered 2 different models in the same scene. As in, excellent light match 👏
axelfenix! It looks like you rendered 2 different models in the same scene. As in, excellent light match 👏
Thanks for sharing! I dare you to do another one 😎
@theluthier This exercise has proven to be very fun and educational, I'd like to take it up a notch. Do you mind if I use this model?

Pre-posed, default material, everyone has access to it. Using this model, make up your own lighting scheme, camera placement, compositing and composition. No reference, just your judgement. Endure the pain of making endless tweaks, because an artwork is never finished, only abandoned.
I had a go at it. It's weird without any reference, you don't know how it turned out just be judging it yourself.
Taking it up a notch ![]() dostovel - I like it! And yes of course you/others can use the creature model. Do I understand the point to be applying what we've learned from imitation?
dostovel - I like it! And yes of course you/others can use the creature model. Do I understand the point to be applying what we've learned from imitation?
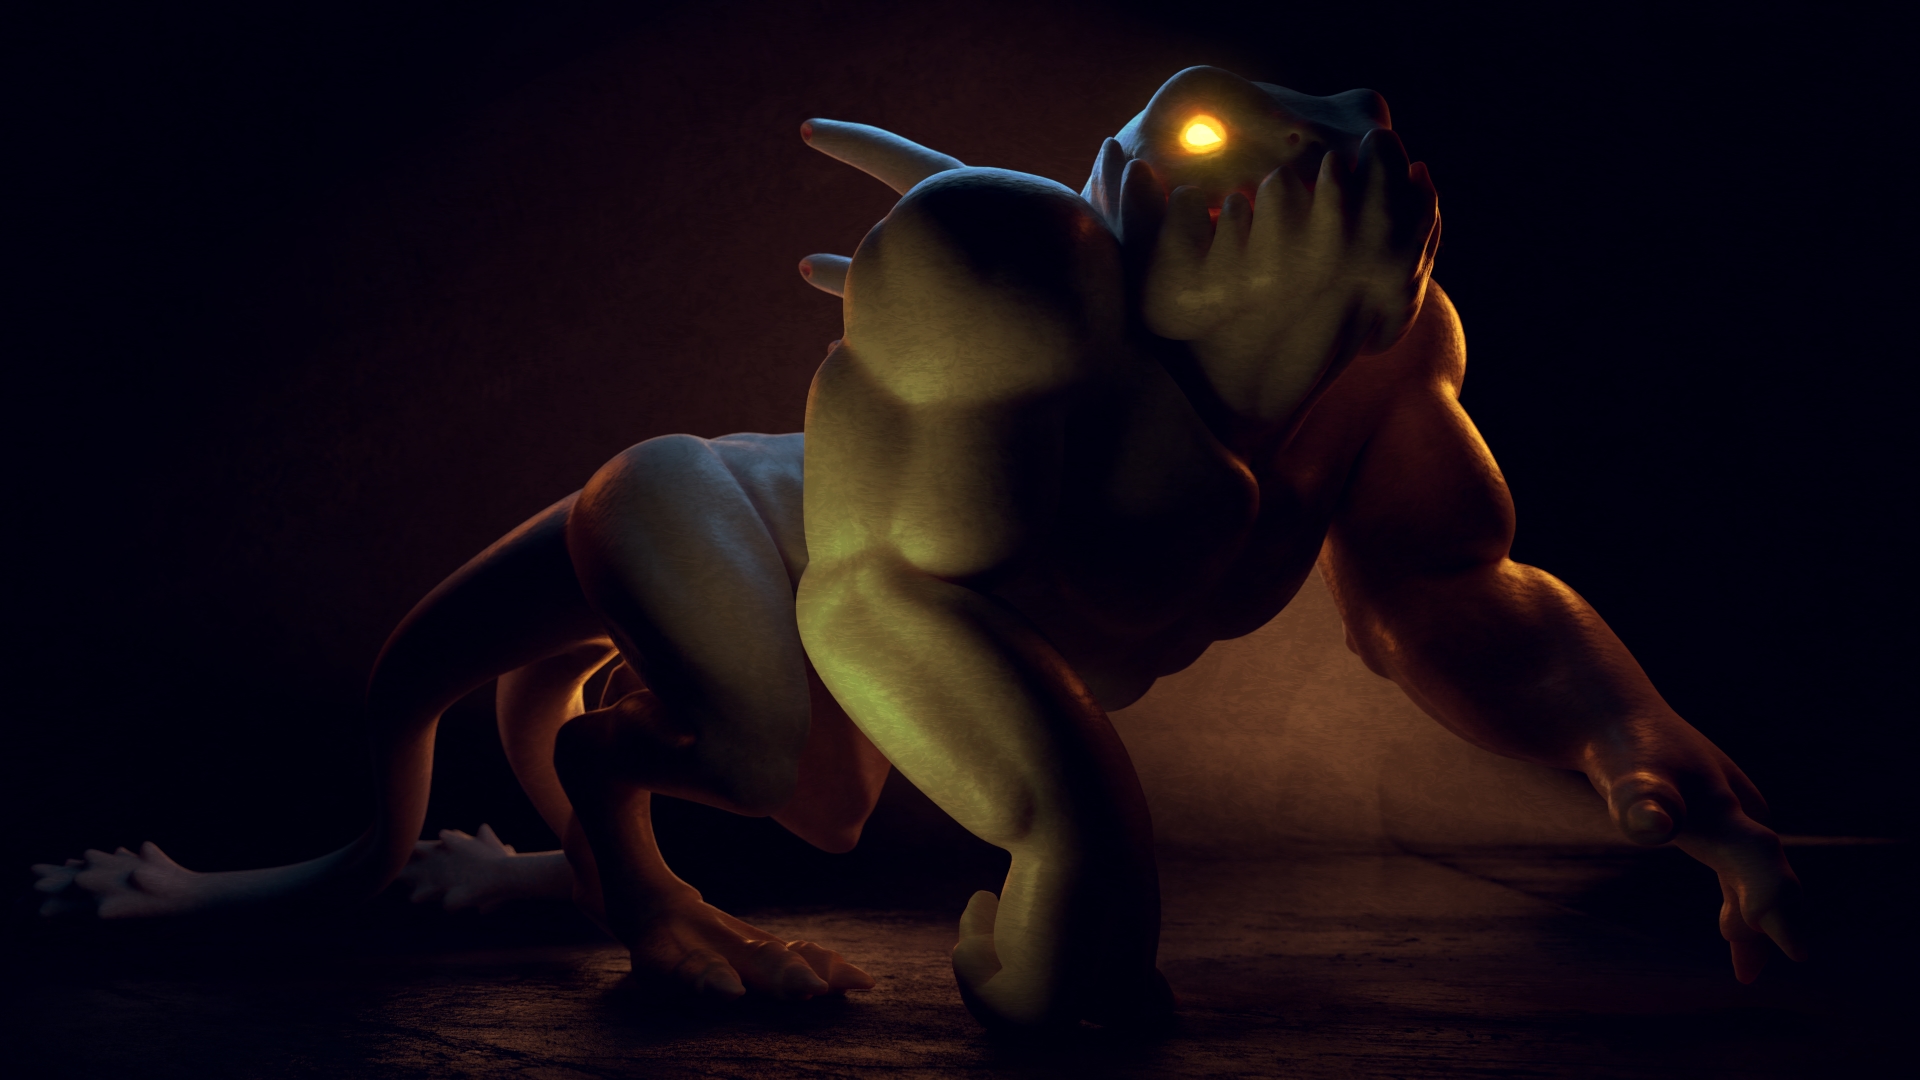
I like your go at it. It's interesting, where it seems like a lot of light sources (4 to my count, is that right?) but a lot of the model is still shrouded in shadow. Makes for a mysterious effect.
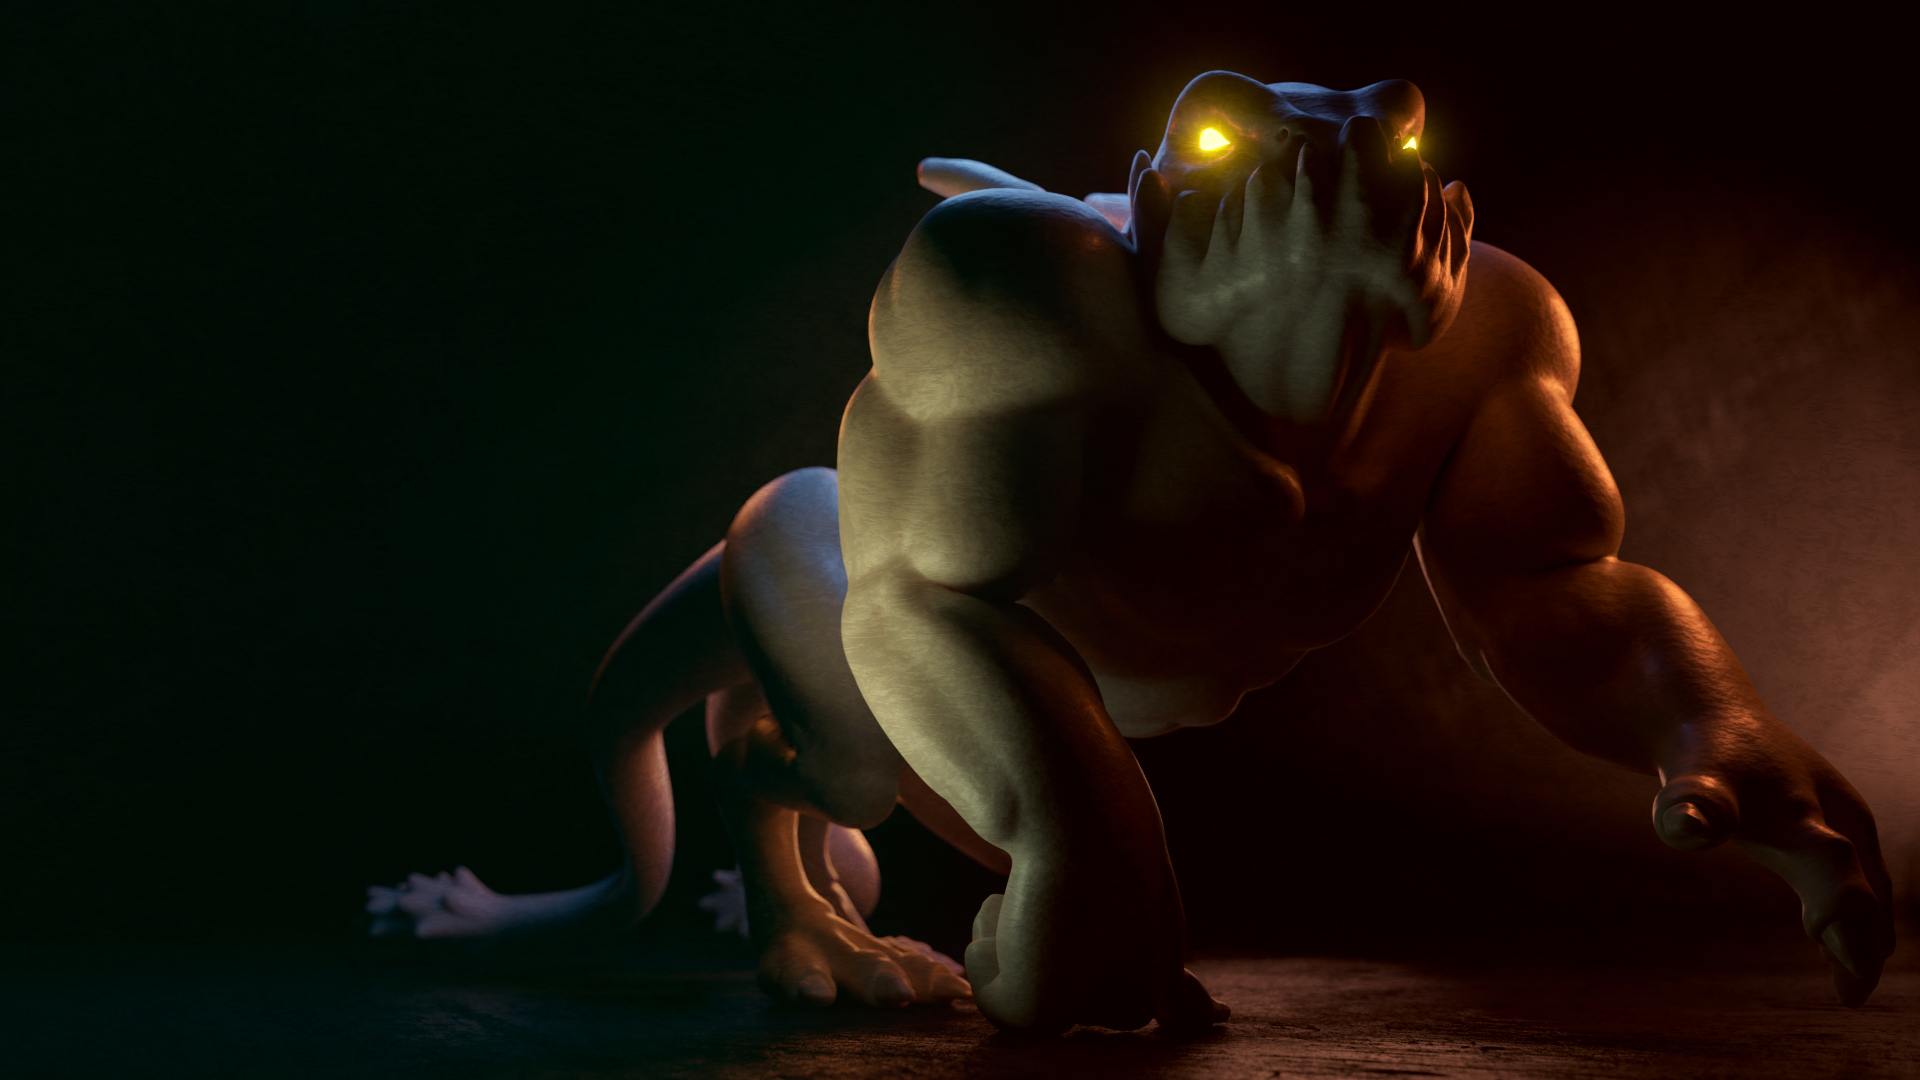
Did another one today. What I liked about this goal was that if felt like "painting with light". In this case I didn't give any usual thought to key light, or sunlight, or environment light. It was just an exercise in placing a bunch of very saturated spot lamps all around the subject - 7 all total, which I've never done for a single character.
If you're interested, here's a gif showing the seven lamps that got me close:
@theluthier How do you make those gifs you post on Twitter and here? Those are a great way to show stuff.
The lighting looks awesome. More evidence that you can have and awesome model with awesome topology with great shading and it can all fail miserably if you don't light it well. And on the other hand you can have a low poly model with a white default material and it can come to life with great lighting as well. So 👍🏼👍🏼for lighting.
![]() dostovel I use Camtasia which I used to record tutorials with. I discovered it's got a very capable/convenient gif export option. So it's quick and easy 1. Screen recording 2. video editing 3. gif export. But surely there's several free and/or web based versions out there too.
dostovel I use Camtasia which I used to record tutorials with. I discovered it's got a very capable/convenient gif export option. So it's quick and easy 1. Screen recording 2. video editing 3. gif export. But surely there's several free and/or web based versions out there too.
Heh you made me think of a new challenge: Make the default cube as pretty as possible with lighting only 😅
For Class BC4-1810. Will need to credit the artist, who made the Girl Bust Marluz_yaphets from blendswap and Dan Crossland for his lighting setup. 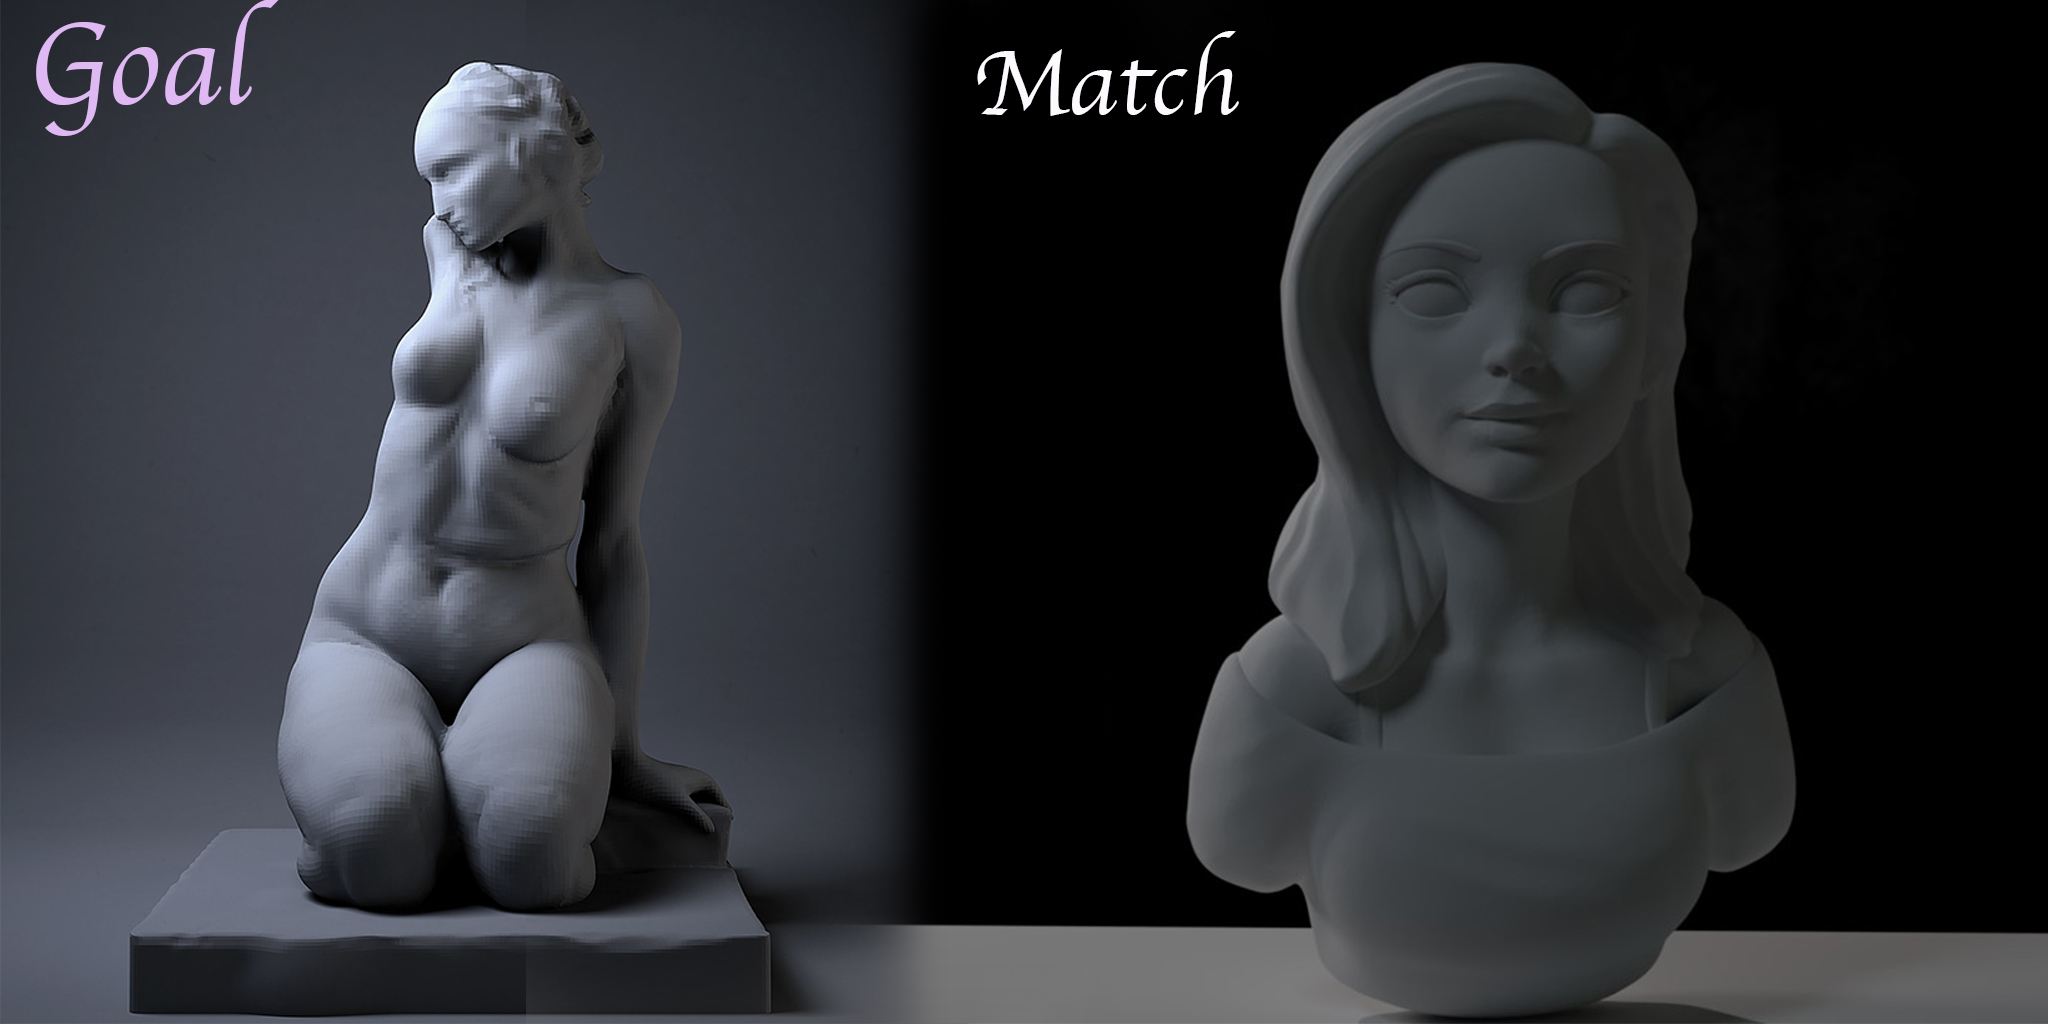
It's not the most impressive lighting for this character, but here it is...
![]() sirchced Brilliant match, Chris. I like how you matched the surface bumpy texture as well. My one critique is that the white light from screen-left and the yellower light from screen-right look more like rim-lights in the source image - meaning it's a shaper crisp focus on the edges. But a tweak like that would only take it from like a 9.5 to a 10. You're super close! Good stuff 👏
sirchced Brilliant match, Chris. I like how you matched the surface bumpy texture as well. My one critique is that the white light from screen-left and the yellower light from screen-right look more like rim-lights in the source image - meaning it's a shaper crisp focus on the edges. But a tweak like that would only take it from like a 9.5 to a 10. You're super close! Good stuff 👏