Hi all. I've followed this video twice or three times now, and my product looks weird, still. I'm attaching two blend files with the image textures so that hopefully someone can help me out. I don't understand why it looks this pale, and why the paint from the dirty vertices isn't showing up/barely showing up at all.
https://drive.google.com/open?id=1wffreymEXyvvRcR9AWoAkg8Xd0z6Pzf4 - here you go. There are two blend files, numbered 8 and 9.
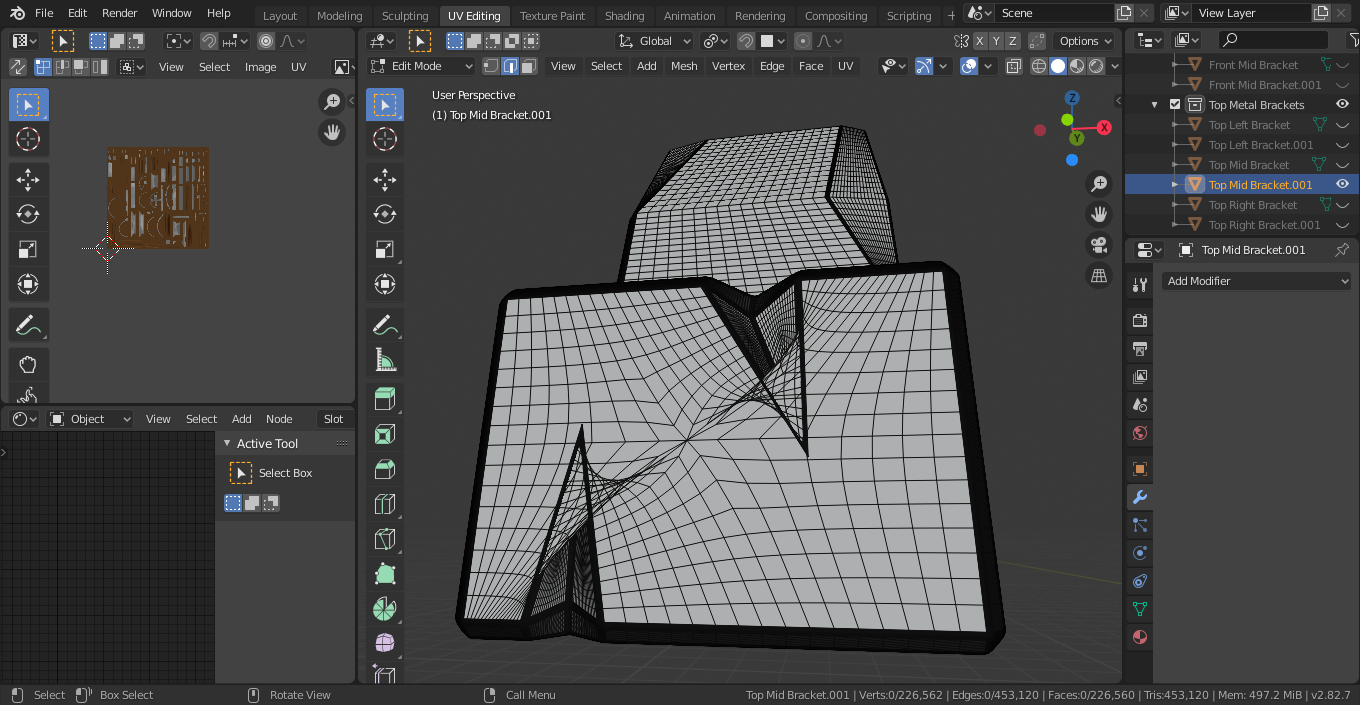
What I'm having trouble with, it seems, is knowing where to bevel and how much to subdivide. Any detail that comes up afterwards looks pretty terrible/clunky, and I don't know how to fix it. Save 8 is the most recent save with beveling and subdivision modifier applied. Save 9 is the workflow demonstrated in the video, but with no subdivision modifiers applied. It looks smoother, but it's brighter and it seems like none of the detail came through. I just want to understand how to do this the right way so that I can feel prepared to move on to the next part of this course.
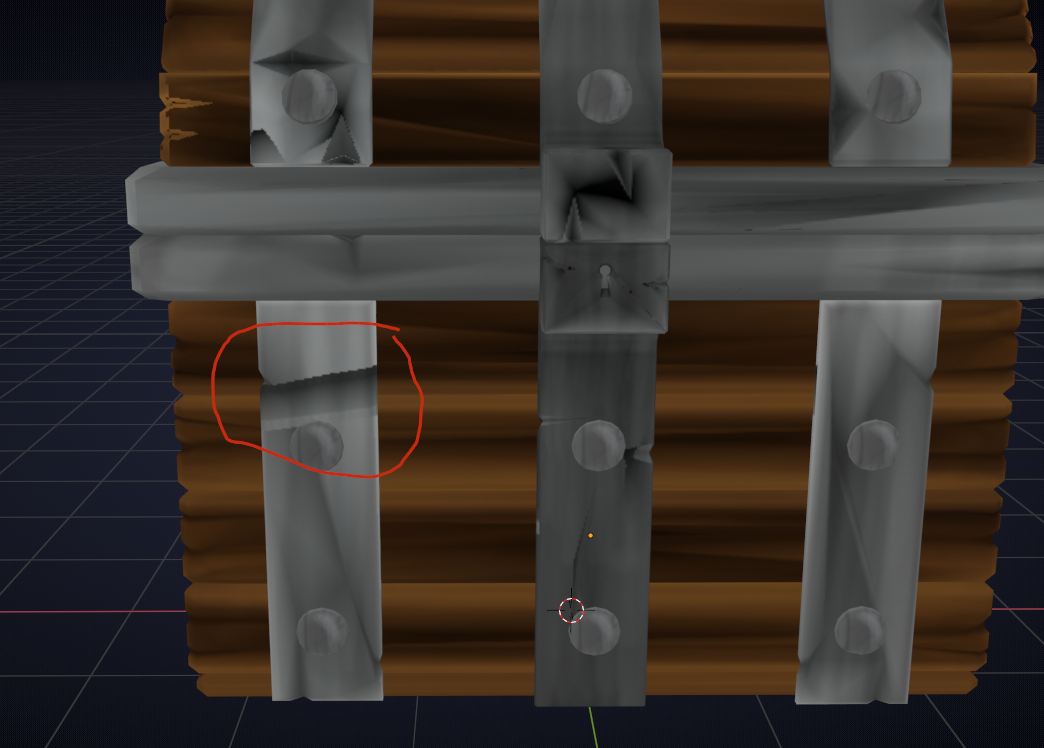
Hey joebods, there is a mistake in what you beveled in Save 8:

This shows in your chest for instance here:
Forget file 8 and work from Save 9.
Carefully select all the edges that should stay 'sharp' (this might well be the hardest part of this course..)
Then (after double, or even triple checking) Bevel them slightly and then re-bake the DVC.
I'd use at least 2 subdivision levels, but probably 3, or maybe even 4.
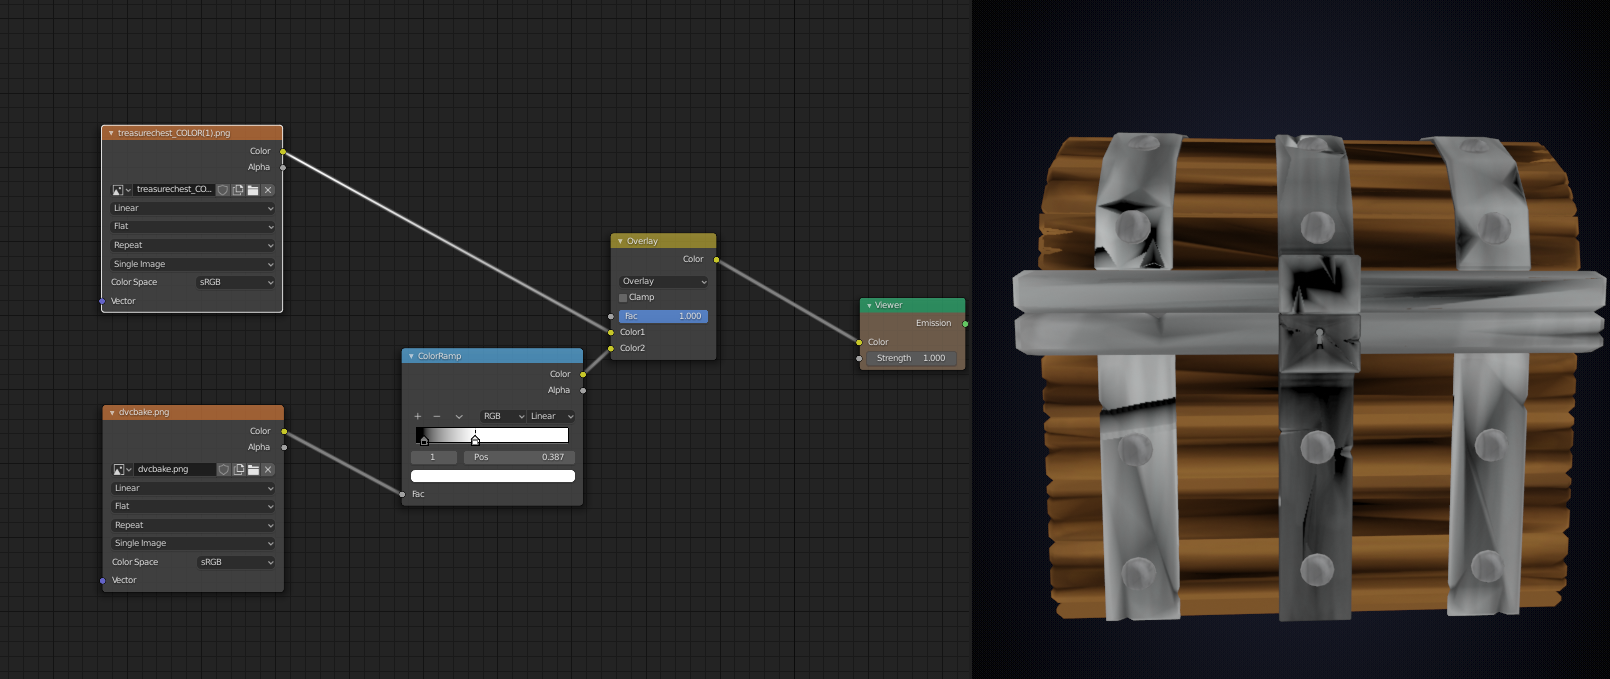
The DVC is definitely showing up, but it will do most of its magic when you actually make the shaders.
You could also increase the contrast of the DVC by inserting a Colorramp:
HI joebods, this is called an N-gon (not because of its shape, but because it has more than 4 Edges):
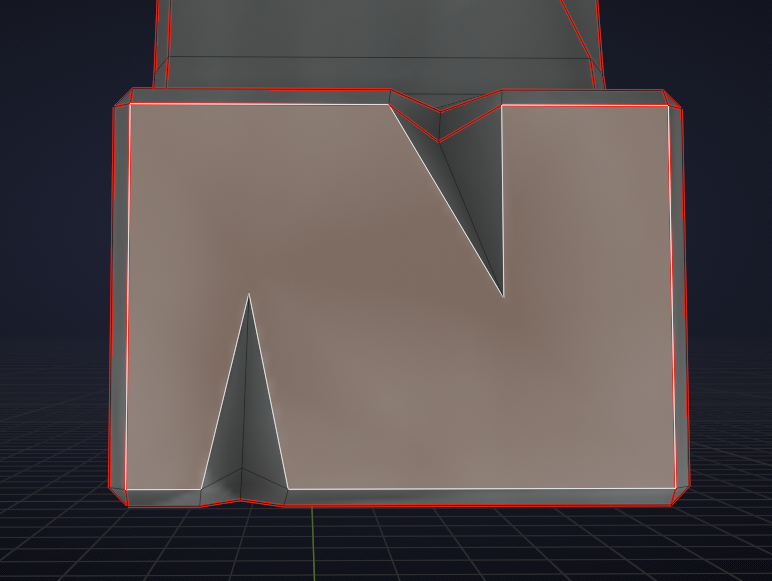
N-gons can give problems when subdivided, especially when they are concave.
One way to fix this is to make everything into triangles before subdividing and Blender can do this for us.
Now, I like to work with Modifiers, so I beveled through a Modifier, so I could correct/change which Edges get Beveled, but you can also use CTRL+B if you want.
I 'marked the Edges I wanted to Bevel with CTRL+E > Edge Bevel Weight, set to 1 (the blue Edges here):
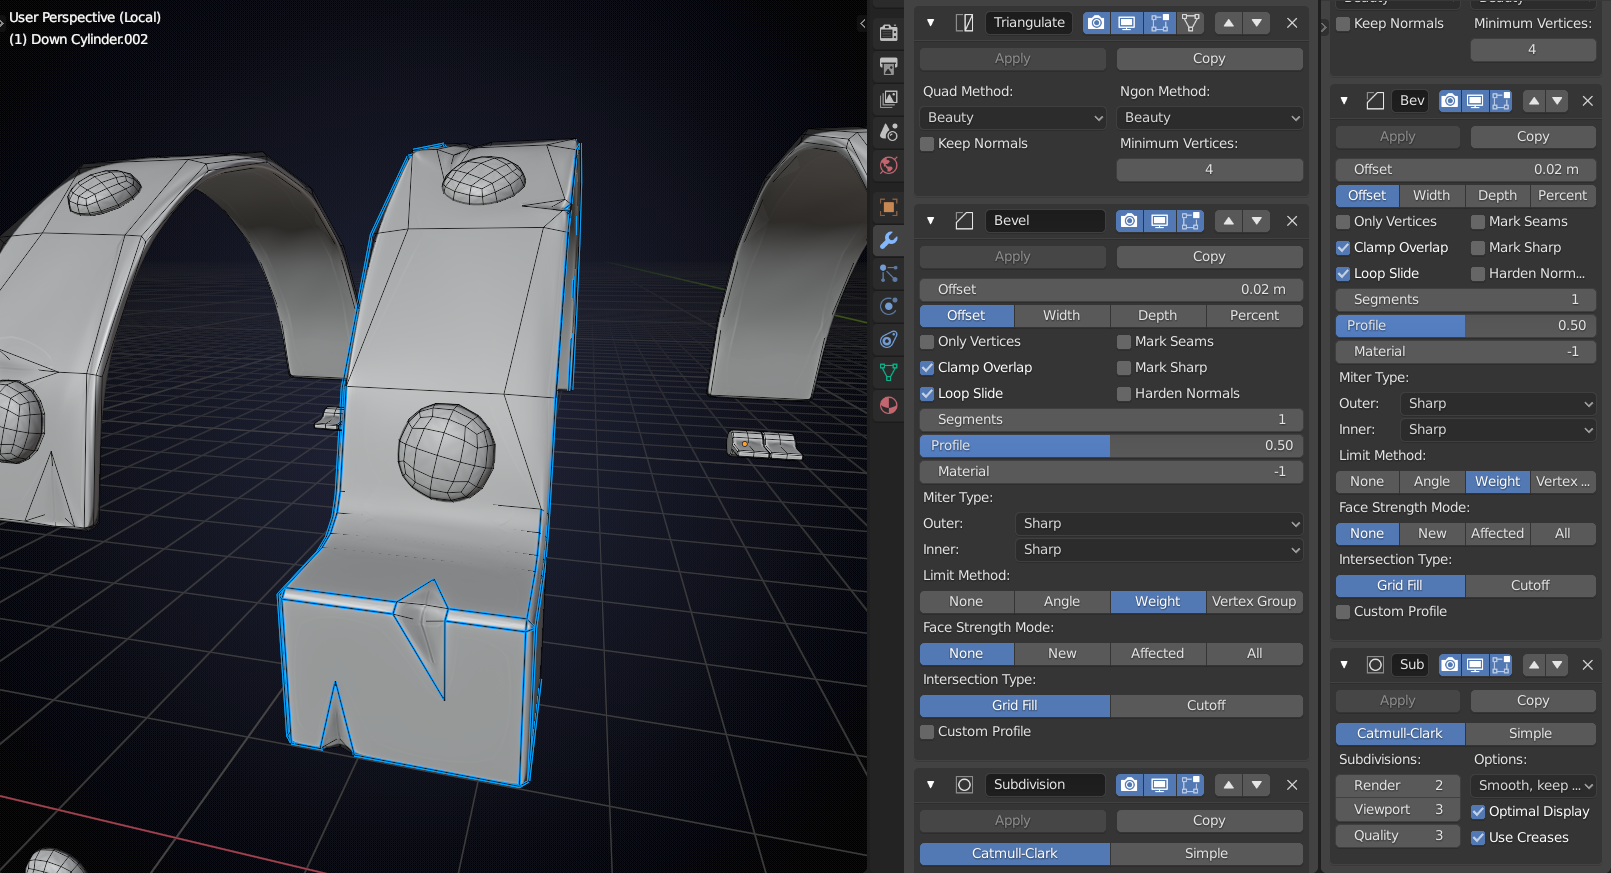
Then use a Modifier stack as seen above: first Triangulate (Quad and Ngon Method set to Beauty), then Bevel (Limit Method set to Weight) and finally a Sudivision.
When happy with the result, Apply the Modifiers (top to bottom) and do the dirty vertex colors:

 How do I prevent this from happening?