Hello Kent, this video is very helpful.
I want to ask about a question.
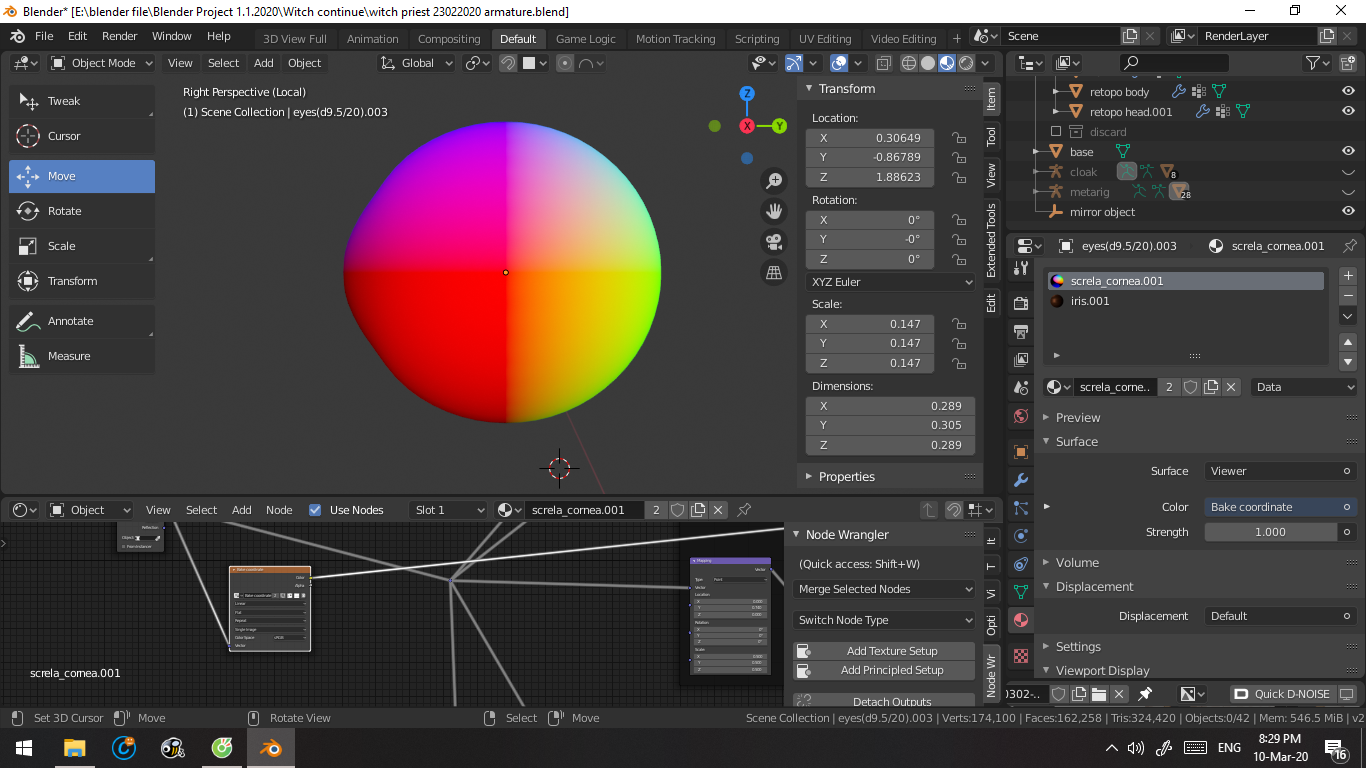
When using this eye node along with armature modifier.
All the texture will be offset if you move/rotate the bone that you assign to the mesh.
Is there anyway to prevent it work from offset with Armature modifier?
If it cannot, is there anyway I can make the eye move/rotate as the bone transform?

Hi there! I haven't seen the tutorial video but I'm guessing Kent uses the Object output of a Texture Coordinates node for the procedural material.
If this is the case, you can bake the Object coordinates to a texture and then use that texture as texture coordinates in the procedural material.
Please ask again here if you need help doing this.
Theoretically, I think you should be able to use drivers for the Location, Rotation and Scale of the Mapping Node.
That is: drive the X Location of the Mapping Node to minus(!) the X Location of the Armature > Bone, and so on...
This works for the Location without any problems, but the Rotation is not so straightforward.
But still, just an idea;)
ggcs_dev 's proposition of baking the Object Coordinates to a texture sounds a lot easier!
Can you show me how to bake the Object coordinate to a texture? This is first time I heard about it :D
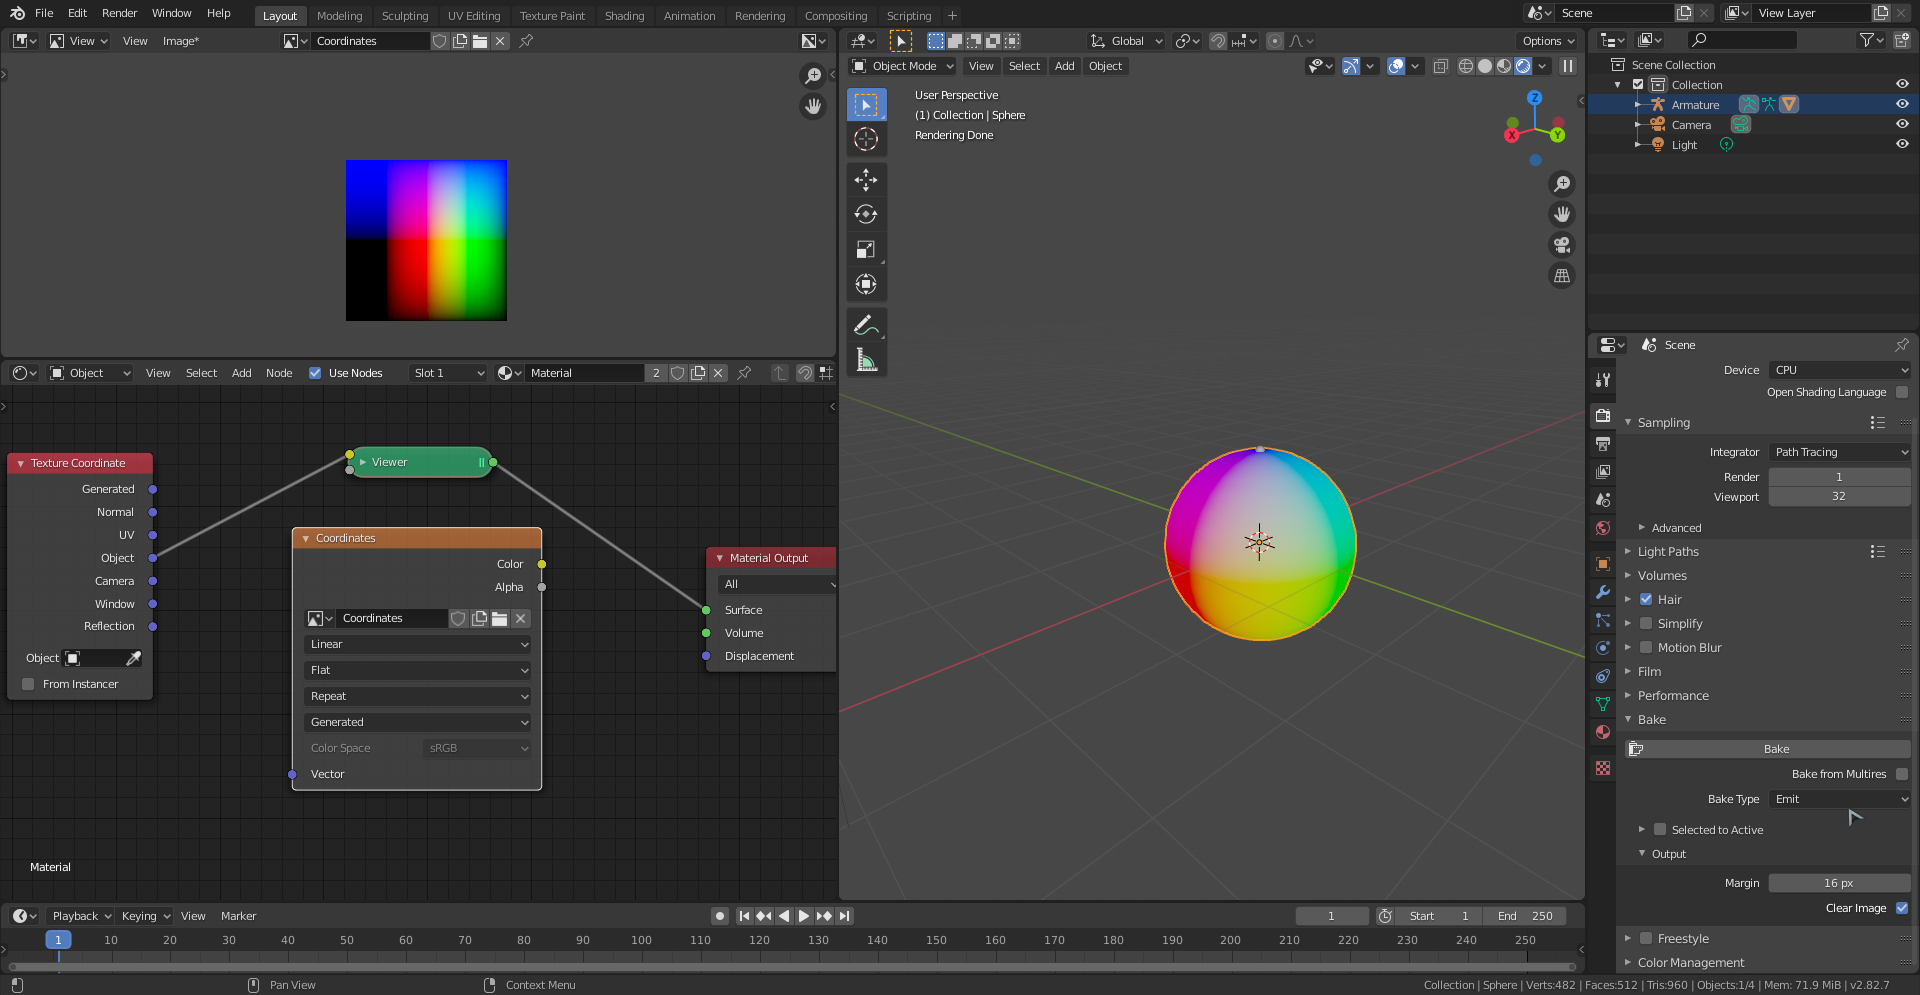
Make a new texture and plug the Object Coordinates into a Viewer Node (Emission). Select the Texture Node with the texture you created and Bake the Emit pass.
Then you get something like this and you can use the Image Texture instead of the Object Coordinates.
![]() spikeyxxx is on the right track but there's a little more to do in order to account for minus numbers, and numbers greater than 1, which can't be represented by a texture.
spikeyxxx is on the right track but there's a little more to do in order to account for minus numbers, and numbers greater than 1, which can't be represented by a texture.
Could you please post a screenshot of your sphere with the armature deactivated so I can see where the Origin of the sphere is?
Ok, it looks to me like the left side of the eye is probably all black indicating minus numbers, so we'll have to fix that.
Here's the process, step-by-step, from beginning to end:
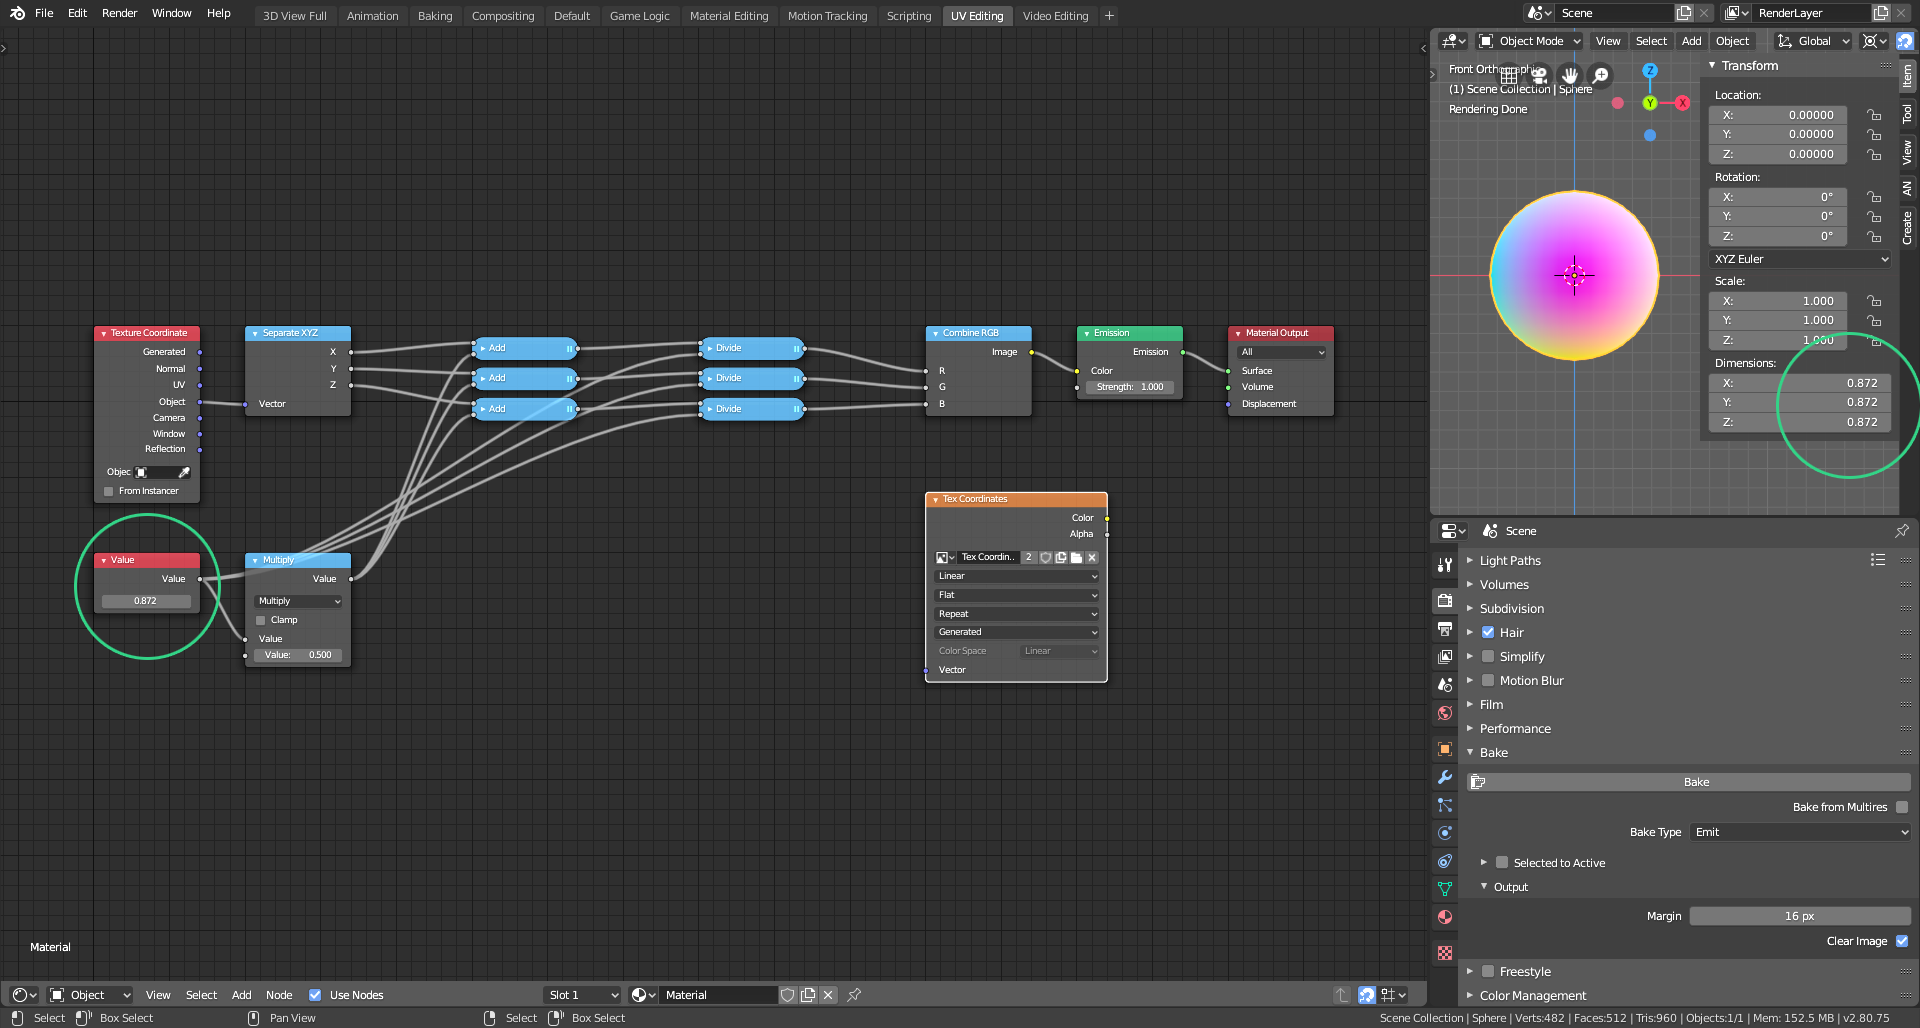 Copy and paste the dimension of your object into the Value node (highlighted by the green circles)
Now to use your new Tex Coordinates image copy the setup below: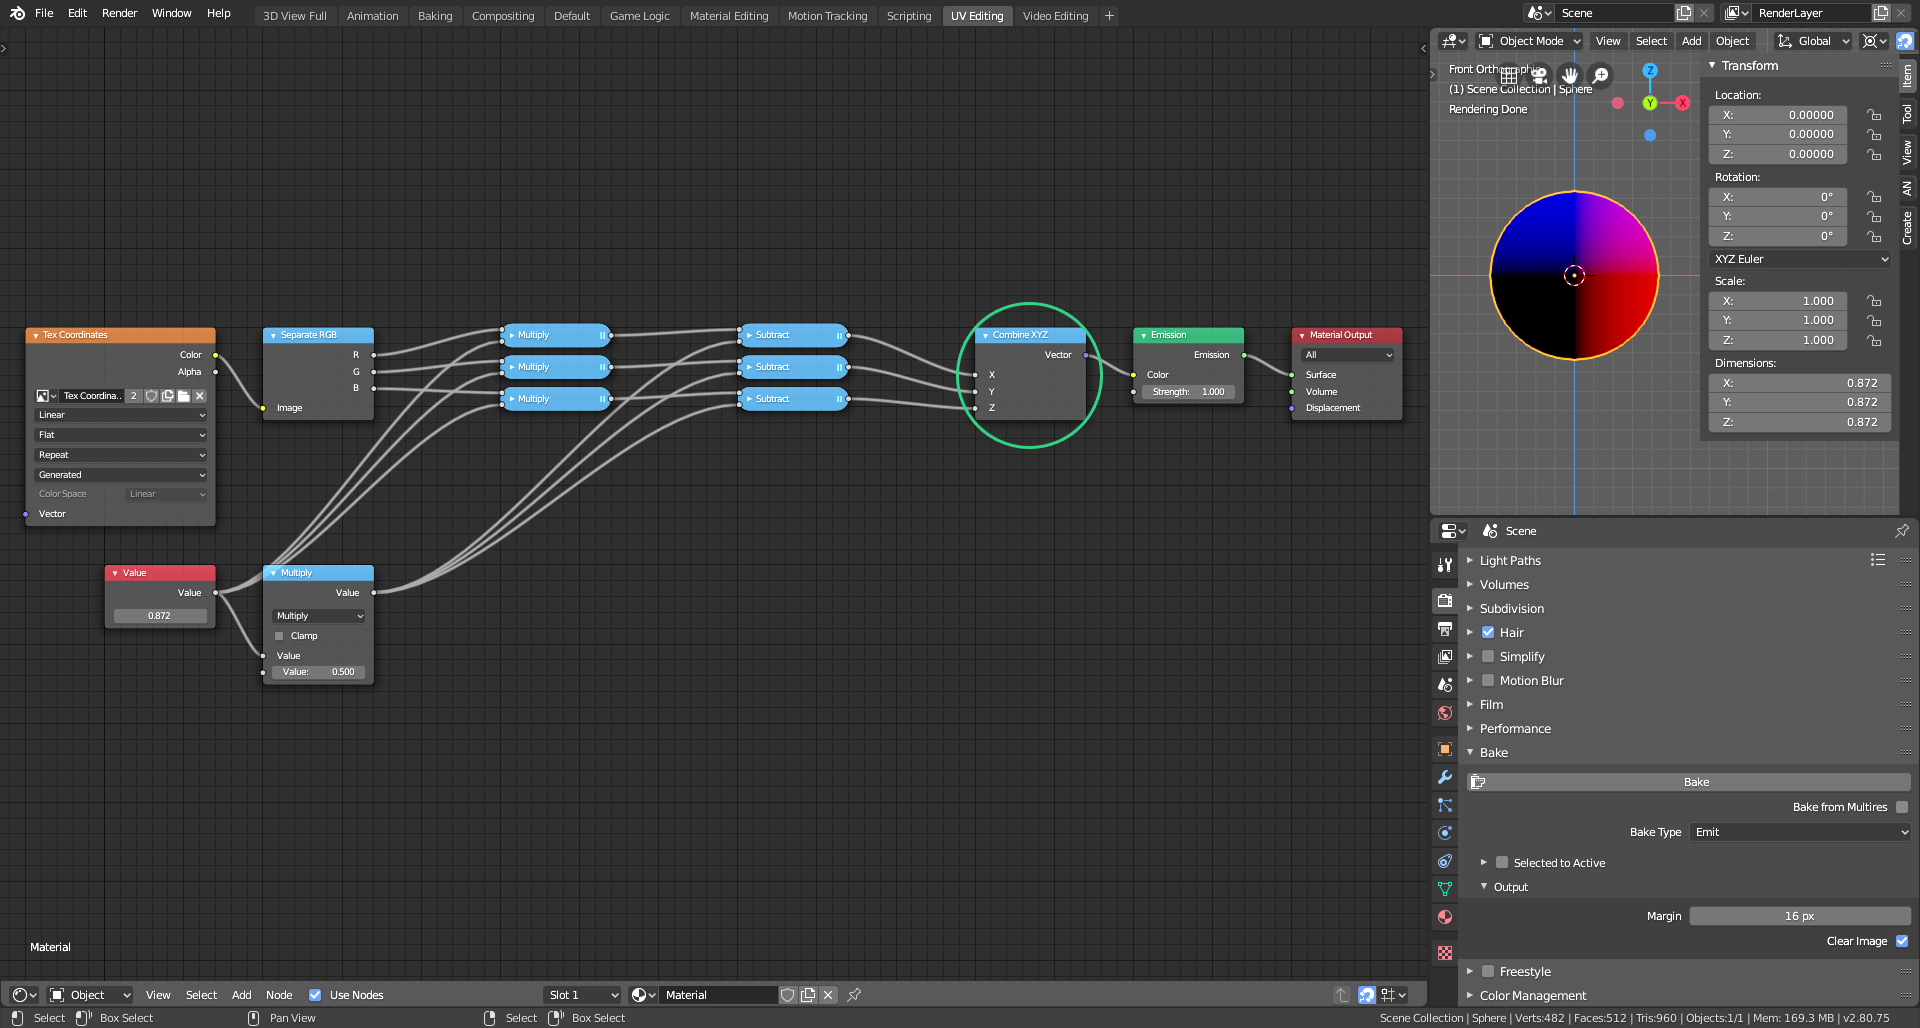
This Combine node (highlighted in green) is now your texture coordinates node.
I hope this is clear enough. Please do ask again if you need more help.
It's cases like this that make me REALLY miss the old "Bake to Vertex Colors" option. Does anyone know why that was removed?
![]() spikeyxxx ggcs_dev You both have shared some clever information here. Thanks so much for taking the time to help a fellow member so thoroughly!
spikeyxxx ggcs_dev You both have shared some clever information here. Thanks so much for taking the time to help a fellow member so thoroughly!
Admittedly I've never thought to bake the object coordinates to a texture. That's kinda brilliant.
Alternatively ![]() zhuk0v1811 could parent the eyeball object directly to the bone instead of using vertex weights.
zhuk0v1811 could parent the eyeball object directly to the bone instead of using vertex weights.
Thanks Kent! The idea came to me a while ago when I wanted to use my procedural wood on a curved-back chair.
Directly parenting the object to the bone is definitely much simpler and quicker! Why oh why do I complicate my life so???
Thanks so much Spikey!
I still reckon @theluthier 's solution of parenting the object to the bone instead of using vertex weights is much more efficient and easier, but it (nearly) never hurts to have one more node-based trick in our arsenal.
![]() spikeyxxx Right!? I'm headbutting my desk for not thinking of that!
spikeyxxx Right!? I'm headbutting my desk for not thinking of that!
You're very welcome! It's quite clear which of us three is the professional tutor, right? Bravo @theluthier !