 hello!
i finally finished to model my first character for an animation project :) but i'm stuck to the stage of polishing the armature.
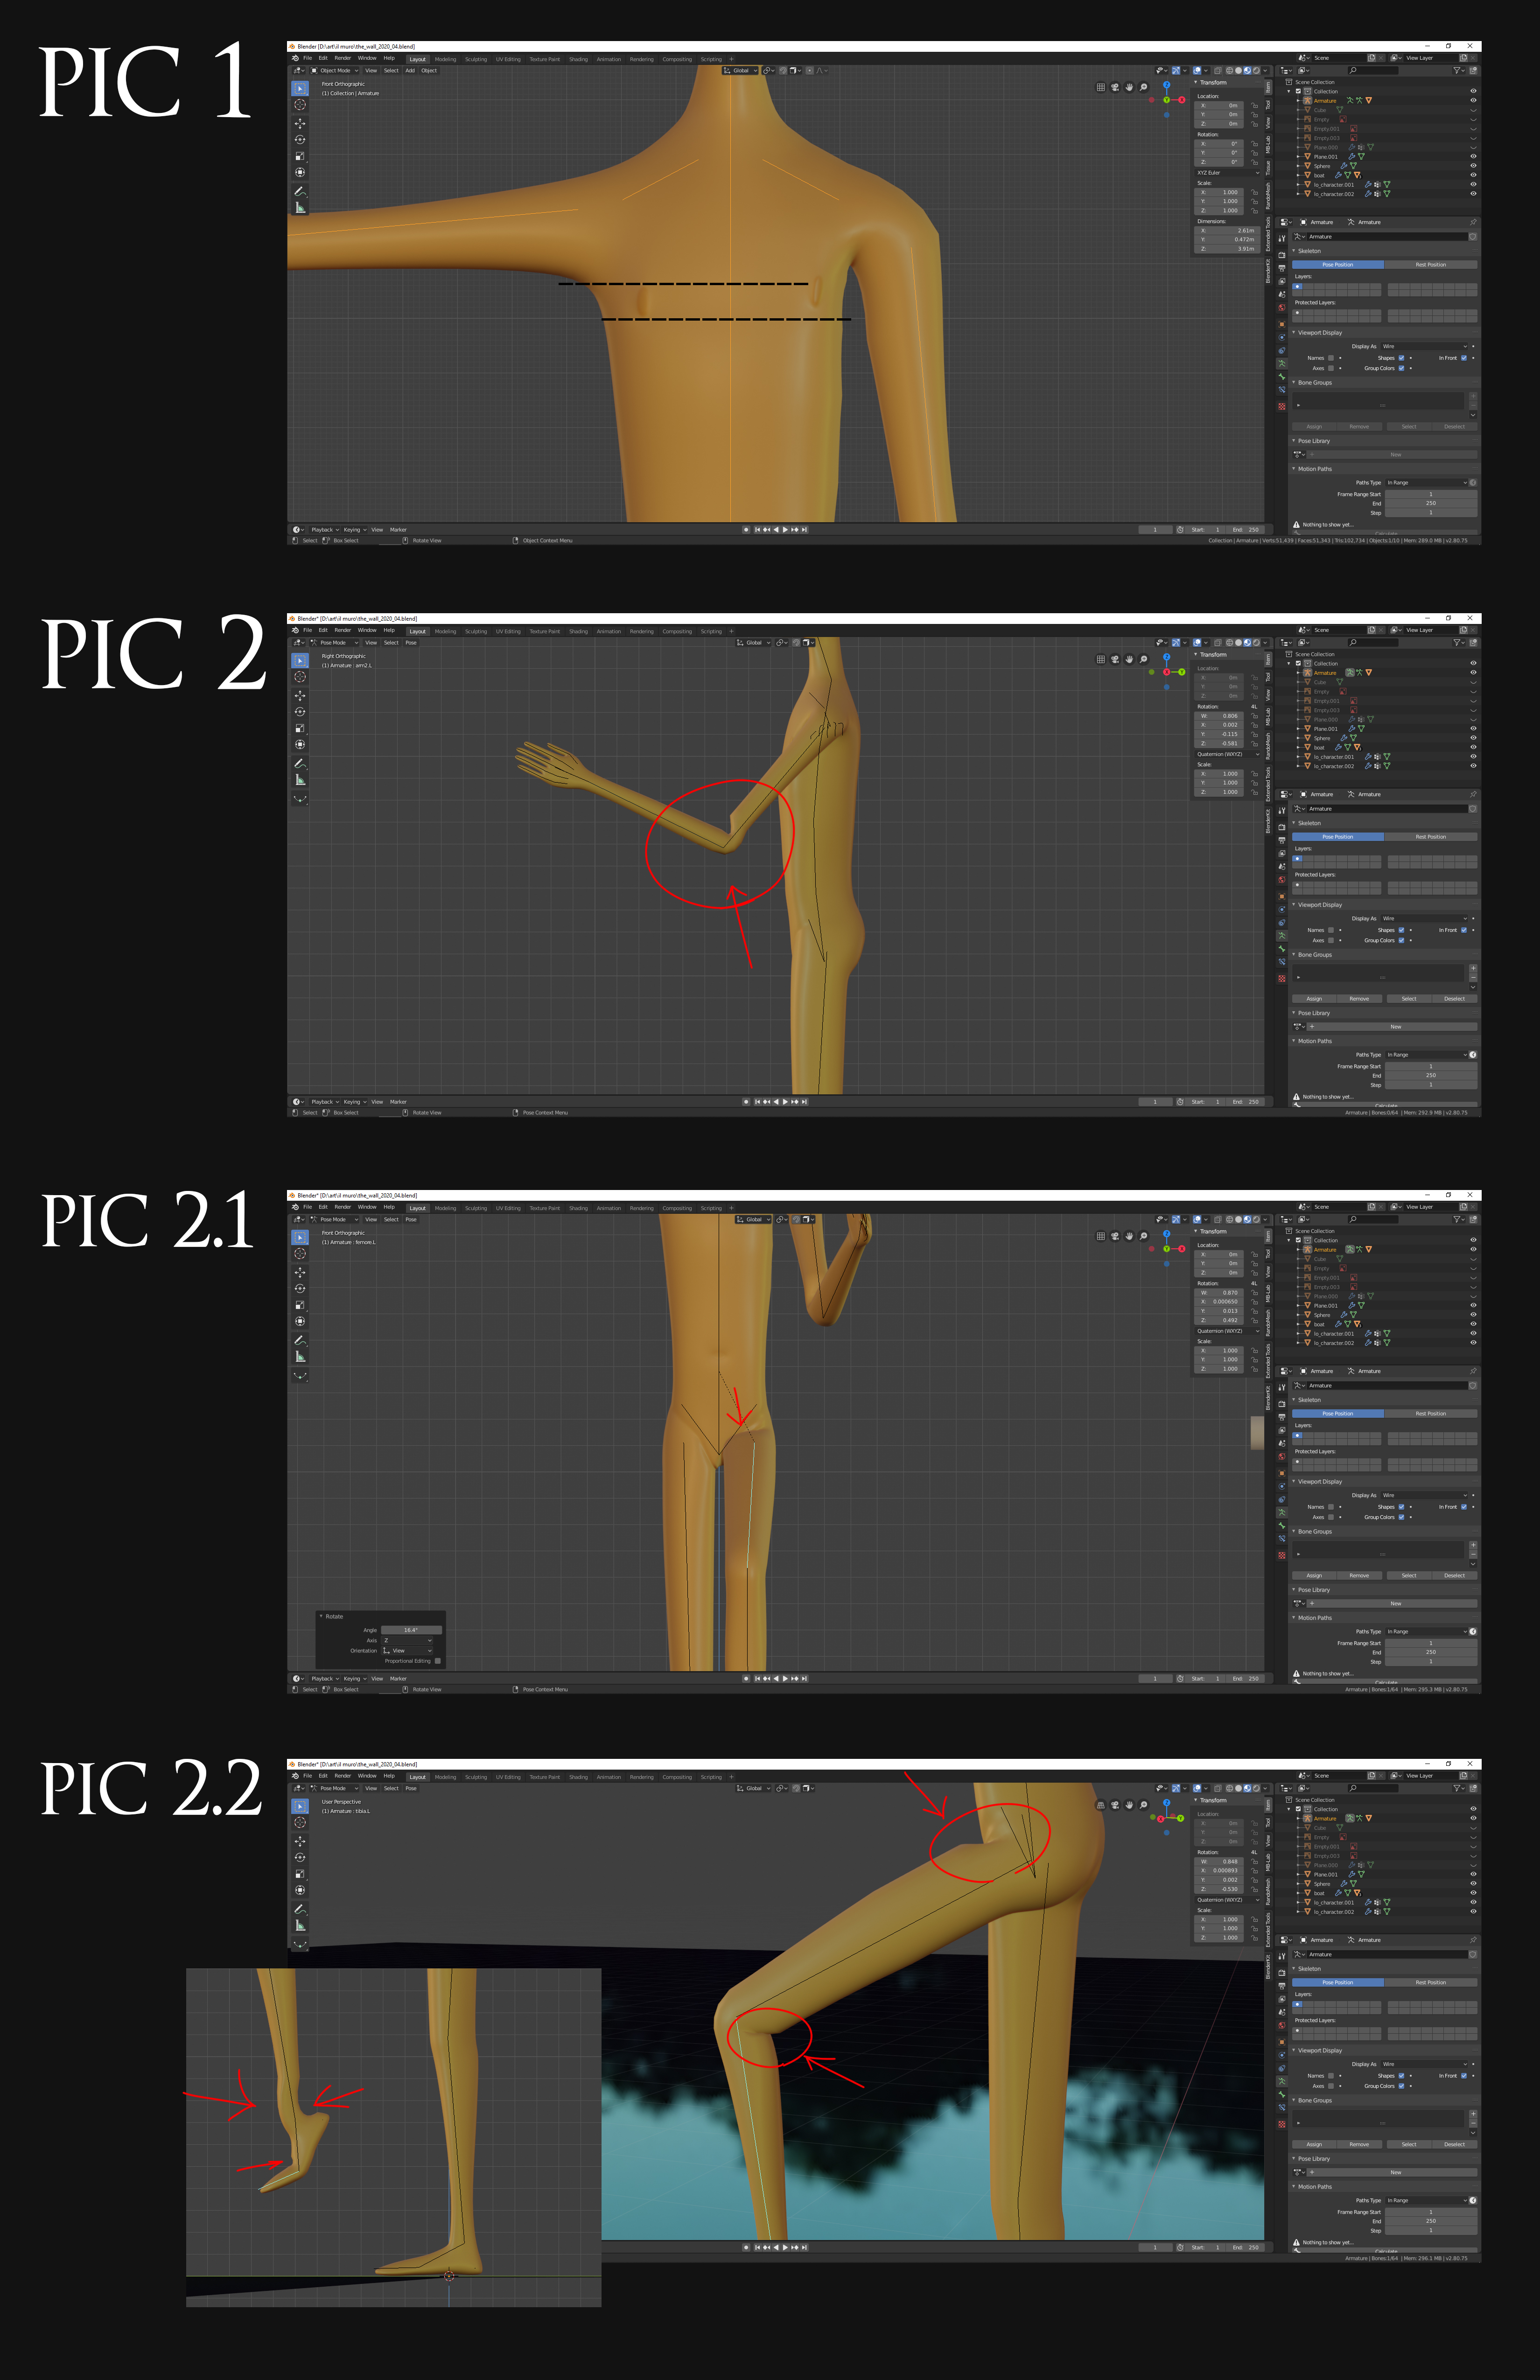
so i parented the mesh with the armature with automatic weights and i'm quite happy with the result but i get some errors that i don't understand where/how to fix them (attached image).
i tried weight painting but it messes everything whenever i try to paint.
i even tried adding more vertices around the areas and it even exaggerate the pinching.
if anyone can help me i'd really appreciate it.
thanks
Hi Julien.
All of those issues look like it's all related to topology and weight painting.
It's hard to tell without seeing the wireframes but you will most likely need more loops at the joints so they can articulate nicely.
Automatic weights does a pretty good job but if the topology is bad, it can't work its magic.
Here's a couple pointers...
Pic 1. Is that the character's nipple? Not sure, but it looks like those verts are weighted to the bicep when they shouldn't be.
Weight painting to remove the un wanted weights should fix that.
One thing that confuses people is the normalizing of these weights. The deformation weights always add up to 1.0 under the hood no matter what the values actually represent.
What does that mean? If a vert is only assigned to one deformation group at .000001, this will be normalised to 1.0
If you have a vert weighted to 1.0 to two separate groups. this will be normalised to 0.5 to each of those groups.
When you are weight painting - turn on 'auto-normalise' so it will make this easier to understand.
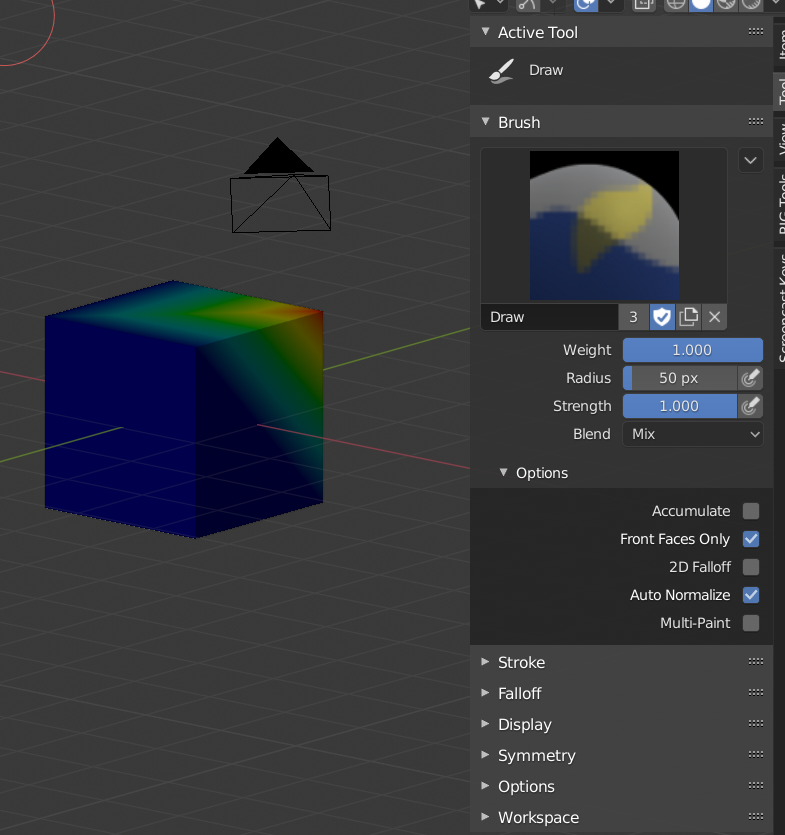
(see it on the right there?)
Pic 2 - 2.3:
This is all weight painting and topology.
The foot bone has too much influence over the shin. So when the foot rotates it takes the bottom of the shin with it. You can weight paint to fix this, but if you want to investigate what weights a specific vertex has have a look in edit mode with the vert selected.
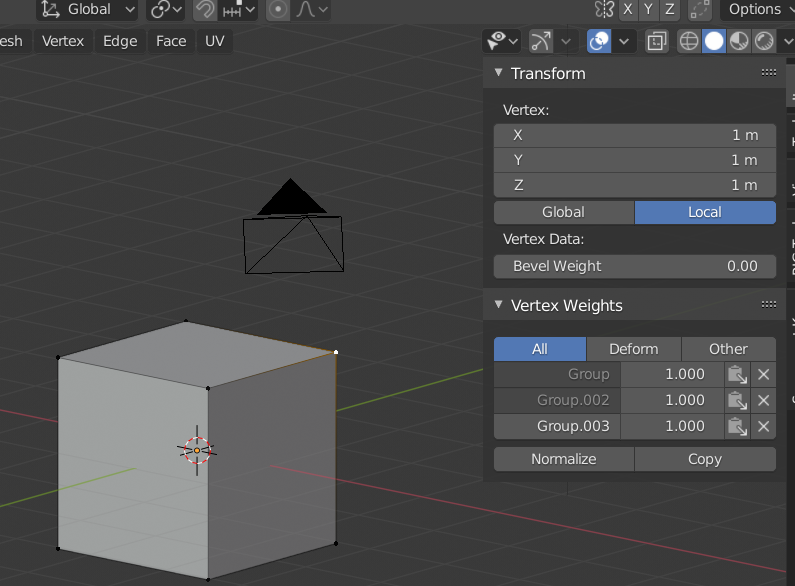
You can see that this vert has 1.0 weight to the groups listed above. you can actually edit those values manually so you can have finer control over the weights. I don't think your model will have too many verts to edit all the problem areas by hand.
With the elbow joint you it looks like there is 100% influence of the forearm which stops at the elbow. Weighting like this will give a sharp crease. The forearm should have a little bit of influence up to the bicep and the bicep should have a little bit of influence past the elbow into the forearm. This will create a nicer deformation.
Weight painting is an artform onto itself.
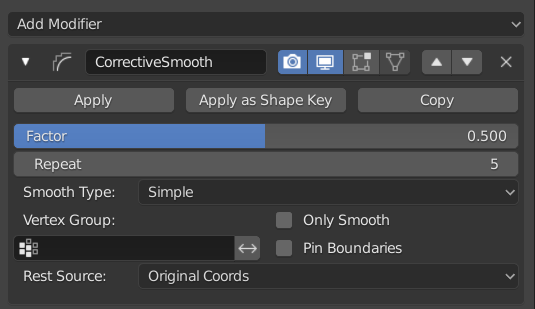
As a last resort you can always use a 'Corrective Smooth' modifier to help you out.
It's important to place this after the armature modifier but you also need to be aware that it can often smooth out things more than you want it to. So you should try to get the weighting looking as good as possible before adding this modifier.
I hope this helps you out,
thank you a lot!
i tried again with weight painting and adding topology but i still encountered the same errors.
but then i read again and thought about what you said on vertex weights and something clicked.
i added some extra loops around the areas and i then decided to try to determine instead which vertices i didn't want to affect the mesh (i always thought the opposite, how to paint/add to correct the weights with draw/add/subtract and i always end up to mess with the automatic weights).
so i started painting with the draw brush with weight set to 0.0 / strength set to 1.0 and i removed the vertices i didn't want to affect the mesh/bones and i finally achieved a quite good smooth result.
i'll continue to work on it as soon as i find some free time and post some screenshots
thanks again :)