Regardless of skill level, everyone gets stuck on a model from time to time. In an upcoming live stream (October 15th), I'd like to take any models that you would like help with and demonstrate how to work through the challenging parts.
Whether it's a retopology challenge with edge loops out of control, something simple that just doesn't reflect the right way, or a shape you're not sure how to make, let's work through it together!
To submit your model to be looked at live, post a .blend file of what you've tried already as a reply to this thread (you can link from pasteall.org or Dropbox, Google Drive, OneDrive etc.) and what part of it that you are either stuck on or not quite happy with. Screenshots and extra context for what you're modeling it for would help!
If you would like to take a crack at helping a fellow user, that's awesome! Please reply to their response and not the main thread to help keep things in order. Thanks!
Submissions are due by October 10th.
Let's get modeling 🐵
damn I think I lost the file, but I was working on a Cadillac would love to have some help with that.
Hello Jonathan. My name is Josiah. I'm really excited to see what happens on the 15th and am hoping to attend!
I'm struggling with the workflow of sculpting through retopo through texturing. I always want a finished project to share at the end, so I get super excited to head into retopo and UV's, but that's where I slow down due to rushing into it too soon. My questions all revolve around that process and how it should be approached.
Q No.1: Is about mesh density and detail in retopo.
I find that the hands and feet of characters are so dense and that density travels up the arm into the body in unwanted ways. How do you keep that from happening?
Q No.2: Is about motivation and how to push through an entire project, especially a large one?
Q No.3: When do you stop sculpting and move on?
I haven't been much of a sculptor so far. I prefer Hard Surface modeling and then texturing/shading/surfacing. I'm trying to grow my skill set by challenging my sculpting abilities. But I never know when to stop sculpting.
With that, I'll explain my model. It's a creature concept I had while falling asleep one night about two/three months ago, and it worked well as a sculpting exercise, so I ran with it. I had fun sculpting it, then when I felt done I moved on to retopo and that's where I got stuck. The last part I focused on was the back legs. I'm pretty happy with most of the work I did but I never finished it, and that makes me sad. It demonstrates everything holding me back, and that's why I chose it.
The .Blend (Along with images of the specific trouble areas): https://drive.google.com/open?id=1IdGT0DdYgdk_gvtx_egNdgYaIjP4DgNa
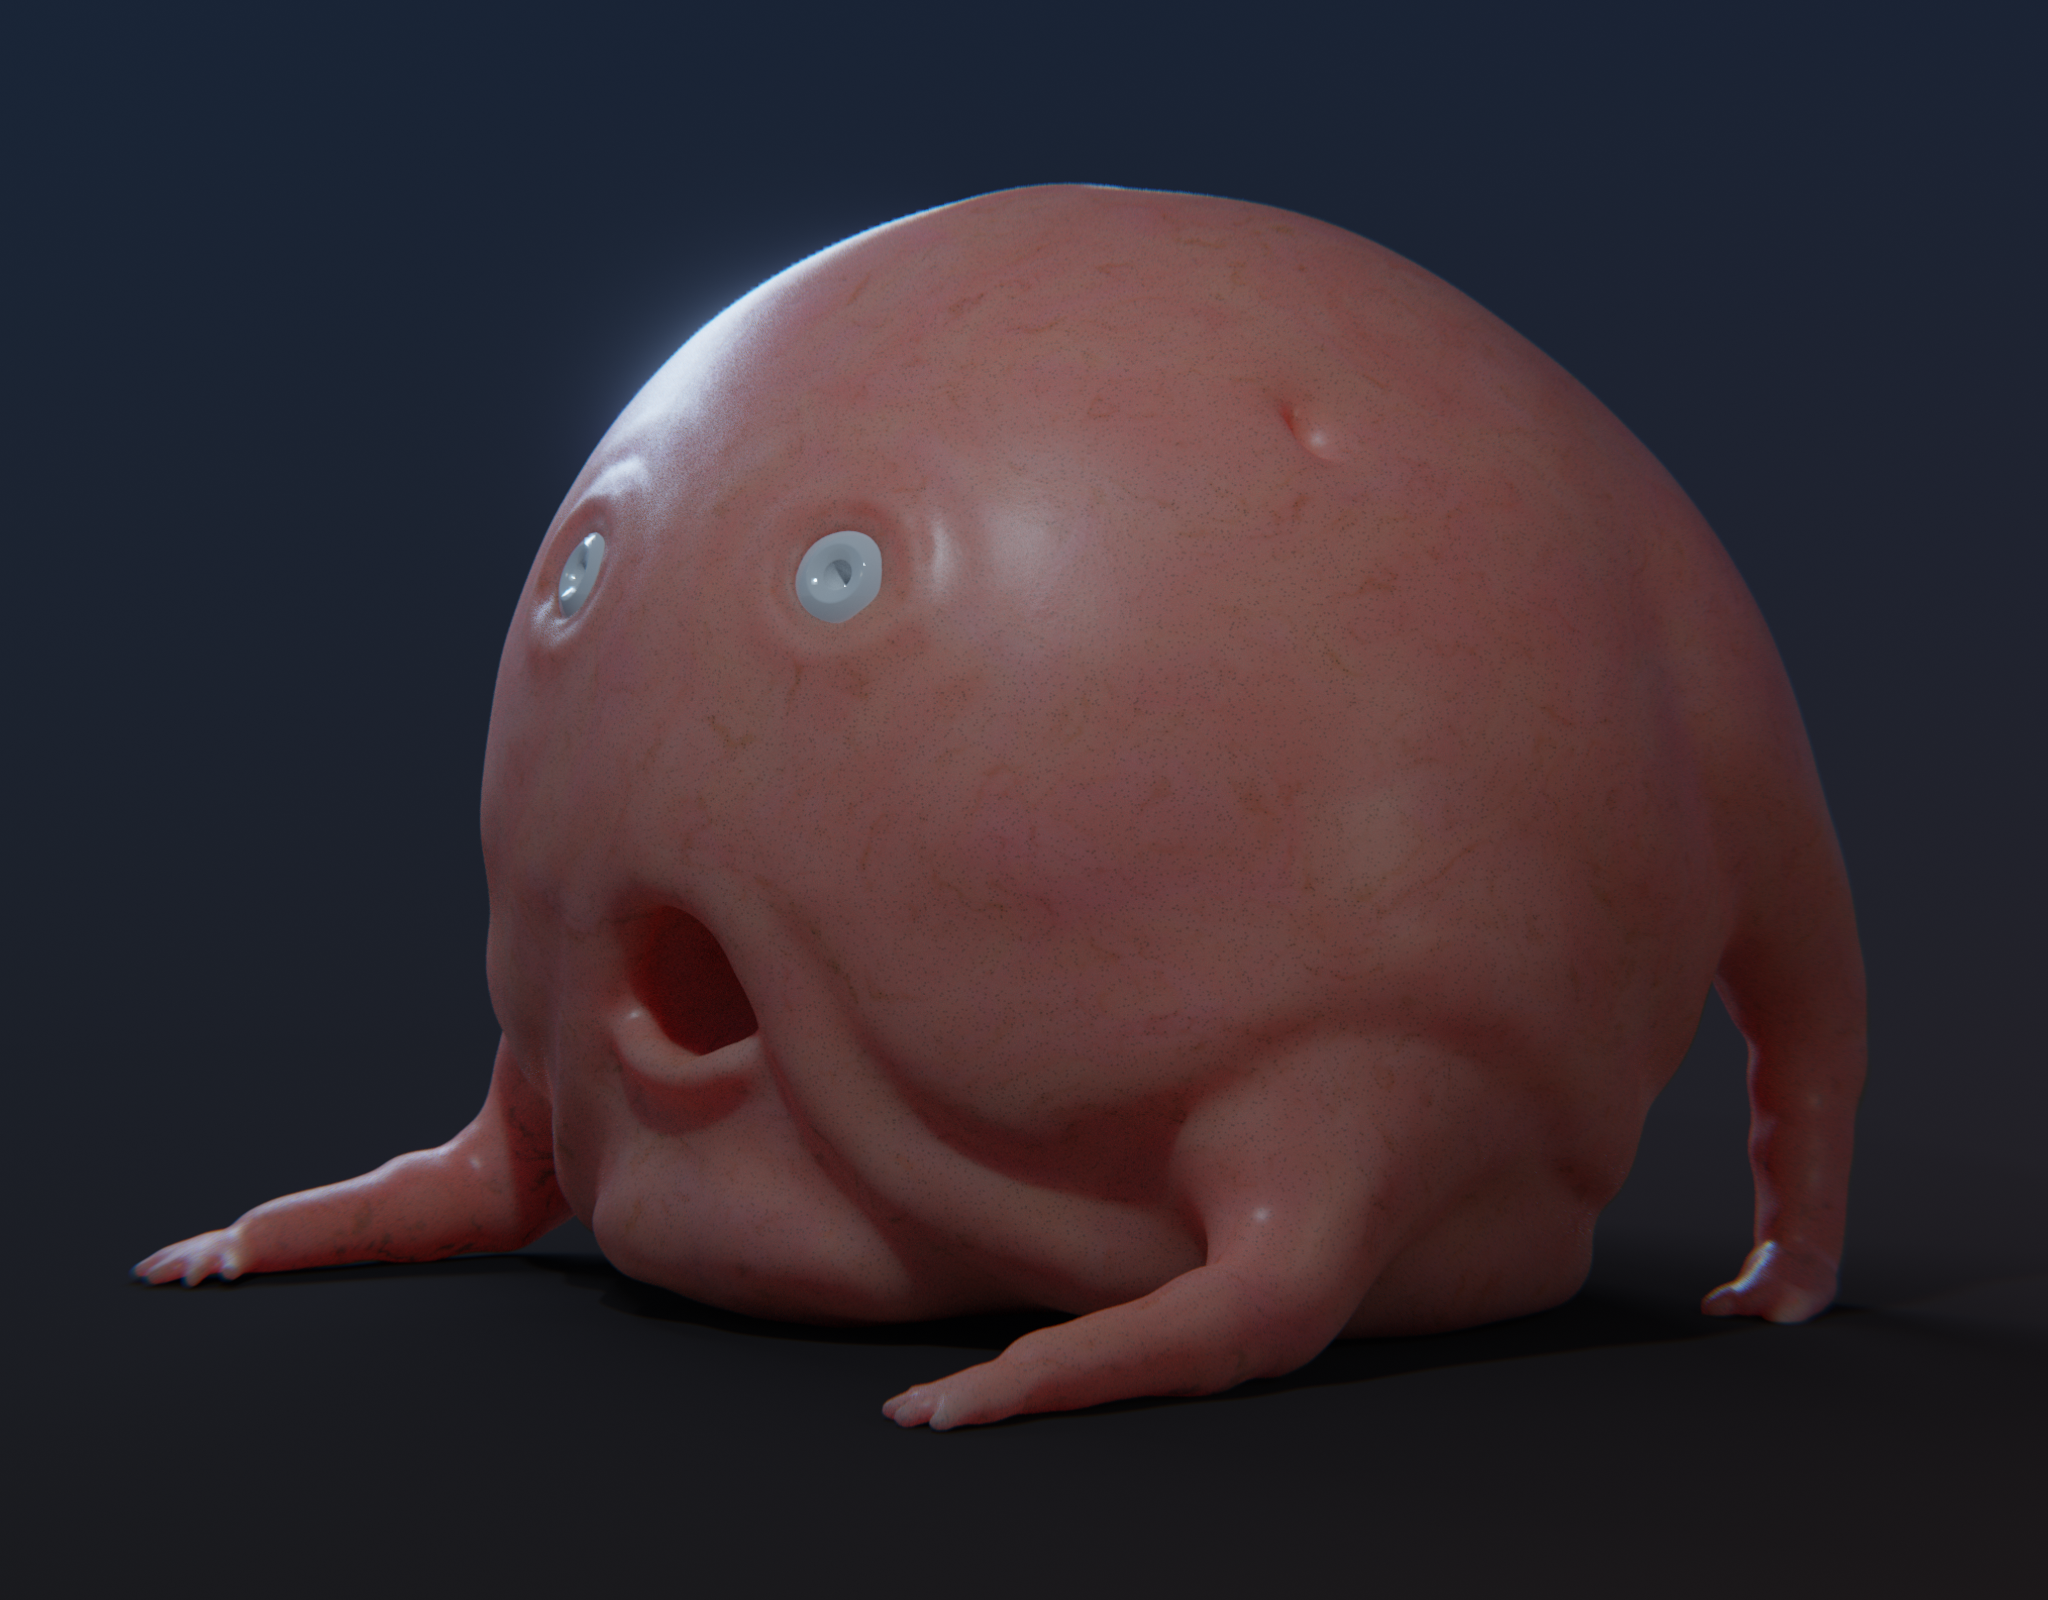 A Render of the "finished" Sculpt.
Here's some of my other work if anyone is interested: https://blendit.artstation.com/
So, one of the personal projects I've been working on lately is to model my entire apartment, to exact scale as much as possible. I chose to do this in order to help myself get more confident with modeling. I have easy access to references and it's also objects I'm more familiar with. And I'm surrounded by objects with all kinds of shapes, which forces me to use different tools within blender to achieve my goal. Anyway, so there is this one object that's been giving me more problems than the rest, and I've started over at least 3 or 4 times, taking a few days or even a few weeks break in between. And it's not even the most difficult or complicated object that I've been working on lately! I've started both from top to bottom, and from bottom to top. Each time I've learned something new. So what's this exciting object I'm referring to? Well, it's a shoe box! Yup, just a simple shoe box...
At first, I would be very careful to just use quads. But as the model started taking shape, I ended up with edge loops all over the place and it's getting more difficult to deal with everything (at least for me at my current modeling level), and I end up caring more about trying to finish the model than making it nice and tidy. But of course that ends up causing other issues like weird shading and pinching. In my last attempt I also ended up beveling the corners of the box, but forgetting to bevel the lid at the same time. So now they are different sizes. At least now I will remember that for the next time I start over....
I was able to minimize some of the shading issues by marking sharp edges all over the place, but is more a quick dirty fix than a proper way of doing it. So I could really use some advice on how to properly deal with that. And some advice on how to approach a model like this would be so much appreciated. And any other advice which could help me finish it. Honestly, it's been driving me a bit nuts lately, and I just want so badly to check this object off as completed.
Here is a Google Drive link: https://drive.google.com/folderview?id=1-ARa6jNxugWLU643nJHbPnyqv0fB315h Hopefully I didn't mess anything up, since I have to use a vpn just to access it, which hasn't been working well lately, and I propably spent more time trying to upload the files than writing this post. Beside the .blend file I also included a bunch of reference images.
Below are two images of the model I've been working on and and an example of a shading issue that can still be seen.
Unfortunately I won't be able to attend the live stream.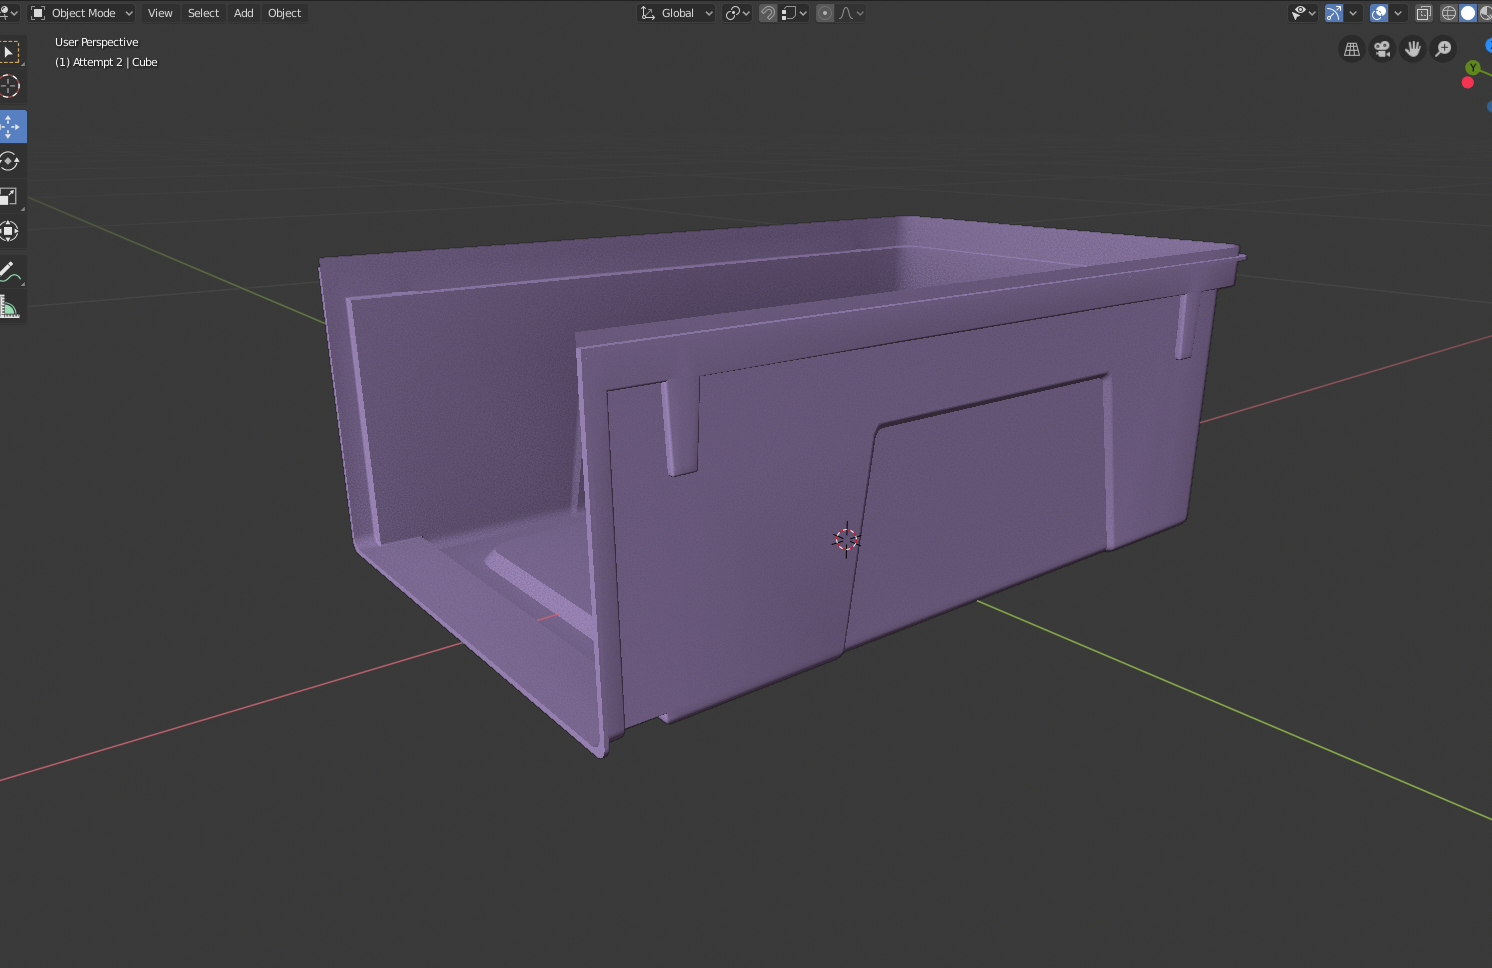

I've been working on a typewriter and I'm quite satisfied with the overall result, but the topology of the case is still troubling me.
It's too messy and complex, but I'm not really sure on how to simplify it:
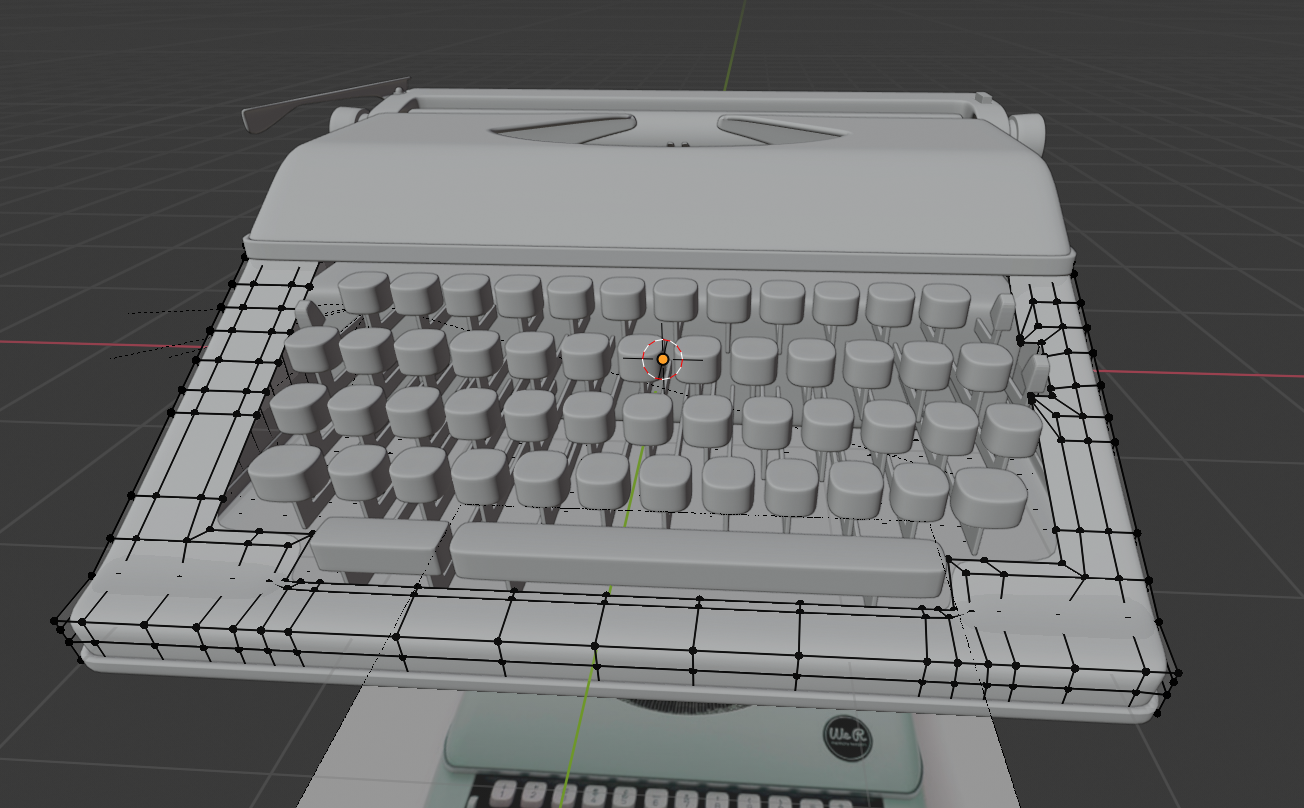
Here is the blender file.
@jlampel Hey Jonathon,
I am working on a game asset for Unity. It is a turn-based game where characters attack one another like in Chess but meant to have a silly and goofy theme with a Toon feel.
I originally drew this character a very long time ago with hopes that one day he would come to fruition. Here is the original crude but awesome 2D version lol.
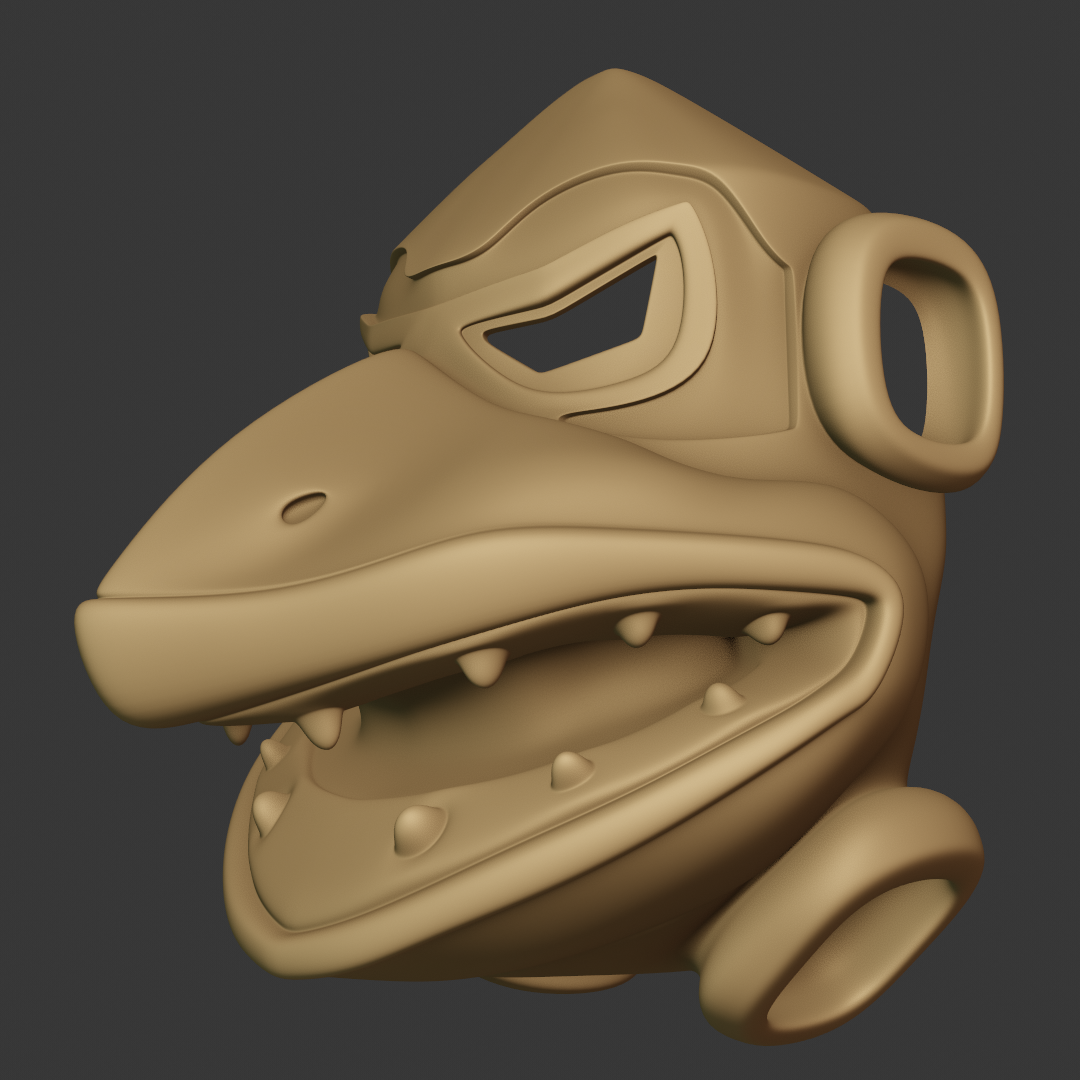
Info/Backstory to Character: His name is Raraku (translated from Maori as Scratch). He is one of the characters on a team of indigenous tribal mask wearers whose masks cover their entire bodies. His legs are shorter than his arms and due to all of the Rarakuing and Pecking his hands and feet have turned into dangerous sharp Claws more-so than fingers. He is jittery and always full of energy due to the power received from his fowl mask.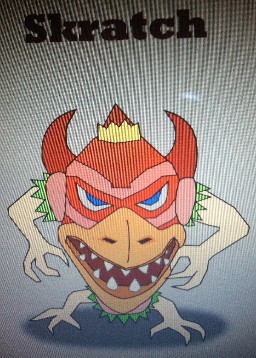 Raraku (Scratch)
Implementation progress thus far: I have got the mask part 80% done. I really like the teeth and beak.
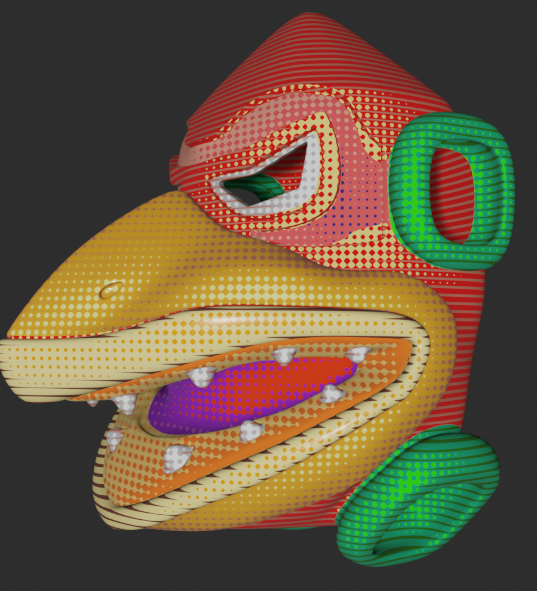 Some Color Shading I am considering, but not set in stone yet.
Requests:
1. I would like to know how I have done with the topology. I think I have made some mistakes but overall I am happy with the shape the mask is turning out to be.
2. I would like to model some feathers around the legs and shoulders (green part of the picture above).
3. And I want to maybe do some detail carve-work into the wood like on many wooden masks with intricate carvings (I'm thinking maybe detailed carving in the light pink area of the picture), so how should I approach that for a game asset? I am just looking for guidance and ideas that keep it simple hopefully since the goal is for mobile platform (iOS and Android).
Thanks!
Here's the link to the blend file.
Update: Oct 13th,
I decided to continue working the mask and character body. This is all "post-deadline" additions and I don't mind if it doesn't get critiqued, but figured I would submit it anyway to show my thought process towards completion. If you have time you are more than welcome to critique this instead but no worries either way.
One thing I think I took away from previous training and was able to apply here successfully on my own: I used the Skin Modifier for the body after having learned that from modeling the beloved CGCookie Monster course, I took some copious notes in my iPhone for quick tips on the skin modifier: this is the short recap I learned
Skin Modifier How-To
Step 1: Make a cube and go into edit mode and select all verts and Alt +M to Merge at Center which makes 1 vertex.
Step 2: Add the Skin Modifier to the active vertex (a.k.a Cube)
Step 3: Use 'E' to extrude a new segment from the selected vertex
Step 4: Extrude away making a stick figure skeleton. Move verts with 'G' as desired.
Step 5: While defining the stick man use Ctrl + A to scale the blocks as they get created. Use Ctrl + R to subdivide a vertex between two verts.
Step 6: Move and Scale verts until 'Skin' shows a nice geometry since sometimes it gets a little wonky.
This made making the body figure super easy compared to blocking it out manually, especially when it came to the fingers and toes. Oh my, it was completely delightful!
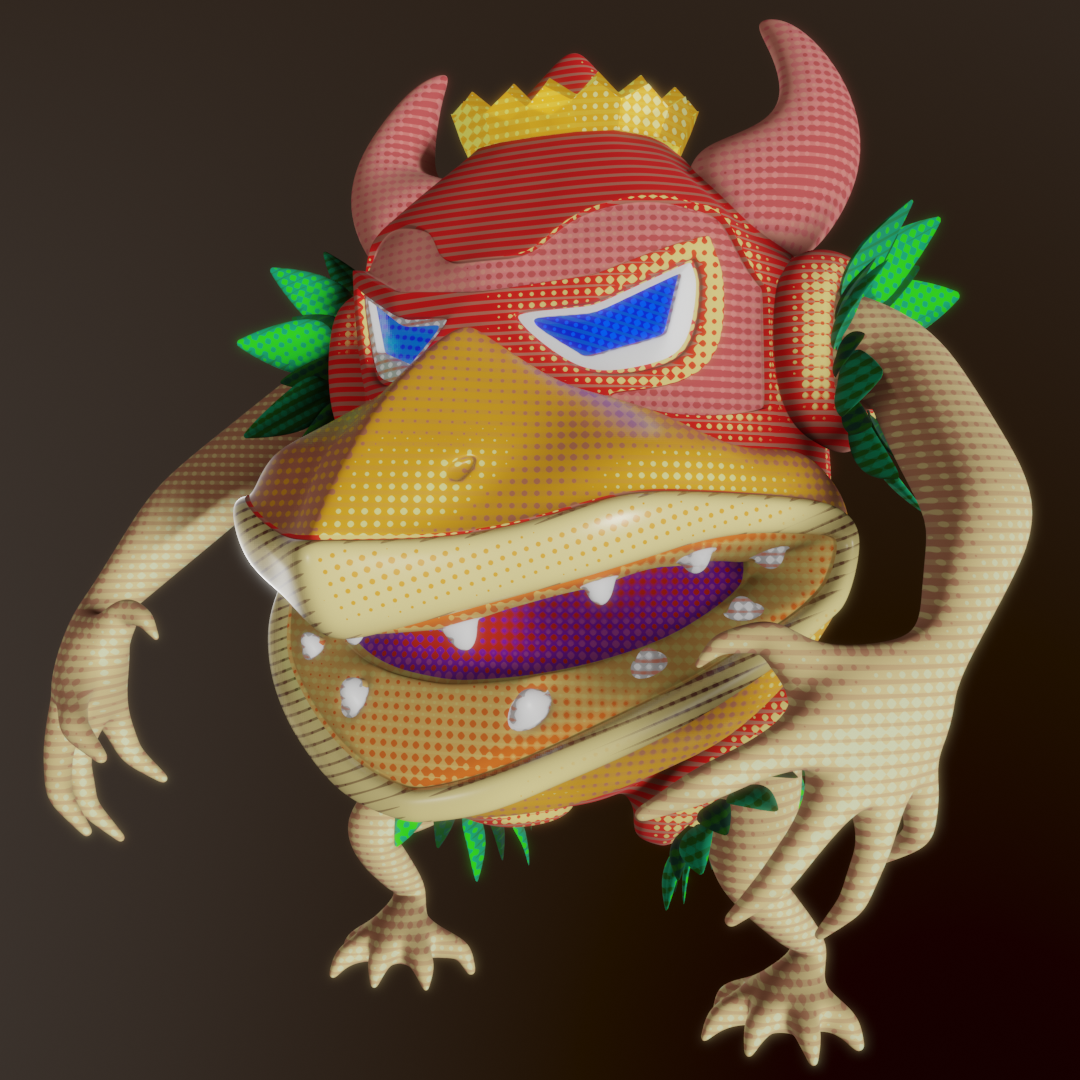
I am finding it really hard to remember how to get sharp corner detail into my mesh and keep it that way for corners that take a hard turn another direction (as opposed to a standard ledge which I have down well). I end up making what I feel is more un-necessary geometry just to get that 'sharp corner' effect. I could really use some good rule of thumb advice for that. I would have liked to get some more sharp around the light pink eyebrow area. It rounds too much for my liking but I wanted to keep quad count to a minimum
@theoryanimation ![]() thebergh
thebergh ![]() eireen @amiemon
eireen @amiemon ![]() blanchsb
blanchsb
Thanks for submitting your work, that was a lot of fun! While I picked apart your models, I want to stress that you all are killing it and I can see that you're all improving really fast. The recording is now up along with a download that includes all my tweaks to the models.
I'll likely write an article or something covering all the main points, and I hope you're okay with me using your work as examples for that since it will likely help a lot of people who don't have time to sit through the 2 hour stream. If not, let me know!
Keep up the good work 👏👏
@jlampel I haven't had the time to watch the recording yet, but just want to thank you first for taking the time to do the live stream. And if there is anything with the model that I submitted that's useful for your article, then please go ahead. Oh, by the way, will there be any more live streams like this?
hi @jlampel thanks again for the feedback and all the explanation, that was really helpful!
Feel free to use my model as a reference for the article.
@jlampel I've watched the recording now, and it's really a shame that I'm unable to attend the live streams. You were right to assume that I had no intention of adding a subdiv to the model. I think it would be overkill here and I'm also trying to cut down on the poly count a bit. After I model each object, I link them in to to another file that contains all the objects for the apartment, and there's going to be a lot of objects in the end.
Thanks for giving me more confidence to not worry so much about all quads. Many of my other models do have ngons, and it's usually on a flat surface. But in the 3d community you always hear how you "must" have an all quad geometry and it almost feels like breaking some sacred rule if you don't. Puts unnecessary stress on a beginner. And by using ngons it will allow me to slant the shoe box a little at the end, which all those extra edge loops were making it really hard to do.
For the beveling, I'll normally prefer to use a modifier, because it gives me a chance to more easily tweak it, or even remove it easily. I don't remember but I think using a modifier here caused me some issues or it just didn't bevel the way I wanted to. Probably user error or too many unnecessary edges interfering. To be honest, beveling is probably what gives me the most issues down the line when modeling.
I tried adding a solidify at the beginning, but it totally skewed the geometry. So those internal faces by the hooks, originally I didn't have those, but when the solidify failed I opted in for filling them up instead. And down the rabbit hole we go. Inability to solve one issue caused many other problems instead.
Thank you so much again for your help and for the live stream. It not only helps me with the shoe box, but also helps me to look at my other models with slightly different eyes.
It not only helps me with the shoe box, but also helps me to look at my other models with slightly different eyes.
![]() thebergh Yay, that was the goal!
thebergh Yay, that was the goal!
will there be any more live streams like this?
Yes! I'm sure I'll do more of these types of things in the future.
@jlampel You are more than welcome to use any of my submission for this exercise. Great job Jonathon. I really learned a lot during that live stream. I enjoy your teaching style and watching you troubleshoot, and fail, and then succeed. It is hard to relate to videos where everything is always perfect. When I see an instructor think through something every now and then it helps. I get it that you don't want too much of that but for live streams I think it is great.