Hi all-
Work got away from me this week, so this is coming in a little hotter than I would have liked, but I'm happy with where it stands so far. I was working on the barrel somewhat concurrently with the treasure chest lesson, so there was a lot of Y->L->shift H->select->fill going on.
I did take some in-progress shots, so I'll try and post them with a writeup here early this week. But in the meantime, here's my
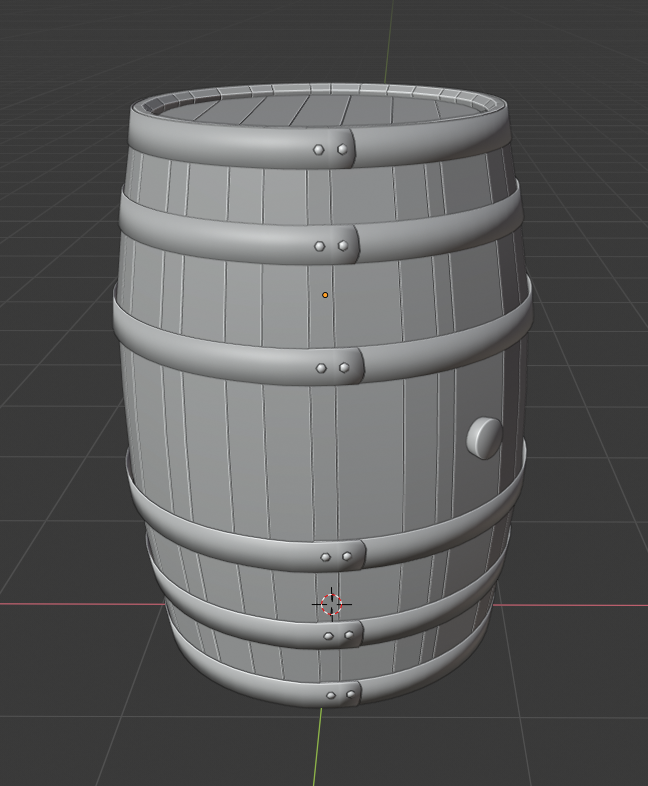
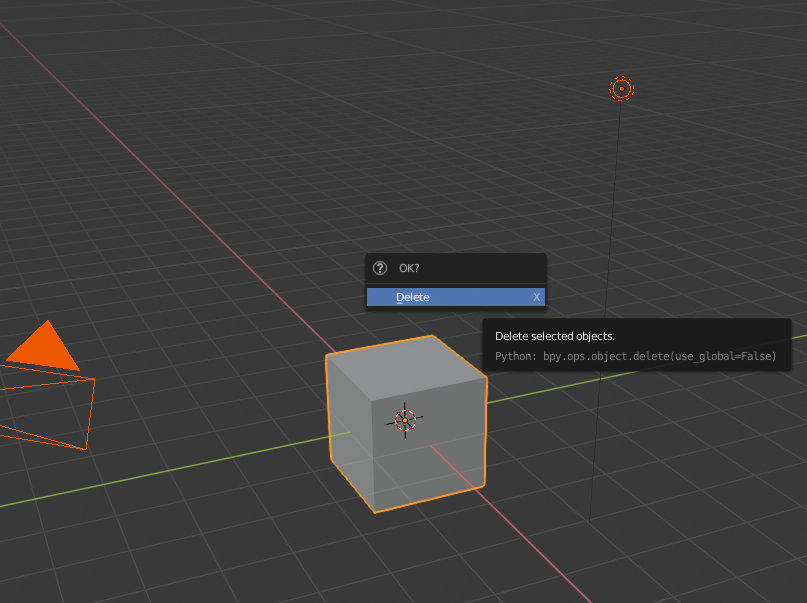
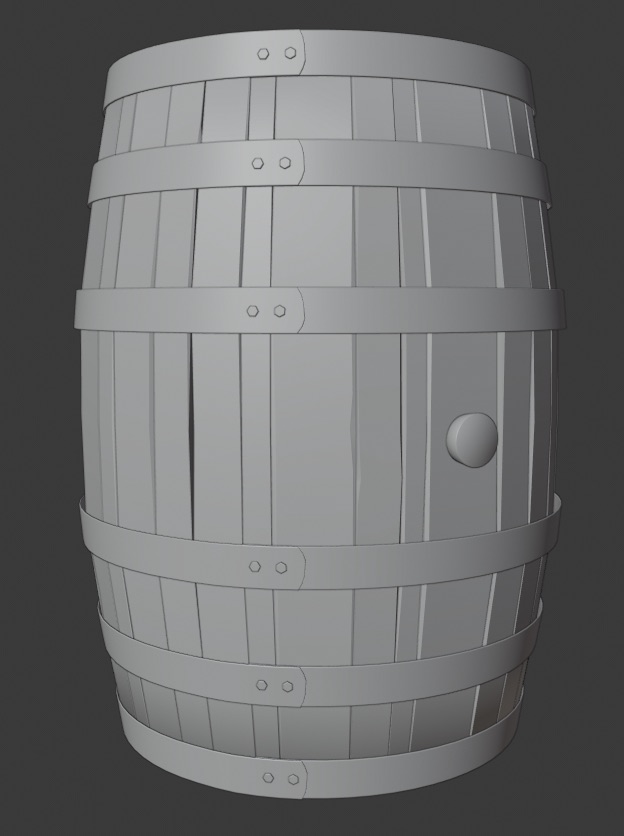
Week 1 homework
Nice details, Jon. The tap plug is a nice touch along with the rivets for the metal bands.
Good effort! I feel you on the "coming in hot" part. But hey, you got something done! Keep going!
I really like it that you made the planks of the barrel ot all the same size!
I watched some barrel making video's on YT, as I didn't know anything about barrels and the first thing that struck me, was that the planks were all different in size...
MMatthew Ullrey, that is not a tap plug! I think that's where they fill the barrel. The tap is going in the lid! In the Bavarian Capital Munich, at the October feast they say then;'Ozapft is!'
Alright, I had some time to sit down and write up my process on how I got here.
For quick reference, I've always been interested in 3d. I remember downloading Strata3d in the 90s to try and make models for game mods, but never really getting past the cool-render-of-a-bullet-in-volumetric-fog stage. I found blender years ago, and keep going through stints where I'll convince myself I'm going to sit down and learn it, fiddle around with it for a little while, then stop using it long enough to forget everything I'd pieced together. Doing this course is my attempt to finally break that cycle and get some dang learning under my belt.
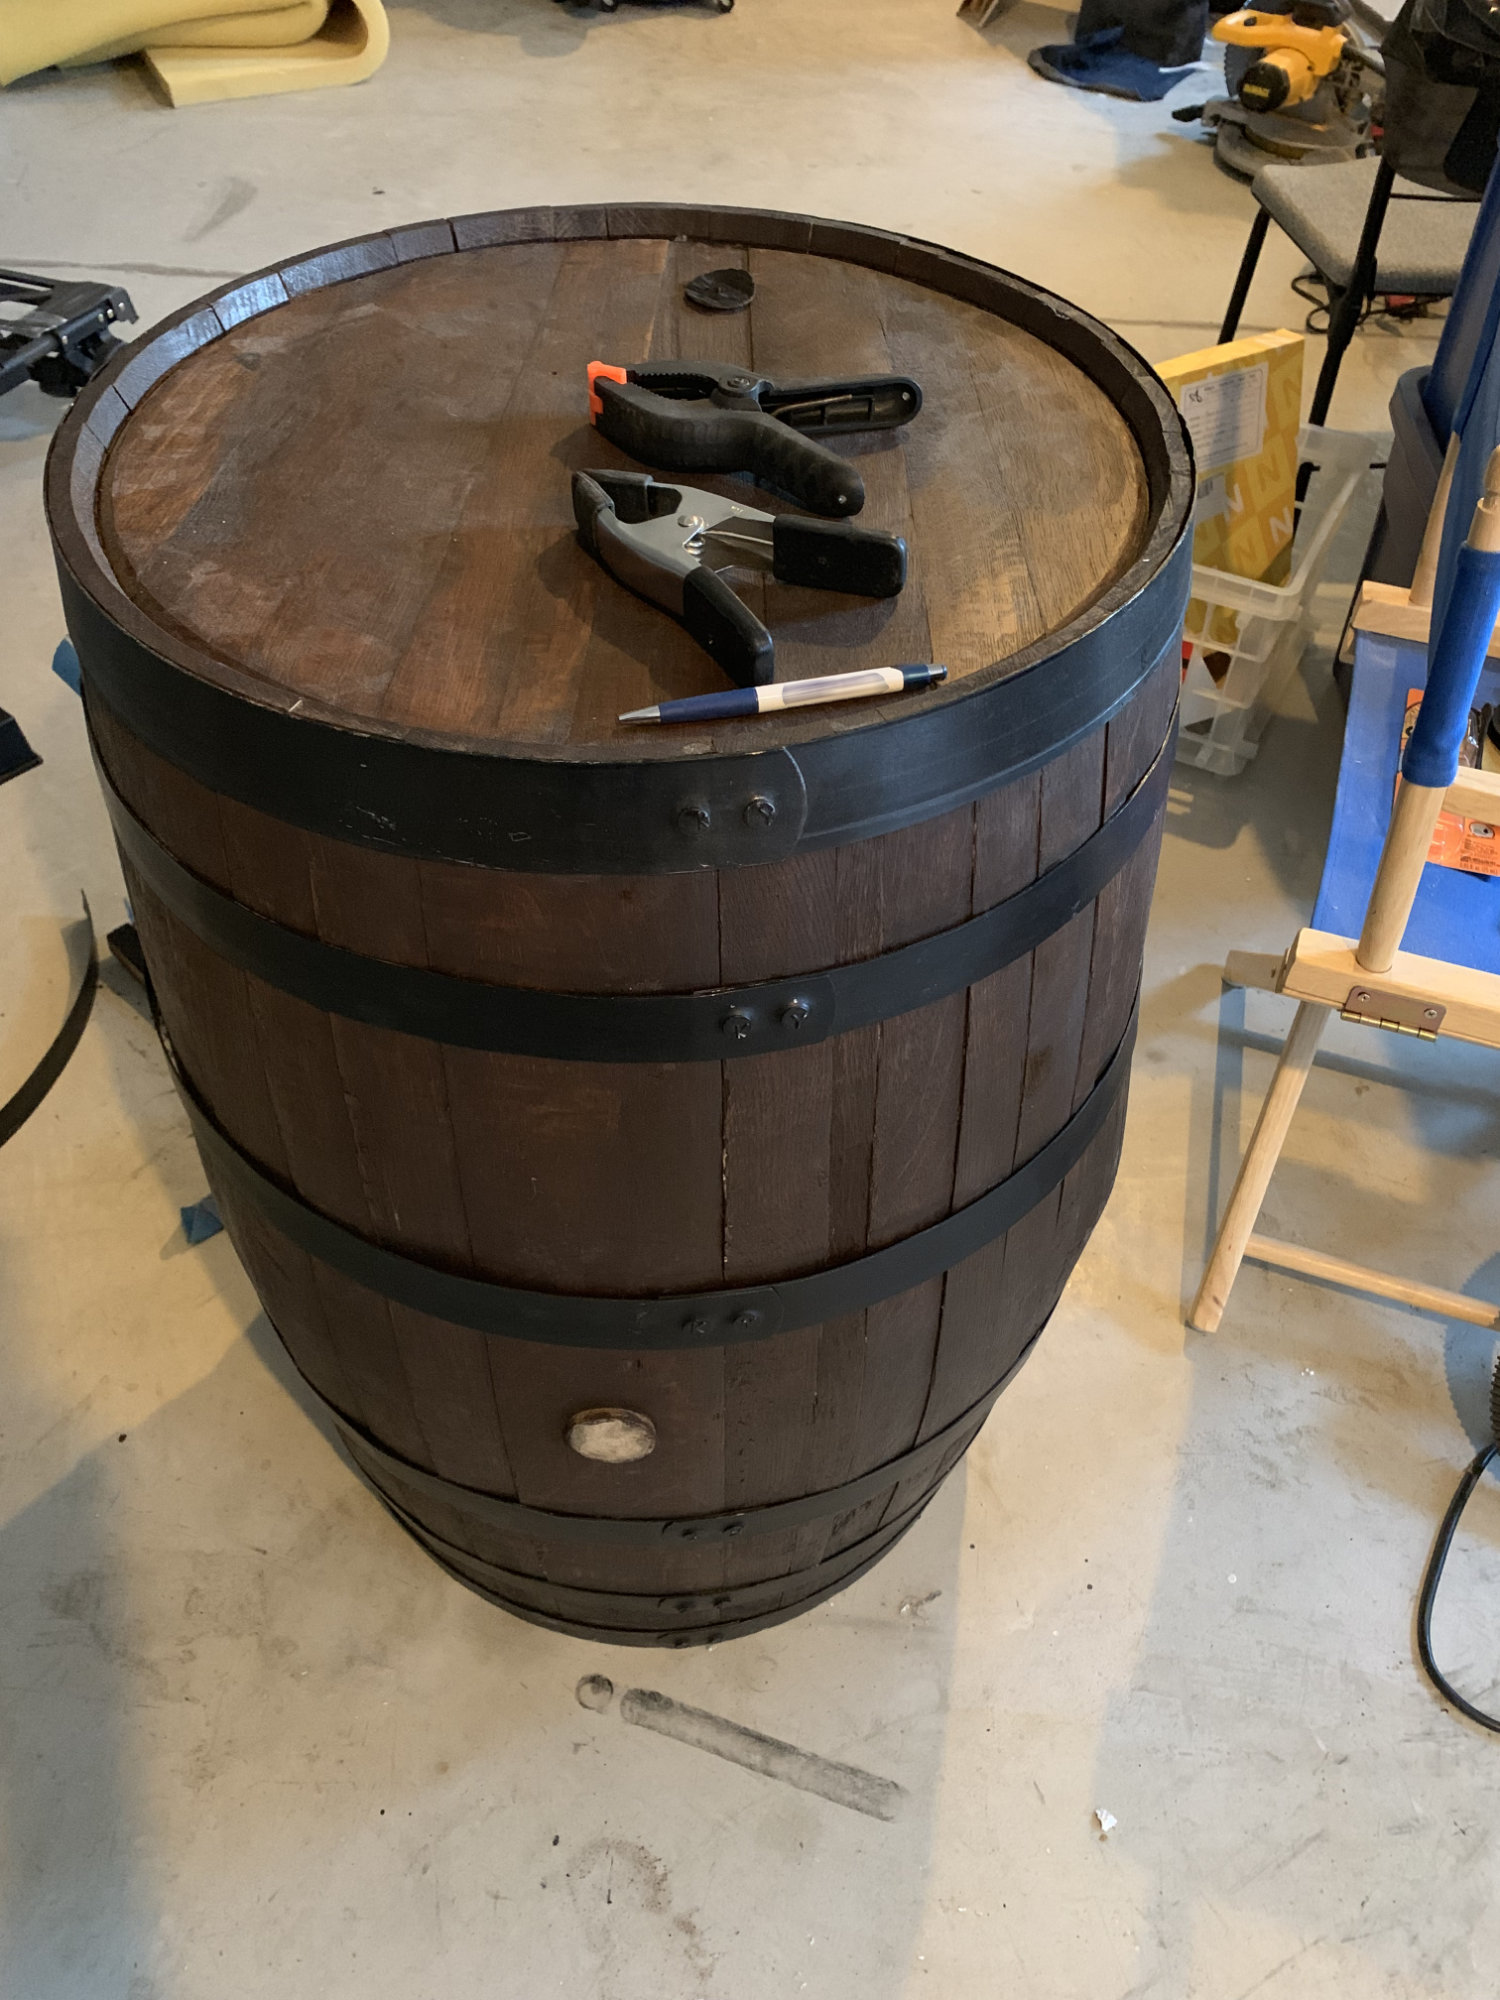
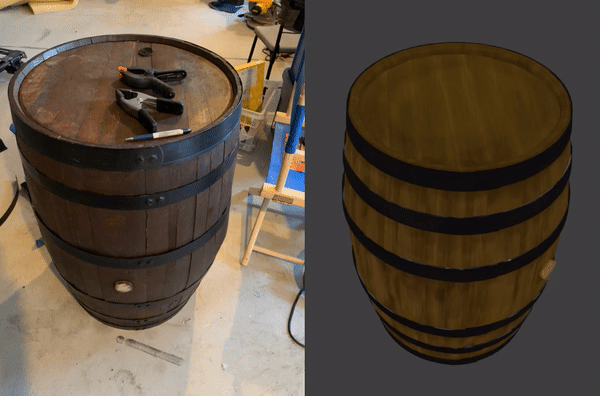
Obviously, I decided to go with the barrel. I have a whiskey barrel in my basement that I'm in the midst of turning into a liquor cabinet. I'm basing my model off of it for easy reference, and to end up with a digital tool to help in conceptualization of construction. Win-win.
One of the things that struck me (as spikeyxxx mentioned above) was the irregularities of the board widths. I always assumed they'd be uniform, and usually when you see modeled barrels they are, but this seems like a quick way to add some character. Plus it gives some variation from the board making process in the treasure chest tutorial.
I was also surprised by the general looseness of the metal rings. They're tight enough to hold things together, but it's not 100% form-fitting.
So on to the model! After getting some pictures and loose measurements, I started with the usual opening gambit.
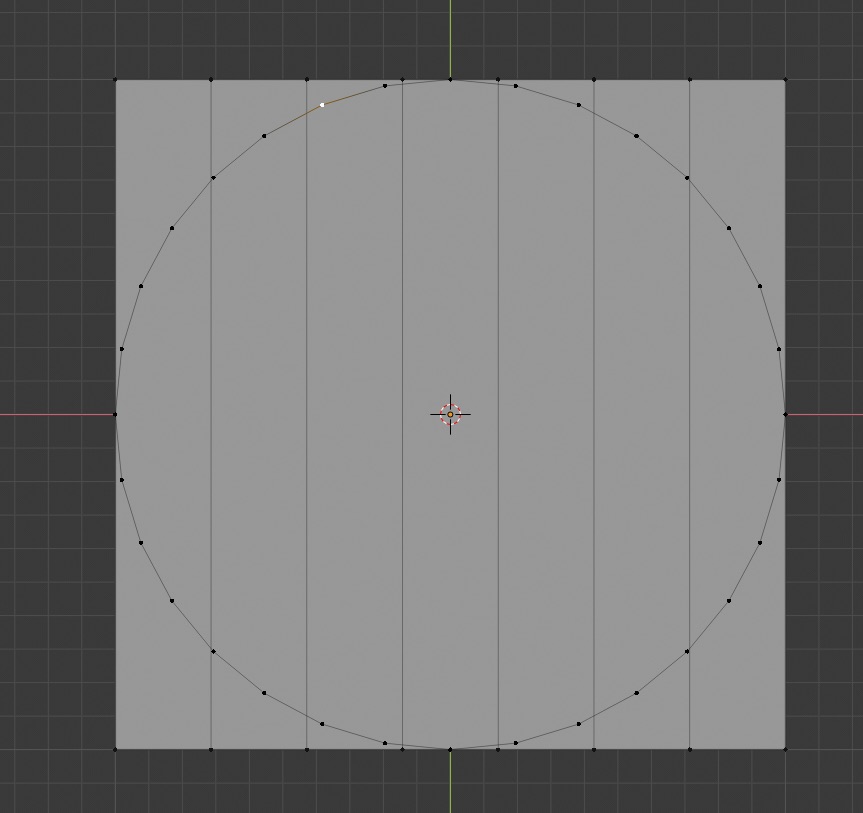
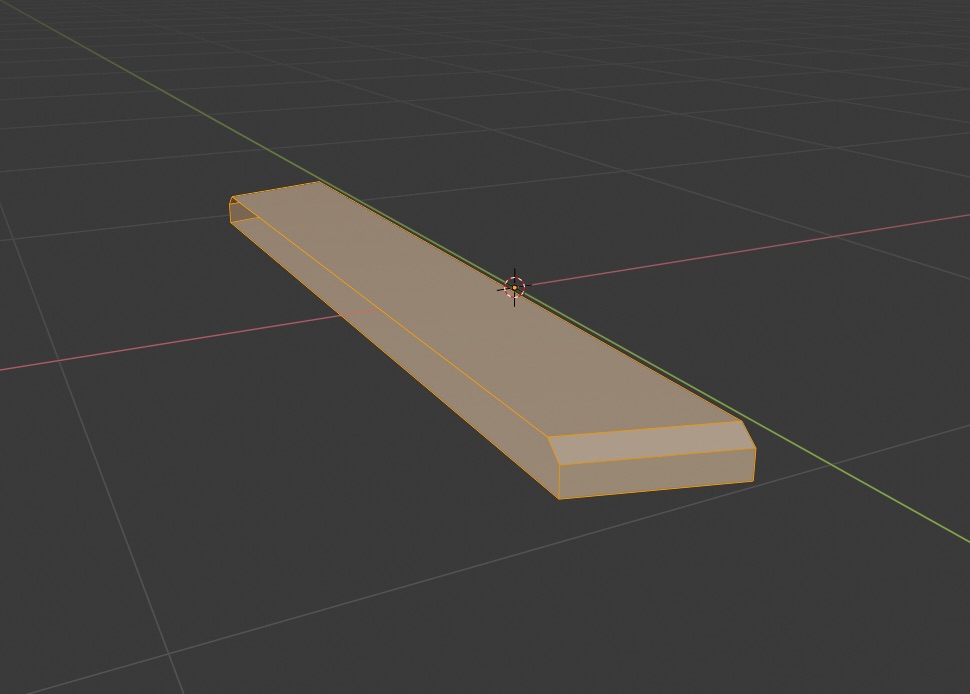
I started similarly to the top of the treasure chest, and made a cylinder with one edge per board.
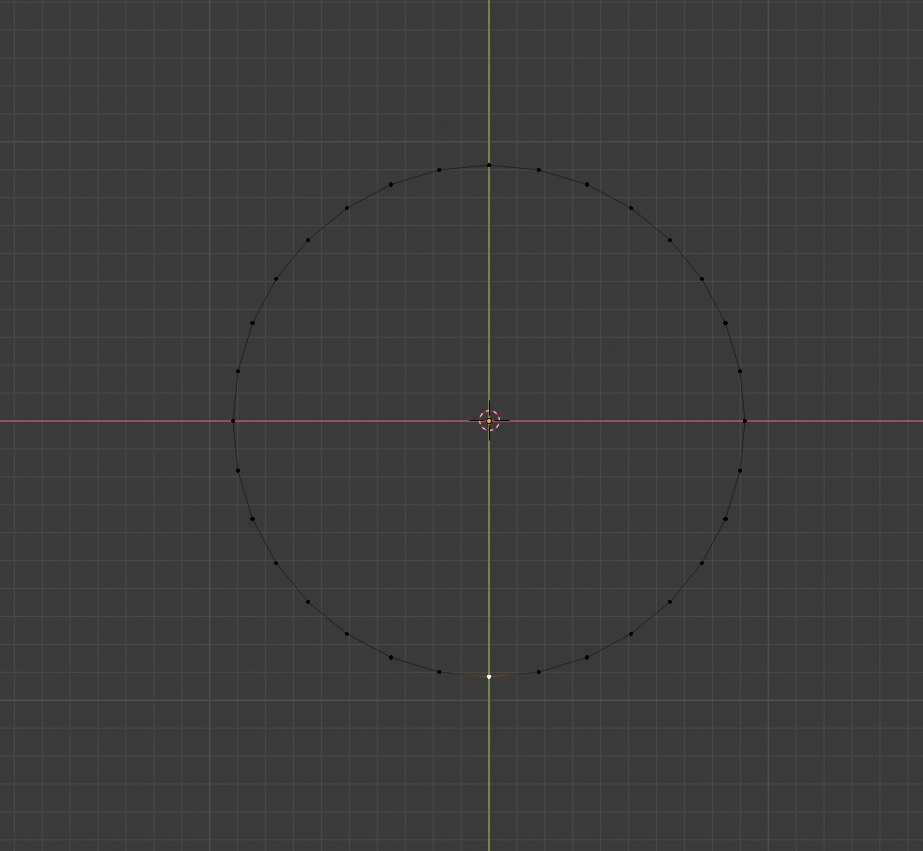
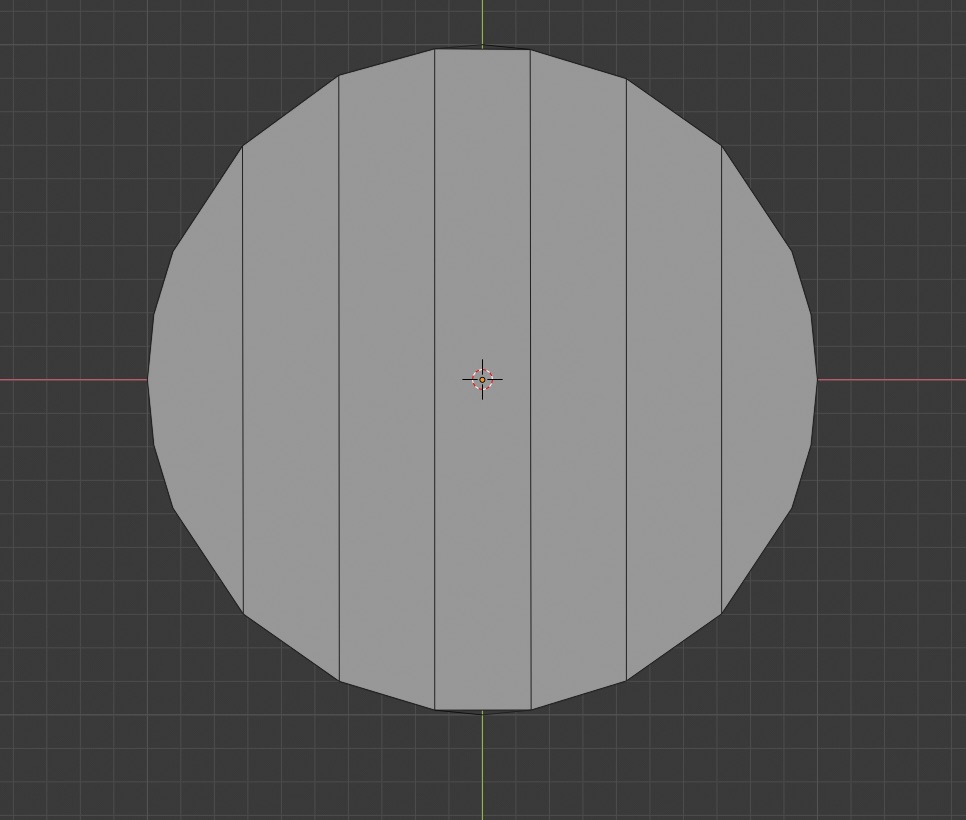
I used the g-g shortcut to slide the vertices along the edges, and got some variance of the board widths while keeping the integrity of the circle. In my time messing around with Blender before I didn't know about that shortcut, so we're already coming out ahead! After the boards were adjusted, it was alt-s to get some depth.
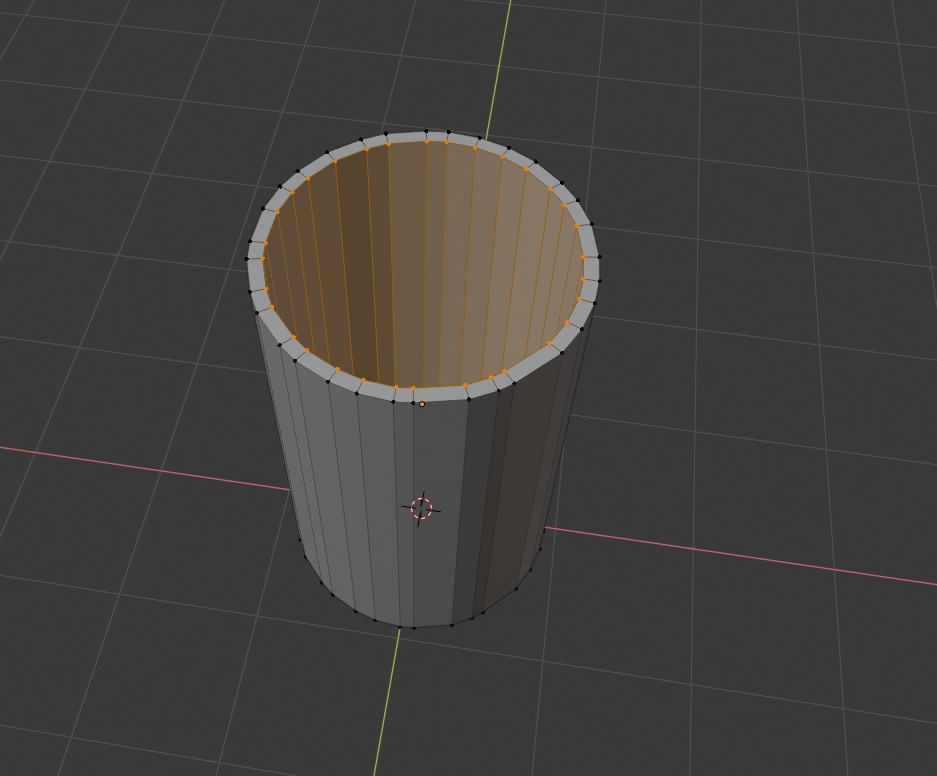
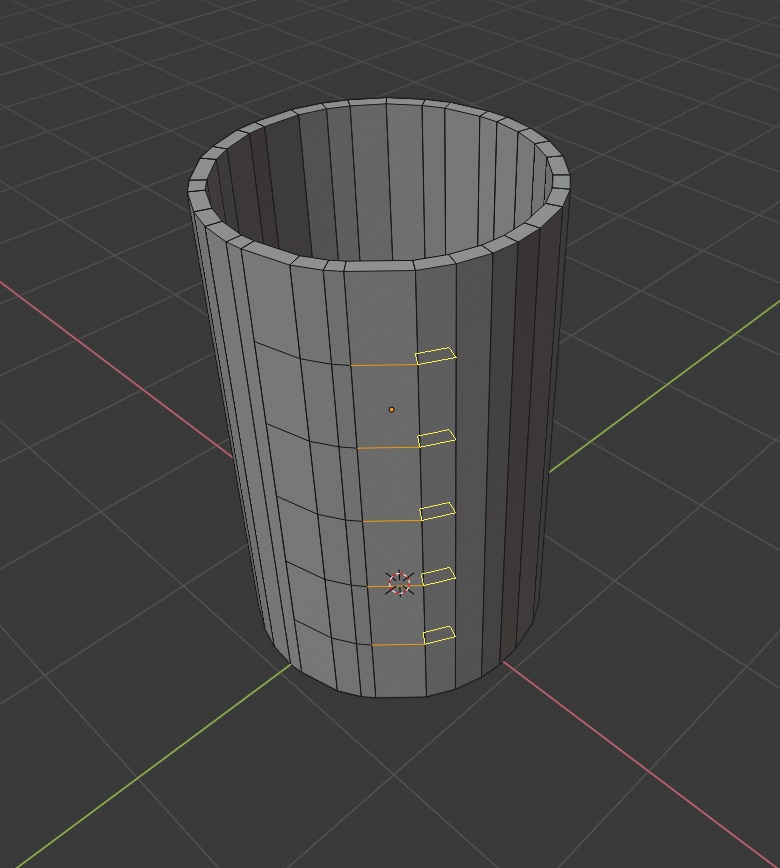
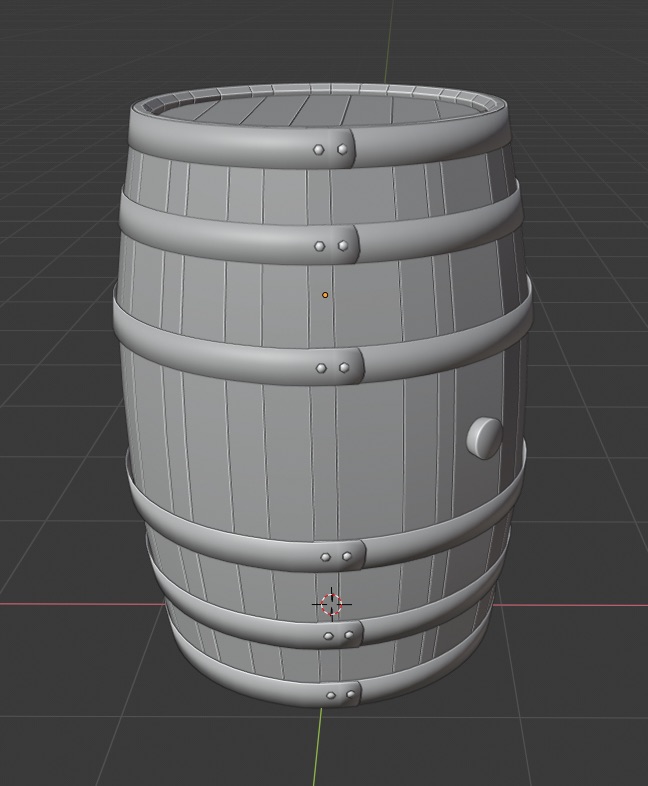
Now as with the chest, there was a lot of selecting boards, separating them, soloing, and filling in missing edges
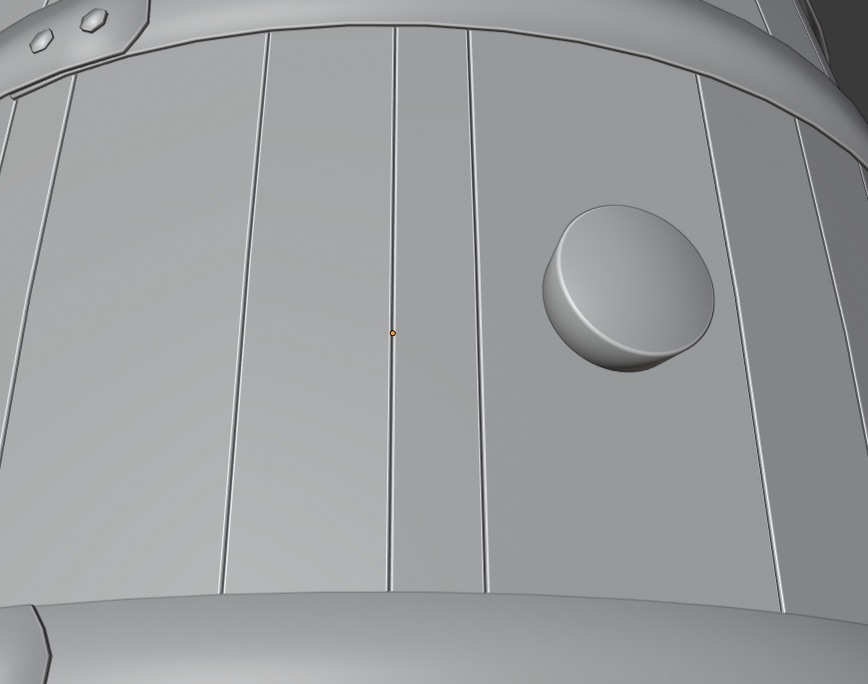
I don't know if there's a better order of operations here to save some repetitive steps, but next I added edge loops to each board in prep for the bulge. I went with 5– that seemed like enough to get a smooth-ish curve without a ton of extra geometry, plus it would give good reference points for adding the rings later. I didn't get an image, but I beveled the inner edge of the top and bottom to match the chamfer on the barrel. I figure I'd wait to do the more minor beveling until the end.
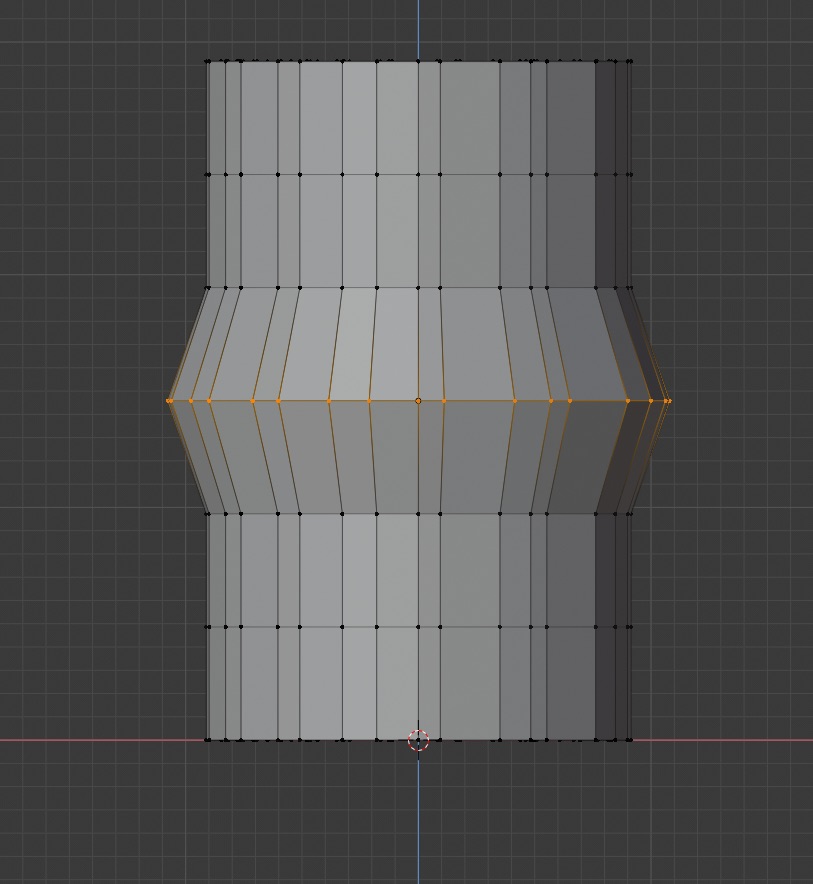
Then, it was eyeballing a scale operation to round things out. On my first pass I didn't select vertices in wireframe mode, so it only plumped out the front. Then I accidentally only scaled along the x axis. Eventually it all came together, though. Learning!
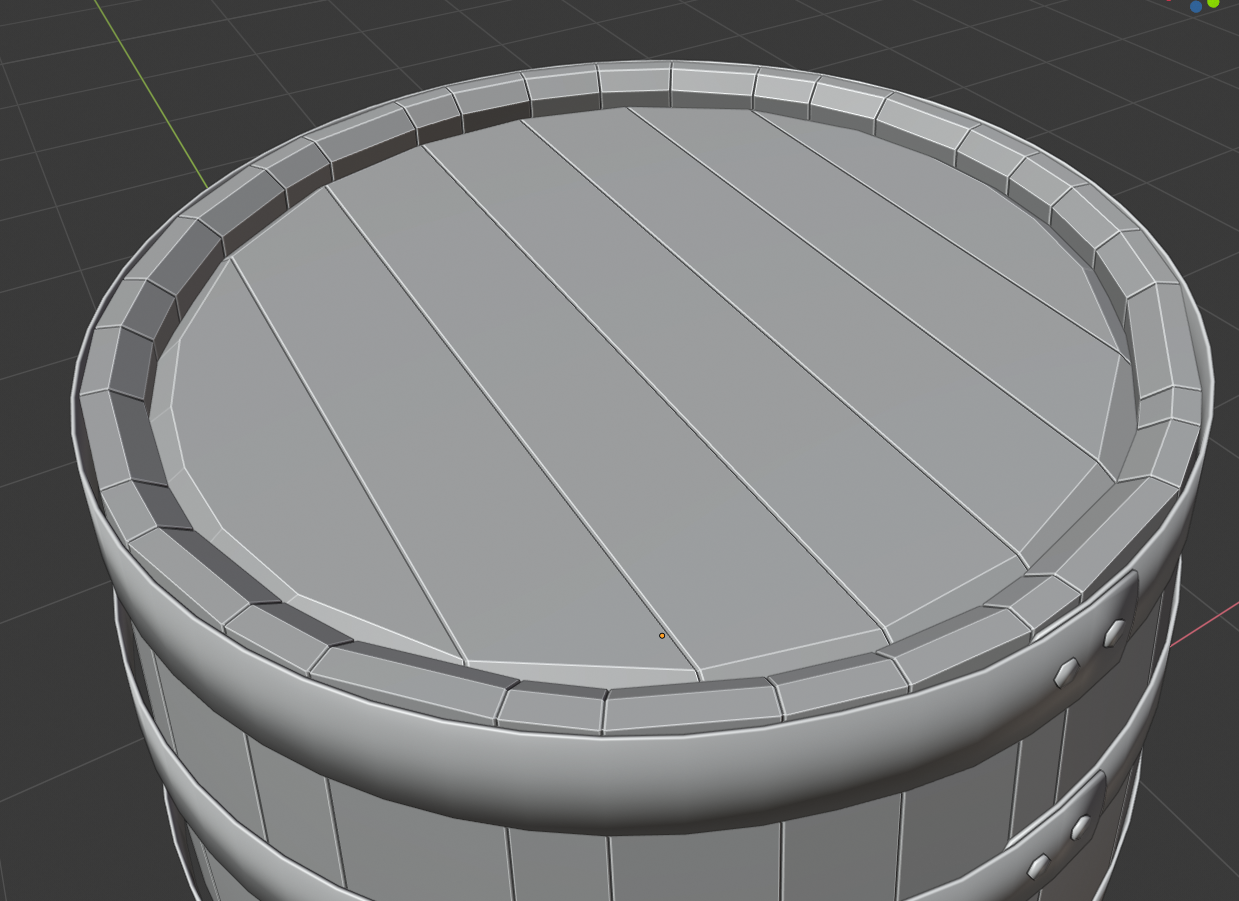
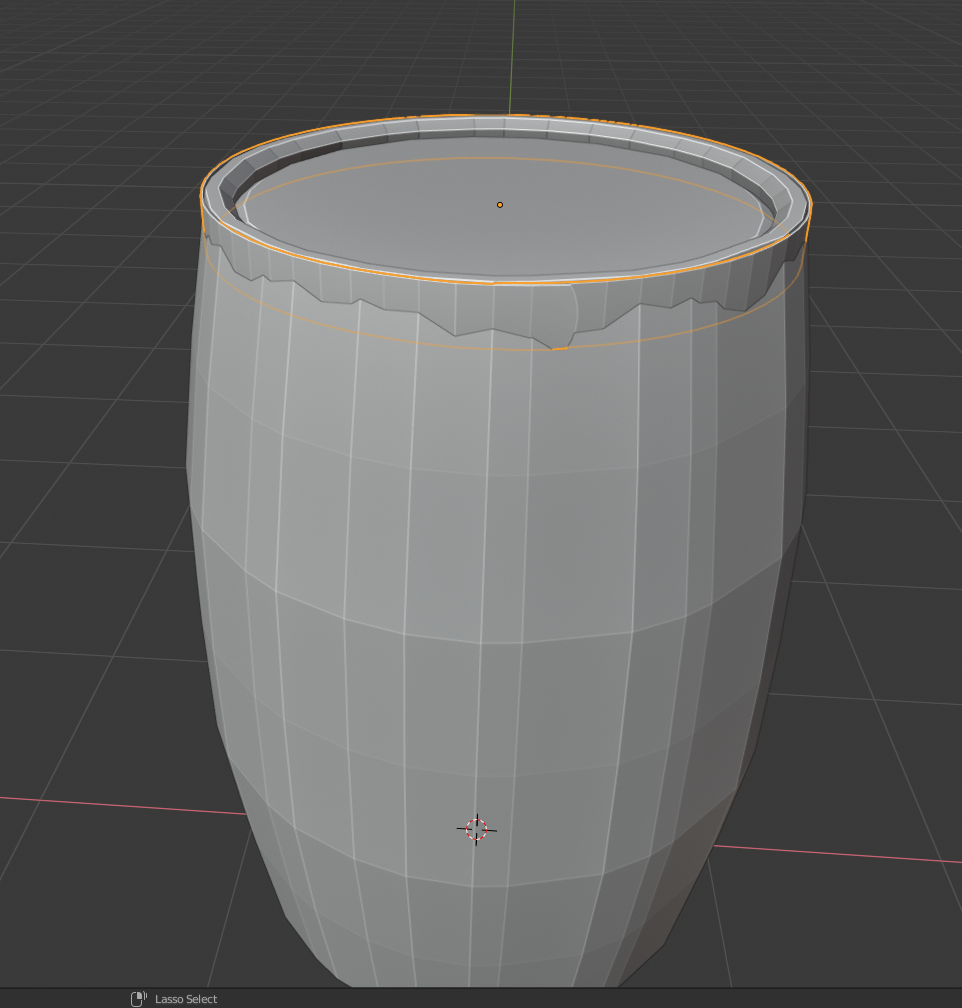
Next I wanted to attack the top and bottom. I was starting to run up against the clock, so I didn't figure out as elegant a solution as I wanted, but this way ended up working. I made a plane, and added loops for the boards. These boards seemed pretty uniform on the real barrel, so I left the spacing. Then I added a circle in edit mode, and got it aligned. Maybe booleans or something would have been cleaner, but I ended up just g-g grabbing vertices on the circle, and eyeballing them to be aligned with the lines on the plane. It was a little rough, but it worked.
After doing a regular extrude for depth, I added the chamfered edge with the bevel tool before doing the separate, solo, fill tango for the boards. I duplicated the finished top, linked the geometry, then roughly got the top and bottom into place with the body of the barrel.
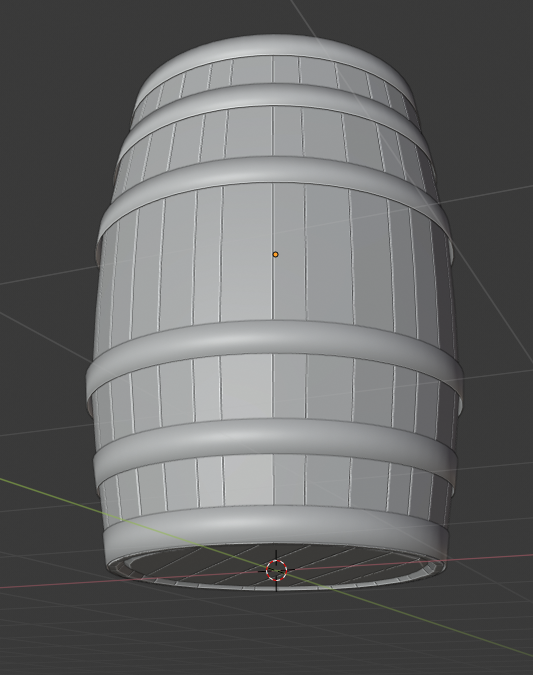
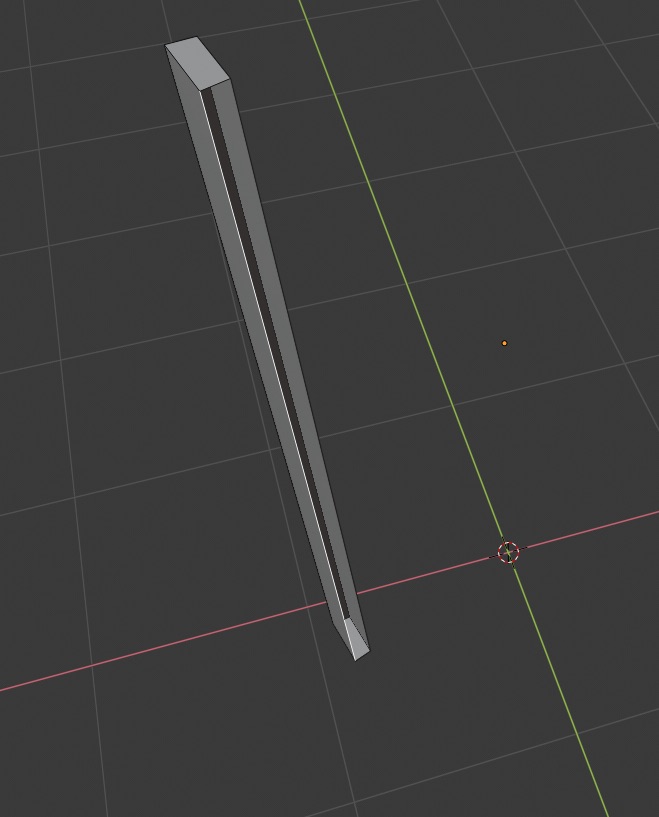
Next up, onto the rings. Since these are supposed to be fully smooth, I made a cylinder with more starting geometry, deleted the top and bottom face, and got everything approximately to scale.
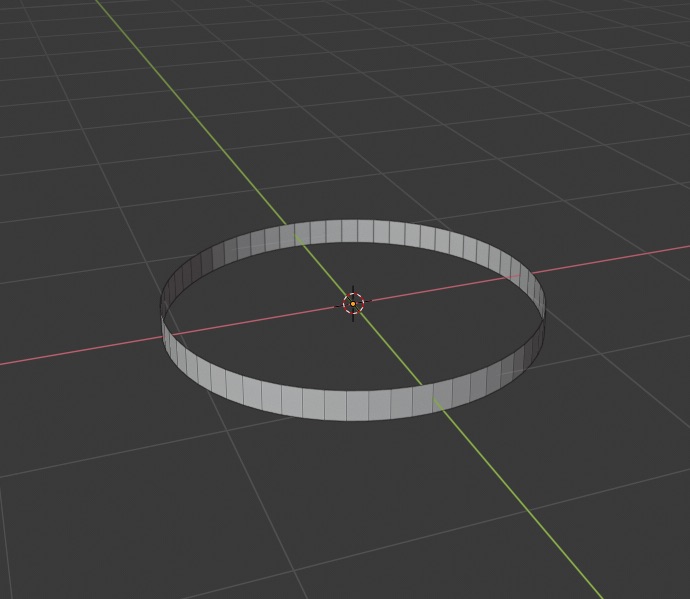
I got a little lax on the screenshots as the clock kept ticking here, but next I wanted to get the curved ends and overlap in the band. First I set up a solidify modifier to give some reference depth. I cleared one face to give the ring a start and an end point. Added a circle aligned to the viewport, then scaled it and attached it to the open end to make one of the rounded ends. I duplicated then mirrored that geometry and brought it out along the y-axis to place the other overlapping end. Then I just extruded until I met the other open edge, and did a little manual grabbing to make the transition more believable. Once this was all done, I got the top ring roughly positioned on the barrel.
All six rings could use the same starting geometry, but I figured I'd break them out into vertically mired pairs of matched scale. The rings are tapered a bit to match the curve of the barrel, so I grabbed the bottom edge and scaled it out until the clipping went away. Then I went in and manually tweaked the vertices on the rounded ends. At this point I was glad I used the solidify modifier, since it meant less geometry to have to try and wrangle.
I added two fasteners by adding a circle with 6 edges, then scaling, rotating, and moving it into place. Once the top ring was done, I duplicated it and linked it to make the bottom ring. At first I rotated it 180 around the y-axis to match the reversed curve, but realized this made the curved end face the wrong way. So I tried the mirror y global, and that seemed to do the trick. Once the bottom ring was in place, I duplicated it (this time not linked), then scaled it to match the barrel's curve at the next position. I was proud that I remembered to not include the fasteners in the scale operation, even though it was a bit more of a pain to have to reposition them. Duplicated it, flipped, and continued on until the rings were done.
Next I added the cork by adding a cylinder and slightly tapering one edge. Learning about the pivot point was a huge help in positioning it, as I changed the pivot point to the center and rotated around that.
At this point I was calling the modeling done. So I went through and did light beveling on the edges of all the boards and rings, and did a lot of selecting to set various things as sharp to get the smoothing right.
All in all I'm pretty happy. I hadn't gotten to the wood detailing stage in the treasure chest lesson yet, so there's definitely some more detail that I can add in the geometry. I haven't gone over the model closely, so I'm sure there are some overlap and occlusion crimes that will need to be fixed.
It was so nice to actually start learning some proper tools and procedures, and to be able to start modifying techniques to solve new problems as they came up. I'm looking forward to sticking with it and getting more comfortable with how everything works in concert.
I need to spend more time with the snap tool. For some reason I haven't been able to wrap my head around it's logic yet, and it felt random whether it was working or not, let alone if it was actually doing what I wanted.
Onwards and upwards!
![]() mrheist To be quite honest, I just skipped over your post now, I will read it completely after today's Livestream, but you mentioned the order of operations, and one thing I learned, is that it is easier to separate the planks as late as possible.
mrheist To be quite honest, I just skipped over your post now, I will read it completely after today's Livestream, but you mentioned the order of operations, and one thing I learned, is that it is easier to separate the planks as late as possible.
If you separate the planks and then start making loopcuts, you'll be making 18 (or whatever number) cuts. If you first make the cuts and then separate the planks... You get the point;)
|Now as with the chest, there was a lot of selecting boards, separating them, soloing, and filling in missing edges
If you select all the 'vertical' edge loops (in edge select mode), you can press 'V' to get all the planks separated at once.
Make sure you have the F2 addon enabled. Now select one plank (with 'L', for instance) and the press 'F'. Now both side of the plank are filled. No need for soloing out the planks. Saves a lot of time!
|On my first pass I didn't select vertices in wireframe mode, so it only plumped out the front. Then I accidentally only scaled along the x axis. Eventually it all came together, though. Learning!
That has happened to me soo often;)
You can select an edge loop easily with ALT click. And in cases like this, proportional editing is a life saver!
![]() mrheist That is awesome you wrote a whole tutorial in the meantime of your modeling!
mrheist That is awesome you wrote a whole tutorial in the meantime of your modeling!
Thanks for that as I was interested in this in theory, however in practice selected the treasure chest
![]() mrheist [belated] Welcome to the class, Jon! I've quite enjoyed reading about your background and process for creating your barrel. I didn't notice the inconsistent board widths that you and Spikey picked up on. That makes things a little more complex.
mrheist [belated] Welcome to the class, Jon! I've quite enjoyed reading about your background and process for creating your barrel. I didn't notice the inconsistent board widths that you and Spikey picked up on. That makes things a little more complex.
One thing I loved about your reference is how the boards appear to have varying depths or thickness as well. I *think* it's depth rather than thickness, but either could achieve the effect. That'd be really cool to see in your model.
Going along with the lo-poly theme, it'd also be neat to see a touch of damge (dents and dings) but that would be a departure from the reference photo. So that's up to you.
Overall an excellent first week of homework. It's an A from me 👍 This will look sweet textured and shaded.
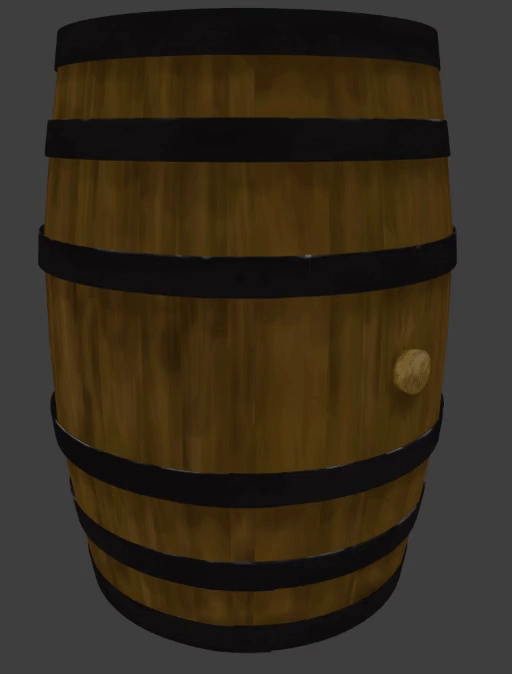
Week 2 homework
In all my times futzing around in 3d before, I don't think I ever actually got to the texturing phase, so this was a fun new thing.
First thing first, I did go back and add some more wood detail/imperfection to the model
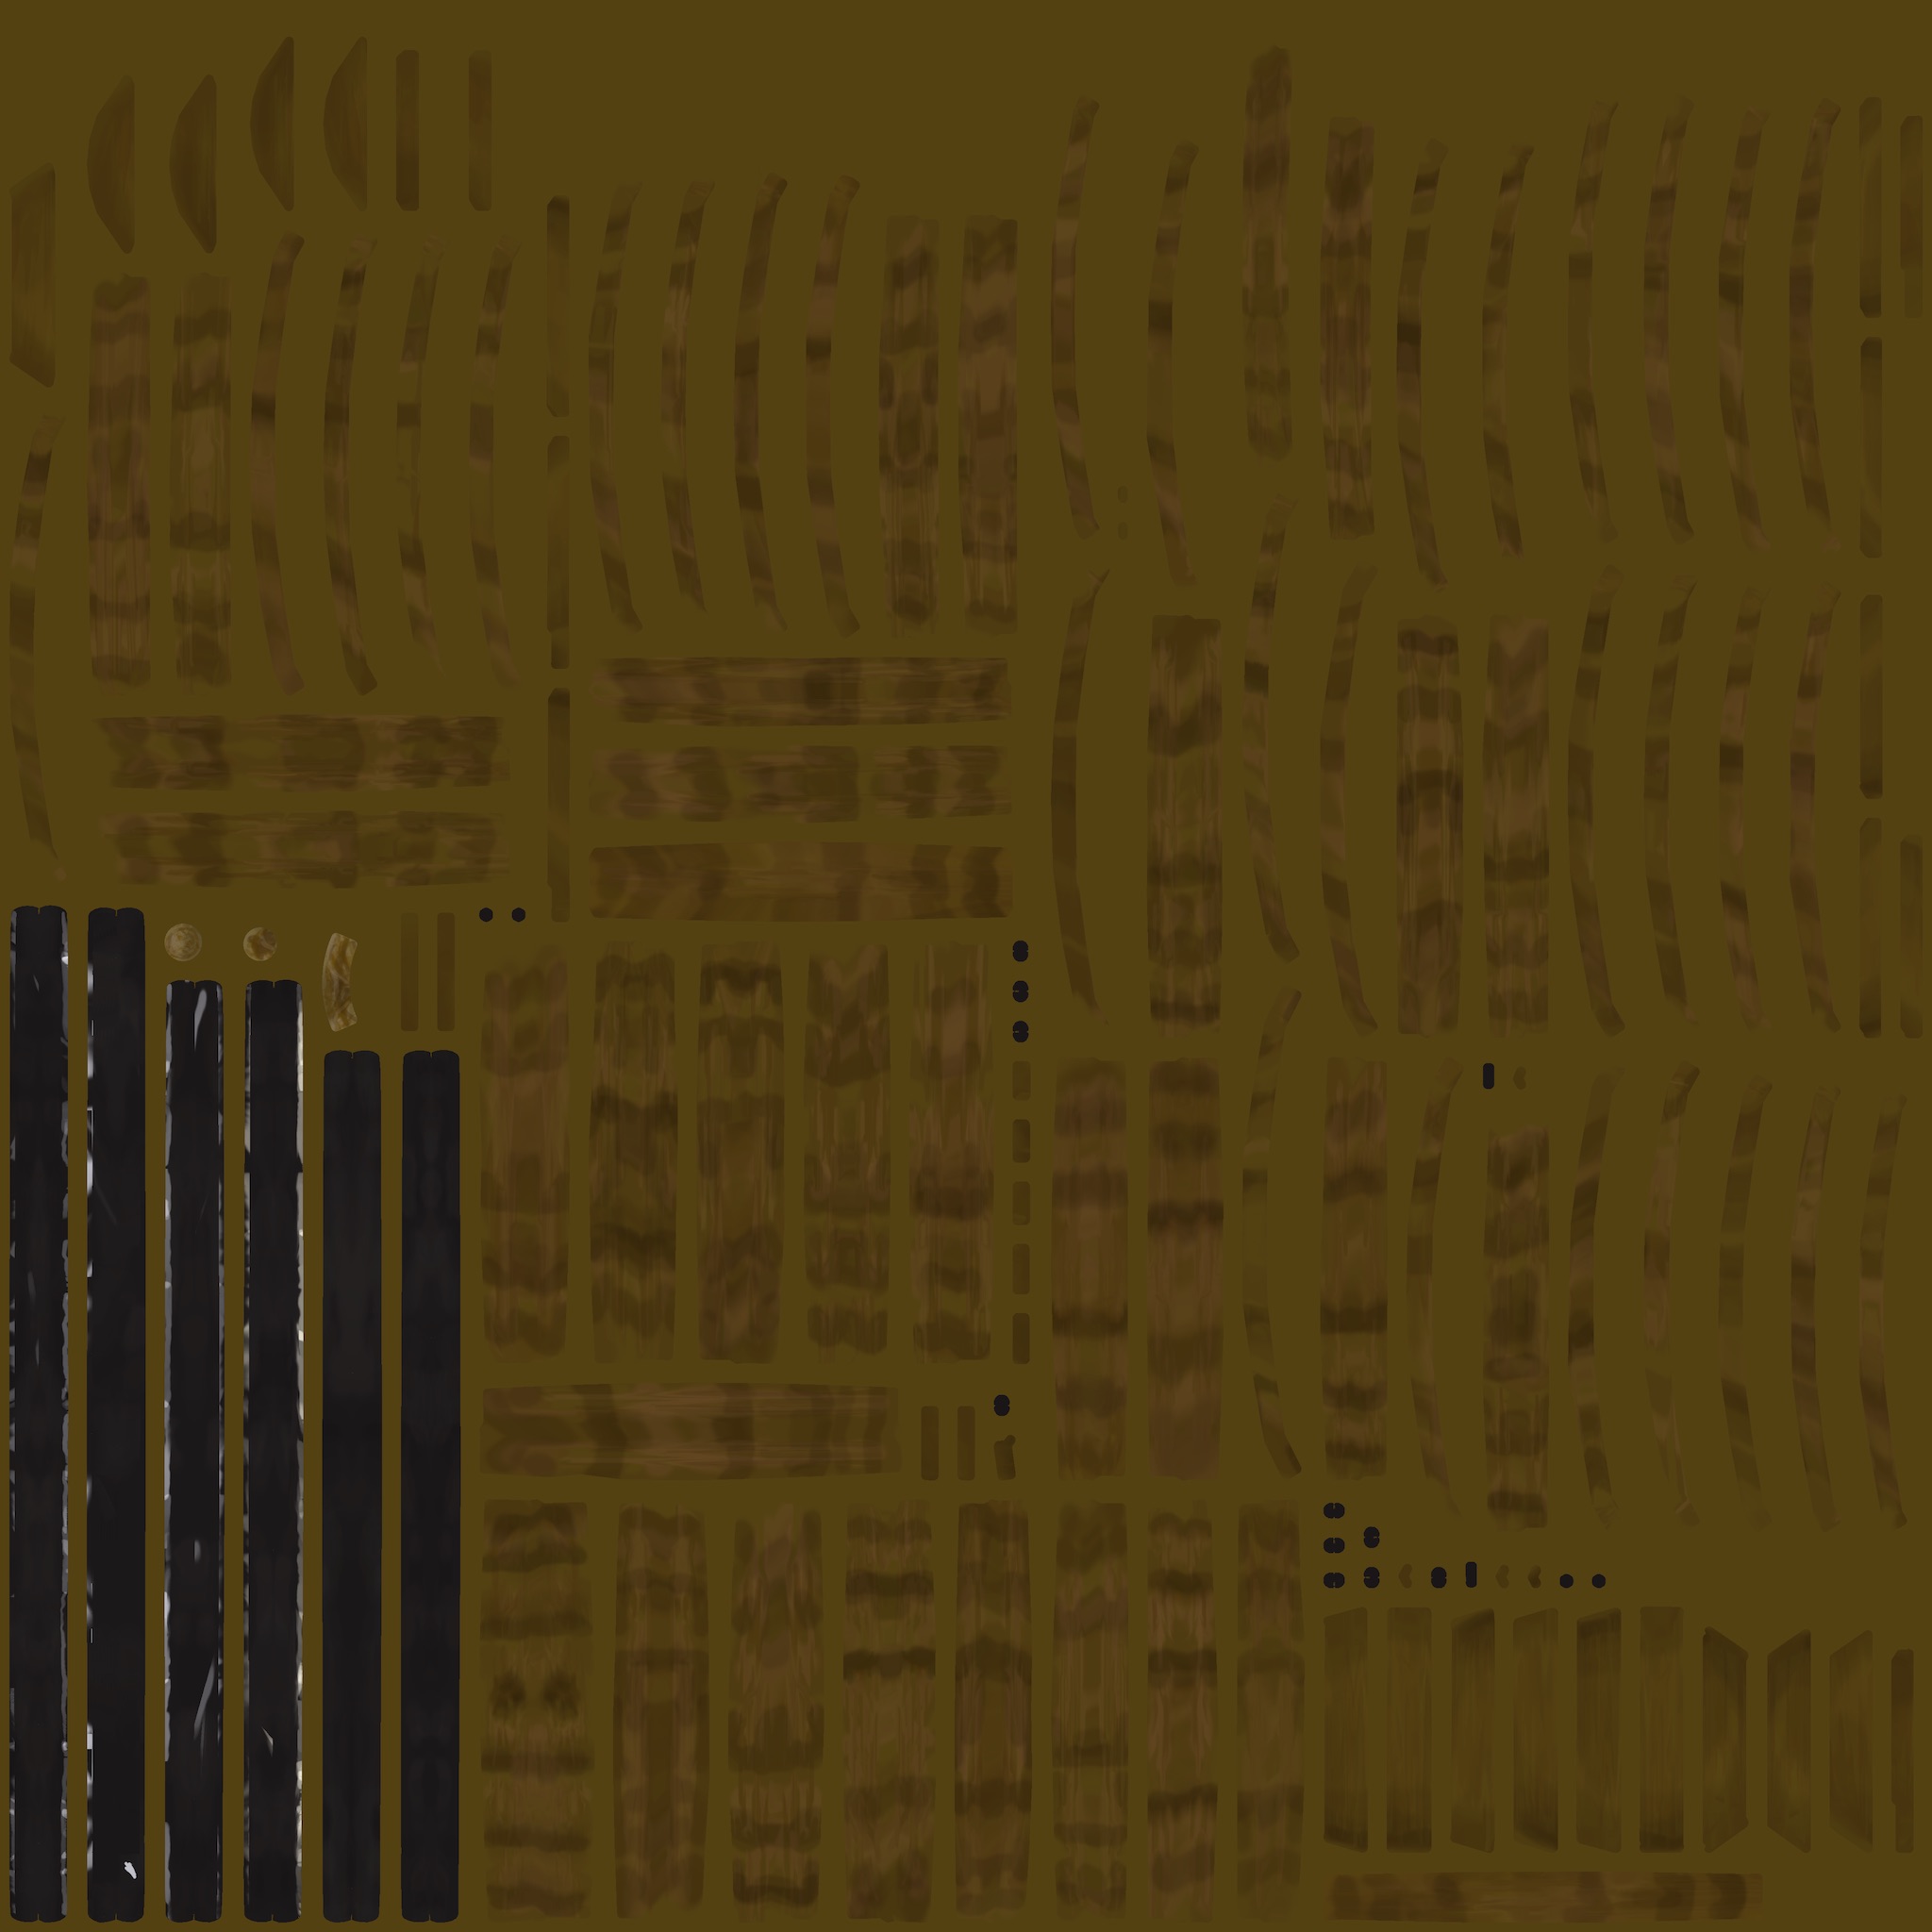
There were definitely some learned-the-hard-way lessons about sharing geometry. Even though I really wanted the boards on the barrel different widths, I could have still divided them into groups (small, medium, large) and gotten some overlap there. Instead, it was a pain seam cutting and painting all 32 unique boards, as well as the 6 different rings (at least I kept the top and bottom sharing data).
It was a fun evolution going from "this looks like garbage" to "this… actually looks ok?" as the painting filled in. Looking at the finished setup, I should probably do a bit more around the bolt heads so they don't just disappear into the rings. But other than that, I'm pretty happy with the results.

Here are the color texture map and dirtied vertex pass. I went with 4096x4096 to make room for all the unique pieces. I think beyond the inefficient modeling, the UV layout turned out alright for a first try. And almost all blue in the stretching overlay, despite all the curves and bevels!

![]() mrheist Good work this week, Jon! I like the streaky, griminess of the wood as well as the detail in the cork. I've got a couple notes to offer:
mrheist Good work this week, Jon! I like the streaky, griminess of the wood as well as the detail in the cork. I've got a couple notes to offer:
Overall you did a good job this week but I think you could push your texture a little further. It's a B+ from me 👍
EDIT: I forgot to acknowledge your model tweaks! I think they're great, leveling up the quality of the model. That bumps your grade this week up to an A :)
![]() mrheist Good work! I agree with Kent's critique.
mrheist Good work! I agree with Kent's critique.
Hey, we all gotta start somewhere. Sometimes the longest route is the only route we see until someone shows us a better way. Nothing wrong in that. As long as you learn something along the way, the time isn't wasted. With that said, looking forward to this thing being shaded and lit!
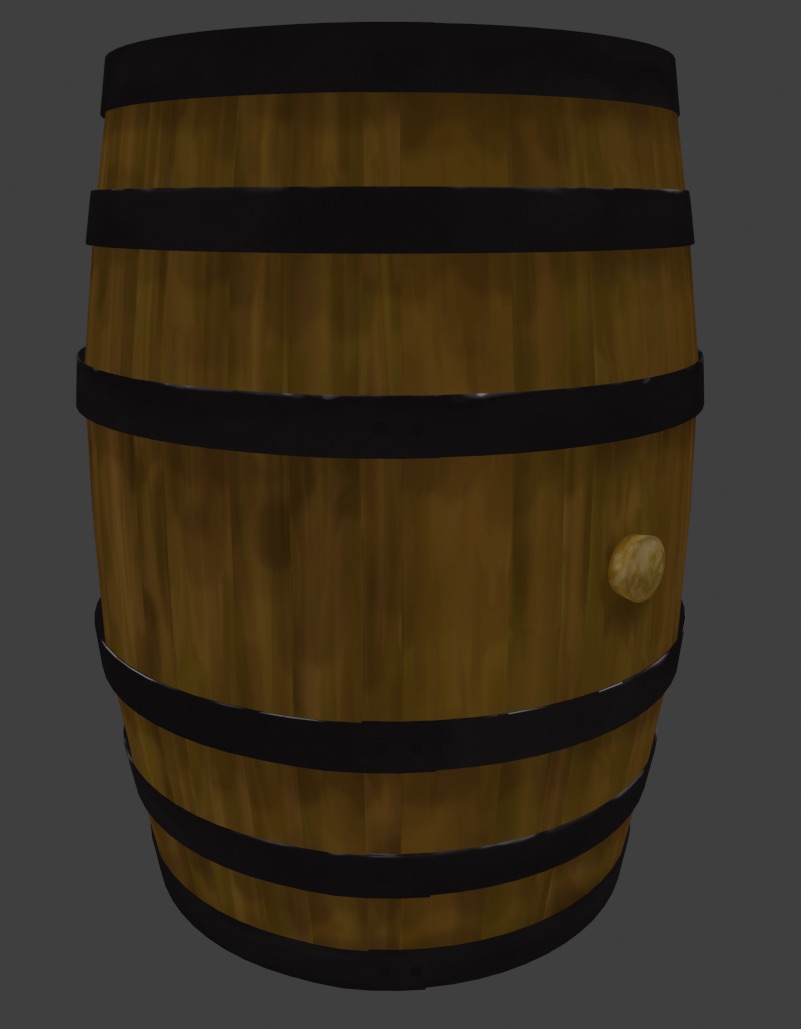
Here we go!
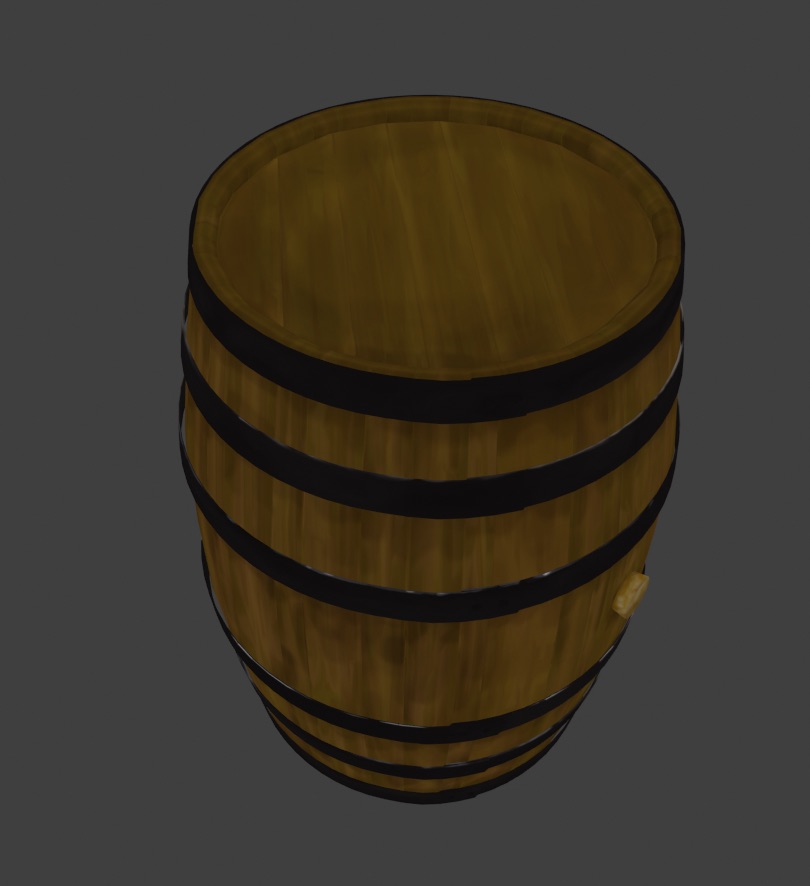
Week 3 homework

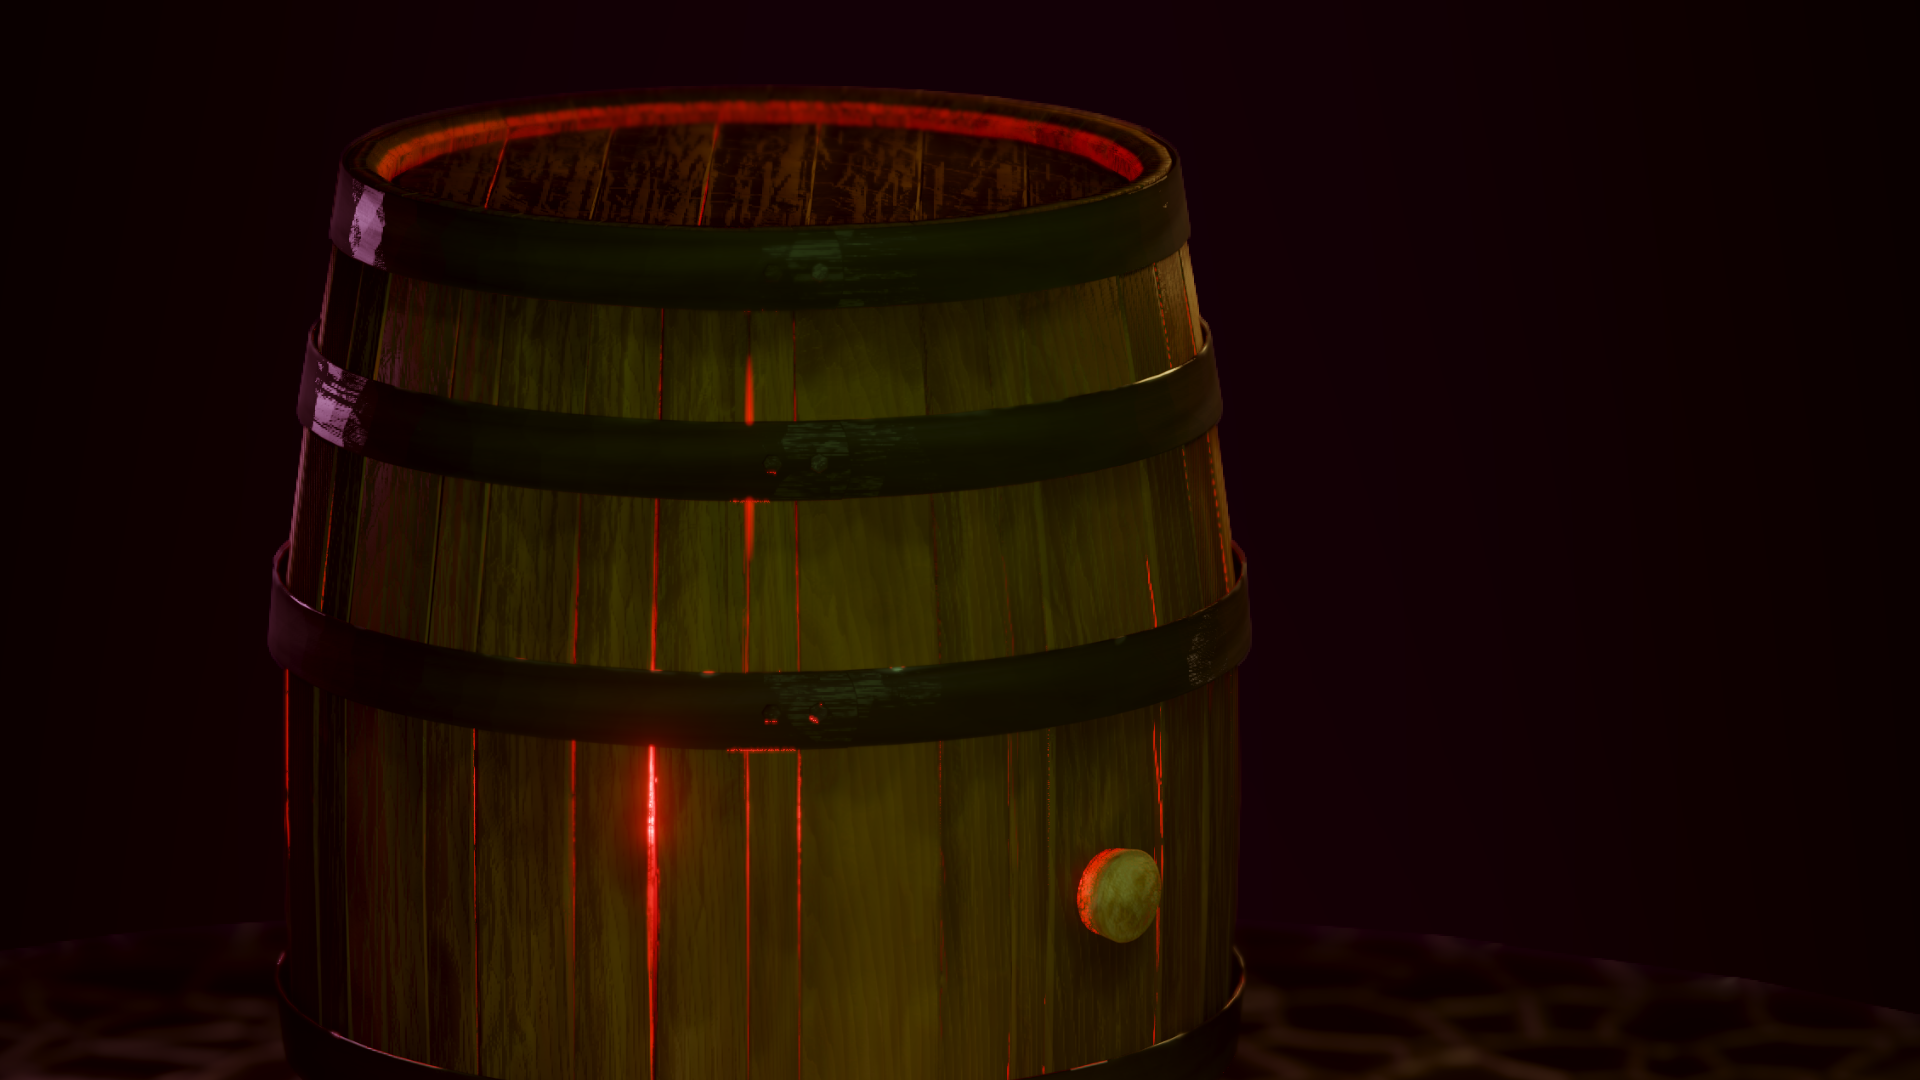
So, I really like the shader and lighting step. Definitely need some more practice to get comfortable with the tools, but it's a lot of fun to see it all come together.
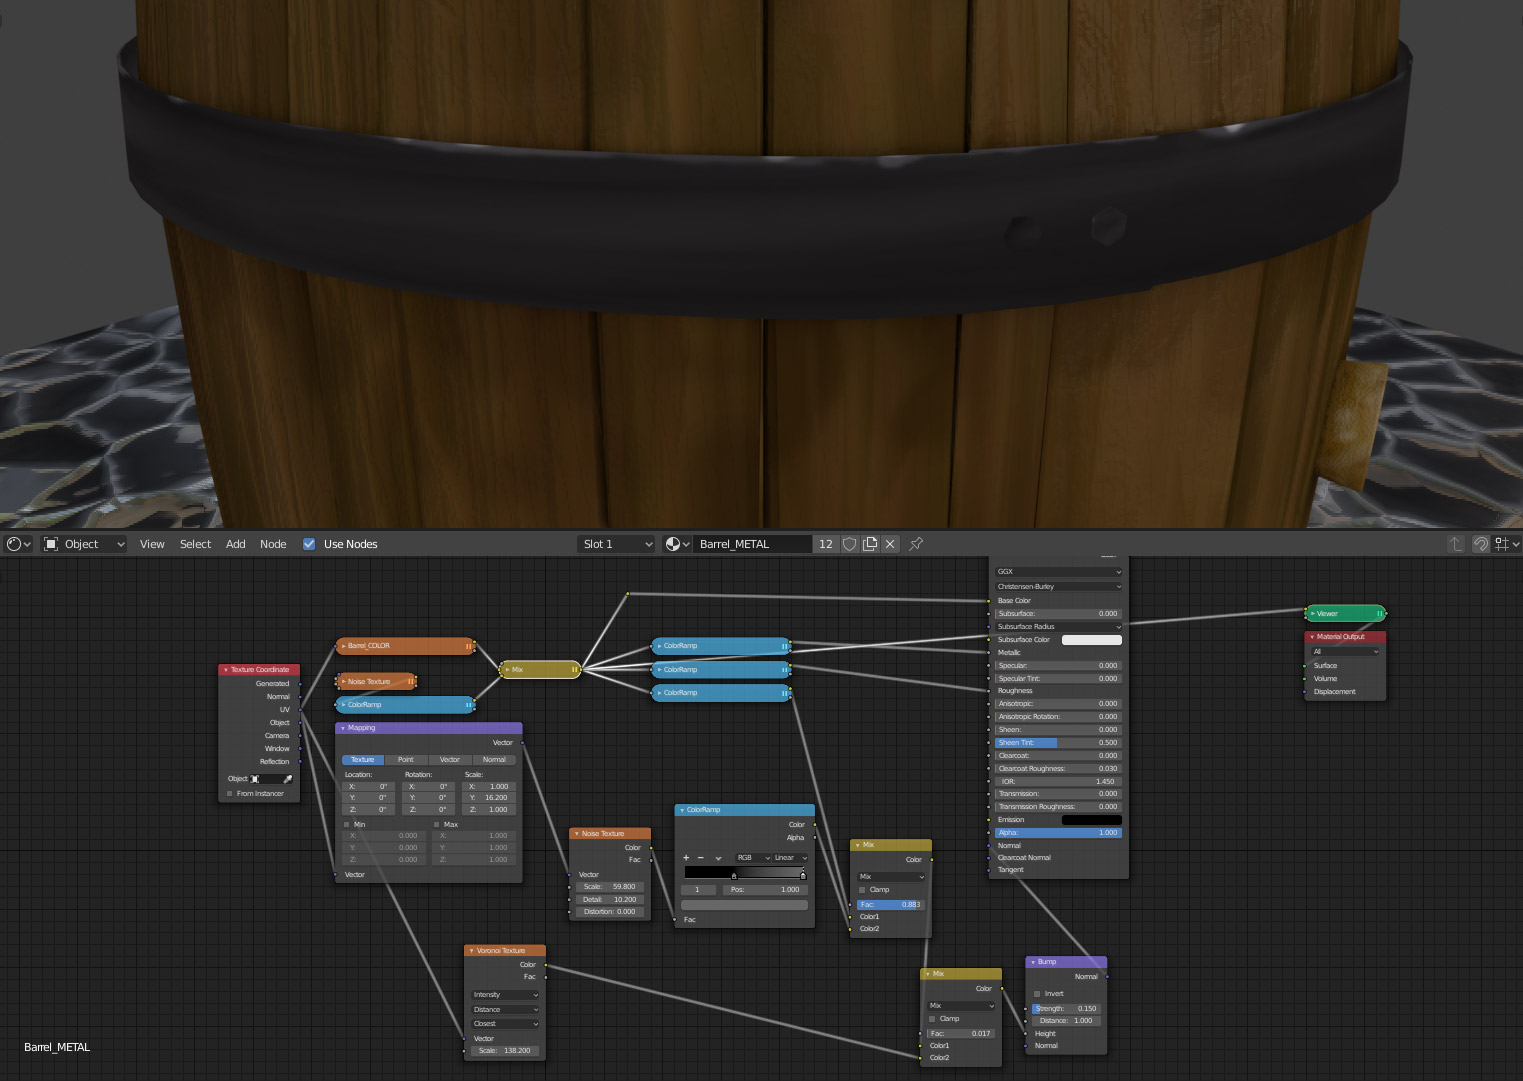
I started out with Kent's suggestion on the too-solid black texture on the rings.
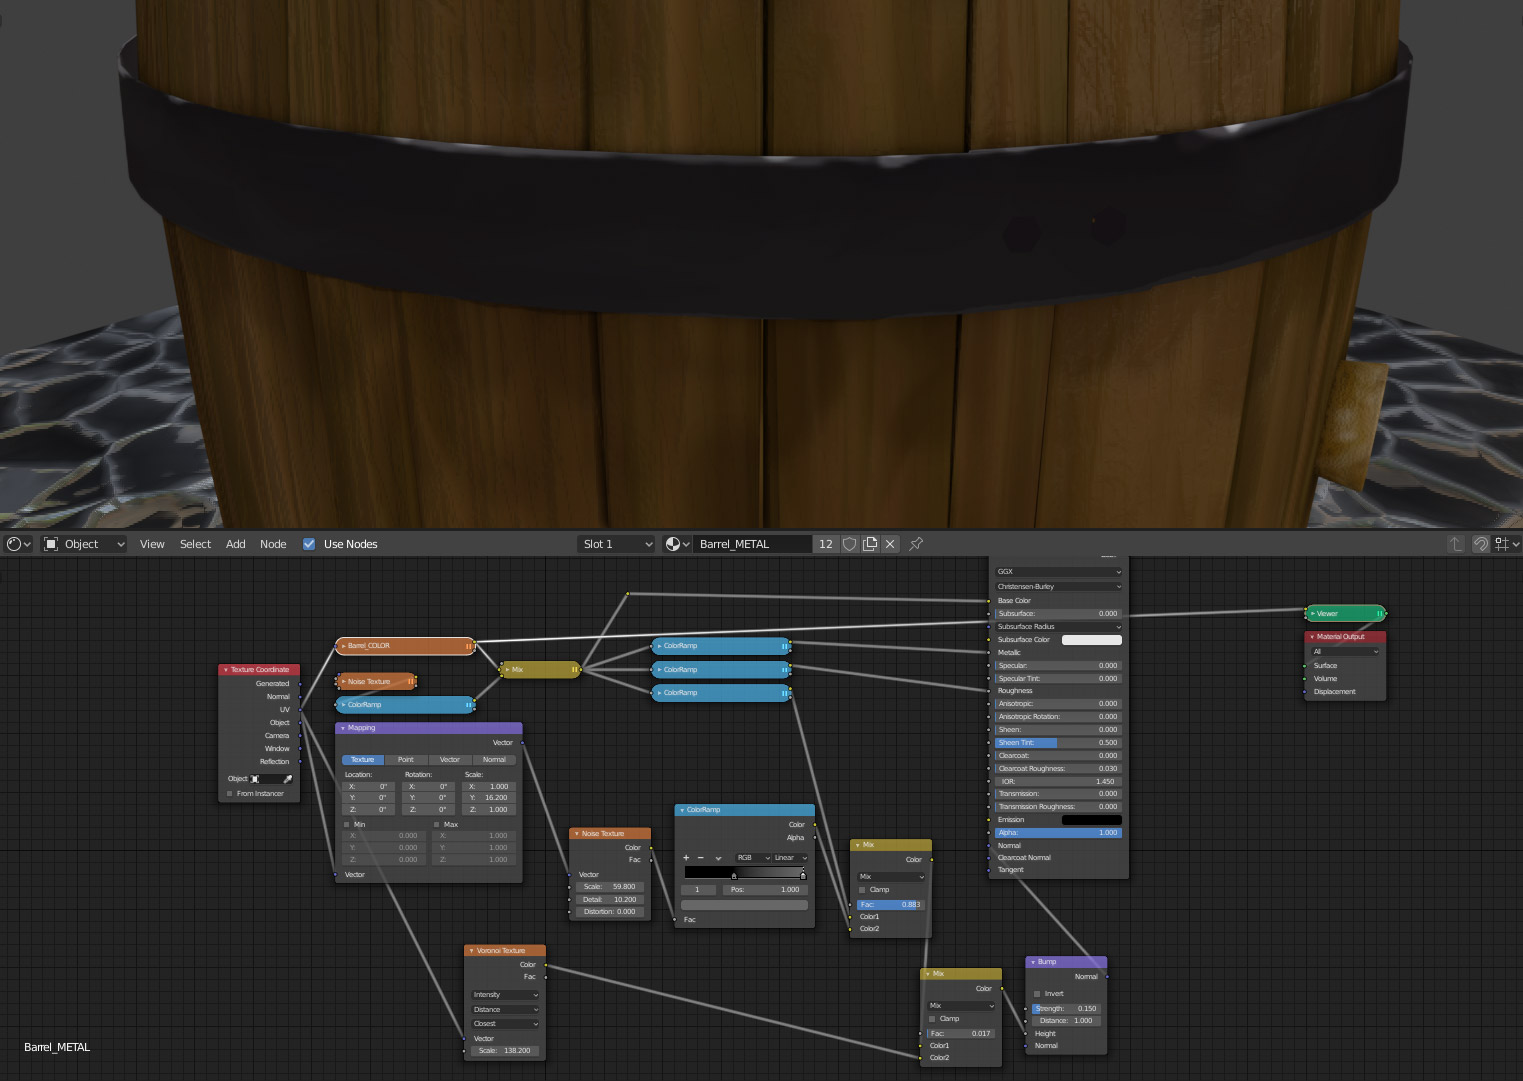
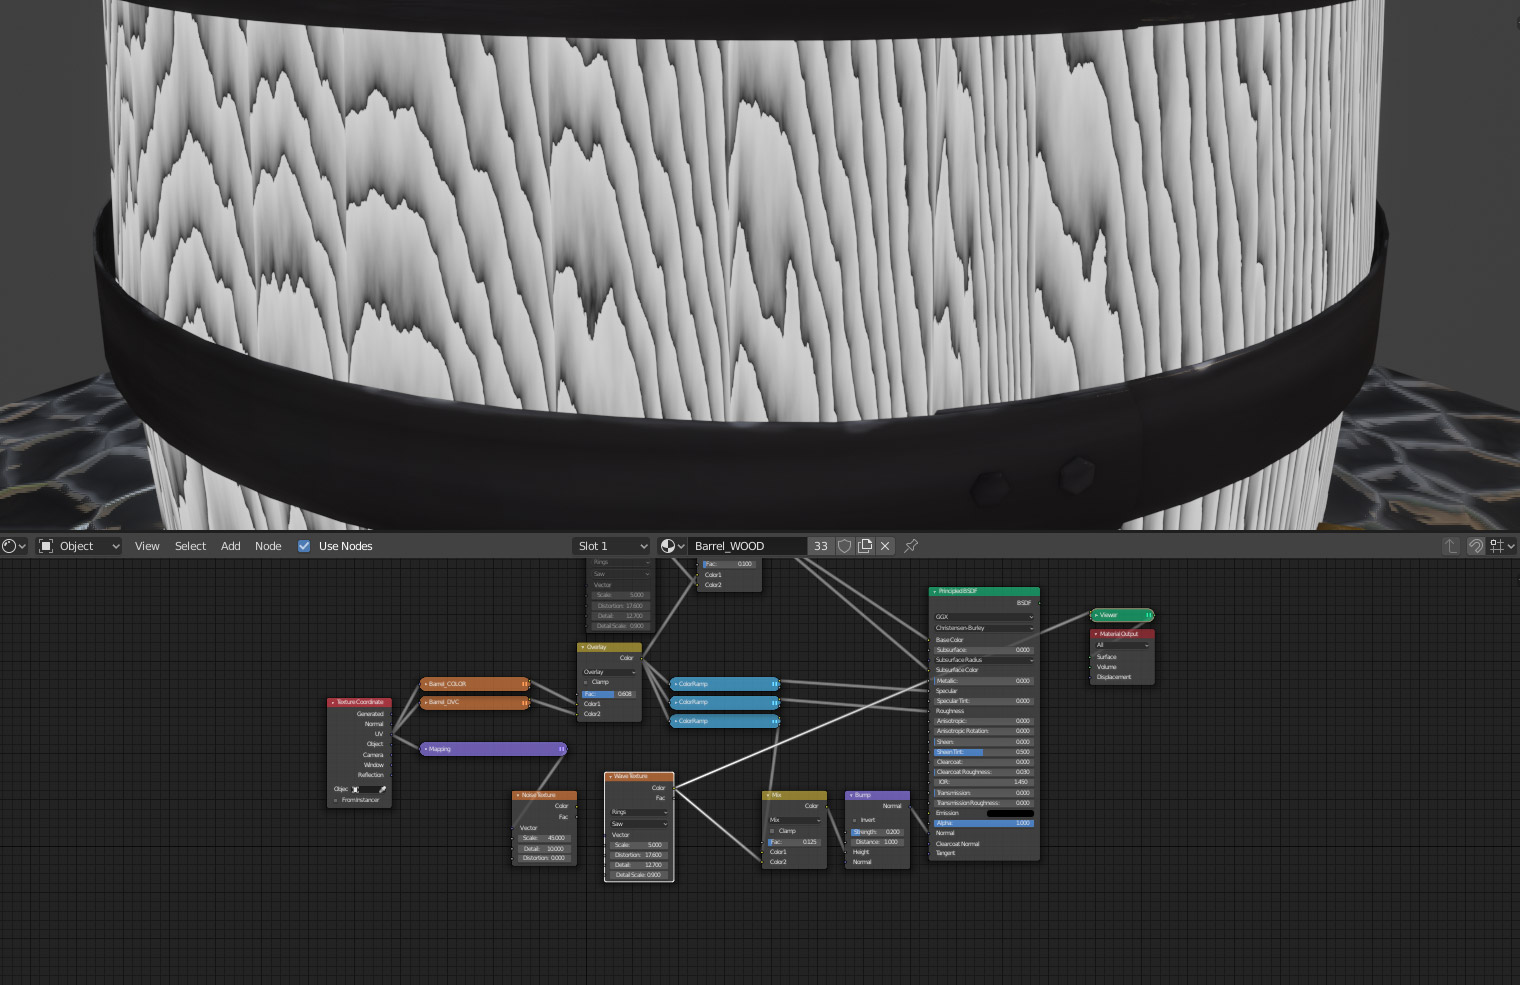
I figured, instead of going back to re-paint, why not try using some node magic? So I added some noise, stretched it…
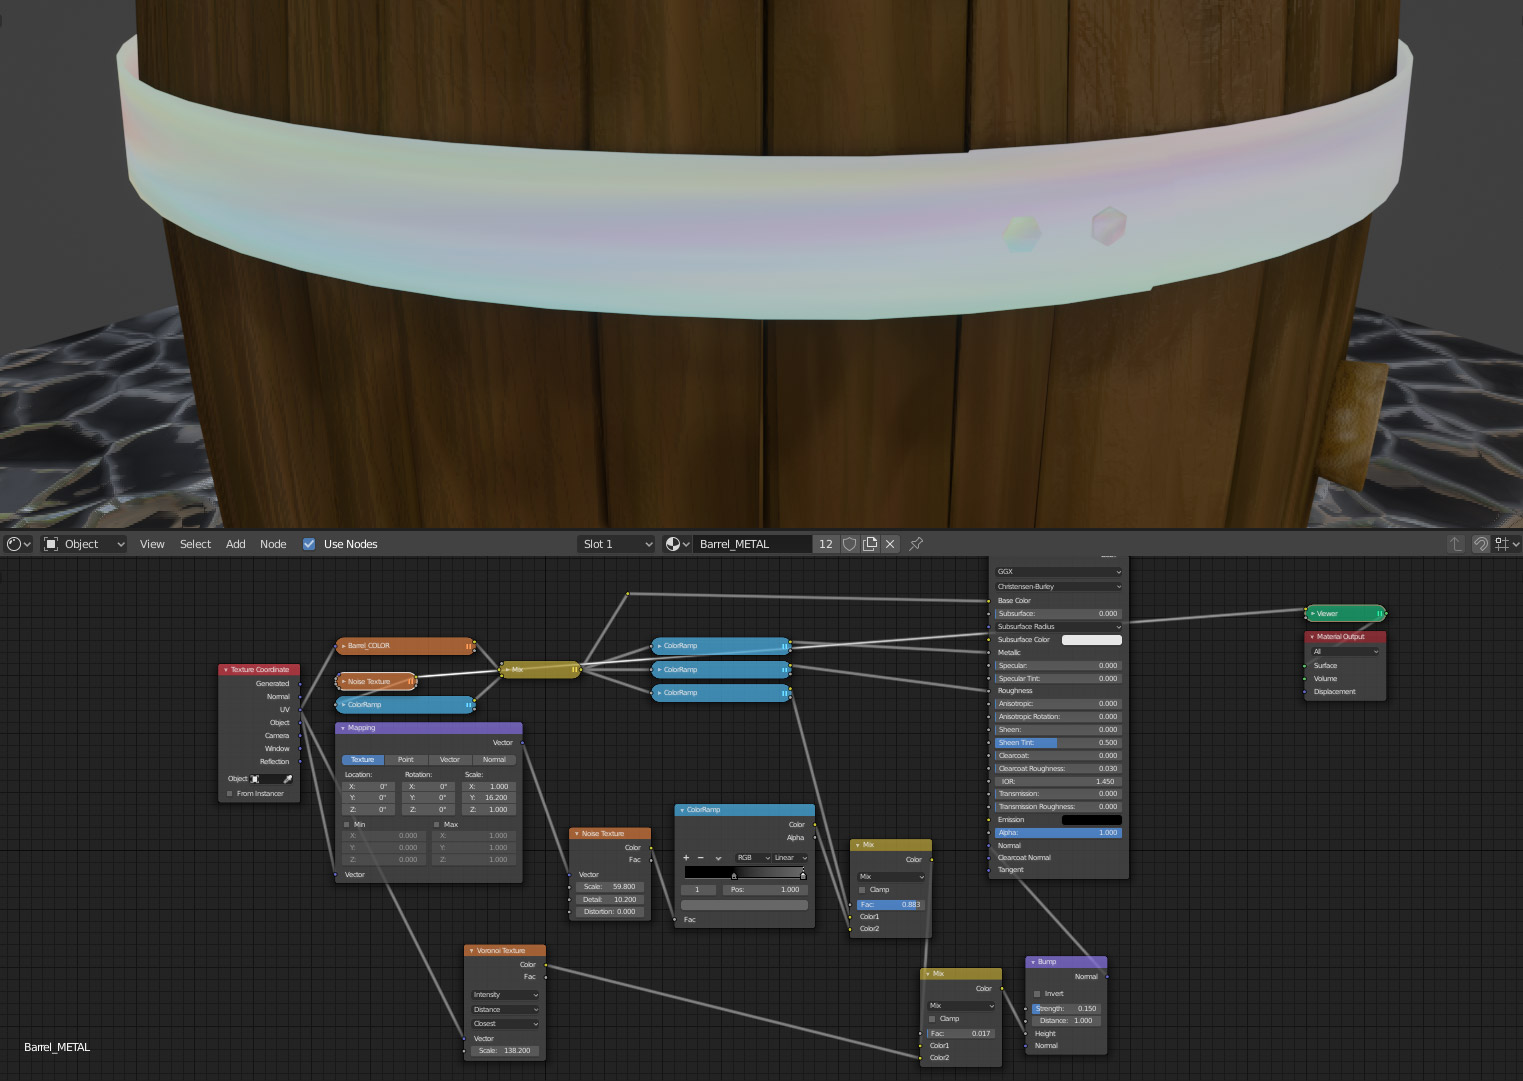
and mixed it in with the base color to start with some more variation.
Similarly, with the wood texture, I stumbled across the wave texture node, and really liked what it did both as an overlay on the texture as well as some basis for the various maps. I didn't like the shinier water-logged look as much with this model, so the addition of the wave texture helps bring out some interest in the render that's lost by things not being as reflective.
The floor is just a cylinder with a jungle of nodes based off voronoi and noise textures.
For the final lighting setup, I decided to try and not use the HDRI lighting. I have a background in studio work, so I wanted to see where I could start applying my skills of physically lugging lights around. It was fun to get back to throwing up one more small light just to pick up a specific detail.
So there we have it. After years of tinkering in blender, this is the first project I've actually seen through to a finished state. Here's hoping I can keep the momentum going and start up something else!
![]() mrheist Excellent job, Jon! I really like to see how you dug deeper into procedurals, both for the noise-varied metal rings and the wood grain wave texture. They really help to increase the detail level of the whole model.
mrheist Excellent job, Jon! I really like to see how you dug deeper into procedurals, both for the noise-varied metal rings and the wood grain wave texture. They really help to increase the detail level of the whole model.
Oh and the voronoi procedural on the ground is really interesting. Other-worldly even. Combined with the lighting I get a very ominous vibe.
You've finished off your barrel project quite well. It's an A+ in my book 👏