My homework project. Midas and Mithril
Homework Submission Week 3 in file attachments.
Hey, nice work so far! You're really hitting the huge and block aspects. It kind of reminds me of a toy sword.
![]() silentheart00 Yeah I am in need of some help for the transition from the handle to the blade. I think there are too many edges there. I am trying to learn modifiers better so this homework I am spending more time to get to know some combos better. This is an exercise in my proper use of one combo I am liking that I learned: I am currently doing a Solidify then Bevel then Edge Split Modifier-Combo to keep sharp bulk edges where I want them.
silentheart00 Yeah I am in need of some help for the transition from the handle to the blade. I think there are too many edges there. I am trying to learn modifiers better so this homework I am spending more time to get to know some combos better. This is an exercise in my proper use of one combo I am liking that I learned: I am currently doing a Solidify then Bevel then Edge Split Modifier-Combo to keep sharp bulk edges where I want them.
I also wanted to perhaps capture some kind of lo poly fire coming from the transition piece through the center of the blade and possibly out the top hole (maybe a blue/white or red/orange style flame) that I think would stretch my creative skills for the modelling aspect on it. I really like the handle and blade though.
Any thoughts or ideas to make improvements on the transition piece? I'm thinking on going back to reference stuff but thought I would throw the question out there too.
Also I am trying to figure out the length of the handle. I had it longer earlier (thinking you need both hands to wield it).But I shortened it up. Should I go longer again?
![]() blanchsb Could you either post some wireframe images of the are or throw up the blend file? It would help a lot towards seeing if the transition area could use some work.
blanchsb Could you either post some wireframe images of the are or throw up the blend file? It would help a lot towards seeing if the transition area could use some work.
As for design decisions, if this is a super heavy sword, it might make sense to be able to have two hands on it. But on the more conceptual side, are those proportions pleasing to the eye? If you lengthen the handle, maybe you could lengthen the blade and see what kind of effect it has.
Nice job ![]() blanchsb. I love the various layering you've built into the shapes, denoted by the colors. It laces the simple shapes with additional interest 👌
blanchsb. I love the various layering you've built into the shapes, denoted by the colors. It laces the simple shapes with additional interest 👌
Any thoughts or ideas to make improvements on the transition piece? I'm thinking on going back to reference stuff but thought I would throw the question out there too.
When I feel that way about a model, reference is always my reflex. There's so much out there to be inspired by. My one general thought about the transition is that right now it's perfectly perpendicular: horizontal cross guard, vertical blade. Adding a piece that bridges the two could help. In the image below, the purple and green shapes represent what I mean by "bridge":
![]()
![]() blanchsb Whilst I think the transition actually looks nice seeing as you're going for such an exaggerated design, I will agree with what Kent said about "smoothing" the transition. Furthermore, you could possibly also slightly adjust the width of the sword at the base? As a lot of real world swords begin thicker at the base than they are at the tip, I think it is an idea worth exploring. Hell, if you being so stylized maybe reverse that?
blanchsb Whilst I think the transition actually looks nice seeing as you're going for such an exaggerated design, I will agree with what Kent said about "smoothing" the transition. Furthermore, you could possibly also slightly adjust the width of the sword at the base? As a lot of real world swords begin thicker at the base than they are at the tip, I think it is an idea worth exploring. Hell, if you being so stylized maybe reverse that?
Thanks for the feedback and assistance ![]() silentheart00 (I am attaching a wire frame in this posting but if needed I can get a close up posted later) @theluthier and
silentheart00 (I am attaching a wire frame in this posting but if needed I can get a close up posted later) @theluthier and ![]() thecabbagedetective
thecabbagedetective
I went ahead and got some more inspiration from your replies and from many reference images and decided I wanted a sword that also mid-nighted as a secondary weapon (for dual wielding). But marrying the two and making that transition was a tough journey. I am posting what I have so far after multiple trial and error sessions. Basically the sword breaks out from the middle of the hammer/guard. I added some geometry to "fasten" the sword once it is sheathed and making that look presentable took some effort. I also added some geometry to allow the sword join with and separate from the hammer guard with more ease.
I like this and I feel like it flows better than the first draft. Looking for any additional feedback or critiquing. I am not going for totally realistic but it has to pass for believable and something that a character could wield. I can post other views or the file itself if needed.
Is the blade long enough compared to the handle length? I am happy with the Guard/Transition and will move on from that unless something blatant is wrong there.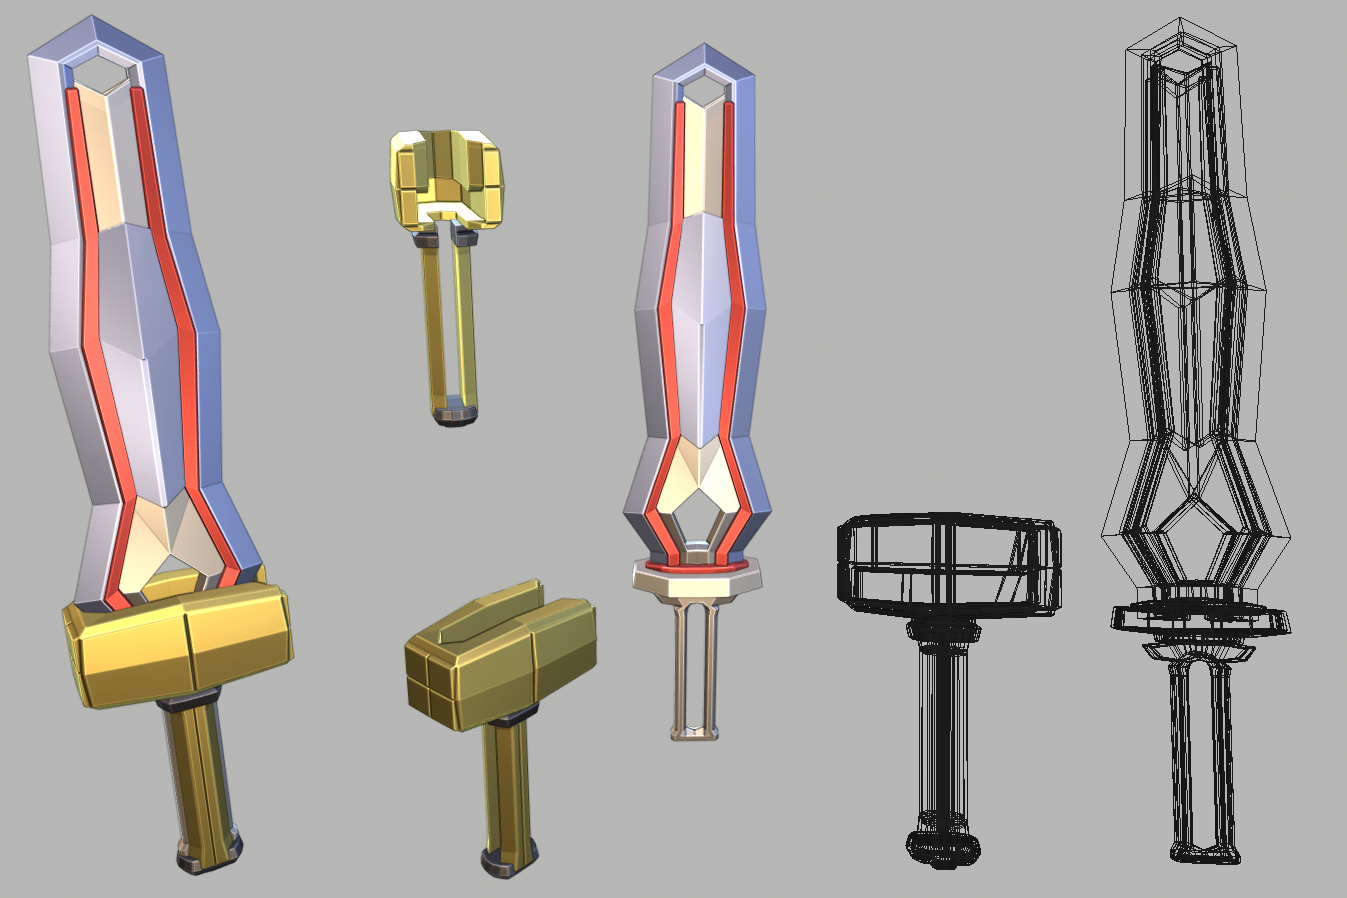
![]() blanchsb Pretty cool! Man, I hope the FFVII remake will be good!
blanchsb Pretty cool! Man, I hope the FFVII remake will be good!
If you're going for length related to the Buster sword, then I'd suggest extending out the blade. To me, the sword is closer to a short sword design.
On another note, man, I hope the FFVII remake will be good!
![]() clintjohnson I think you might be right. Here's a length reference to a character. I am going to work the next step of making some material damage and I'll think on the length of the blade some more......
clintjohnson I think you might be right. Here's a length reference to a character. I am going to work the next step of making some material damage and I'll think on the length of the blade some more......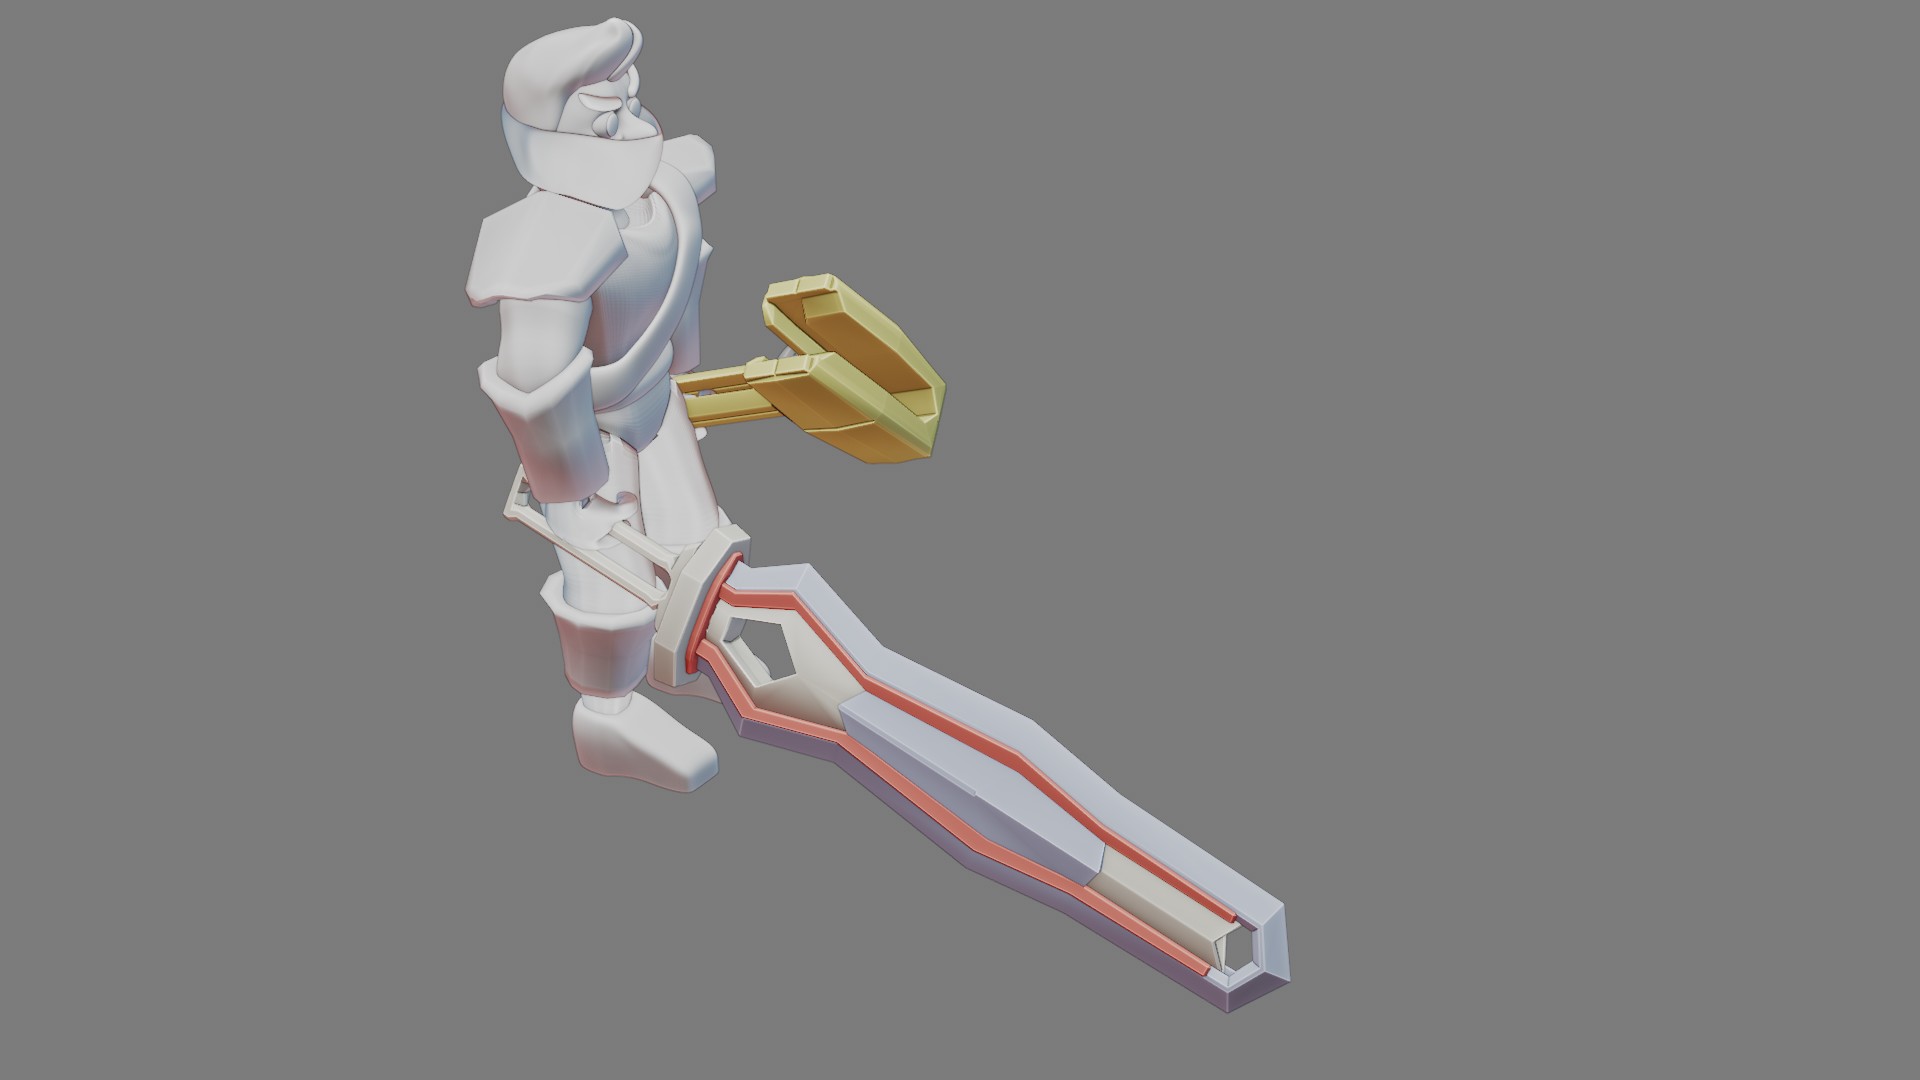
![]() blanchsb Looks good to me man, being stylized gives you so much leeway. Keep at it!
blanchsb Looks good to me man, being stylized gives you so much leeway. Keep at it!
@theluthier Homework Submission Week 1, Blanchsb
(sorry Kent, I submitted it last night but it's my first homework and I didn't label it exactly like the others. I removed other commentary to help you review)
Midas and Mithril
![]() blanchsb Ooo, I like the change in concept. Duel wielding power! My next thought is how is the blade going to stay in the hammer? Overall, really good effort.
blanchsb Ooo, I like the change in concept. Duel wielding power! My next thought is how is the blade going to stay in the hammer? Overall, really good effort.
![]() blanchsb Yip, looks cool blanch! That sword should have some nice damage bonuses ;)
blanchsb Yip, looks cool blanch! That sword should have some nice damage bonuses ;)
![]() silentheart00 Oh yeah! Great comment. I have thought about that a lot and am coming up with some blanks. I was thinking of using some chain or a thick pin in the center perhaps? I could use some help with an idea for that. I want to keep Midas as clean as possible but maybe have a "dongle" chain or pin dangling from the sword perhaps? Is there a reference perhaps I could up that would showcase that style?
silentheart00 Oh yeah! Great comment. I have thought about that a lot and am coming up with some blanks. I was thinking of using some chain or a thick pin in the center perhaps? I could use some help with an idea for that. I want to keep Midas as clean as possible but maybe have a "dongle" chain or pin dangling from the sword perhaps? Is there a reference perhaps I could up that would showcase that style?
![]() clintjohnson: I am thinking knockback bonus as well! I am totally using this asset in my game design.
clintjohnson: I am thinking knockback bonus as well! I am totally using this asset in my game design.
So there is one thing that has bugged me about adding the damage. The knife edges are faintly showing up where I am not working but where the edges were cut. It can be seen slightly but I see it more on the working model up close. I tried to follow exactly as Kent shares in the video about keeping the details along a planar direct of a smooth face but I am having limited success on my own with that espectially on curved edges that are taking sharp corners.
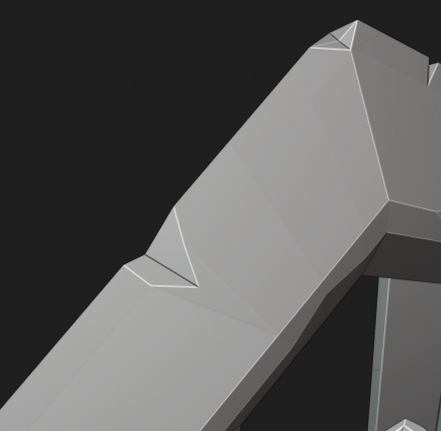
What I am trying to replicate: 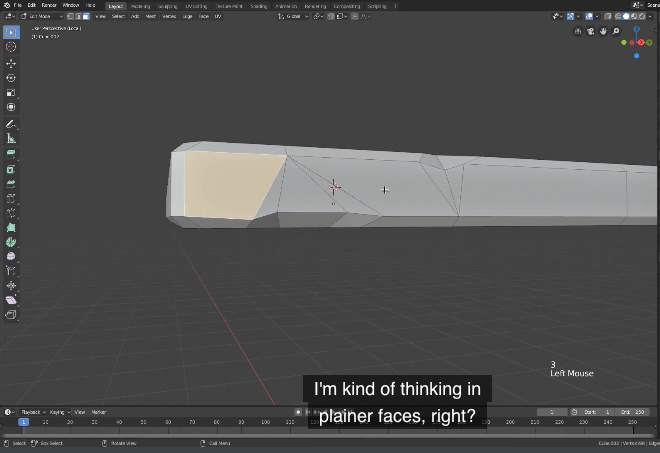
What I can easily replicate on a plan cube:

What I am getting instead on my blade surface: I originally had bevel, solidify, edge split, and ultimately lattice modifiers on the blade and applied them all prior to adding the dings and dents. Funny though because everything still looked smooth up to that point:
4 or 5 faint lines. 1 faint line parallel to the blade edge, multiple edges elsewhere. Why is this happening?
![]() blanchsb its not clear on the right one picture, but to me it looks like you have sharp edge marked on where there is faceting happening. the other one could be that you have flat shading currently on. on object mode select mesh, right click to open context menu and select shade smooth.
blanchsb its not clear on the right one picture, but to me it looks like you have sharp edge marked on where there is faceting happening. the other one could be that you have flat shading currently on. on object mode select mesh, right click to open context menu and select shade smooth.
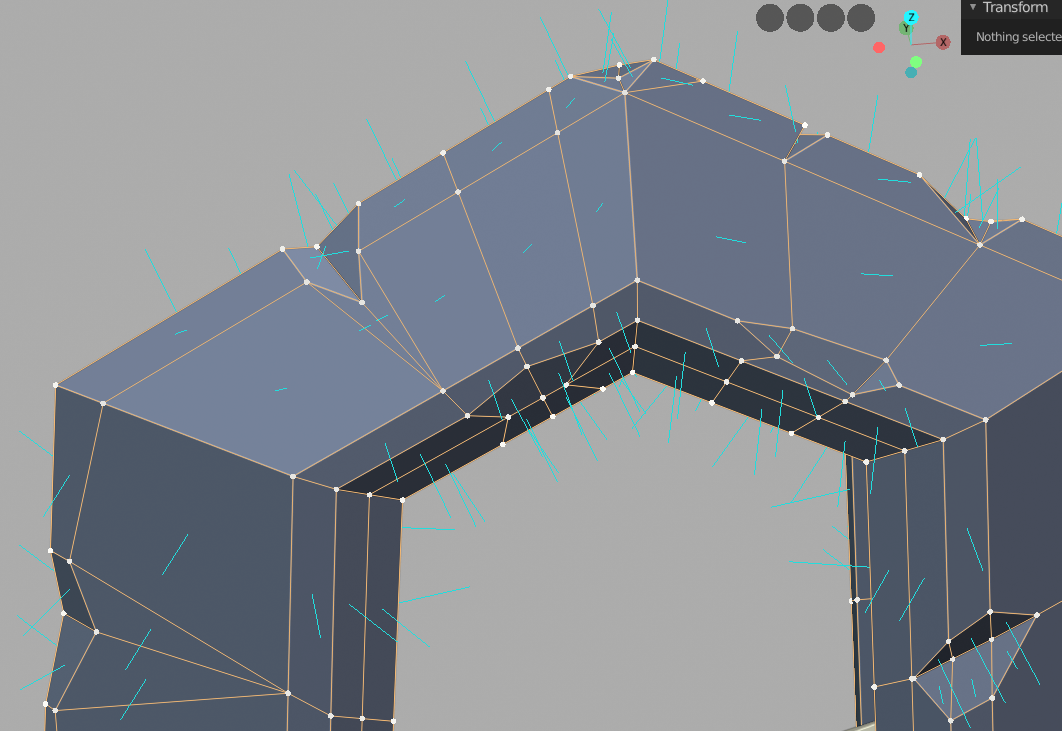
![]() louhikarme When I was using the bevel modifier I marked some "bevel" weighted edges. I turned those off after the applied modifiers but to no avail. Smooth shading is making it loose the sharpness and visual stylized effect terribly so flat shading needs to stay (i think). One interesting thing I am observing is the normals all appear to be going skiwampus long the same plane so that is probably it. Not sure what is causing that maybe it is the ring parallel to the blade edge???
louhikarme When I was using the bevel modifier I marked some "bevel" weighted edges. I turned those off after the applied modifiers but to no avail. Smooth shading is making it loose the sharpness and visual stylized effect terribly so flat shading needs to stay (i think). One interesting thing I am observing is the normals all appear to be going skiwampus long the same plane so that is probably it. Not sure what is causing that maybe it is the ring parallel to the blade edge???
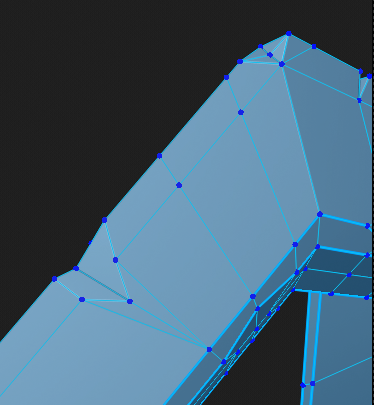
![]() blanchsb ahh ok, yeah its the flat shading. what you actually now need todo is mark the edges sharp that needs to be sharp. that way you can do smooth shading and get the sharp look. like in pic below.
blanchsb ahh ok, yeah its the flat shading. what you actually now need todo is mark the edges sharp that needs to be sharp. that way you can do smooth shading and get the sharp look. like in pic below.
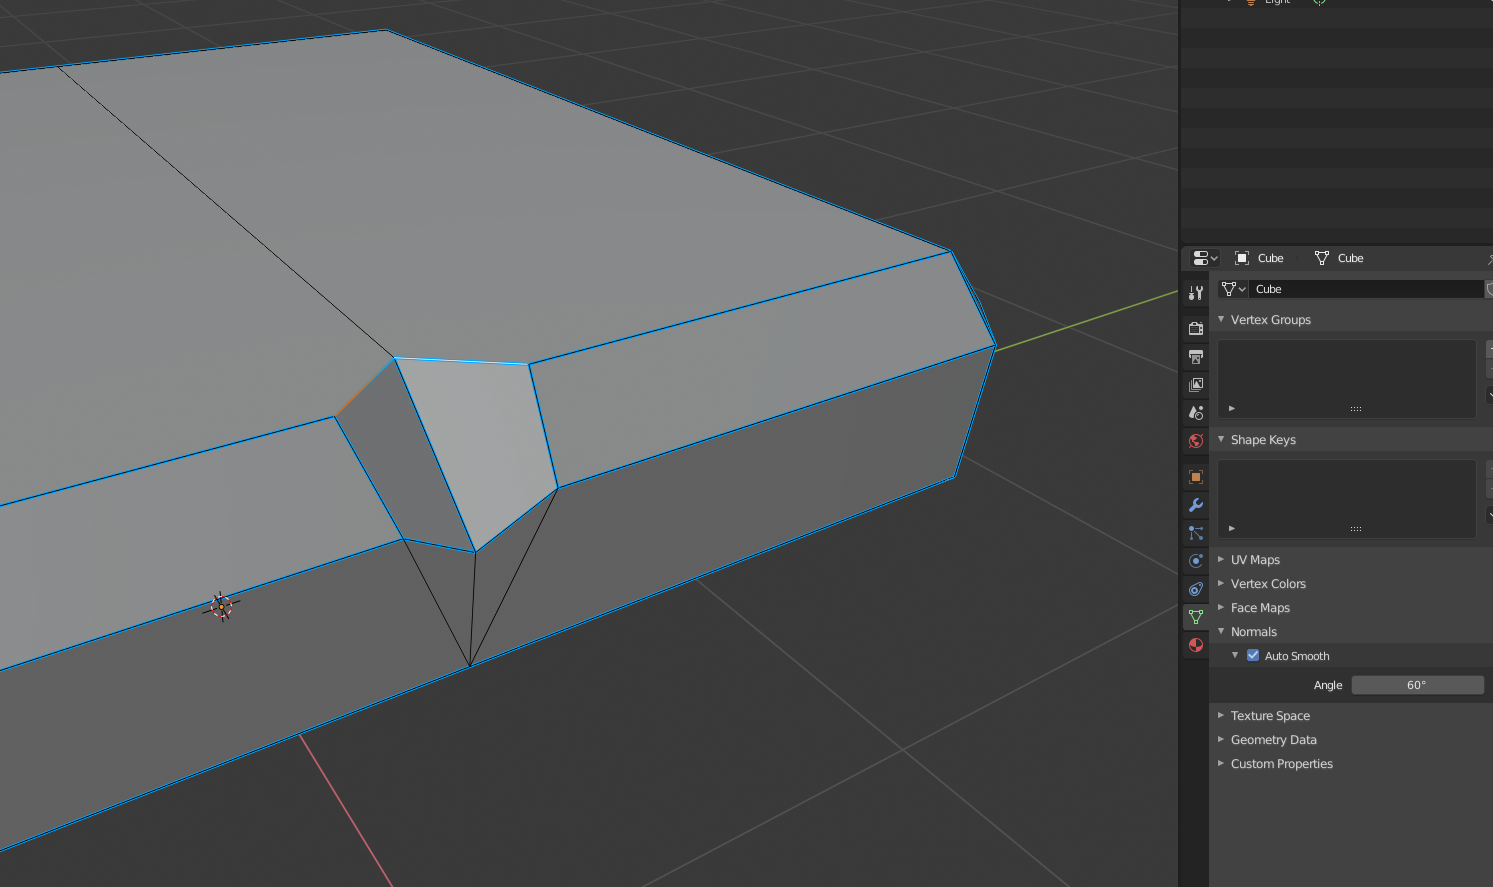
the normal going that way could be the autoosmooth setting.
![]() louhikarme interesting. Thanks for that idea. Ok I will see what I can do with that. On a side note I think it is because my faces were not 100% planar to begin with, so when I "cut" the 2 new planes it was like subdividing or adding a light bevel when that happened so it failed before it started. I can illustrate my point with the illustration.
louhikarme interesting. Thanks for that idea. Ok I will see what I can do with that. On a side note I think it is because my faces were not 100% planar to begin with, so when I "cut" the 2 new planes it was like subdividing or adding a light bevel when that happened so it failed before it started. I can illustrate my point with the illustration.
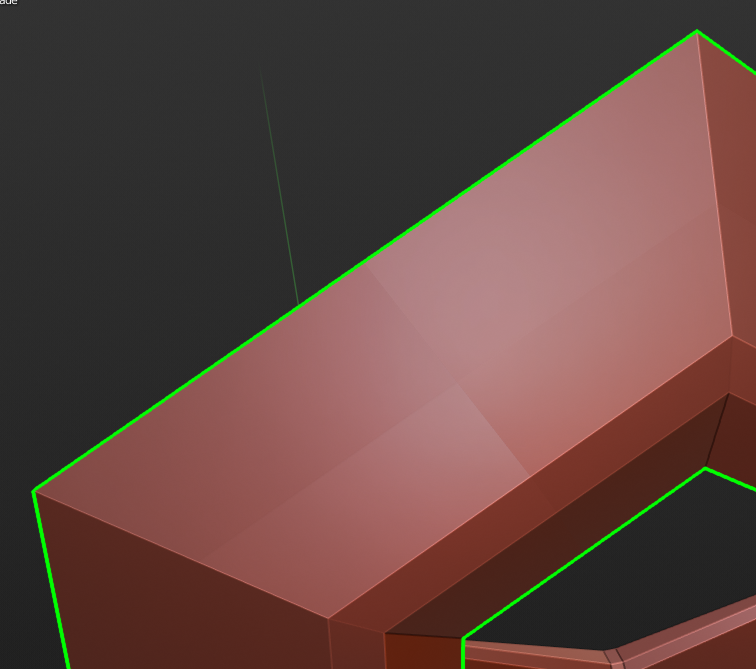
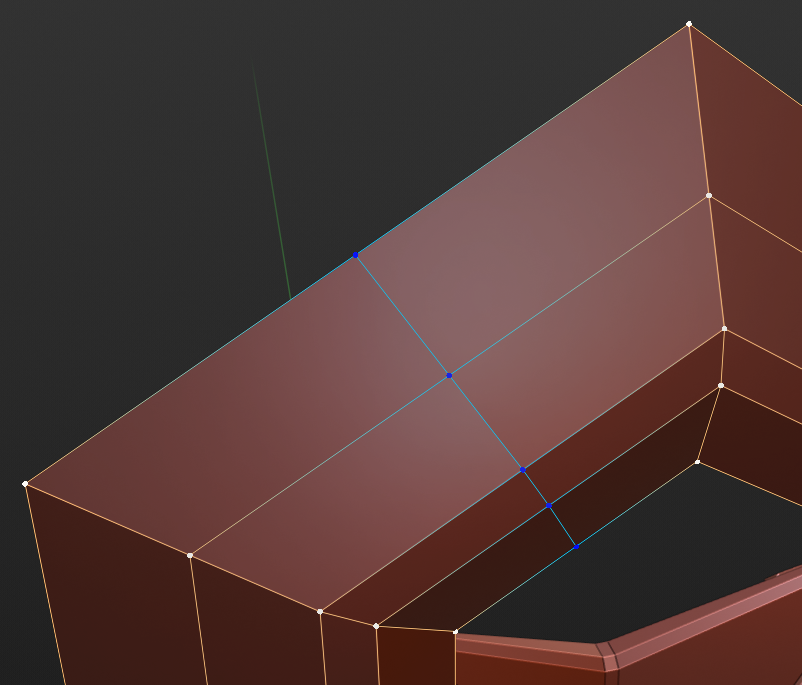
I figured out how to 'fix' it but I don't know where to go from here because it messed with the other side. I tried making a custom transform orientation and flattening in the custom-z direction but it messed with other verts. Although.......maybe I need to do that before cutting the edge loops on the pre-cut faces???
Notice the difference when I smooth that set of faces though? (I made a GIF but it won't upload) see link https://drive.google.com/open?id=1xrnJIjI4mZNWYOINgpSbDoEDAXUEYhQg)
Maybe I should just stick with your method.
![]() blanchsb ahh yeah, if they are not planar then you get unwanted faceting. they way you can fix that is to select the whole edge loop in the middle, edge slide it to the one end so its stuck with the other vertices. finalize the operation. then edge slide it back to middle. other way is to delete the whole edge loop and make another, then its also again in the middle. and you can do this basically which ever way you want to slide them edges or just vertices to straighten out the line between two verts.
blanchsb ahh yeah, if they are not planar then you get unwanted faceting. they way you can fix that is to select the whole edge loop in the middle, edge slide it to the one end so its stuck with the other vertices. finalize the operation. then edge slide it back to middle. other way is to delete the whole edge loop and make another, then its also again in the middle. and you can do this basically which ever way you want to slide them edges or just vertices to straighten out the line between two verts.
Another way to make things planar, is to select those faces and use Loop Tools > Flatten.
Loop Tools is an addon that comes shipped with Blender, so just enable it. (It's really great, I use it all the time!)
You can find it in the 'specials' menu (is it still called that?) in Edit Mode:
For RCS: W > LoopTools.
For LCS: right click in empty space > LoopTools.