I have retopologized my original mesh to a low-poly version and now I need to be able to apply UV maps, normal maps, height maps, and maybe light maps to the low-poly version to make it appear high-poly. I have the two meshes perfectly aligned, but after that, any tutorial I am following stops working, and I can't find where I am going wrong.

I have the vertex colors for the original mesh applied to the material in blender. I now need to create a UV map from that, and normal maps etc. for the rest of the bumps and detail. I really need some guidance as to what I do next in order to complete my transition of my object.
Any help would be greatly appreciated!
Hi ![]() eithman, here's how to do it:
eithman, here's how to do it:
Ideally place your highpoly mesh in one layer and the retopo'd one in another one, makes things easier to control (I think).
1- Unwrap the low-poly mesh
2- Create a new image from the UV/Image editor (chose the size you desire according to your needs).
3- Create a new material for the low-poly mesh (a diffuse or a principled will be enough) and add an image texture, using the image you created at step 2. Have that input selected.
4- Select the two layers with the high-poly and the low-poly models. MAKE SURE THEY HAVE THE SAME ORIGIN AND THEY ARE OVERLAPPING.
5- Select the high-poly first, then the low-poly (you can use the outliner menu). The order is important!
6- In the render settings, go to the Bake menu, and select Diffuse. Unselect Direct and Indirect: you should only have Color left. Otherwise this would also bake shadows and lights if a lamp is present.
7- Check the "Selected to Active" box
8- Ray distance: this may need some trial and error. I usually start with a high value (1 or higher ) and go down if the results is not nice. If the value is too high it might cast colors from a wrong part of the high-poly mesh into the image, and vice-versa.
9- Press BAKE and check your result.
10- For Glossy, Normal, AO maps, repeat from step 2 with new image and make sure you change the image on the node editor!
I hope that helps, let me know if anything's unclear. As you see there's many step and it's easy to forget one and have bad results.
Happy baking!
/Thibaut
![]() tbrbn thank you so much, this helped A LOT!
tbrbn thank you so much, this helped A LOT!
I can't seem to get my fine details to transfer in normal maps, though. :/
I thought that a height map was what I needed for that, but apparently that adds actual geometry, and I'm retopologizing because the polycount was too high for animation in the first place.
Any ideas? Am I missing something?
![]() eithman The normal map baking can sometime be a headache. Keep tweaking the Ray Distance parameters to even lower values, or try using the Cage option ( a good description on how to use it is available on the Gun modelling course I think).
eithman The normal map baking can sometime be a headache. Keep tweaking the Ray Distance parameters to even lower values, or try using the Cage option ( a good description on how to use it is available on the Gun modelling course I think).
Also, how do you control the details quality ? Directly on the baked map or using a shader ? I personnaly recommend using a diffuse shader with the said normal map (don't forget to switch to Non-Color Data!)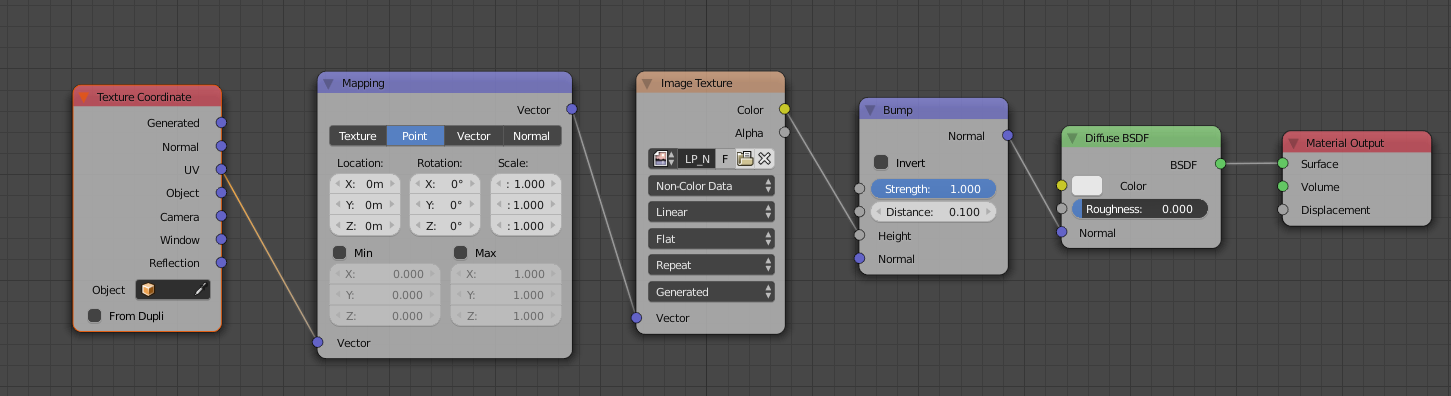
![]() tbrbn
tbrbn
I honestly am having a a hard time processing your answer, which asset should I attach those nodes to?
I'm not sure about the "details quality" I assumed that was included in the shader.
I also can't seem to get any of them to transfer to Unity
Any thoughts?
![]() tbrbn I have come back to this time and time again and I simply can't seem to make sense of it... I thought I was pretty close on having this flow handled, but now I'm completely lost
tbrbn I have come back to this time and time again and I simply can't seem to make sense of it... I thought I was pretty close on having this flow handled, but now I'm completely lost