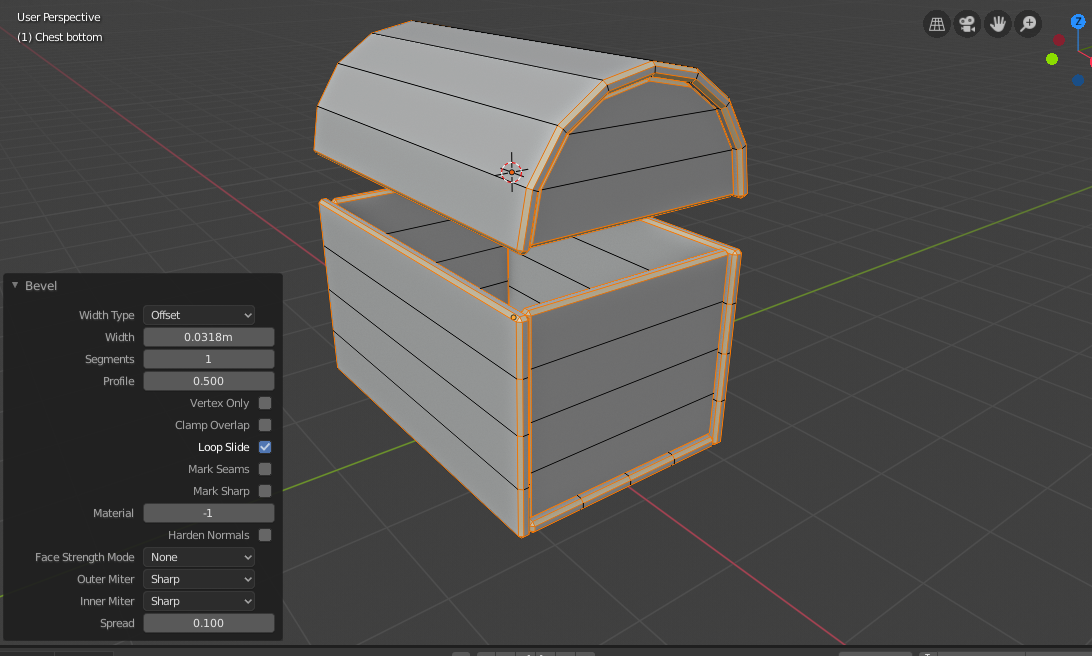
Kent Trammell can you please take a look at this problem? I have experienced the same issue as peaky01 and fuchs, which makes me think that others may also be hit with it. My solution was to re-create the bottom part of the chest (where the bevels work as expected) and replace the bottom that was not handling bevels correctly. But, I'd still like to understand what happened. Here is a screen capture of the problem:
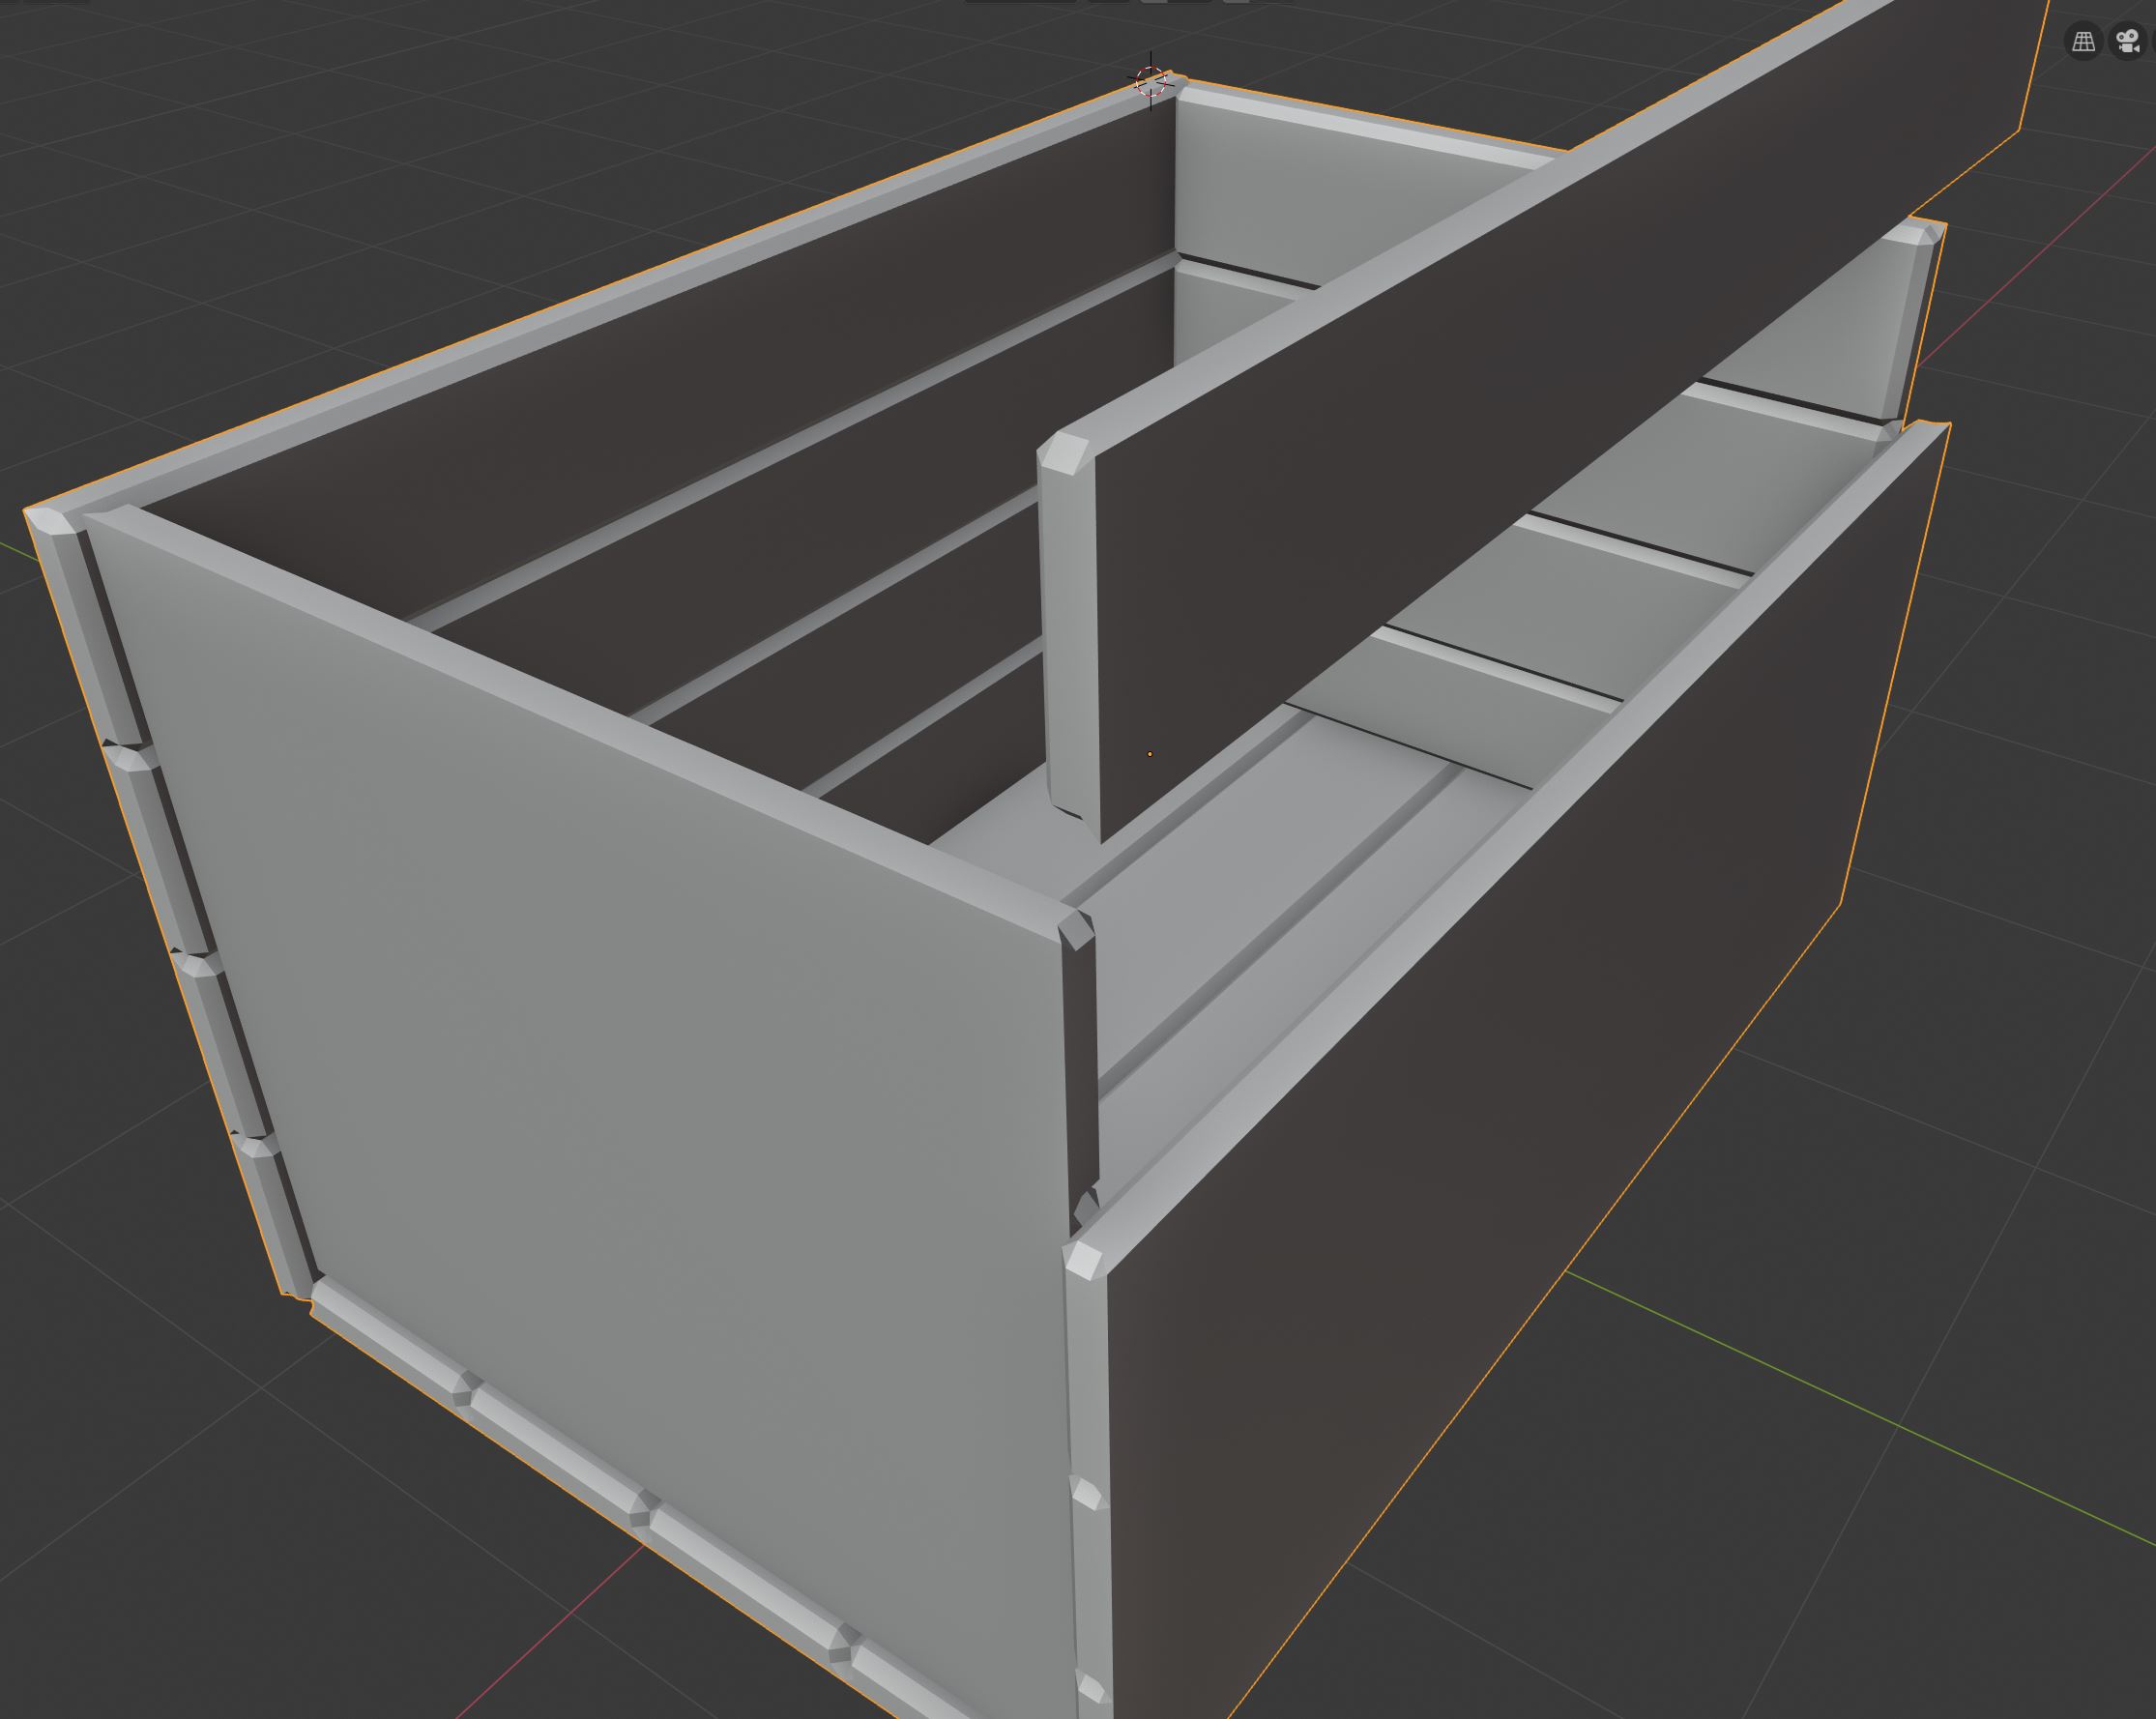
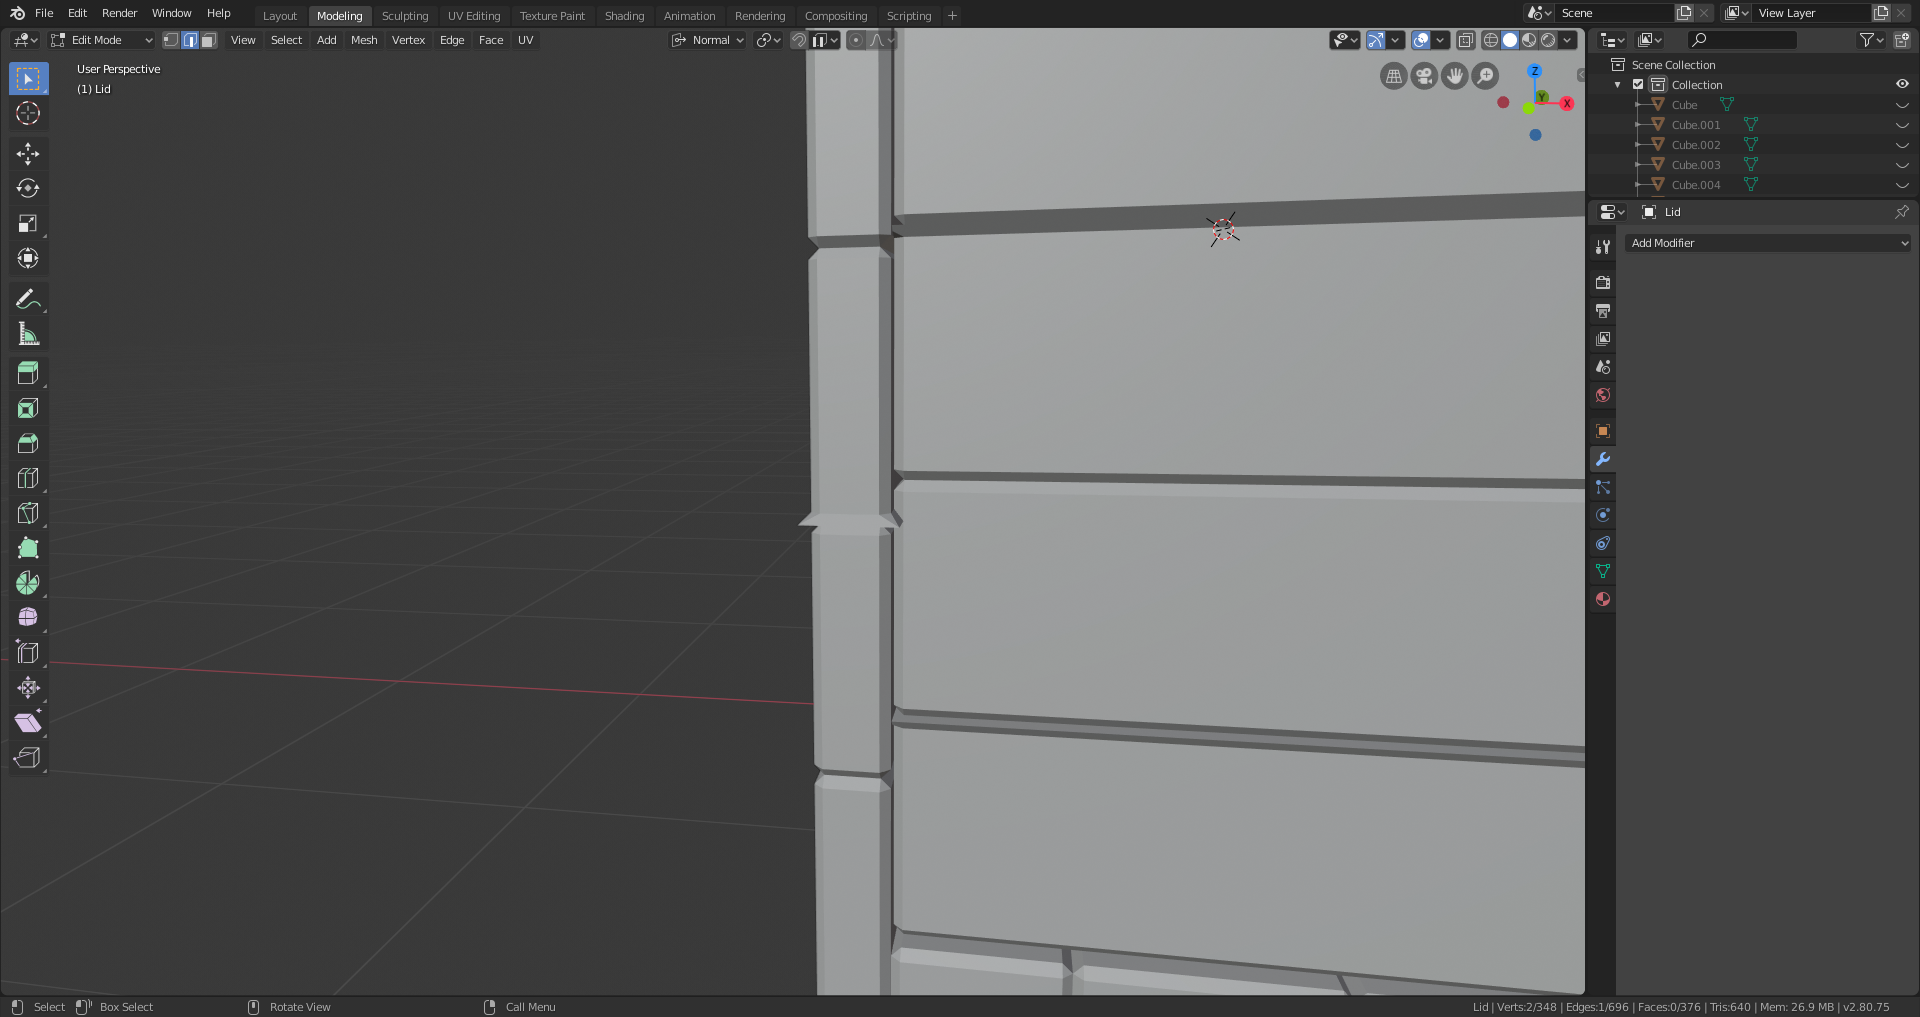
In Edit mode, the bevel looks like it was correctly applied on both the inside and outside. But, in Object mode the planks are beveled correctly on the inside of the chest, but not on the outside. As you can see, I took one plank, selected with the L-Hotkey and raised it in the Z. It "seems" that the Split done earlier in the workflow is working. I am using Blender 2.80.74 (7/9/2019) and have tried earlier versions as well as 2.81. All exhibit the same problem.
Below is a link to a blender file that isolates the problem. Just press A & Ctrl-B and Tab out of Edit mode and into Object mode to see the problem.
https://www.dropbox.com/s/al1ecwm1i4isk3q/Treasure%20Chest%201-6-2%20Diagnostic.blend?dl=0
Also note that if you increase the bevel width greater than 0.1 then you can start to see a separation in the outside of the planks in Object mode.
Thanks!
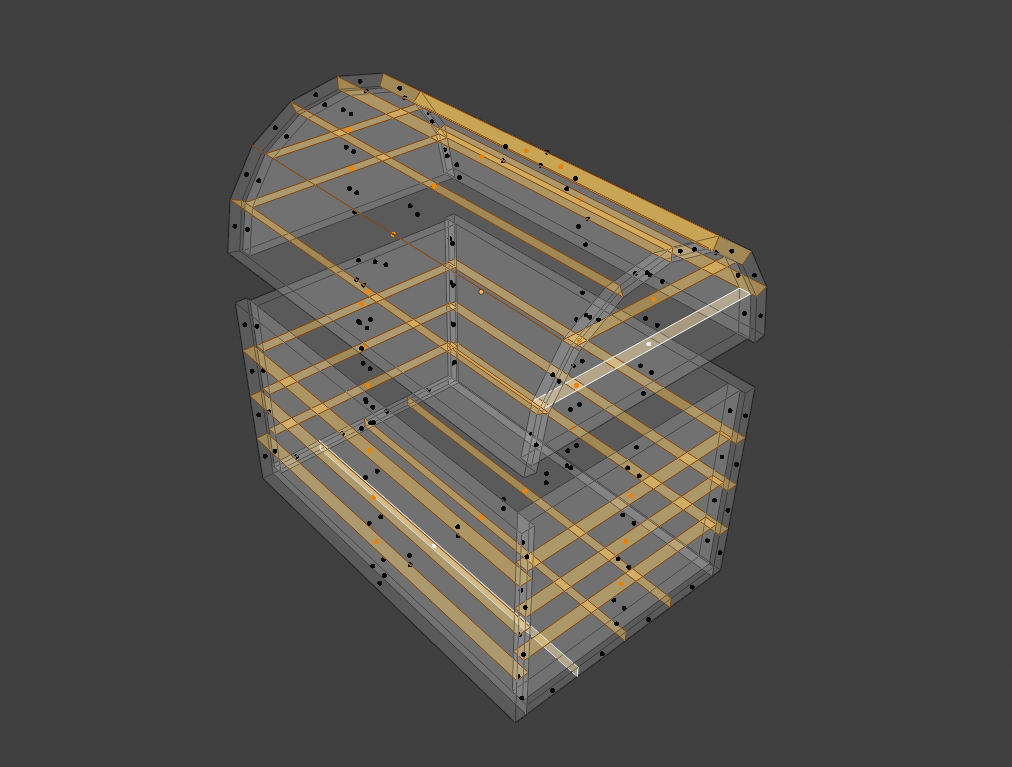
Thanks for preparing a scene to troubleshoot ![]() splat21. ffuchs ppeaky01 I think I found the solution: There are duplicate verts in the boards - a lot of them actually. You need to select all verts with A and go to Vertices > Merge > By Distance:
splat21. ffuchs ppeaky01 I think I found the solution: There are duplicate verts in the boards - a lot of them actually. You need to select all verts with A and go to Vertices > Merge > By Distance:
Once the duplicate verts are corrected the bevel tool should work as expected.
Ran into the same problems and this exact solution was the one that finally did the trick. Thanks!
After merging the vertices it seems the planks aren't separated anymore so the bevel still doesn't work as expected.
I'm having trouble separating them at this point because it's much harder to do so now that the planks are 3D than it was before they were extruded. Manually selecting most of the faces is possible though tedious, but what about the top and bottom ones for each plank? Even if I hide the adjacent planks (also tedious), the merge vertices operation seems to have made it so that each adjacent plank shares the same single face between them.
FOUND SOLUTION: I was having this same issue. In fact I have to go in and separate each plank one by one again because when I extruded it didn't keep the planks separate. I also had to add a lot of new edges as the planks were "sharing" the same edges on the inside. But there still seemed to be an issue. when I went to bevel, the bevel seem to be inverted so there were weird random faces sticking out in between each plank.
Here's how to solve this:
1.) make sure each plank has all of its OWN faces
2.) make sure that the normal on the faces are facing OUTWARD
when normal are inverted this can cause destruction and issues when performing any action to the face.
here is a great video explaining normals and how to invert them to face the correct way:
I really hoped this help some of you because I know I spent a good hour trouble shooting and now my treasure chest looks great and I can continue on in the course!
Thank you for the merge vertex instructions, Kent!
However, I'm now having the same problem as clorf. After the merge vertex operation, the planks have also merged and only bevel around the outer edges of the chest.
I've tried separating the planks out again one by one, but I keep encountering weird issues when I try.
My process is:
- select vertical and horizontal face loops around an individual plank using the shift key so the whole plank is selected
- hit "y"
- hide all the other planks
- use edge select and "F" to add faces as needed.
An example of a weird issue is sometimes when I select the edges around the missing face and hit "F," nothing happens, so I'll then right-click and select "Fill." This works but the new face has a diagonal edge going through it.
Or when I separate out the planks this happens during an experimental bevel.

(That extrusion is not the same face as the one that had the diagonal line through it.)
My question is, what is the best way to separate the planks after the merge vertex operation?
My file is available here if needed (saved right after the merge vertex operation but before I tinkered with the planks): http://pasteall.org/blend/index.php?id=52424
Thanks very much for your help!
In your treasure chest, you have inside faces:
Select them all and press X > Delete Faces.
Then select all edge loops where those faces where:
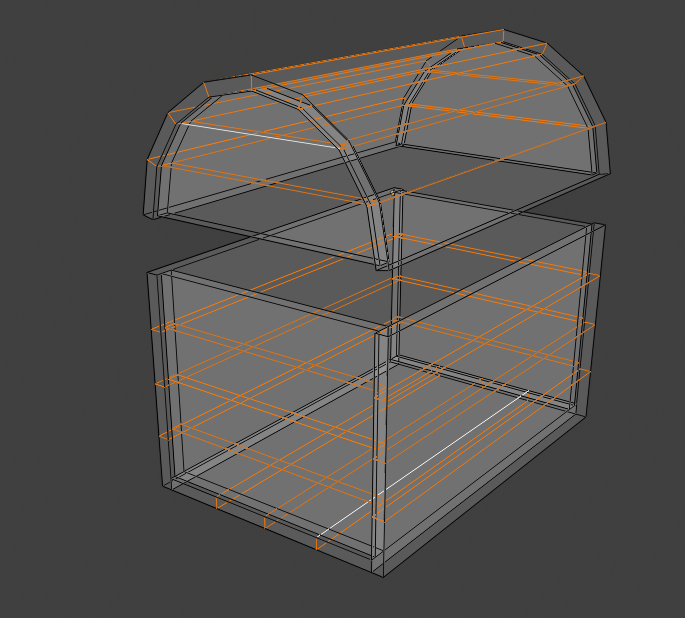
Press V (rip), immediately followed by Enter, to separate all the planks.
Select everything with A and then press F. This magically fills all the planks, keeping them separate. (Make sure the F2 Addon is enabled!)
I also found this problem with my chest bevels too. I used a modified version of Kent's solution to fix it. Essentially just correcting each plan individually instead of trying to correct the entire chest as a whole.
In edit mode, I selected an individual plank with 'L'. Only select one plank at a time.
Hit Alt-M for "Merge Vertices", then select "By Distance".
Repeat for each affected plank.
Fixed the extra vertices in each plank and I'm now applying the bevels as expected.
Also had this issue. I think as a newbie, there may have been times when the wrong key was pressed (or with/without pressing CTRL / Shift etc). For example, there's object mode and edit mode.
If you press Shift+D to duplicate in edit mode when you should be in object mode, then I think a mess is being made to the mesh! Lots of duplicate polys.
What spikeyxxx said is interesting... Blender really should have an option on the extrude tool to not create all those inside faces. To try to fix those is a nightmare for me just trying to select them! Kent's solution was, unfortunately, never going to work! For me hhaase has the solution other than just creating the main box again.
However, trying to create the main box again, I came across a Blender issue. Trying to do those loop cuts with the mouse is so difficult! I found mouse accuracy while trying to snap can also be a problem. Maybe this is all new to 2.8a which I'm using.