This doesn't have to do with this project, but I'm looking at the domino material in the node editor and am a bit fascinated by the setup and how it changes the pattern based on each duplication of the object. Are there any tutorials on the site that cover how that is done? I'm not quite at the level where I understand simply by looking at the various nodes.
Hey Skyler, I wrote it out in a forum post somewhere, but I can't seem to find it. Here's what's going on:
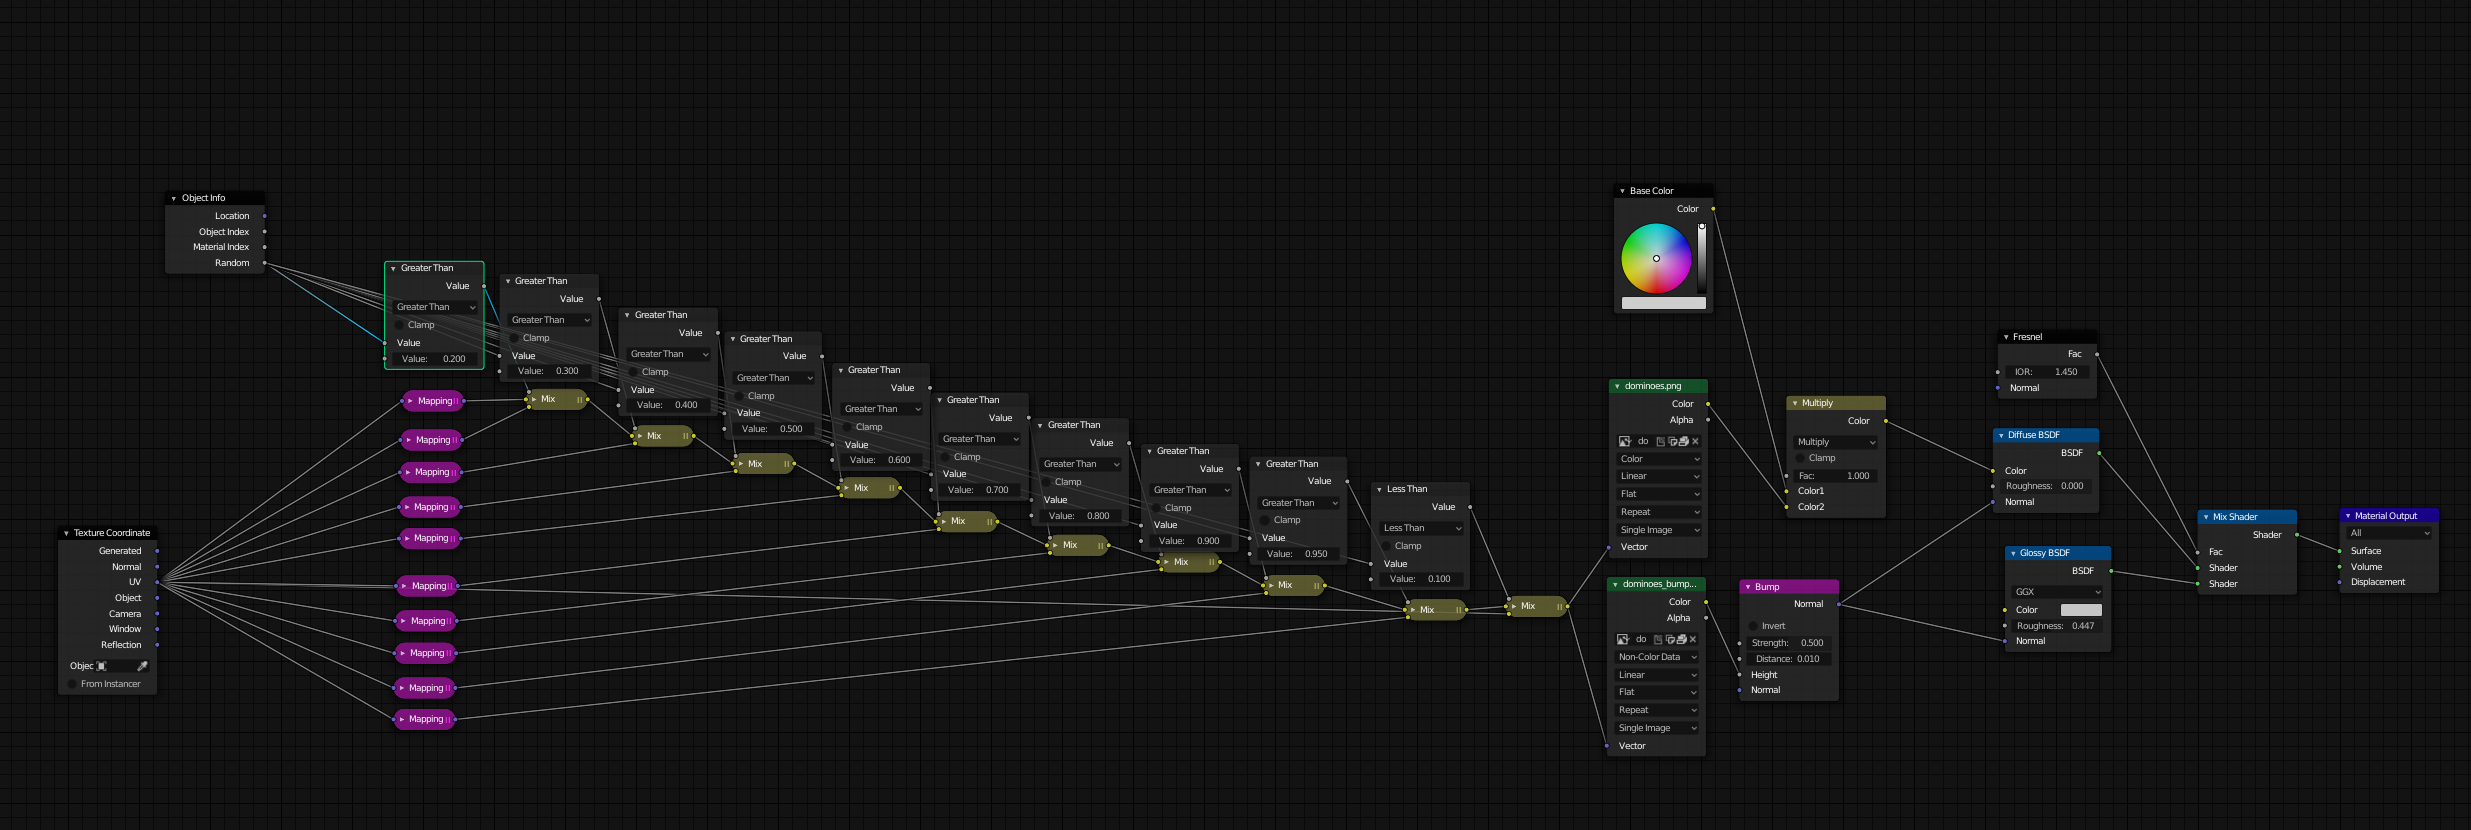
The texture is one long strip of each possible set of dots, one through six. The domino is unwrapped so that the top and bottom sections can be placed on separate squares, the middle placed on the line above, and the rest of the mesh is left unwrapped.
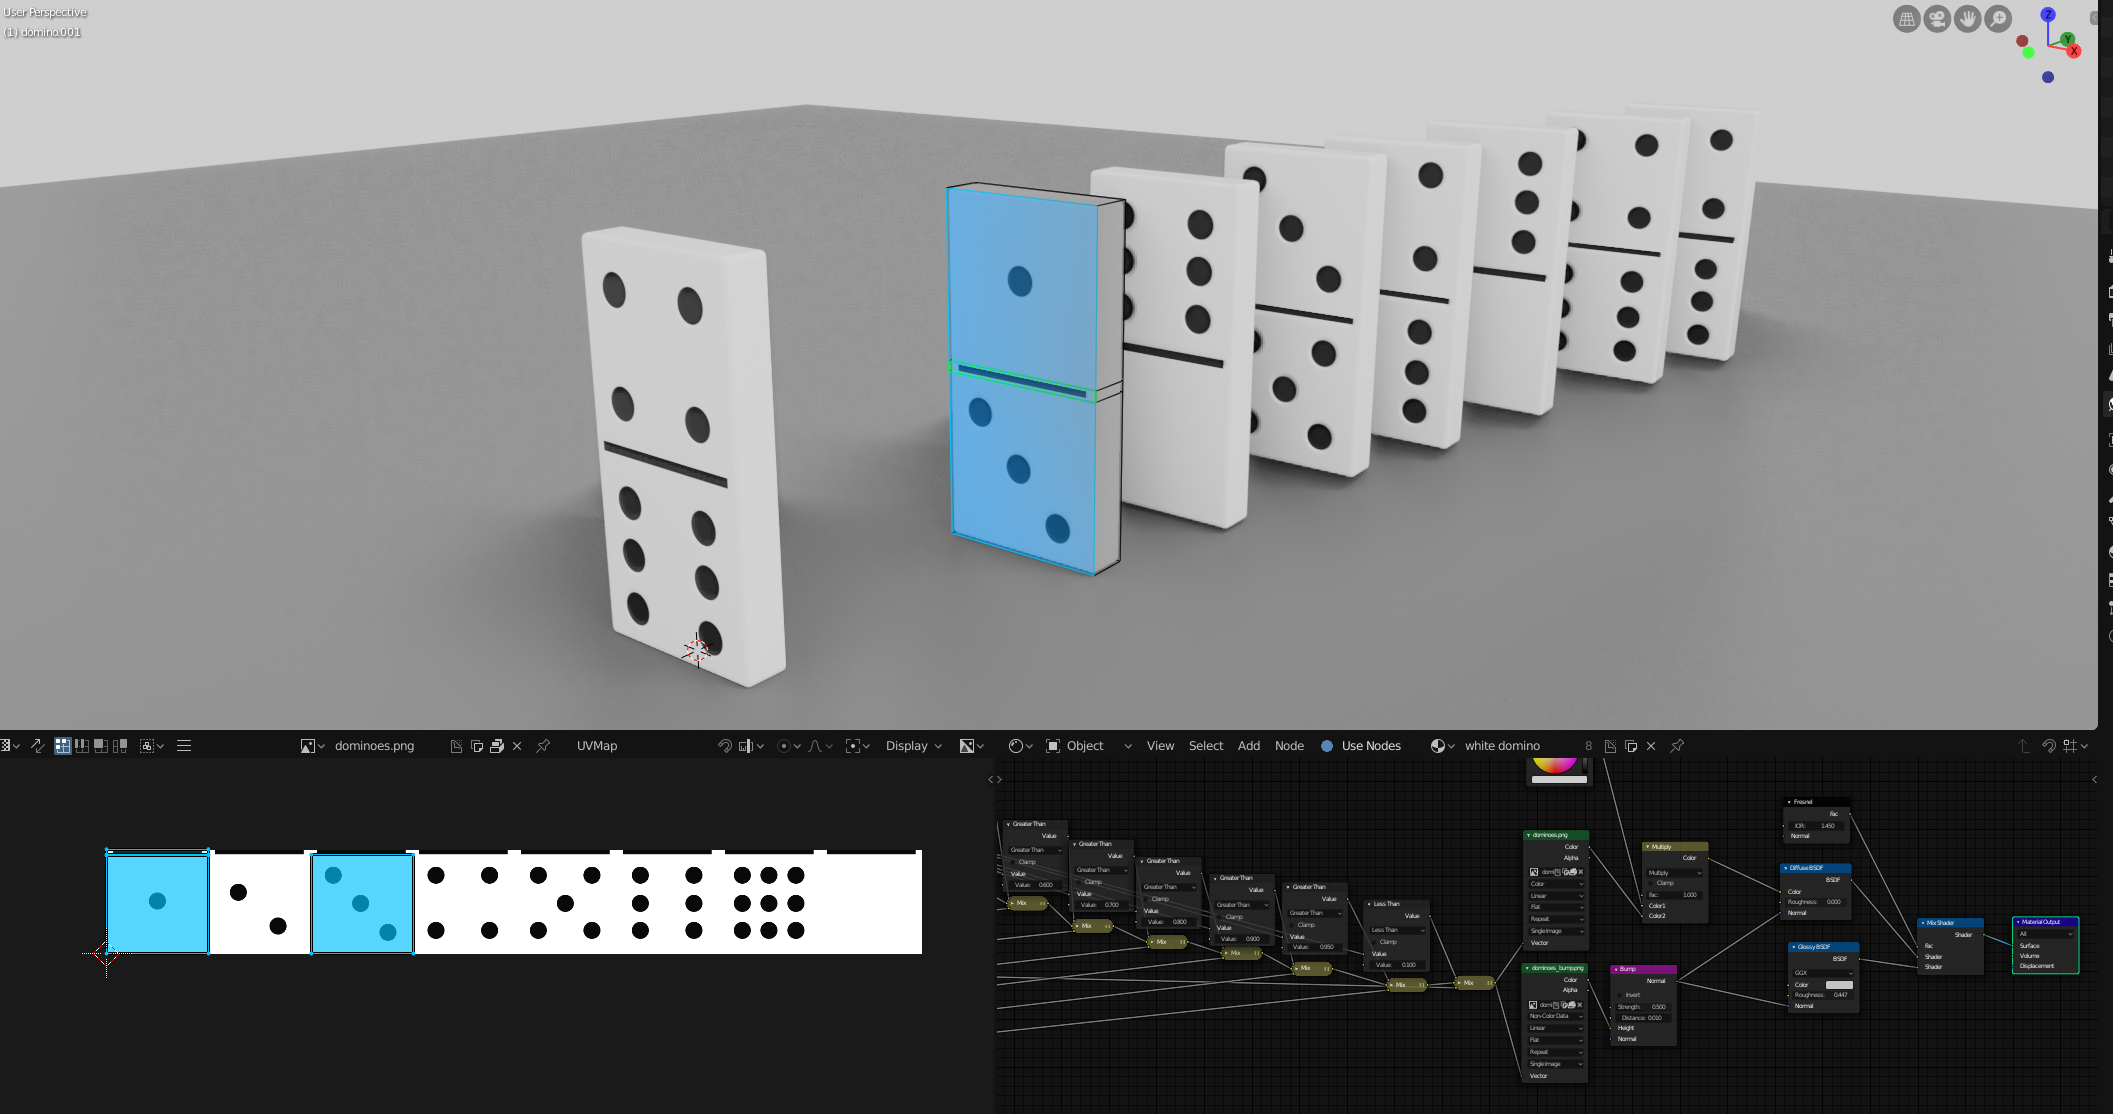
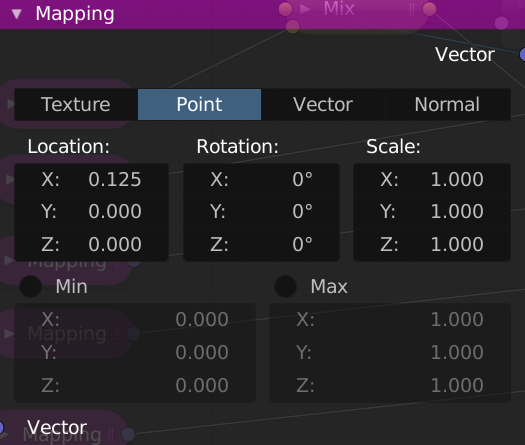
Then I'm using a mapping node to shift the UV coordinates over one square. Try moving the UV's manually 0.125 along the X direction - that's exactly what this top mapping node is doing!
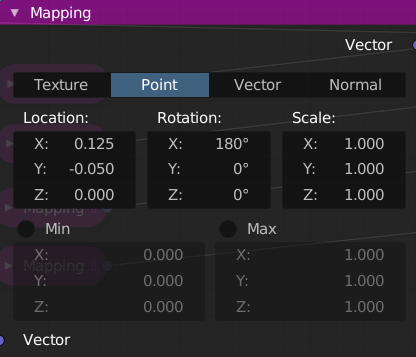
The 2nd mapping node is shifting it over two squares, the 3rd is shifting it over 3 squares and so on until the UV's reach the end of the line. Then, because the same numbers would otherwise always be on the top or the bottom, I flip everything over 180 degrees and repeat the process with the next five mapping nodes.
This is a bit of a brute force method, as it isn't quite random. The number of possibilities is limited to the number of mapping nodes you use. With 10 nodes, we get 10 possible results. Enough to be able to look random, but if you have more than 10 you will start to see duplicates.
A more robust way to do this, looking back now, would have been to use separate UV maps for the top and bottom, and randomly select one of the 8 possibilities for each. That way you would almost never see a duplicate.
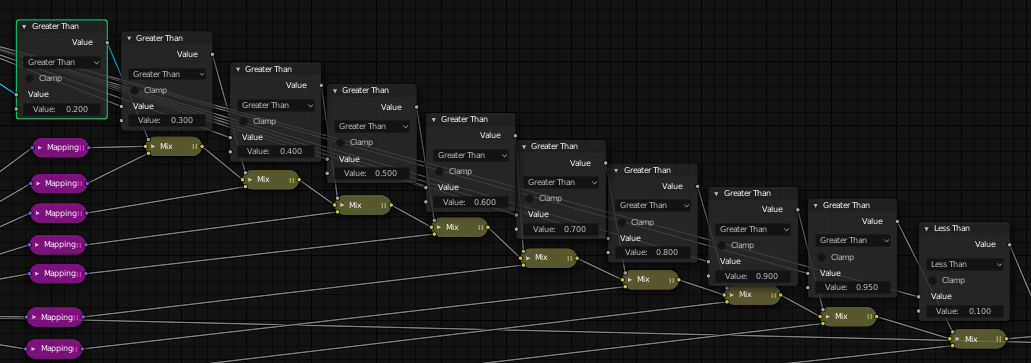
As for the random selection, I'm getting a random number for each object from the Object Info node, and dividing that by how many possibilities I have. Since I have 10 possibilities, I have 10 Greater Than nodes mixing between two possibilities at increments of 0.1
 .
.
That way, every possible number between 0 and 1 will result in a different mapping node affecting the texture. Lastly we plug the result into the Vector corrdinates of the texture and away we go!
It's a pretty niche material, but a fun one! Hope that helps :)