

Following along i found that when i got to the extrude down the z-axis part of the tutorial, after duplicating and separating the selection created from the original mesh of the hdd casing, it did not work at all like yours did, even though i used exactly the same commands to get there...
I will add both screenshots (below) of what it did instead and then add in what i found seemed to fix it, but i have no clue how or why this happened or what it actually did to seemingly fix it (if it did)
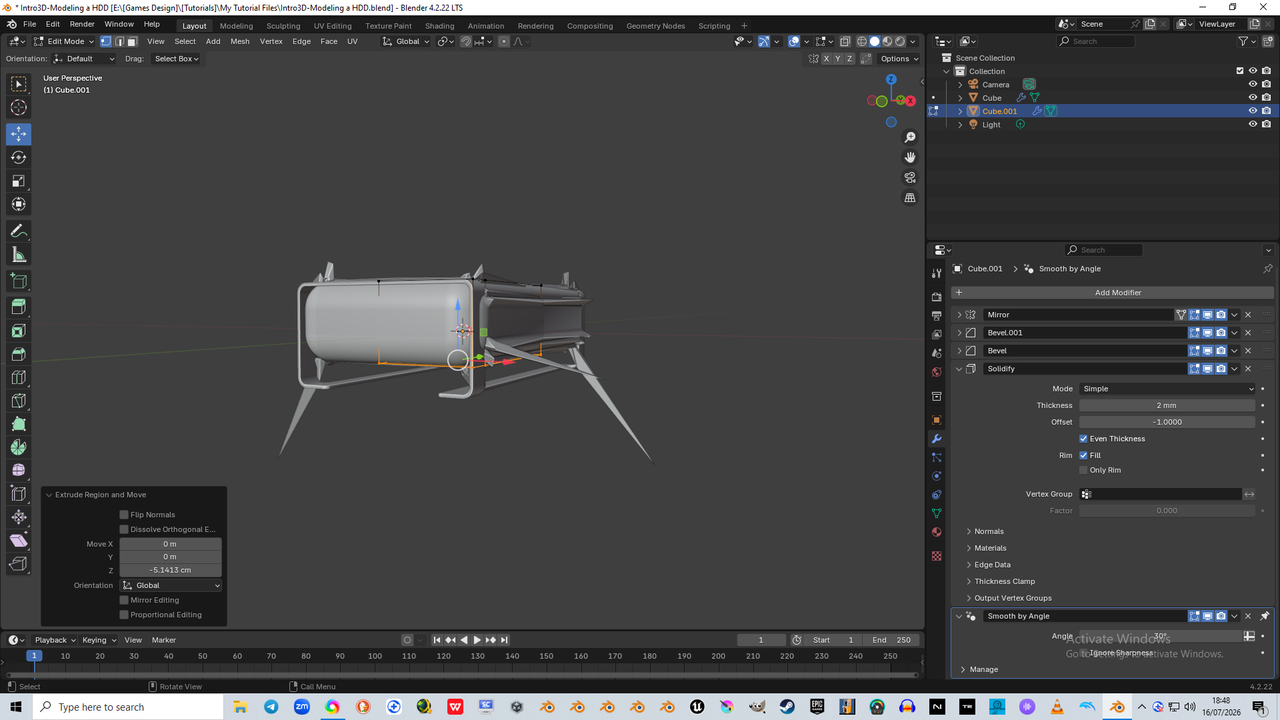
This is what it did unexpectedly, by following your tutorial to the letter...
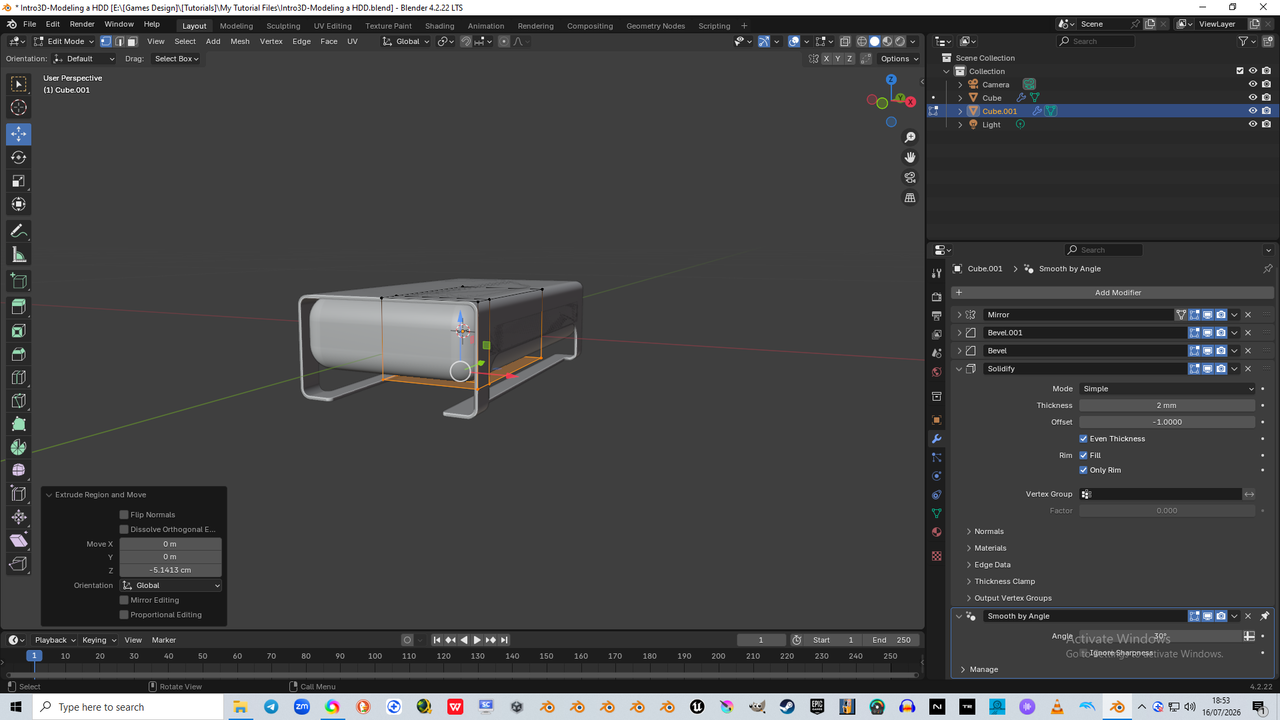
So, what seems to have fixed it was checking the "Only Rim" box on the Solidify Modifier above it in the stack, but i am clueless as to whether it is a fix, or if it was not the optimal way to fix it, or even if i could go through this without needing a fix, and i am also lacking the understanding of why this happened... is it a Blender version thing, or something else?
Help is most certainly needed here to understand what has happened and why it has not worked by following along to this tutorial

HI Charlie KingFisher78 ,
Although I don't know exactly what happens, it looks like a classic case of ye good ol' double Vertices, maybe combined with some inconsistent Normals. It is almost certainly not because of a Blender Version difference.
So, do what you should always do, when running into problems during Modeling: (in Edit Mode) A, to Select everything (all), then M > Merge > By Distance, followed by SHIFT+N, to re-calculate your Normals. (In some cases, Merging can leave you with wrong Normals, so do the Merge before trying to 'fix' the Normals.)
If this doesn't help, the problem may be in one of the Bevel Modifiers, but I actually doubt that.
You know what Martin... i was even using merge by distance whilst doing that tutorial exercise throughout, but i guess it slipped my mind at this point, and i certainly do need to keep reminding myself to check these things often, and not just get so engrossed by what i am doing that i forget such an important little lifesaver like this.... merge by distance, recalculate normals
I no longer feel sorry for that poor old Blender cube, it's all those unwanted vertices i feel sorry for now