I have read the answers to this question and I checked my Verts, they are all merged by distances and it said 0 Verts merged which means it did not need any. I checked all my normals and it showed all blue and I use the Alt+N just to make sure. No matter what i do, those slots will not bevel
Are you using normal means to bevel or the bevel weight? (Press N to bring the item/tool/view sidebar)
If so, then double check if you applied scale.
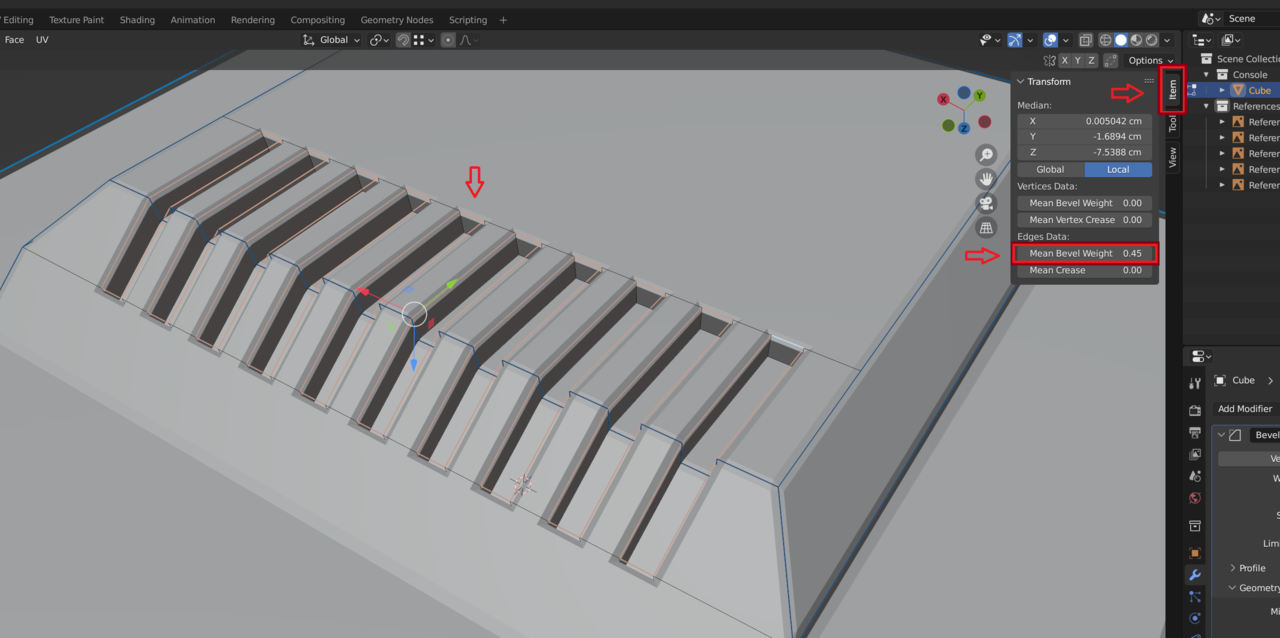
I am also having the same issue. When i try to bevel them one at a time it works until all of a sudden poof. they break when a reach a one of the slots. They wont all bevel a the same time. Im trying 0.4 as value on the Edge Data mean bevel weight or 0.45
Hi ddeathjdstn and FFrixTheBlenderNoob ,
If you are still having problems and care to share your .blend file (post a link here, using something like GoogleDrive or Dropbox or so), I (or someone else) will have a look at what is causing this (not necessarily one and the same thing in both cases).
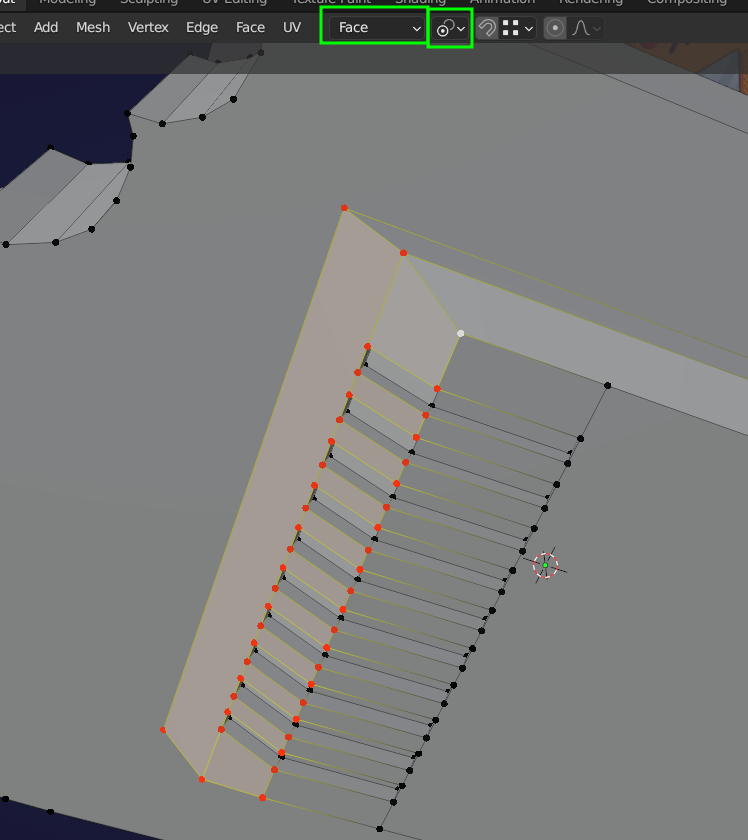
FFrixTheBlenderNoob , your screenshots show you are using vertex select, try using edge select as in the lesson.
Using vertex select also selects unwanted edges in between.
A link to my onedrive project folder
https://1drv.ms/u/s!ArvMjznIHWvbhZR9ksNP35tbBfzIUg?e=K7UpEx
I tried both vertex and edge select and it did not work.
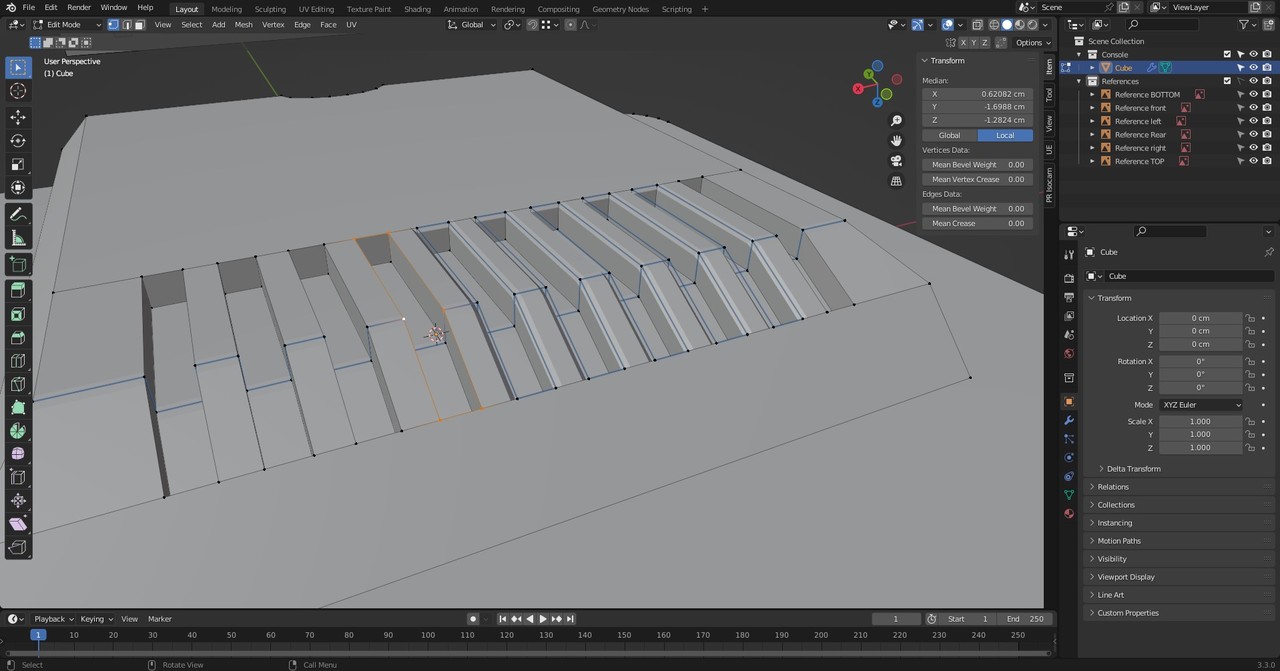
I disabled clamp overlap and now it works but not for one of the sides. As you can see the it doesnt bevel the buttom edges. I can't find any duplicate vertices. 

I even did the slots again cause i extruded along the global Z axis unlike the video. But that didnt fix the issue either.
Hi Frederik FFrixTheBlenderNoob ,
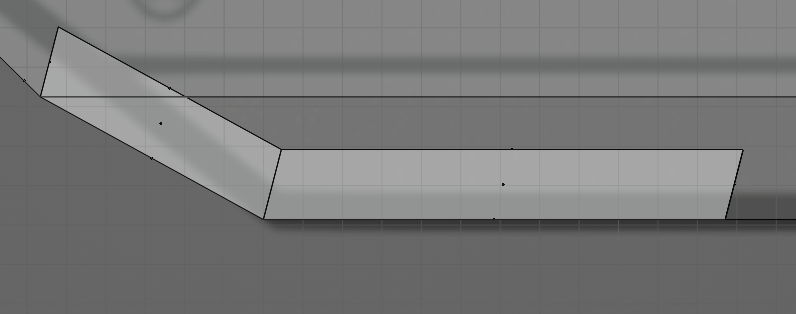
The problem seems to be the Angle here:

I also made those insets go straight up for good measure, but I don't know if that is actually necessary.
The result:

And to get those Faces straight, you can for instance:
Select these 4 Vertices, F to fill them with a (temporary) Face and make a new Transform Orientation:
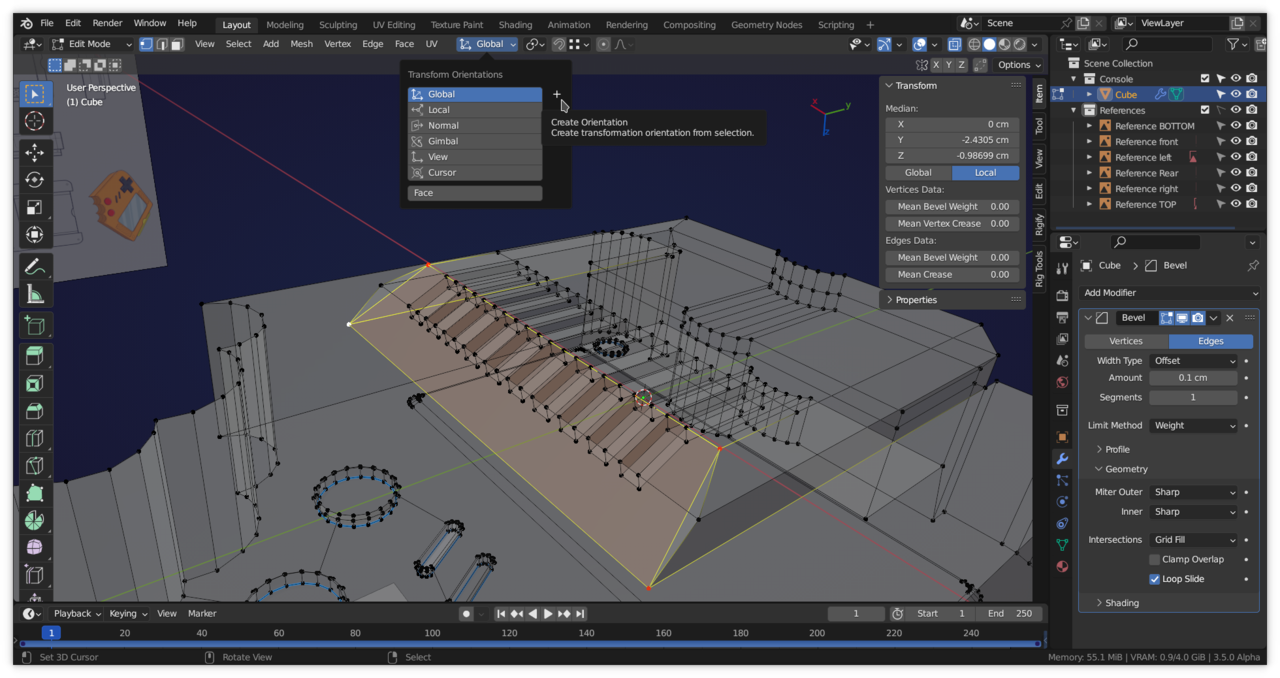
After making the new Orientation, you can Delete that Face (Blender will remember the Orientation).
Select these Faces and make a relevant Vertex the Active one, for instance this corner Vert (and use Active Element as Pivot Point):
Then S, Z, 0.
You'll still have to fix those insets, but I'm sure you are able to do that.
FFrixTheBlenderNoob , if you disabled clamp overlap, you probably have double verts.
If you have already tried merge by distance, and got zero deleted. Try again, and this time in the Adjust Last Operation window increase the merge distance from the default 0.0001, try 0.001. Keep an eye on the whole mesh, in case you go to high and remove verts you want to keep
I am having the same issue here. Tried to merge and check face orientation, everything seemed to be alright. https://drive.google.com/file/d/1cfbBYCWpr31tNftpDbAXBasO_1Iu8Qj9/view?usp=sharing this is my project, please help me :')
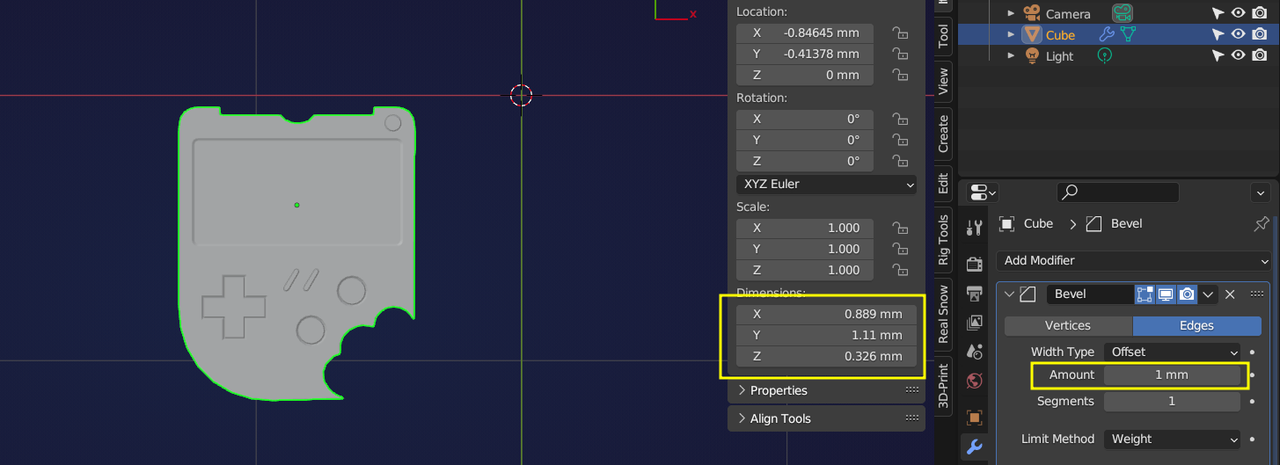
yeah, I think I got confused with the inches/meters thing ahah. Anyway I tried changing the amount of the bevel modifier and even scaling up the object won't do the trick, the modifier still doesn't work. I think I'll just bevel it the normal way.
Thank you for the response!
Hey Enrico @Sir Pegassi ,
Don't give up on the Bevel Modifier! It's really worth getting it right (also for your future projects!).
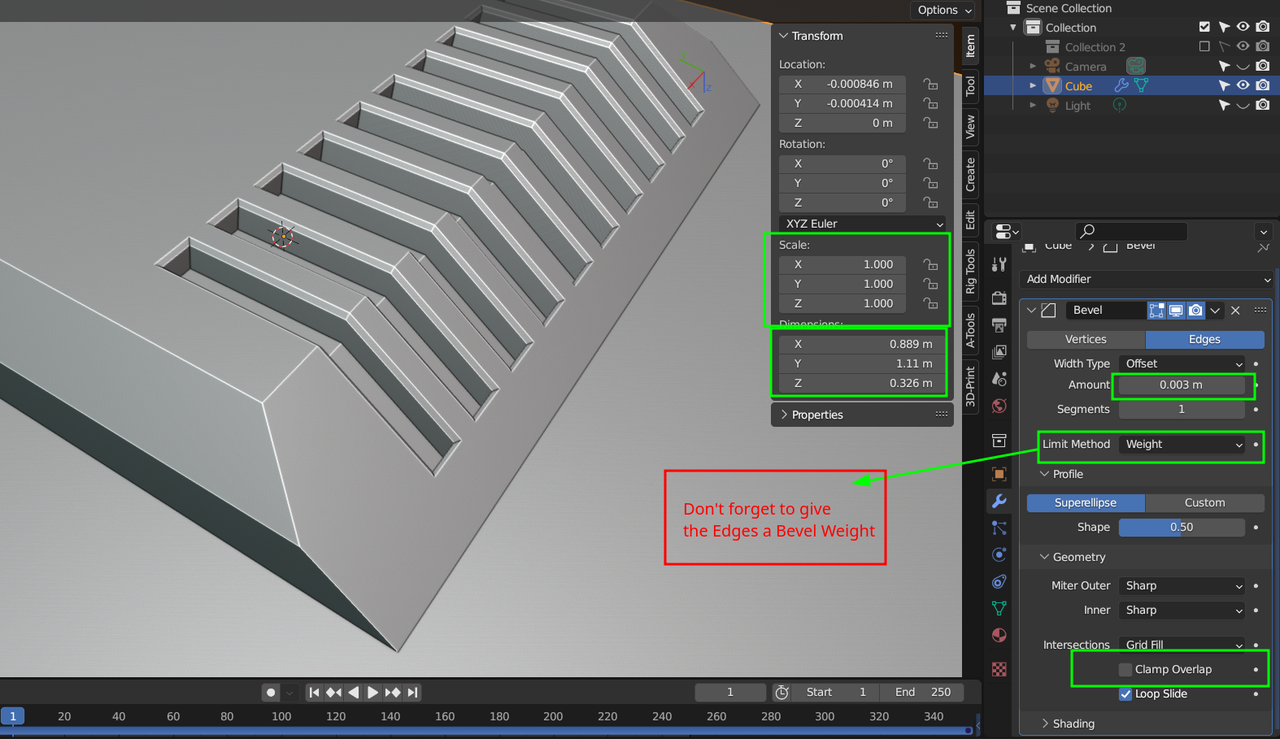
You just have to get everything right, or it won't work as expected. If you have Scaled your Console in Object Mode, you'll have to Apply the Scale! Set the Bevel Weight for the Edges (in Edit Mode) and disable Clamp Overlap.
This is your Console,and as you can see: the Modifier works: