Seeing this is my first post for my blender journey I'll give some background of where I'm coming from(I'll put this in the get to know each other forum later)
Backstory:
Well I had this account for a long time, February 26th, 2012 according to my profile (10 YEARS !? O_o) and I never used it. But it was rarely used and didn't signup for the membership. Mainly because at the time, I was using blender for fun and it wasn't really serious as I was helping my brother with effects in 24 hour jams. Though I lost interest due to being in IT but kept tabs on blender.
Fast forward to just last week, I mentioned to a team in the company that I work for (I work as a lab tech for a certain M$ company as a vender) that I was getting a 3D scanner soon and they got excited about it. Somehow, one thing led to another and the team I'm working with decided to get cameras, lighting and other stuff with a Gamer PC that can run Blender like a champ for video production, mainly for How to videos and visual documentation. Which is the absolute opposite of what I'm paid to do, but I didn't care.
At least when I realized that I need to have knowledge on a 3D program in order to make use of a 3D scanner. I then remembered this account and immediately got a membership to essentially do a crash course in blender before the 3D scanner arrives in March.
Wish me luck!
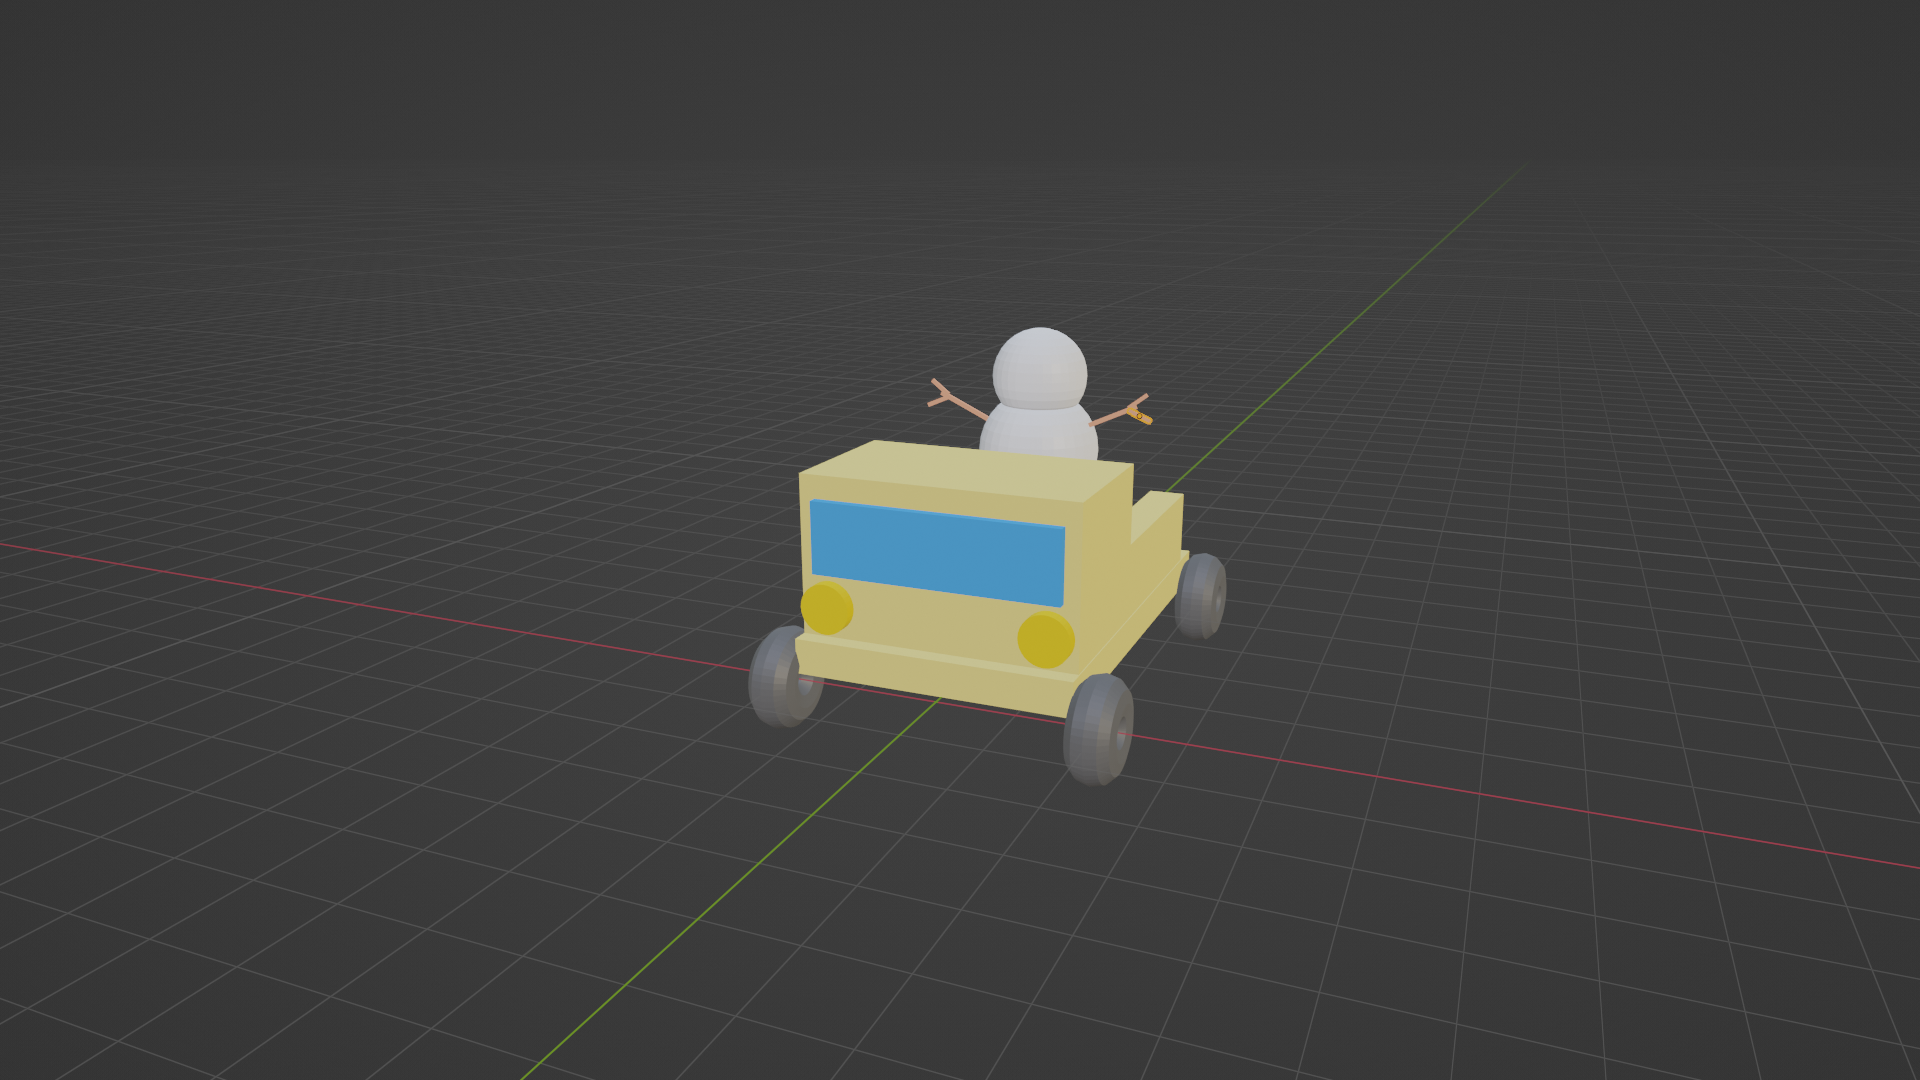
Anyway, here's my primitive, I was going to make an object similar to the 3DO logo, but after making the tous inner small, it look like a tire so I made a truck and made a snowman on it.
It's good to see you come back and take Blender again. Good luck on your journey. Look like snowman will be in a wild ride.
Whelp, Here's my space crate from the fundamentals of modeling.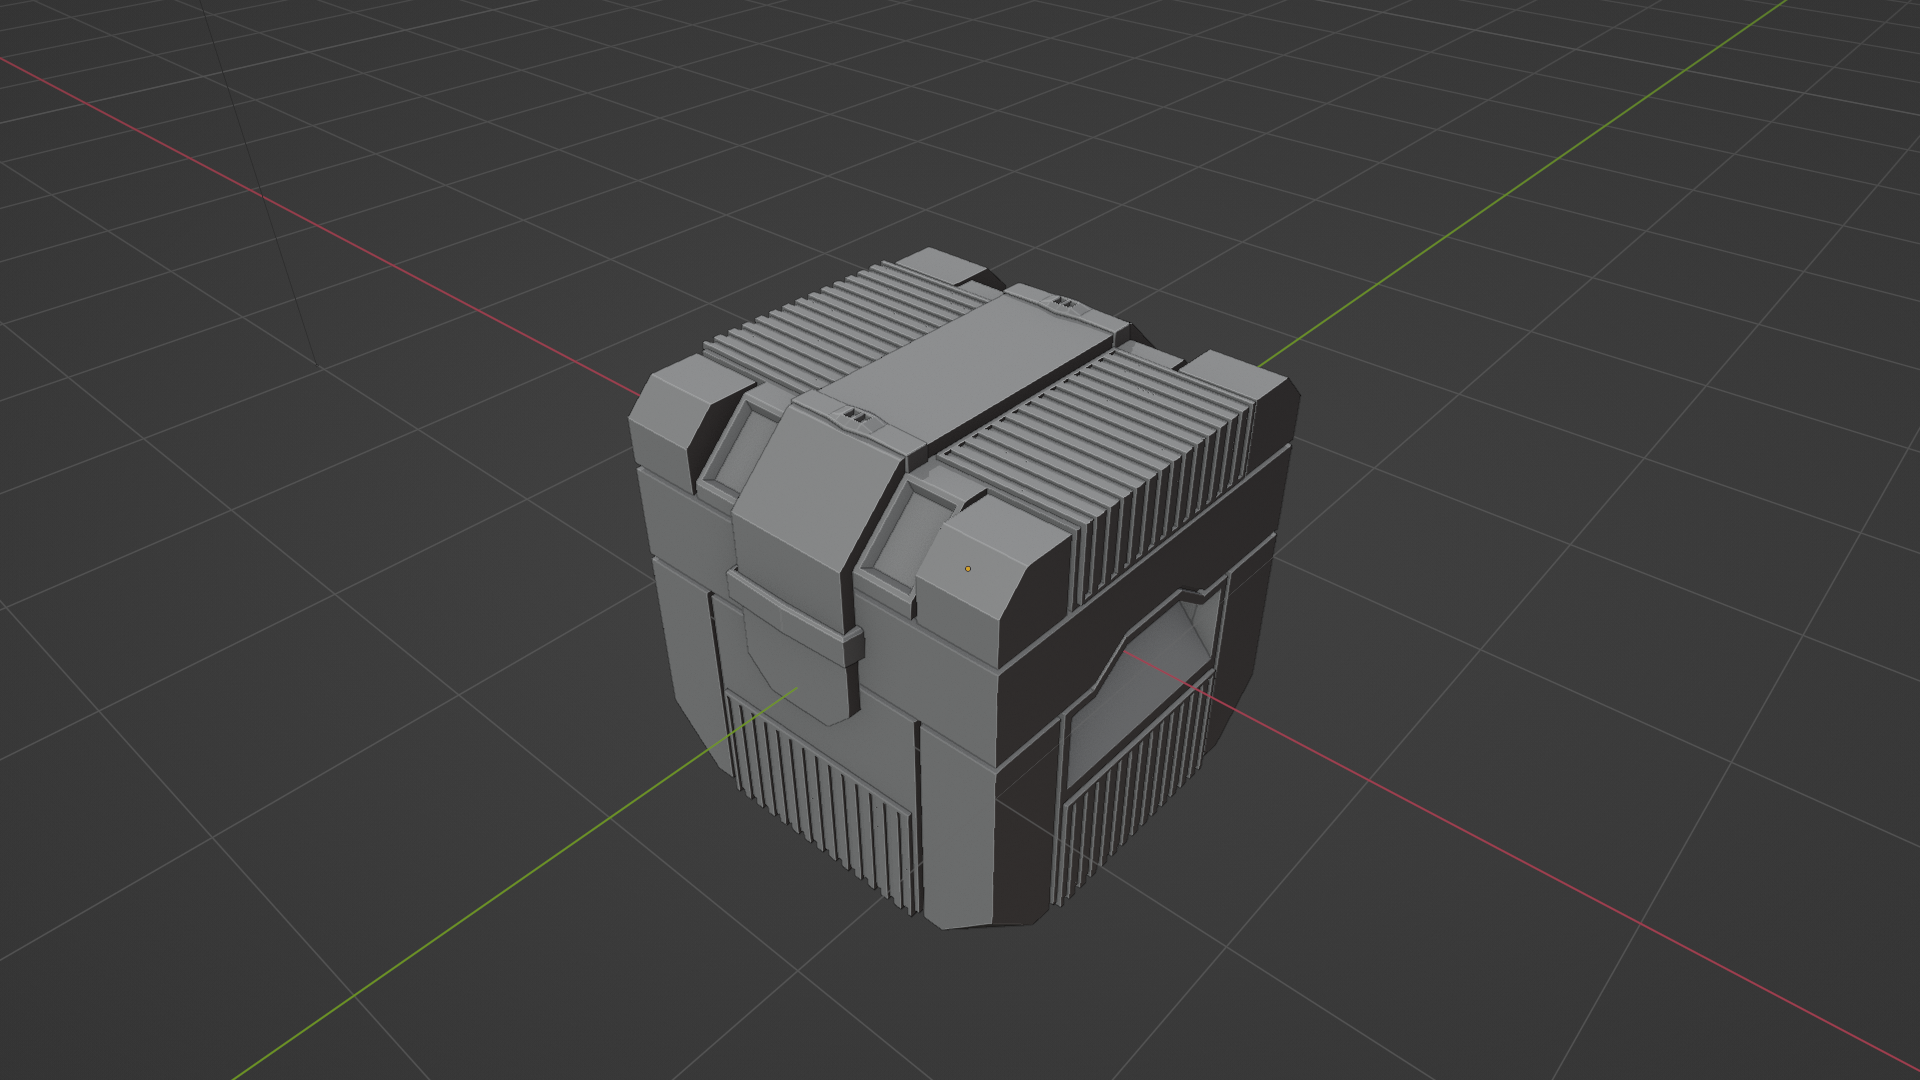
Ok, technically I only did some minor edits after the tutorial to build this together. The design itself was so good that I was drawing a blank on what to add or something to add my own.
So I added the only thing that made sense for a crate to have, clamps!
I added a clamp meant to guide the latch in and a clamp at the top of the create with a detail to indicate that they separate.
I need to play more sci-fi games than halo for better idea XD
Oh, and I made the top part of the handle more upper because some handles are guided in/upwards for better grip. 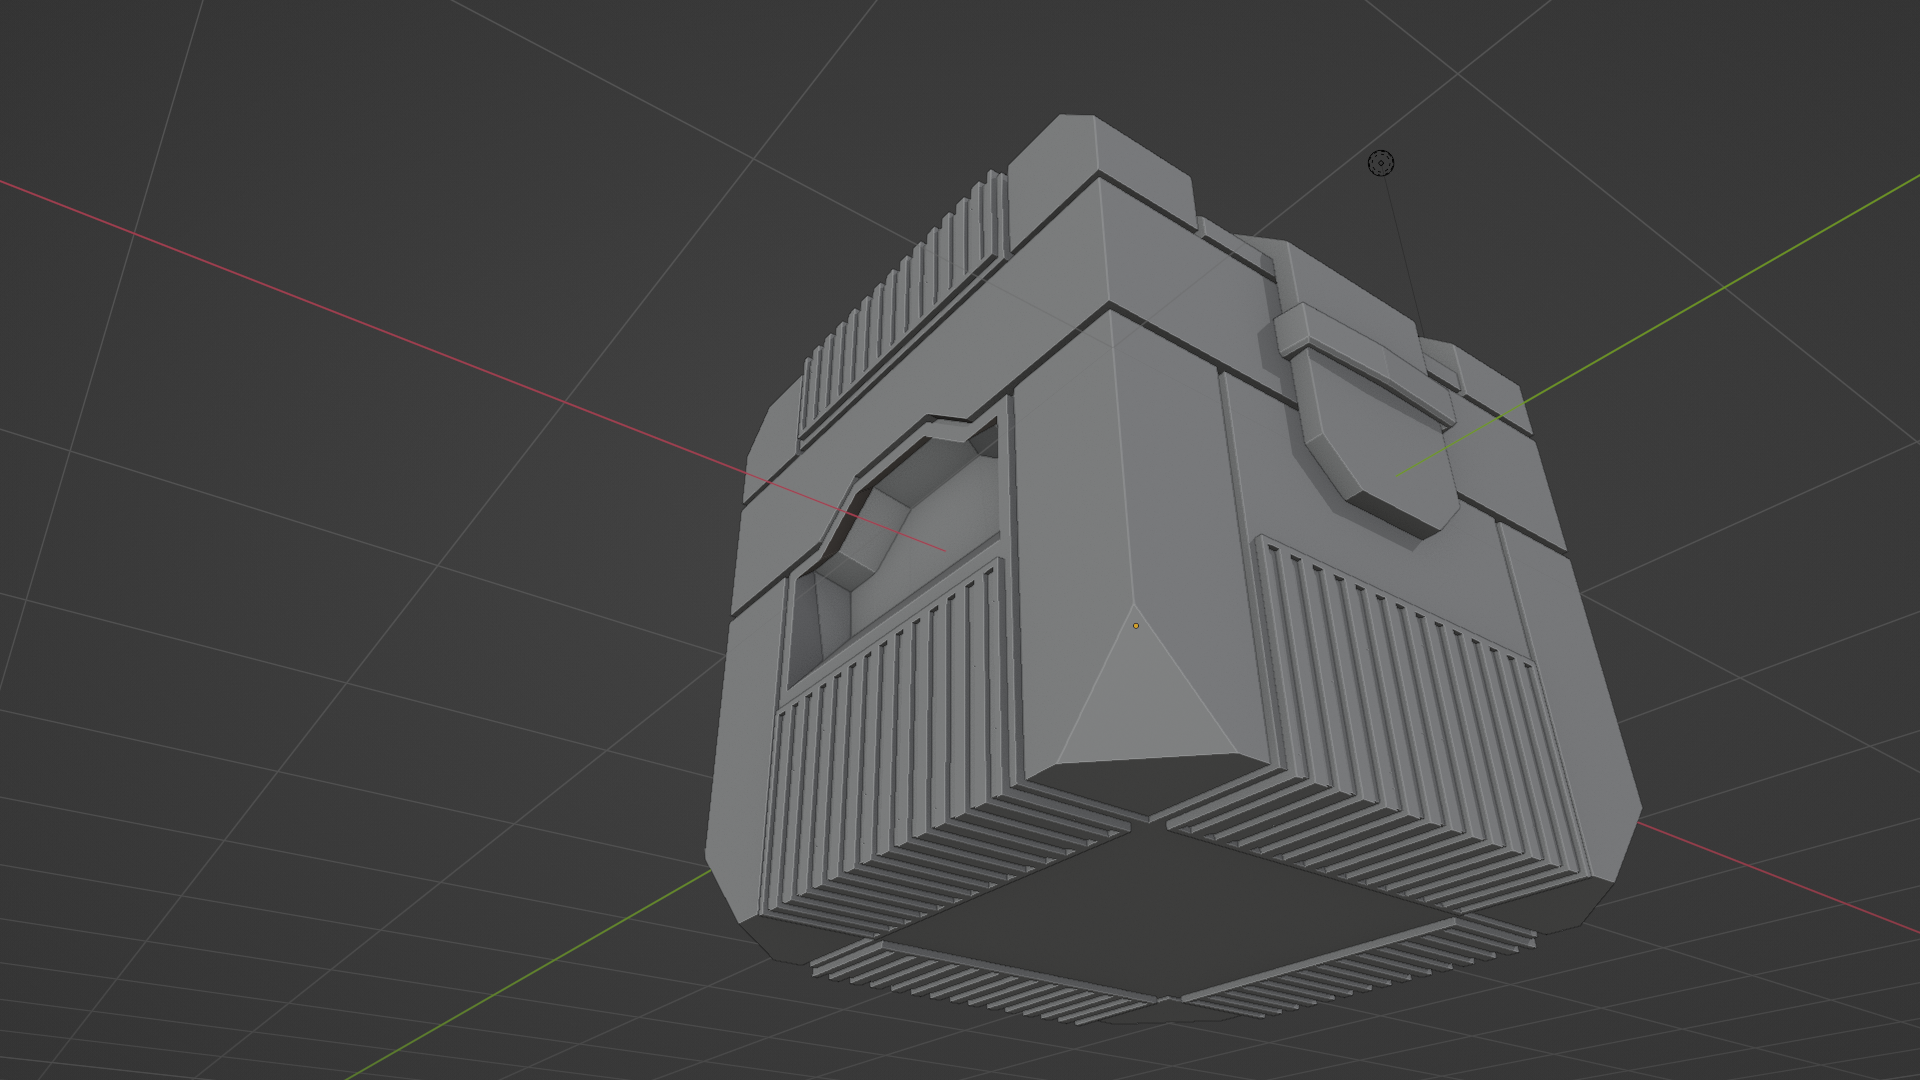 I think this would be another thing I would like to return to in the future because this was fun to follow along. :)
Ok, I've done the Fundamentals of modeling and I'm currently working on the bedroom based on my own bedroom (which I'm starting to regret due to the massive amount of stuff I have lol.) Progress is slow since I don't have much time to work on it when I get home from work.
However, I did model something for work that I would like feedback on:
What you see above is a work in progress model of a Dediprog SP700 that I'm modeling for practice and for other reasons. I've almost finished the model, just need to make the usb port and power prong at the top and it's set.
Considering how I did this using the methods from PRESS START and modeling fundamentals, also the fact that the reference image images I took at work were not leveled with the camera at all, I think it turned out good.
However, I had a bit of a time getting anything curcle related that I wonder if there's anything that I could do in terms of my model.
Here's 4 images of the wireframe of the model.

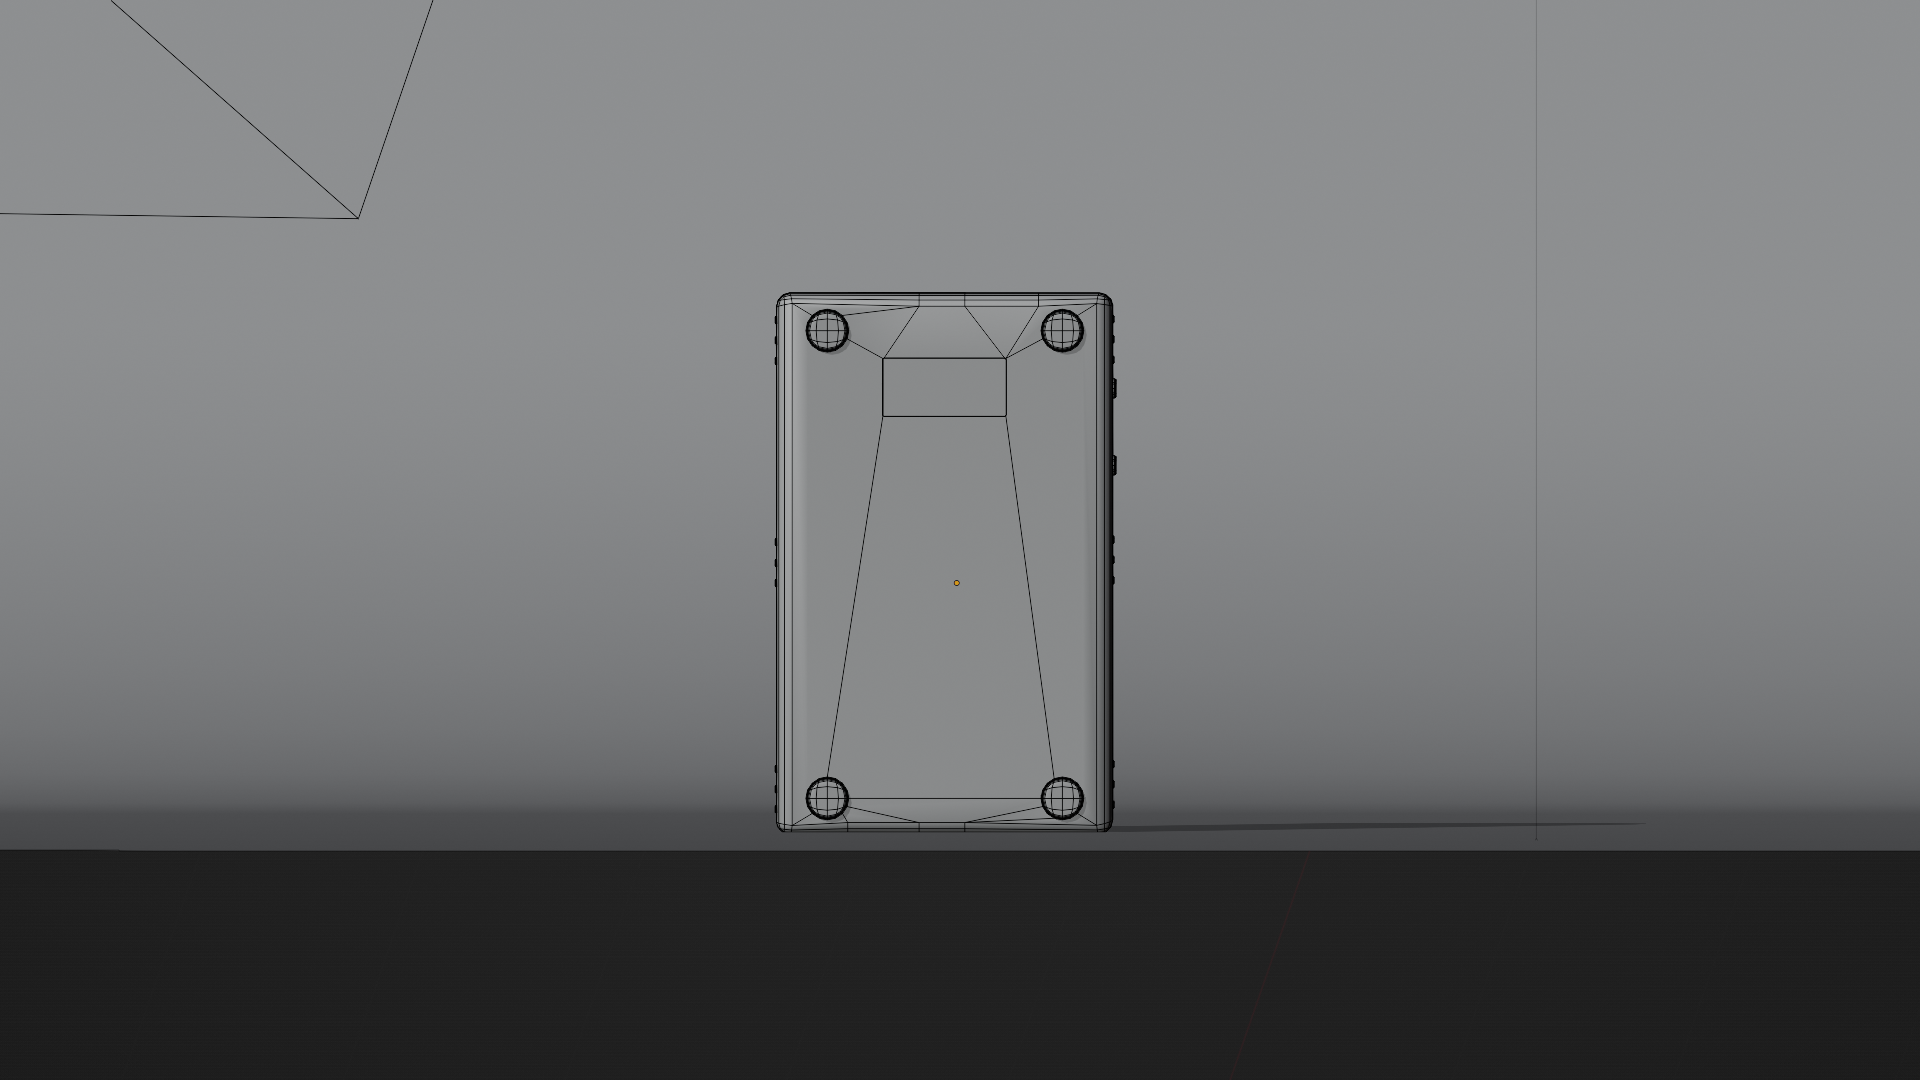
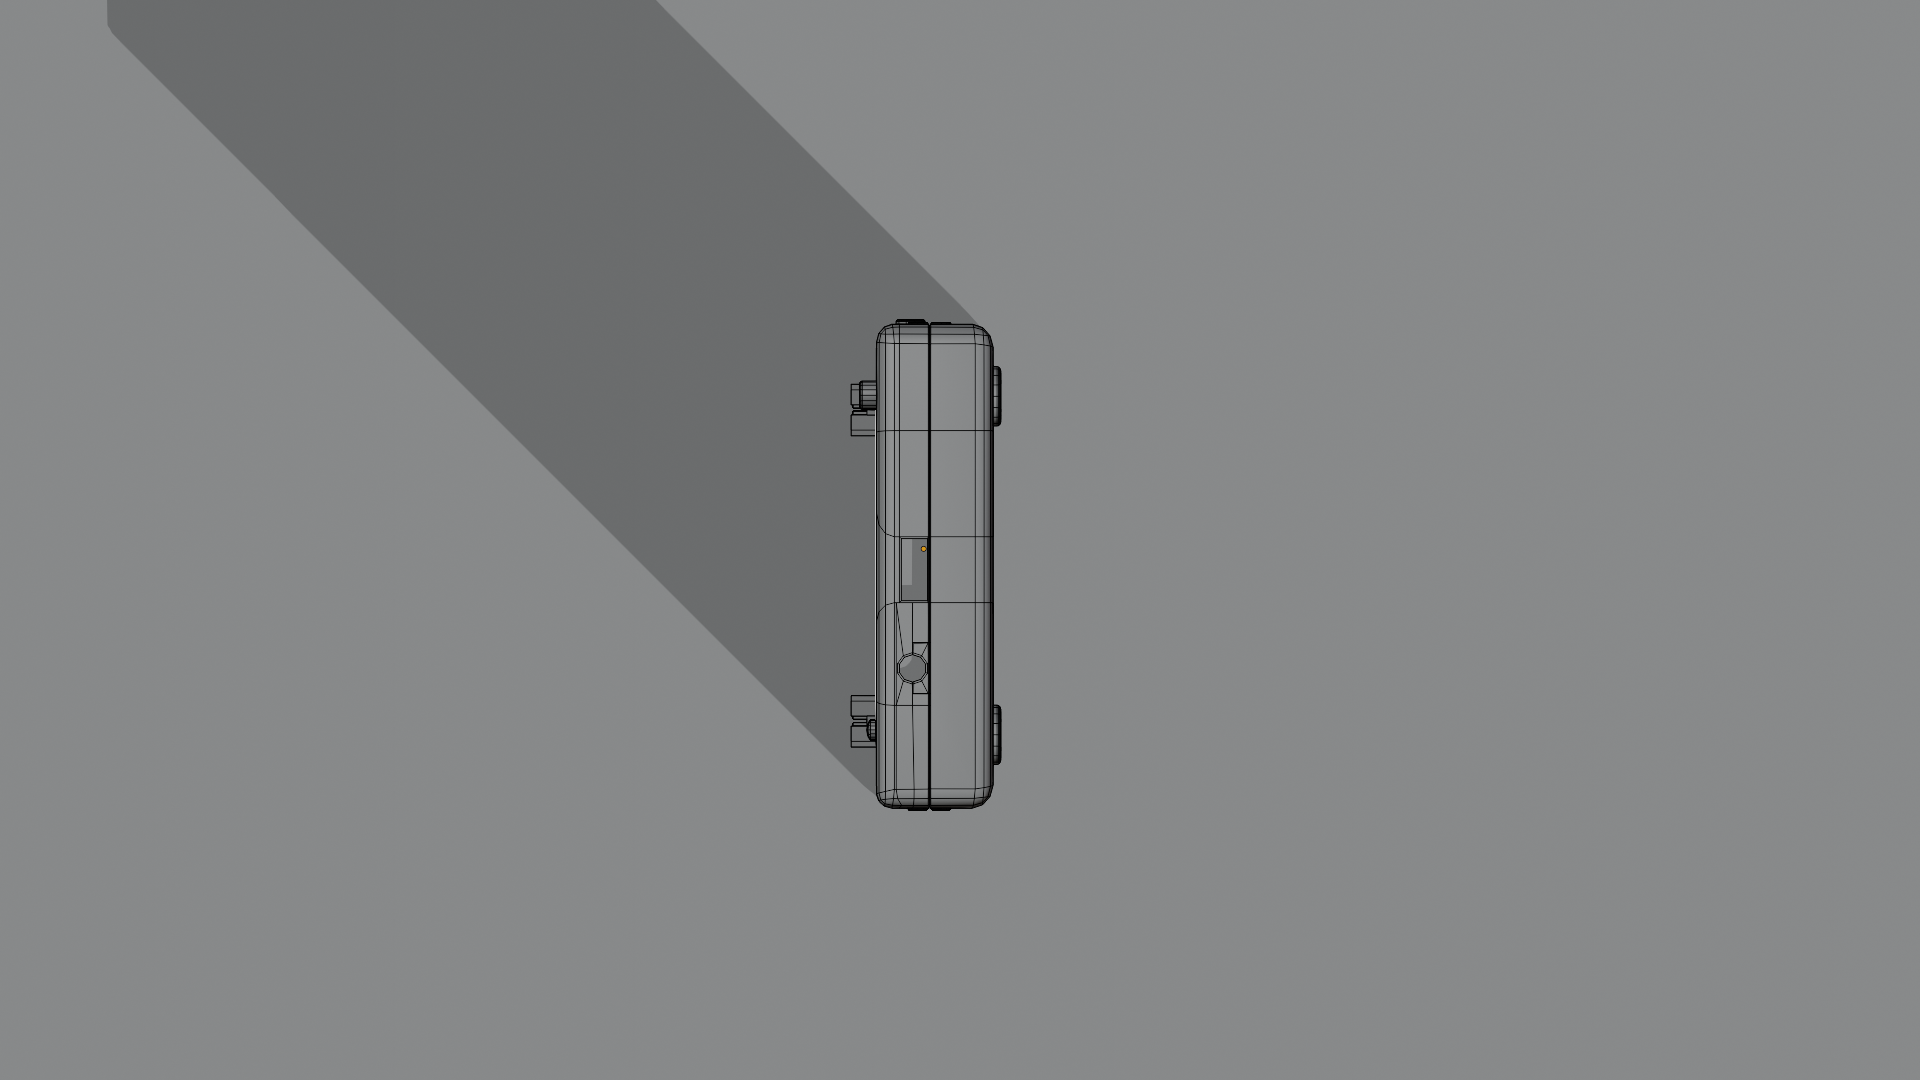
Is there a better method to go about this in terms of adding circular objects or items where I had to delete the face, add in the safe and connect it back?
Any suggestions is appreciated!
additional note on my progress to learning blender, I'm doing the fundamentals of lighting as I'm speed running the fundamentals as I have only two weeks before the 3D scanner get's shipped!
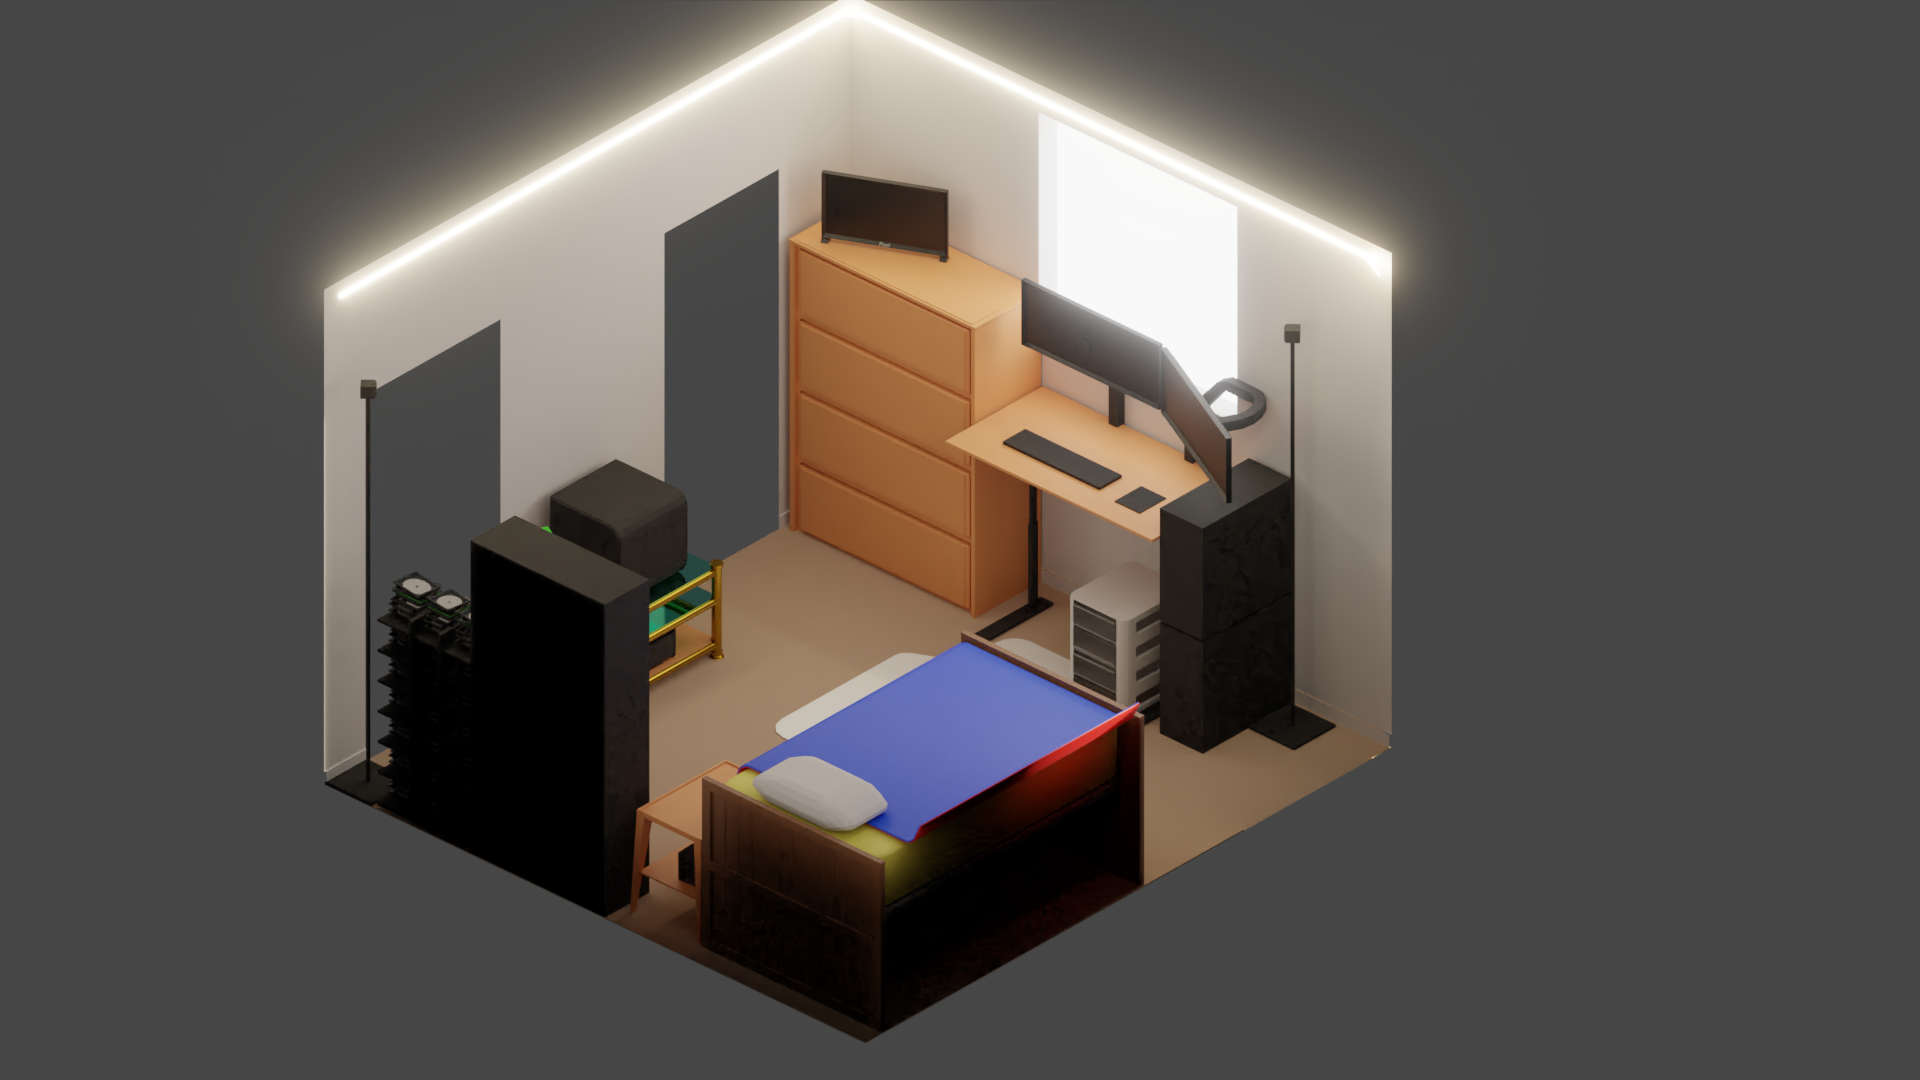
Here's my progress on the final assignment for the low pillow room so far:
I almost have all the main furniture modeled. Though I think I may have went to far with the details. All that's left for the main furniture is the computers, the monitor, the 3D printer and another shelf under the desk.
After that it's adding the small details like all the books, CD's, DVD, Blue-rays, various videogames....and regretting my decision to model my room because WOW there was a lot of stiff I didn't expect I would need to model :-( .
Not gonna lie, I'm gonna just cheese it and model one type of book, cd, etc and just copy paste a couple of times.
I'm also skipping cables as I don't know how to do that and I think that would take more time than it should.
Wish me luck!
Well here's my low poly bedroom pretty much complete.
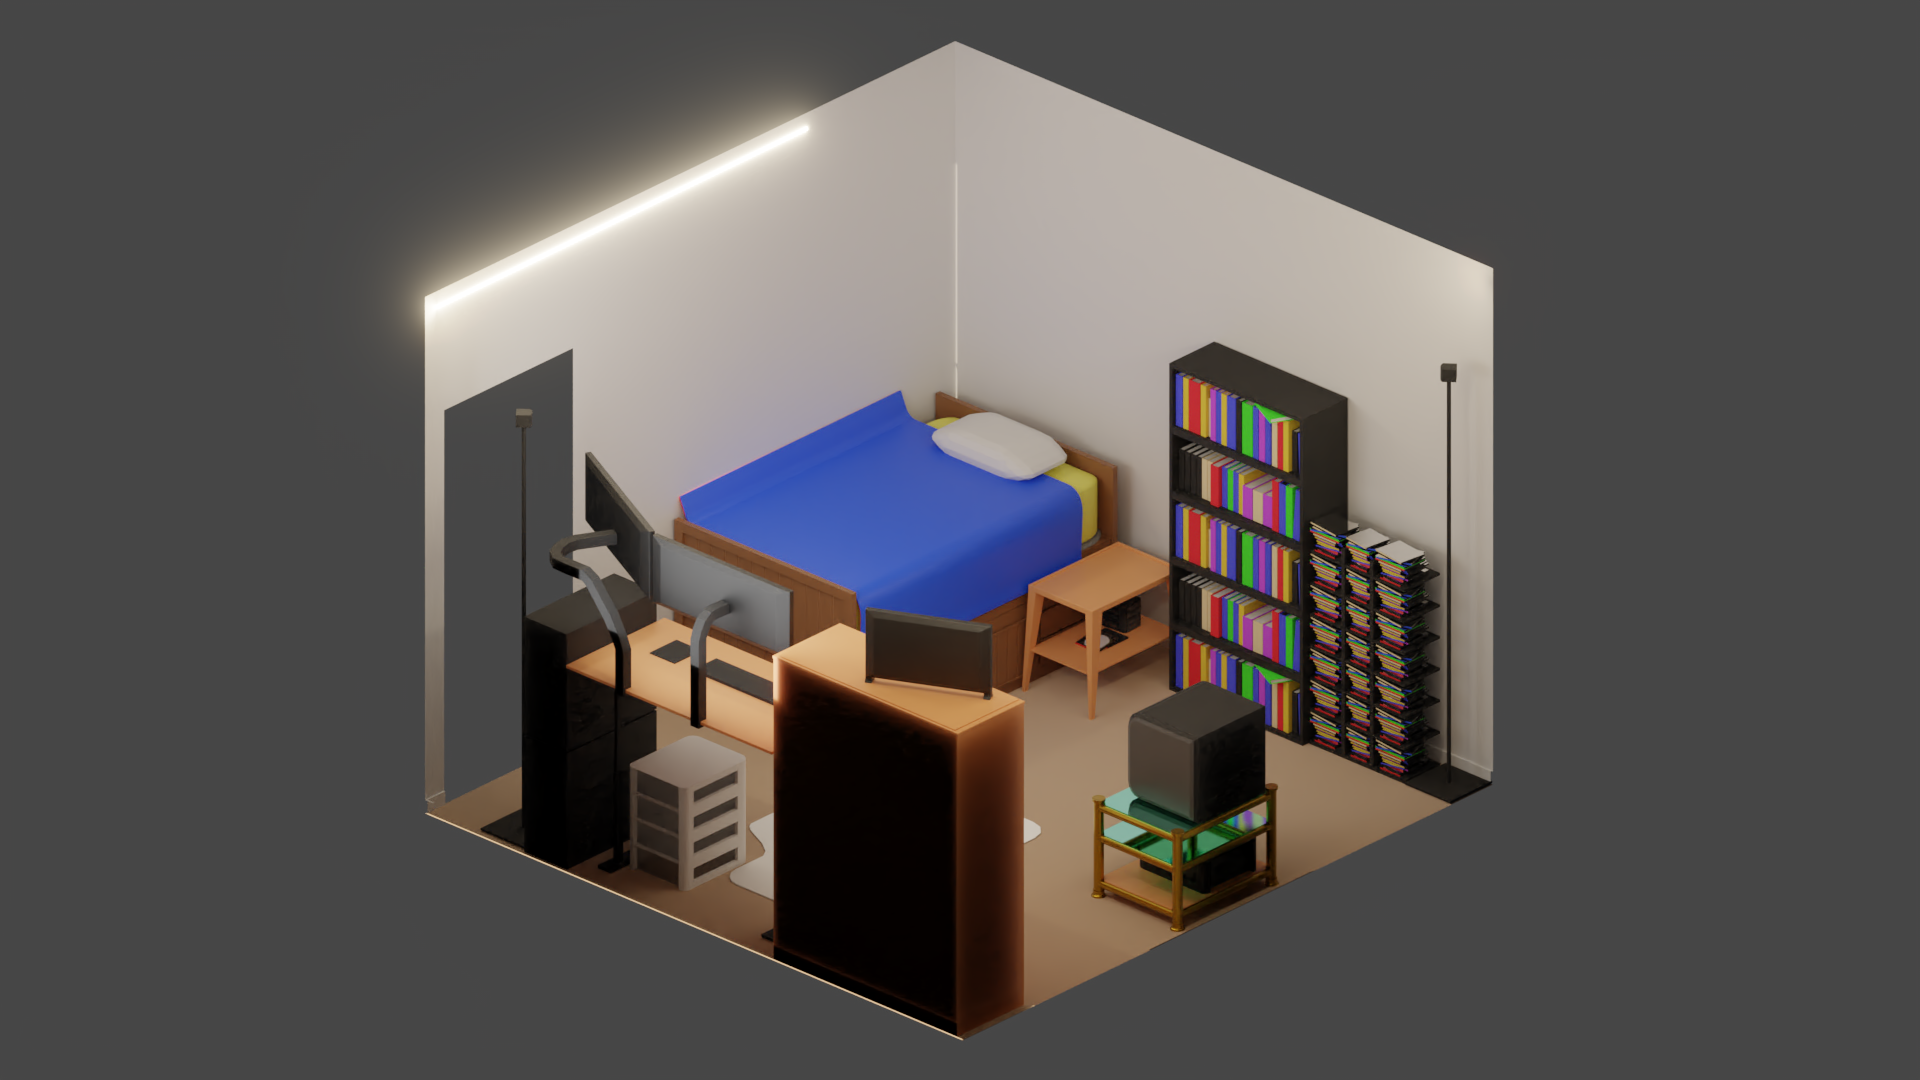
I think it came out good. However, near the end I was simply burned out as I had a LOT of stuff to model that it became to much and I wanted to move on as I was working on this for 2 weeks after work that I just wanted it done.
What also didn't help was I didn't know when to stop adding details and what counted as "low" poly.
I'm going to come back to this one when I have a better understanding on materials, lighting and texturing as I think it will benefit a LOT.
P.S.
Here's what it looks like from a different angle: