I started learning digital art, and Blender in particular, in January of 2021. Here is where I'll post my progress. Please feel free to offer advice, comments, constructive criticism, etc. I'm eager to learn, especially from those more knowledgeable and experienced than I.
Periodically, I try to take a break from online courses and do a solo project that implements much of the lessons I've learned so far. Here's a render of one I did last month that I called Sea Obelisk. I was inspired after seeing a hand drawn piece with a similar looking obelisk in it, and deciding to incorporate it into a scene of my own making.
I still see a lot of areas I'd like to improve on, but overall I'm happy with my progress. The rocks were fun to make, and gave me some good sculpting practice. The ropes and broken sail you see hanging from the shipwreck in the background I did with physics, and there was something particularly entertaining about pressing spacebar and watching all those fall into place. Fiddling with dressing the figure in that robe with the cloth modifier was significantly more time-consuming, but still fun. It's like Gi-Joes all over again.
If you have any advice on things that I could have done differently, or if you know of a way to do what I did more efficiently/easier/etc, feel free to speak up.
Just some of the things I wish I'd done differently:
* Made the shoreline water a little more translucent maybe catch more of the brown of the sand.
* The figure's skin looks a little doll-like to me. I know that skin is incredibly hard to get looking
* Getting the water right at the shoreline to look right was quite difficult. I tried simulation at first. It was my first time doing that, and it seemed like way too unwiedly a method for what I ultimately wanted. Plus waiting for the simulations to bake was slooooow going. I ended up giving up on simulation as a solution. Ultimately, I loaded some royalty free images of waves into a photoeditor, cut out the parts I didn't need, and loaded them as planes into Blender. I gave them a little bit of dimensionality, and this is the result.
*Finding a way to make the sand around the base of the obelisk flow more organically into the surface sand.
* Making the ocean close to the horizon a little flatter. I can convince myself that it's maybe the crest of a growing wave, but it still looks a little "off" to me.
Your in the best place to learn Blender for sure.
My advice to you whilst learning Digital Art and Blender, there are so many ways of doing everything, like you found out with your sea. Learn different ways of doing everything, but use the most productive way for the result you are looking for.
For example, an image plane is fine for this render, but if you were to animate the man's bow to the obelisk, you would also need to animate the waves.
Also the ship wreck is so far in the distance and tucked away behind the cliff, at first I thought there was a man with a raincoat and hat on, it may be satisfying creating the sail but a lot of effort for little reward.
You could try sculpting the sand around the base of the obelisk or have you seen ![]() cbaileyfilm on CGCookie YouTube Channel talking about Geometry Nodes.
cbaileyfilm on CGCookie YouTube Channel talking about Geometry Nodes.
Nice work overall.
Thanks for the feedback! I'll definitely check out the cbailey stuff on geometry nodes. I might re-visit this project and see what I can improve with the geo nodes.
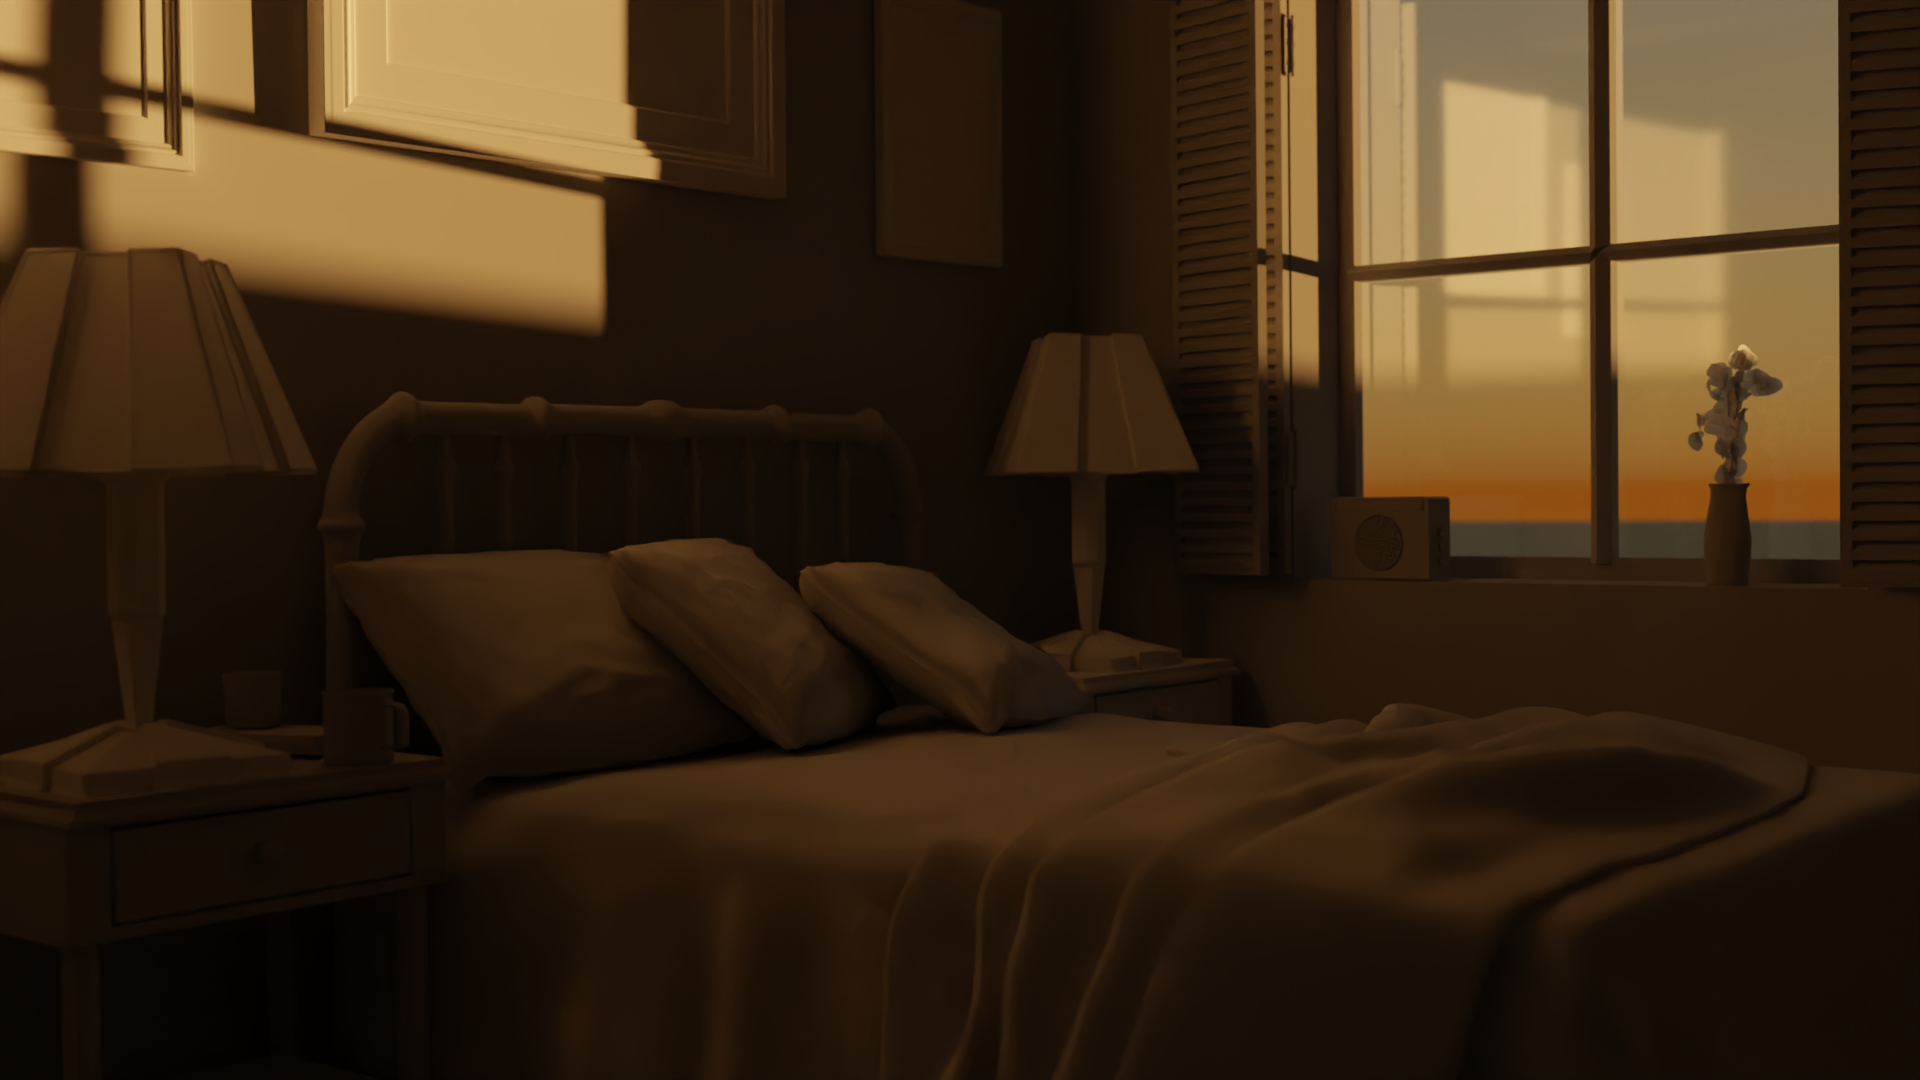
@jlampel I just did the bedroom lighting scene and saw where you gave the option for us to tag some scenes in our polybook. Here are some renders I did after that. As always, I appreciate any feedback you can give. I was trying to achieve believable lighting that showed most scene details without over or under exposing anything. How do they look?
Render 2 is same as Render 1 but with the lamps off. I used a sun lamp and a Hosek-Wilkie sky.
Exposure is around .5 under Film and at 0 under Color Management.
Speaking of, are there particular times or situations in your workflow that you use one exposure setting as opposed to the other? My understanding is that one affects exposure on the "data" of the scene while the other just affects the composite. 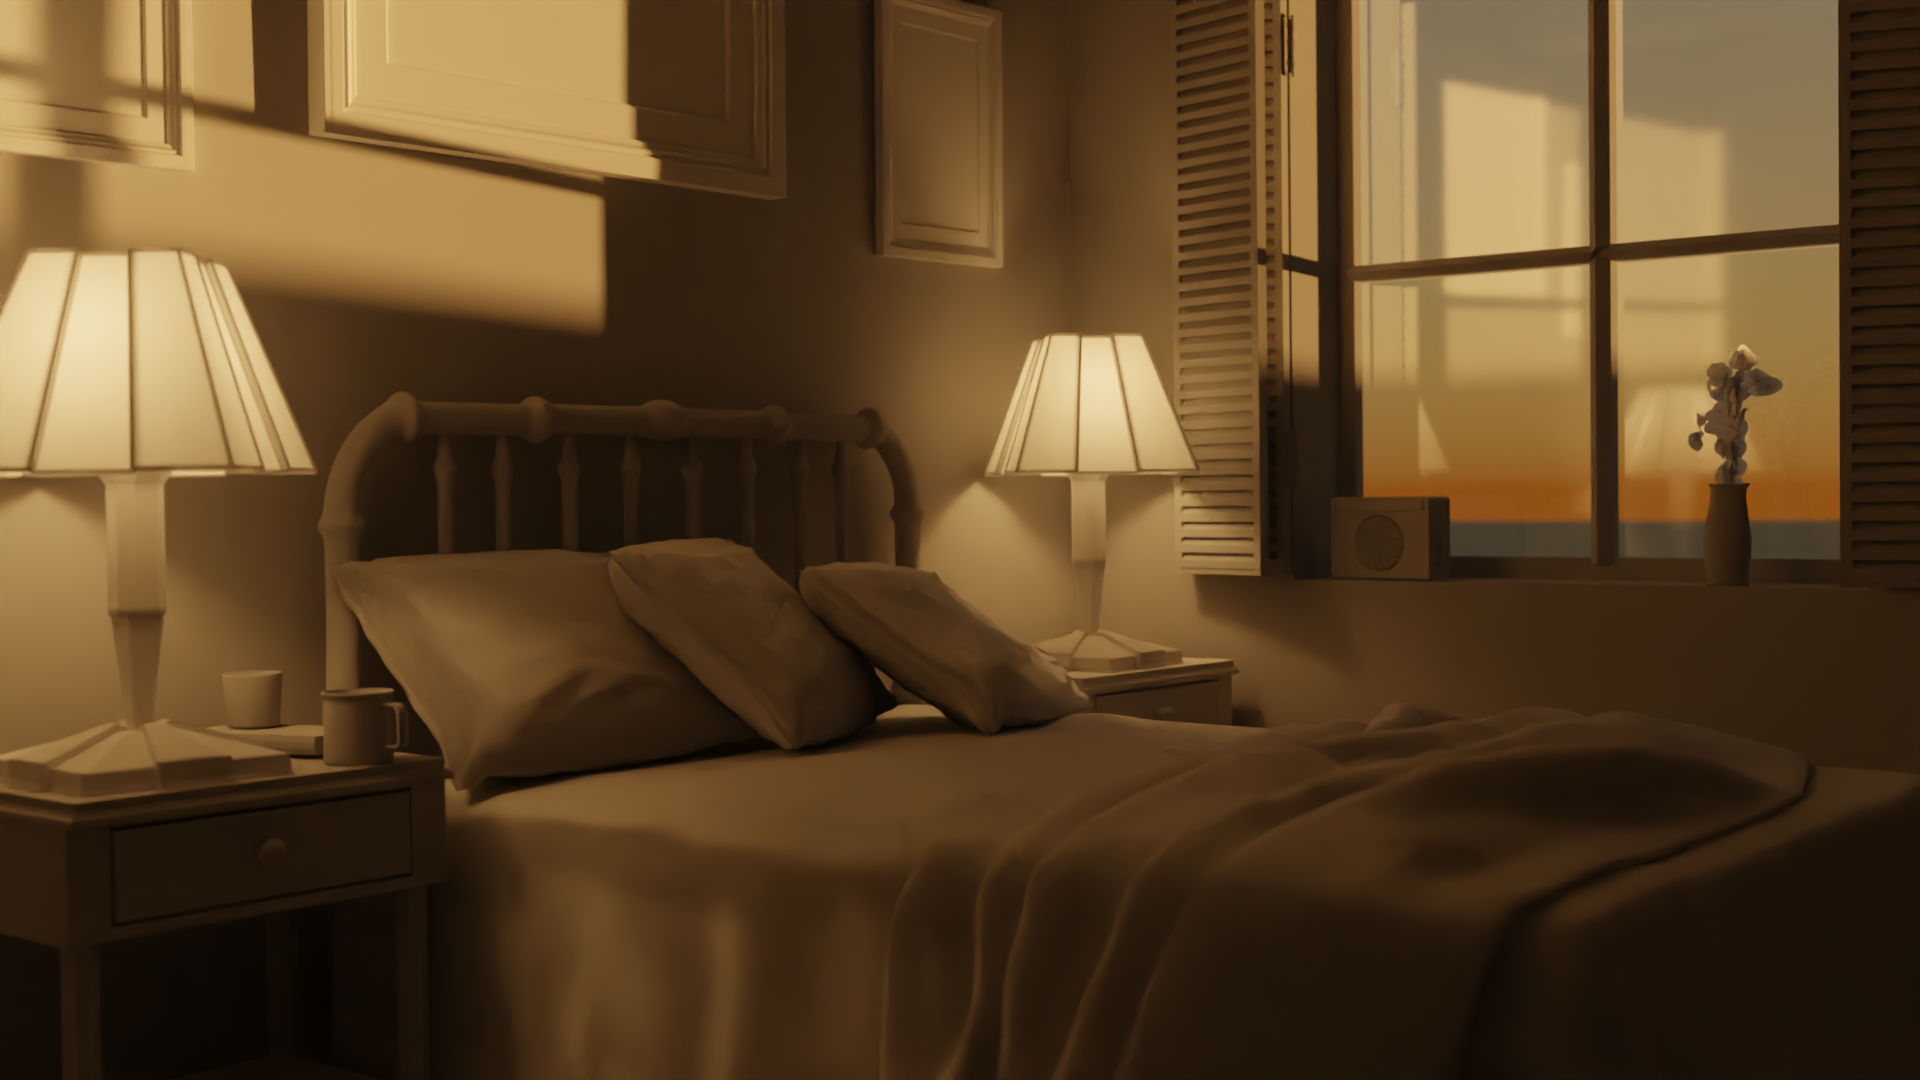
Nice work, I'd say those are looking good!
Technically, the one in the Film panel is the correct one to use so that it doesn't mess with the color management of other things in Blender (like baking or compositing), but that control doesn't exist in Eevee so I just stick with the Color Management one for everything for now. I also like to use the Photographer addon and that's the exposure setting it controls.
It's been a while, but I finally finished one big project I've been working on. Please see the video embedded below. I say "finished", but I'm still very much open to constructive criticism or ideas on how I could have done something better/more efficient.
Most of the models I created myself, with the exception of the shells, cat, and some of the greebles on the spaceships. The planets I assembled from photos of real planets that I then edited to be more alien.
Regardless, I learned a LOT doing this project. Most notably, I learned a lot about the NLA editor. While exceedingly powerful, it has to be the most unintuitive part of Blender I've encountered by a long shot. It's also real hard to find quality tutorial videos on it.
It's real subtle in this one, but I also learned a good bit about using surface imperfections. Even now I'm seeing I could have used them to greater effect, but I can also see the differences in realism they made even with the small amounts that I did end up using.
@waylow do you have any advice on how to set up NLA strips in the editor? Like is there a convention or set of conventions to follow? I've seen a couple people have it set up so that NLA strips are dedicated to each "body part" of an object. I've seen other people that have them roughly correlated to actions.
When using the NLA editor, I made it so that most tracks were added on to the one below, and were more like “poses” than movements. However, some strips, like head bobbing while licking paw, were indeed motions. I then just blended in and out of these "pose strips" using the blend setting and ample use of additive extrapolation. However, this strategy meant that it was a little harder to use force curve modifiers effectively. I got around this somewhat by putting two sets of keyframes of the pose position, at the beginning and end of the strip, and then f-curving between them. However, that got messy and relying solely on blending between strips to transition between actions limited how much control I had over the animation. I don't know if that makes sense. In the future, the additive method wasn’t so bad of an idea, but it would probably be best to break the transition motions into their own actions. Someone please correct me if I'm wrong.
I see a lot of areas I'd like to improve (e.g animation realism, the scale of the spaceships, more surface imperfections, etc), but overall I'm happy with how this turned out given my current level of experience.
Hi Ryano!
I wouldn't call myself an expert with the NLA, in fact I've only recently started using it (very sparingly).
All of the work I do requires all the animation to live in a single action data-block so that is predominately how I work.
However, I have been trying out Tal Hershko's Animation Layers Add-on recently.
This essentially just makes the NLA more usable for character animation.
How would I recommend using strips and actions?
Well I wouldn't recommend breaking it different strips for different body parts. You need to be smarter with the grouping. I would suggest having the entire main action in one strip and then any tweaks or polish in different strips. This is so you have a solid base animation that you can apply changes and quick iterations to. Here's an example or a recent animation.
Imagine a run cycle (character holding a weapon and running)
-The base animation would be the full cycle. (everything is animated)
-Then I added a weight layer to the torso, to push the ups and downs. (this is animated much further than looks correct because you can pull the influence up and down)
-Added a weight layer to the weapon (same as above)
Looped this 7 times
-added a layer that spans the entire 7 loops and adds subtle changes to each step. One step is a little bit more this way. That one was a little higher, etc (just so it's not exactly the same each loop)
-added a hair polish layer that incorporates all the subtle changes in each run loop (as well as all the other overlappy bits)
Hopefully that makes sense.