Everything New in Blender 2.91
Dec 4th 2020

It’s time to update Blender again! This newest release, 2.91, packs a couple flashy features but is mostly about smaller improvements that add up to a much improved user experience.
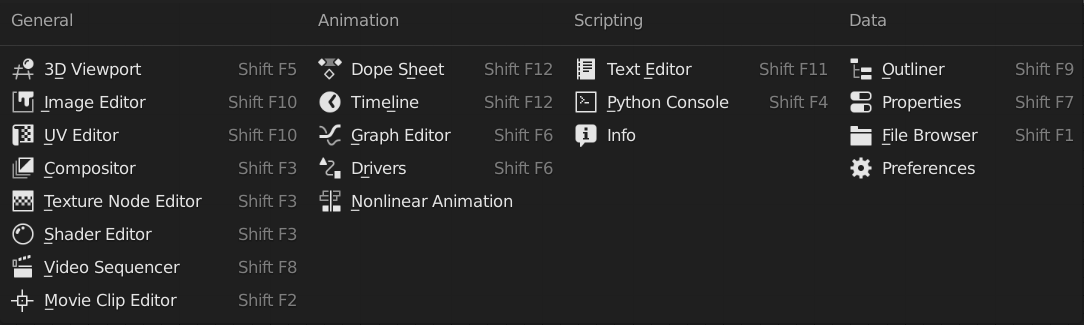
New Blender 2.91 Interface
If you’ve used Blender for a long time, you probably don’t do much work in the Outliner.
That could start to change soon though, as it’s gotten a lot more useful recently. In 2.91 you can color code collections in the right-click context menu, use the left and right arrow keys for collapsing or expanding sections, drag and drop modifiers or constraints between objects, manage modifier and constraint visibility, and even drag and drop objects into the 3D view.

Another interesting addition is the mode icons and dots that appear when you enter Edit or any other non-object mode. Clicking on any dot will switch you to editing that object instead, while Ctrl-clicking will add or subtract it from the current mode.

The Properties Editor now has a search bar, which can help you find any setting by taking you to and highlighting any word that matches what you type.

Speaking of searching, many searches now support fuzzy matching, which means you could be wrong about what something is called exactly but might still be able to find it anyway.
A somewhat hidden but incredibly useful feature, Reset to Default Value (the hotkey is Backspace while hovering over any value), has been improved to work with a lot more areas in Blender, like modifiers. It’s spotty with nodes still, but it looks like that’s a known issue to be fixed in the future.
Number inputs will now just display 0 instead of a rather cryptic -0 when setting to zero from a negative value.
Additionally, sectioned lists of stuff such as editors or modifiers are now easier to read thanks to improved header styling.
Modeling
One of the most interesting additions to Blender 2.91 is a new Boolean modifier solver, called Exact.
The old method has been renamed Fast, because it is quite a bit faster in most situations. Exact is the new default though because it can handle quite a few more types of situations, like overlapping edges and coplanar faces.
By enabling the Self option, it can even handle objects that have self intersections! It won’t handle non-manifold surfaces well though (it even fails subtracting a sphere from a plane), so it’s not a magic bullet just yet, but it is a good step forward.

The Edit mode Intersect tools are also able to use this new Boolean method. Additionally, whole collections can now be used for Boolean operations, which should make the Hard Ops crew quite happy.
The Subdivision Surface modifier (which recently had its official nickname changed from subsurf to subdiv) got a couple improvements aimed at making it exactly match the subdivision behavior of other software such as Maya and Modo.
First, it will try to keep the shape of the mesh the same when increasing or decreasing levels. This can be disabled by turning off Use Limit Surface, but in most cases it should be left on so that the lower level that you’re working with in the viewport will better match the render. Second, the modifier can now smooth UV corners with the UV Smooth option set to All.
Curves got a Fill Caps option! Simple and helpful. And, rumor has it that rounded caps will be coming shortly.
Curve and text objects now support custom bevel profiles like the bevel modifier, which opens up a whole new world of possibilities.

Symmetry is now a per-object setting, so it will be consistent across all modes and will not have to be messed with every time you switch which object you’re editing.
A new Fade Inactive Geometry option in the Overlays helps you to focus on whichever objects are currently being edited in any editing mode.

Sculpting
New Box and Lasso tools have been added for quickly creating face sets, cutting the mesh via booleans, and masking. The new Line Project tool also works for slicing objects in half using a faster method.

The Cloth brush in Blender 2.91 supports collision with objects if the objects have the Collision physics modifier. No self collisions yet though, so you will see some intersections. It also now has gravity across the whole simulation, a new Plasticity option for controlling how rigid the effect is, new Grab and Snake Hook methods, a new Dynamic Simulation Area option so you won’t run into the boundary as you sculpt, and a whole slew of other changes for better results out of the box.

Even the Pose brush got some cloth simulation love, as you can now set the Deformation Target to Cloth Simulation and a character’s clothing will pinch and fold right at the joint.

Multiresolution sculpting was not forgotten and has gotten a really cool upgrade - you can now sculpt directly on the base mesh while previewing any level of resolution. This allows you to make larger changes to the mesh (like posing a character) and see how it impacts the smaller details in real time.
In Blender 2.91, tucked among the ever growing list of sculpt tools, is the new Boundary brush which can create any type of deformation along a mesh boundary. With the Falloff set to Loop and Custom, you can create quite an array of patterns!
Another new tool, the Multires Displacement Eraser, can be used to set higher levels of detail back to the original base mesh limit surface (the surface that the new subdiv modifier sticks to in order to look consistent across all levels of detail).

The Mesh Filter tool got a couple new options this time. Sharpen is a really useful addition which smooths the smooth parts of the mesh while creasing the sharp parts. Enhance Details was also added, which does the exact opposite of the smooth brush.
In fact, holding the Alt key while sculpting with the Smooth brush will now execute an Enhance Details operation.
Face Sets are easier to work with as well thanks to a new Edit Face Set tool to shrink or grow them and a Face Set Extract operator in the menu to create a new solidified object out of one.
Texturing
Missing tools were added to the UV menu in the UV Editor and Live Unwrap has moved to the Options popover in the 3D View header.
Loop selecting boundaries on UV islands now works the same as on meshes in the 3D View.
Lastly, the control for UV wire smoothness has moved to the User Preferences under Viewport / Smooth Wires / Overlay and is on by default instead of off.
Grease Pencil
The Interpolate Sequence operator now has a Steps option for if you would rather animate on every x number of frames instead of every single one.
A new Cleanup Frames operator was added, which removes any frame equal to the previous one.
Converting mesh objects to grease pencil objects has been made a bit tidier thanks to the layers and materials using the original object’s name.
Grease pencil materials can now be set as a Holdout material which punches out everything behind it.
A new Trace Image to Grease Pencil operator was added to the object menu, which allows you to convert image empties to grease pencil objects. So far it seems to work ok on simple objects but fail on more complex ones (as in the example below), but it’s still a very cool option to have around.

The Fill tool now fills everything except the area selected if the Ctrl key is pressed. It also has a new Layers setting under Advanced which allows you to specify which lines it takes into account when filling.
Grease pencil brushes now have a pin icon next to the Material / Vertex Color mode selection so that a brush can be locked to a coloring mode.
Several other minor tweaks were made to the Grease Pencil, including setting the Onion Keyframe mode to All by default, changing the Interpolate shortcut to Ctrl+E, and adding a Subdivision setting for new primitives.
Rigging & Animation
Child Of constraints will automatically Set Inverse for you when created! No more momentary confusion when the child object would fly off into space.
Action Constraints now have an Evaluation Time property which can be used to drive the animation without the need for a target.
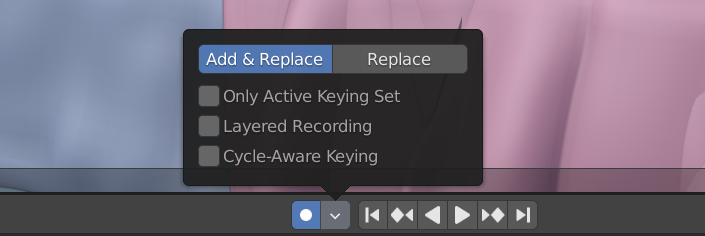
The Auto Keyframe settings have been handily moved to a popover right next to the Auto Keyframe toggle.
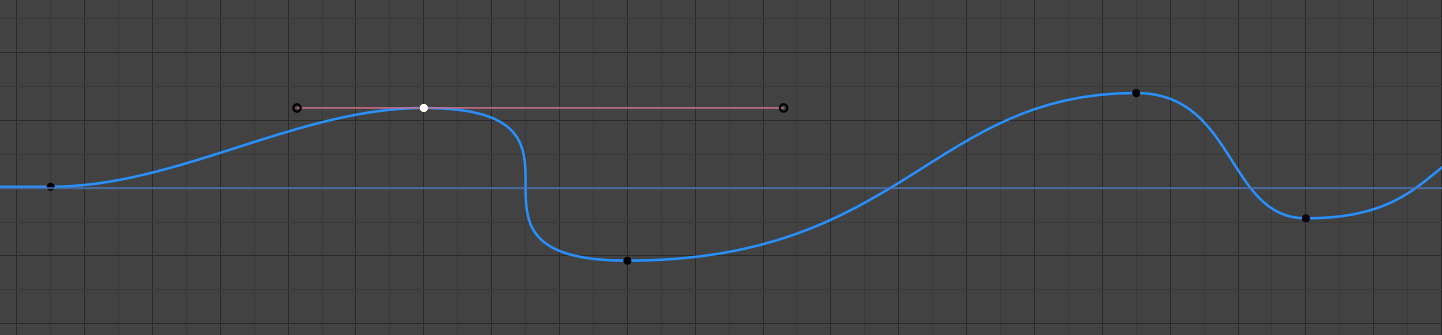
Animation curves respect the keyframe handle sizes for much better, which allows for snappier and more extreme transitions between keys. Additionally, all curve types now have an active keyframe and can have a keyframe inserted between keys without changing the curve’s shape.
NLA Editor strips are now easier to work with! Sync Length will no longer mess with the keys location, and the animation will still play properly even if the keyframe is outside of the strip bounds. Additionally, deactivated strips won’t disappear any more when entering tweak mode.
Simulation
The Ocean Modifier now has separate resolution controls for viewport display and rendering, which is something I’ve wanted for several years! No more slowing down the viewport just to render at full resolution. This is likely thanks to one of the previous improvements which allowed for changing the resolution without shifting the look of the waves.
I’m not sure whether the Volume Object should be under simulation or modeling here, because in Blender 2.91 you can convert a volume object into a mesh and a mesh object into a volume! Using modifiers no less, so the effect is completely nondestructive. Since modifiers for volumes were implemented anyway, they’ve also added a volume displace modifier which is fantastic for adding details to smoke, clouds, or anything else.

Rigid Bodies have a new collision option, Compound Parent, which fixes a surprising amount of problems that Convex Hull and Mesh have trouble with. To use it, create a simplified version of the mesh (even with just edges that have no thickness), set it to be a rigid body with a preferably primitive collision shape, and parent it to the original object.
The Fluid Simulator now handles object collision better for liquids, and the cache file size is reduced substantially if using the Mini Precision option. The Viewport Display options have a couple cool new features for visualizing the more scientific properties of the fluid as well, thanks to one of the Google Summer of Code projects earlier this year.

Rendering
HDRI rotation in LookDev view can now be locked to the viewport camera, which makes it more helpful to use Eevee while sculpting or modeling.
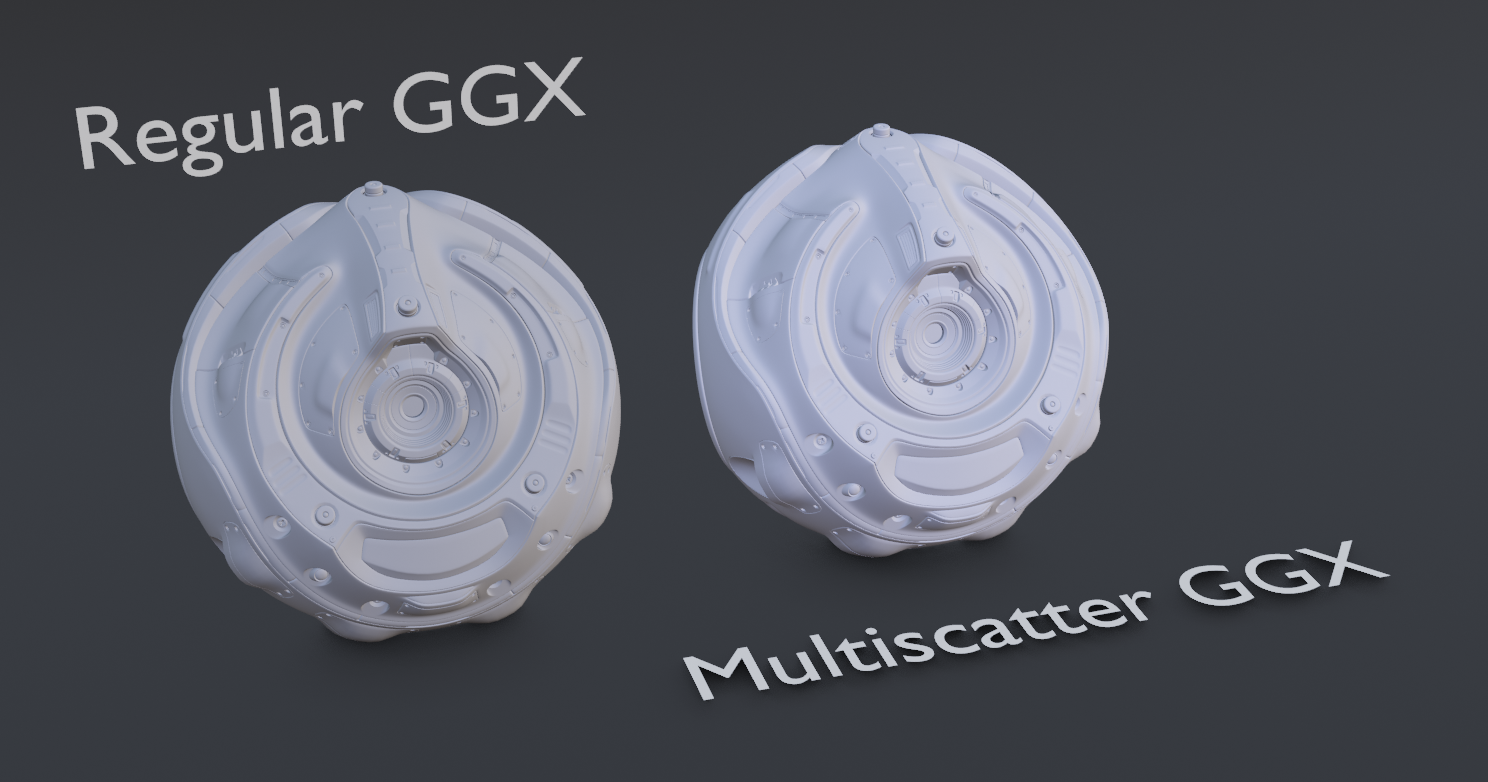
The MultiScatter GGX reflection method, which keeps increased roughness from incorrectly darkening the color of the material, is now approximated in Eevee and can be used on the Glossy and Principled shaders. It’s a very slight difference in most cases though, so you’ll likely only notice it when working with rough metals.
Eevee Motion Blur can now use the same Center on Frame, Start on Frame, and End on Frame options as Cycles.
Cycles didn’t get any big upgrades in this release, but it does now better support the newest RTX cards and more AMD cards.
The Principled BSDF in both render engines now has an Emission Strength slider, which is great because a HSV node was almost always needed in the past to boost the strength.
Both the UV and Image Editors were improved significantly performance wise and now handle very high res images quite smoothly, even when tiled. They were also updated to do alpha blending in Linear Scene Reference Space and support pure emissive colors.
VFX
Masking menus were updated to be comprehensive and more consistent with other editors.
Motion Tracking got a new distortion model, Brown-Conrady, which improves compatibility with Meshroom, RealityCapture, and other photo scanning software.
Rendering and playing videos in the Video Sequence Editor is now much faster, thanks to vectorization support.
Import / Export
Library Overrides, the system that will eventually replace proxies entirely, was upgraded again in Blender 2.91. Armatures can now be overriden, proxies can now be converted into overrides, a Resync button can now be found in the Outliner so that you don't need to revert your whole file to see updates, and Delete was added to the ID Data section of the context menu when right clicking on an override, and it will get rid of the override hierarchy and relink itself to the original file's data blocks.
The Mesh Sequence Cache modifier can import velocity values via Alembic now, and it automatically works with motion blur.
Alembic and USD formats can now export hidden objects, and Alembic now exports objects with the same object data as instances as well as object custom properties.
The Alembic importer now handles animated vertex colors and vertices that swap places during animation.
glTF is a format that's quickly becoming more and more useful thanks to how it handles textures. In Blender 2.91, the importer and exporter received quite a few updates that all combine to make it more reliable.
And, last but certainly not least, large .blend files that are more than a couple weeks old are now opened 10-20% faster.
That's a lot of great new additions!
Blender keeps getting flashy new features at such a fast pace, and it's good to see that stability, speed, and small quality of life improvements are not at all forgotten in the hype.
ffxswan I don't find it very useful right now, but I bet in the future you'll be able to color your viewport objects based on collections and that would be pretty great.
Love the changes, but other then esthetics, why color code your collections?
@toshiro The commit mentioned stale RNA, but frankly, I have no idea what that means 😅
That's a great overview.
I am not sure if something is wrong with this senance or I just need another coffee.
"And, last but certainly not least, large .blend files that are *more than a couple weeks old* are now opened 10-20% faster. "
What does the age of .blend file has to do with how fast it opens?
"Another interesting addition is the mode icons and dots that appear when you enter Edit or any other non-object mode. Clicking on any dot will switch you to editing that object instead, while Ctrl-clicking will add or subtract it from the current mode. "
I may have found a bug with this if you are in edit mode on 1 object and then you Ctrl + Click on another object's dot that has linked duplicates then you can add it to edit mode but the link'd duplicates don't change from a dot to "edit mode" icon. So you can technically attempt to Ctrl + Click on them and then..........you lose your beloved Blender because it just crashed lol. I have been able to replicate this bug. I'll try to enter a bug report today.
Maybe it's purely perception, rather than reality, but it feels like stylus input is a little smoother in 2.91, too. So far, so good.
Great article for reference. I think it would be nicer if I can X delete a collection along with its content.
Very helpful! Thank you for doing this.💓