
Blender 2.83 packs a couple big features and a slew of smaller enhancements.
Thinking about upgrading? Here are all the important changes that you'll need to know about.
Modeling
The most important change, in my opinion, is one that has hardly gotten enough press. Blender 2.83 has a completely reworked undo system! In previous 2.8 versions, undoing an action in a heavy scene could take upwards of five to ten seconds, which can really get in the way of making progress. In 2.83, that's been reduced down to about two to three seconds for heavy scenes (simple scenes take nowhere near that long). According to the developers, this system will continue to improve over the next few releases and the time it takes to undo an action in polygon heavy scenes should be reduced even more in the future.
Extruding middle sections of curves used to only duplicate the points, which was pretty useless. Now it behaves like you would expect!
Metaballs are now supported by Dupliverts and Duplifaces. To use them as such, parent the metaball to an object and then enable Verts or Faces instancing in the object's properties.

Always wanted to make a lumpy Suzanne? Now, you can!
Modifiers
The Ocean Modifier got a serious upgrade with the introduction of a few new simulation methods.

- Turbulent Ocean, the default, is what was already in 2.82 and earlier.
- Established Ocean aims to simulate bodies of water way out at sea where the wind is fairly constant and the waves have reached a sort of equilibrium.
- Established Ocean (Sharp Peaks) is the same as the previous method except the waves continue to grow over time.
- Shallow Water can be used to better simulate small lakes and ponds that don't have heavy winds.
The Remesh Modifier can now also use the Voxel method that was previously introduced to Sculpt Mode. It's the new default because it's much faster and usually gives better results than Smooth!
The Corrective Smooth modifier, which is useful for fixing joints that deform poorly during animation, now has a Scale parameter which allows you to tie the strength of the smoothing to the location, rotation, or scale of a bone.
The Solidify Modifier now lets you assign the newly created geometry (Rim or Shell) to a specific vertex group. There's also a new Flat Faces option when you use a vertex group as a mask in Complex mode which makes sure the connecting edges are flat.

The UV Warp Modifier has new options for fast 2D transformations.
The Surface Deform modifier, which allows an object to mimic the deformation of another object regardless of the topology, now has a vertex group factor and a strength control to make it much more flexible.
Lastly, most modifiers that take an object as an input can now take a bone as an input, and modifiers that take textures as an input can have a bone control the texture's coordinates. That's great news for riggers!
Sculpting
The Cloth Brush, which is an artist-friendly cloth simulation inside sculpt mode, is a game-changing new brush. You can change the mass and damping properties, control the simulation falloff, pin masked vertices, and use a total of 7 deformation modes (drag, push, pinch, pinch point, pinch perpendicular, inflate, grab, and expand) with 2 different falloff types (plane and radial).
There's yet another brand new brush for sculpt mode! The Clay Thumb Brush accumulates material as you draw, mimicking how clay deforms when pushed with your fingers.
The Clay Strips Brush has a new Tip Roundness setting that lets you control how square or round the brush is.

The Layer Brush has been completely redesigned! It now works more like, well, a layer. If you use the Persistent Base option, you can even subtract back to the original mesh! In the example below, check out how the high res details are preserved throughout.
The Pose Brush that was introduced last release got an update that lets you disable the IK anchor point if you'd like to move that area as well.
The Smooth Brush got a new Surface Smooth deformation type which keeps larger details but smooths out noise. The usual default method has been renamed Laplacian.
The Surface Smooth from the smooth brush has been added as a Mesh Filter as well, along with another new filter called Sharpen, which keeps sharp areas sharp while smoothing everything else. Here is a comparison between Smooth, Sharpen, and Surface Smooth:

If you'd like to make sure to avoid sculpting on the edges of your mesh, there's a new Mesh Boundary Auto-Masking option that includes a Propagation Steps option that acts as a falloff across the geometry.
Auto-Masking can also be set globally now, so that you don't have to turn it on or off every time you switch brushes.
In general, all brushes now have a separate Normal Radius and Area Radius so that you can better control how much of the surrounding normal information is calculated in your stroke.
Another large new feature in Sculpt Mode in Blender 2.83 is Face Sets. It's a system that allows you to segment your sculpt into different areas. These areas, or Face Sets, can be used to automatically mask brush strokes or mesh filters, can be easily hidden or isolated for when you want to only work on one part of your model at a time, and can be used by the Pose Brush as joints.
Face Sets can be created either with the Face Sets Brush, Flood Filling with Shift+W, or by using any of the initialization options the new Face Sets menu. They'll be perfectly intact when you remesh if you choose Preserve Face Sets, and you can even smooth out their boundaries with the Relax Face Sets Mesh Filter.
Guessing what Voxel Size you should use with the Voxel Remesher is hard. Or, it was! You can now set it dynamically with a live preview by pressing Shift + R.
Last but not least, you can improve viewport performance with really dense sculpts by enabling the new Delay Viewport Updates option. When this is checked on, only what's seen by the viewport will be updated when you're not navigating.
Animation
There are not a lot of animation updates in Blender 2.83, but there are a few polishes of existing features.

The Graph Editor now displays the axis colors as a little strip in the source list rather than being the background for the eye icon, and the sidebar has been slightly rearranged to make more sense.
Lock Time to Other Editors has been renamed to Sync Visible Range. It's a simple change, but hopefully it helps more people discover the feature because it's really useful! If you have it on in two animation editors, zooming in on one will also zoom in on the other.
Action Baking will now no longer insert keyframes that don't cause any change. That's less cleanup for game artists!
Personally, I'm very happy that in 2.83, the Child Of Constraint's Set Inverse function works reliably regardless of what axis options are chosen for location, rotation, and scale. The way it worked previously often frustrated me but now it's dead simple.
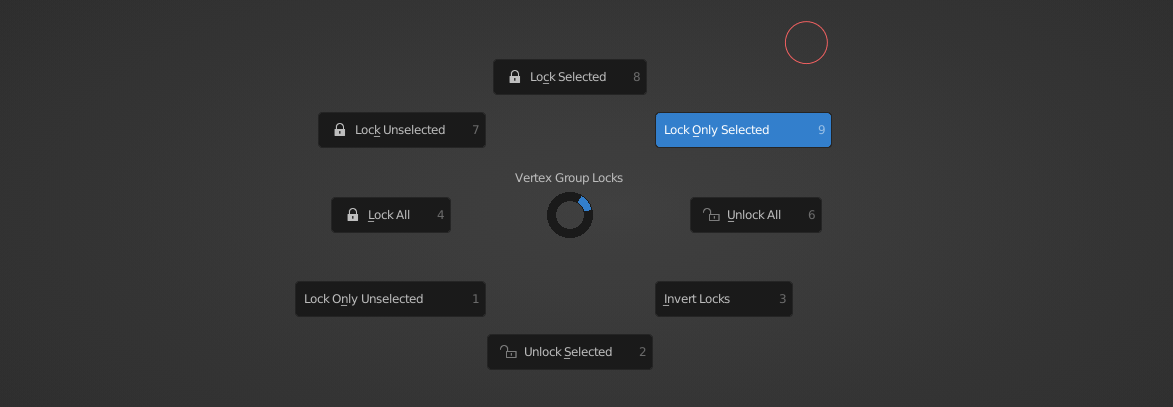
If locking and unlocking vertex groups is your thing, you'll enjoy using the new pie menu in Weight Paint mode when you press 'K'. Additionally, any bone that corresponds to a locked group will be shaded red as an indicator.
Physics
Hair Dynamics now uses the same collision algorithm as cloth, which makes it much more robust and predictable. To go along with this, cloth self-collision has been sped up by about 15-20 percent!
Fluid Simulation has also been optimized under the hood to improve baking, cancelling, and particle loading times. There are also a few new options:
- A Use Effector checkbox for effectors means that you can now animate when an obstacle or guide will be calculated.
- Subframes can also be added to obstacles so that fast moving objects will still collide with the fluid correctly.
- Smoke rendering in the 3D viewport has been improved and now supports thick, dark smoke.
- The default resolution of fluid simulations was decreased and the cache type set to Replay so that it's faster to jump right into seeing the animation.

Volume Objects
There's an entirely new object type in Blender 2.83! A Volume object is specifically for holding voxel information. In this first implementation, it's useful for importing .VDB files, which are used by many programs for exporting everything from smoke simulations to medical scan data.

Volume objects use the Principled Volume Shader by default and even have a wireframe representation of the voxels.
Grease Pencil
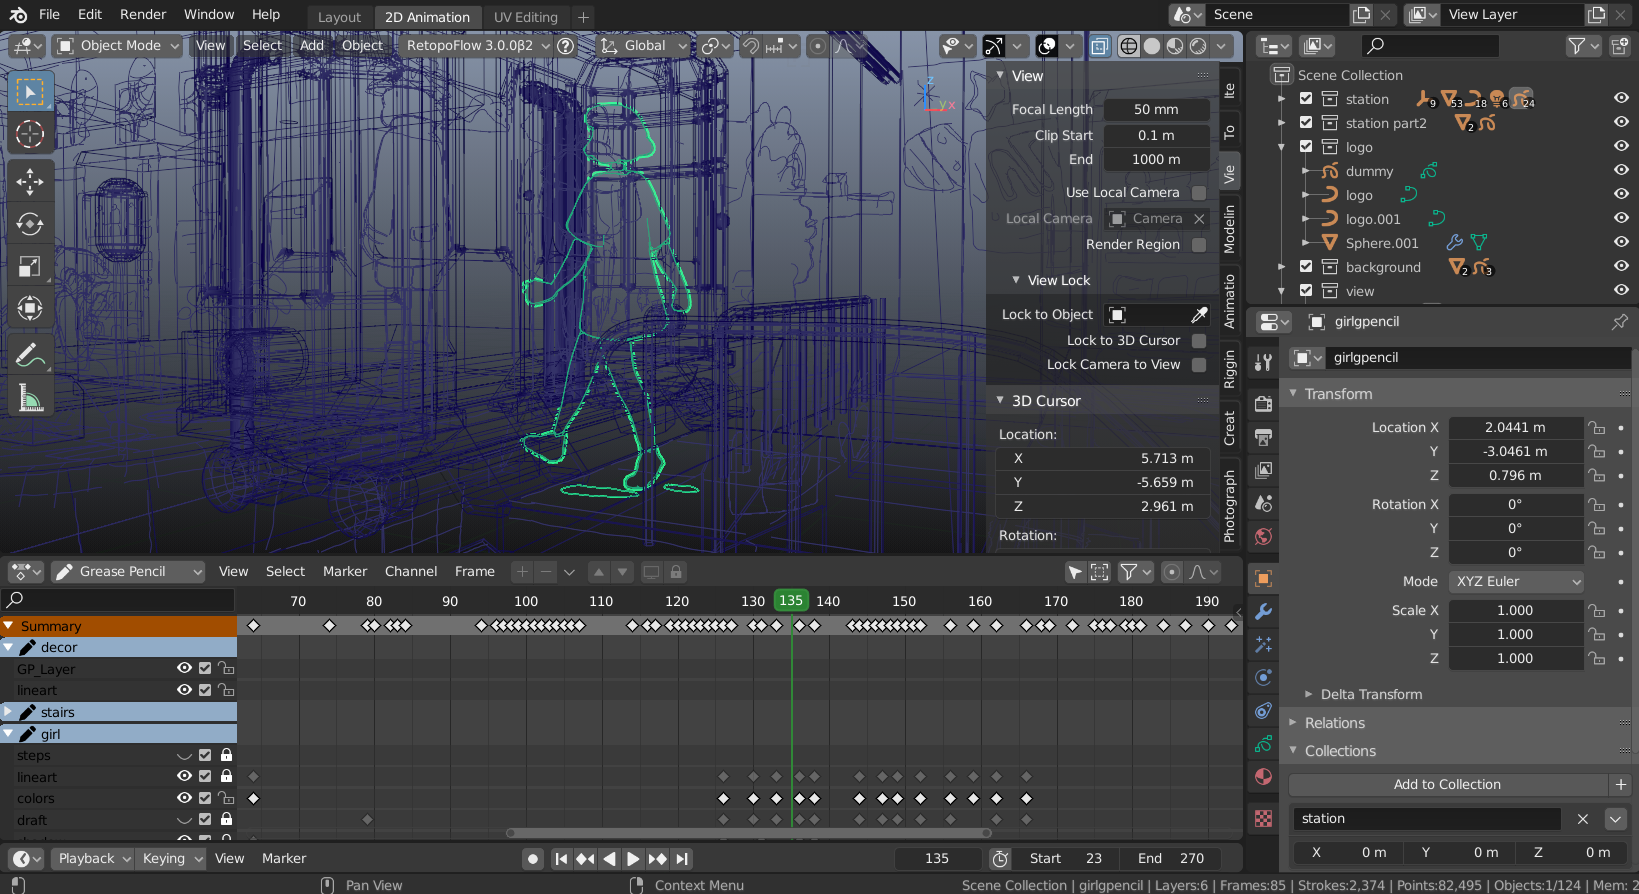
While it may look like an incremental update, the Grease Pencil in Blender 2.83 has been completely rewritten. Not only is it faster (animation FPS especially), it's also tied more closely to the rest of Blender.
Light objects can now affect grease pencil objects. They don't cast or receive shadows, but you can set a light to be the pivot object for a 2D Shadow Effect in the Effects properties.

Effects are now calculated in world space rather than screen space, so they'll look the same in the viewport as they do in the render, regardless of the resolution. The Glow Effect in particular has been upgraded to support more blend modes as well as include controls for its size and rotation.
Transparency for materials has been better integrated and you can now set an alpha value in the base color property for both fill and strokes. z
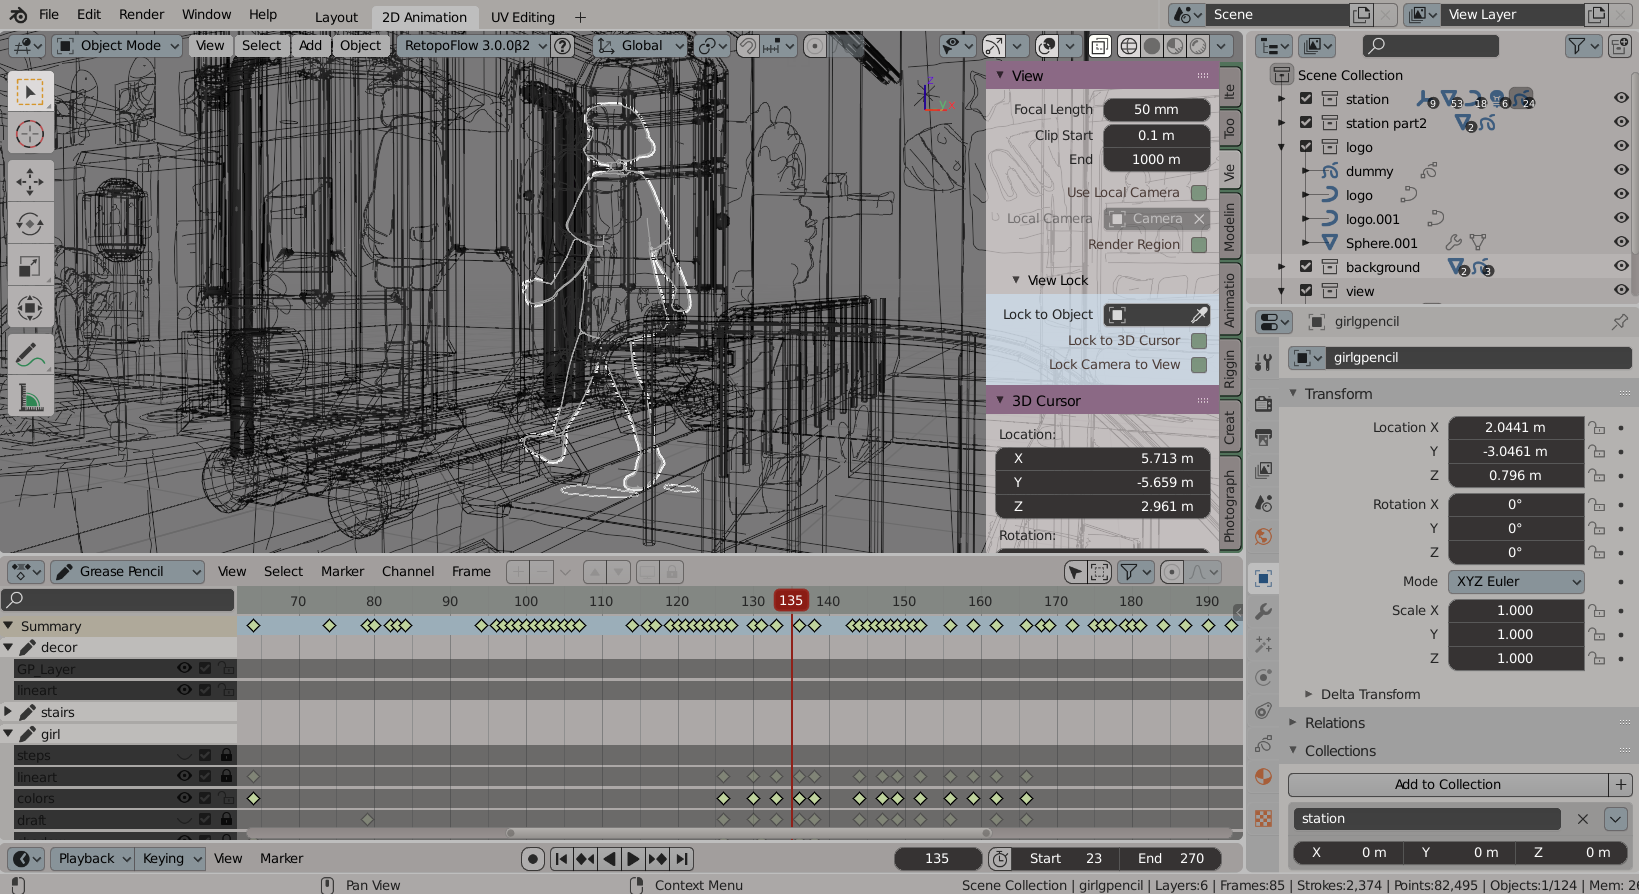
Viewport Shading for grease pencil objects now matches all other object types. That means wireframes, random colors, and X-Ray all just work!
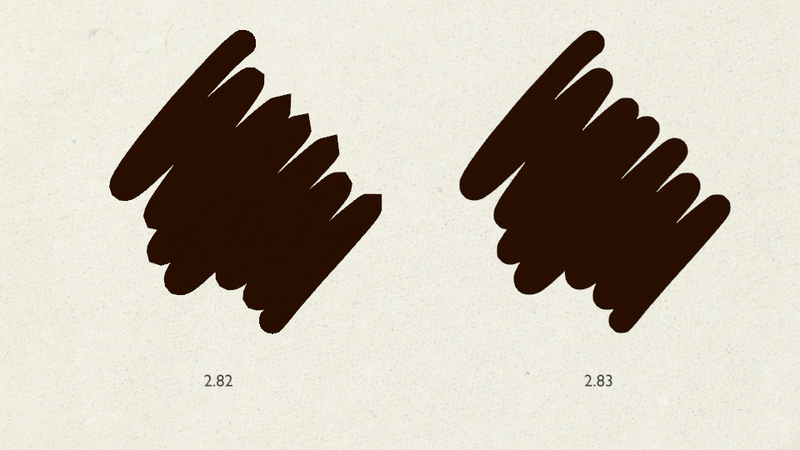
Drawing fast strokes or hard angles no longer results in artifacts. Everything is now smooth and crisp!
Several presets have been updated to make it easier to start drawing, including the 2D Animation template, default brushes, and default materials.
There are two new context menus in Draw Mode and Edit Mode. The I key introduces more animation and keyframe commands while the Y key can be used to change the active layer. The active layer has also been included in the right click context menu in Draw Mode.
If you turn on the new Scale Stroke Thickness option in the Edit Mode Stroke menu, you'll be able to scale the stroke along with your selection when you scale things up or down.
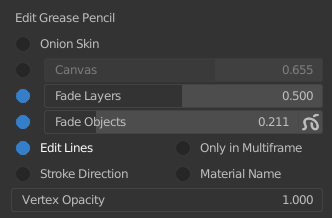
There are new and updated Overlays for Edit Mode including displaying the material name, adjusting the vertex paint opacity, showing the stroke direction, and more.
If you have a lot of similar materials that could be combined, there is a new Merge Similar Materials operator in Edit and Draw Mode that lets you do just that! It takes hue, saturation, and value thresholds and combines anything within that range of each other.
A new Transform Fill tool in Edit Mode allows you to interactively translate, rotate, or scale where a texture is placed within a fill, similar to adjusting UV's.
The new Tint tool in Draw Mode lets you paint vertex colors on top of your materials without having to switch to Vertex Paint Mode.
The Tint modifier can now use a gradient instead of just a solid color, so you can keep your materials simple.
Speaking of Vertex Paint, there's a whole new system for painting using vertex colors in Draw Mode rather than materials. You can switch to it in the Tool Properties under Color. What's great about painting that way is that you can use the nice color palette system and quickly switch between colors and between strokes and fills without thinking about managing materials. The Eyedropper tool has also been upgraded to work with both workflows.

Lastly, the Grease Pencil mask system got a refactor that makes it more reliable. It also has a new list view which you can find in the Layers panel in the object data properties.
Cycles Rendering
The biggest new feature for rendering in Blender 2.83 is Adaptive Sampling for Cycles. It's always been a bit unintuitive to try to guess how many samples a render needs. 100? 1,000? 5,000? Who knows! We just want to have it be noise free but not render forever, so testing sample counts was always a necessary consumer of time. With adaptive sampling, however, you can set a noise threshold. Once a tile reduces the noise to that level or hits the sampling limit, it will stop sampling and move on to the next one.
This is excellent for a few reasons. First, it won't waste time sampling areas to death that don't need it (like transparent backgrounds or areas of emission). Second, you won't have to guess how many samples to use! Just use the sample count to a high maximum cutoff and let adaptive sampling take care of it from there. This not only results in a more even render, but it also can reduce render time by about 10-30% depending on the scene.
The below image shows the result of the Sample Count render pass, which can be used to see which areas are getting more computation.
A new sampling pattern, Progressive Multi-Jitter, can be set and is intended for use with adaptive sampling. It's turned on automatically and cannot be changed if adaptive sampling is enabled.
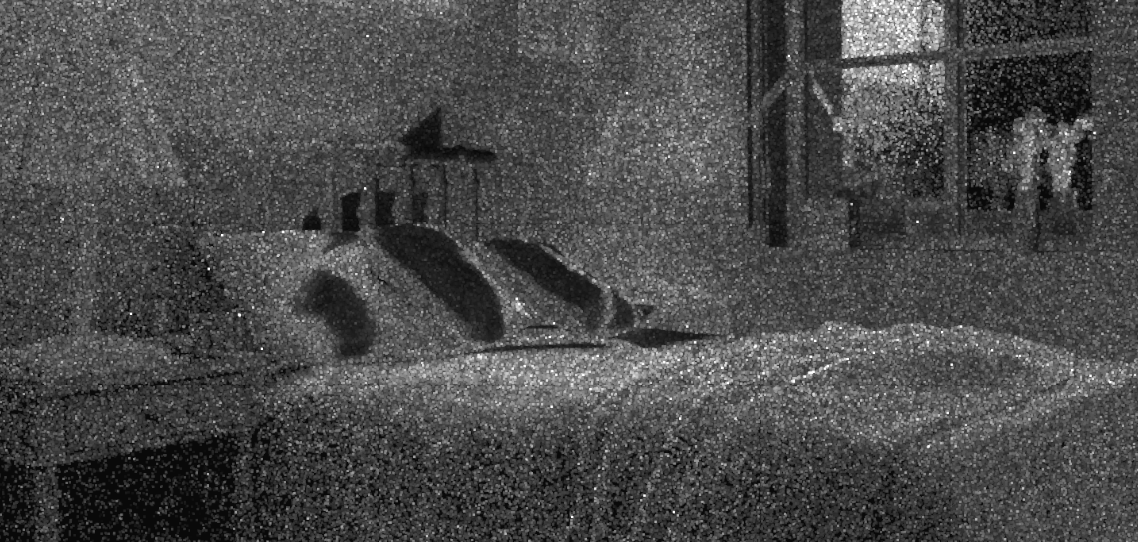
Is it magic? Well... not quite, at least yet. In some scenes it appears to produce more artifacts in very dark areas. Below is a comparison where the first render used adaptive sampling (threshold at 0.01 and maximum at 5,000) and took 10 minutes to render while the second render just rendered out 2,000 samples everywhere and took roughly the same amount of time. The second image looks a bit better in pretty much every area, so perhaps only use it for scenes were the difference in sample counts needed is more drastic.
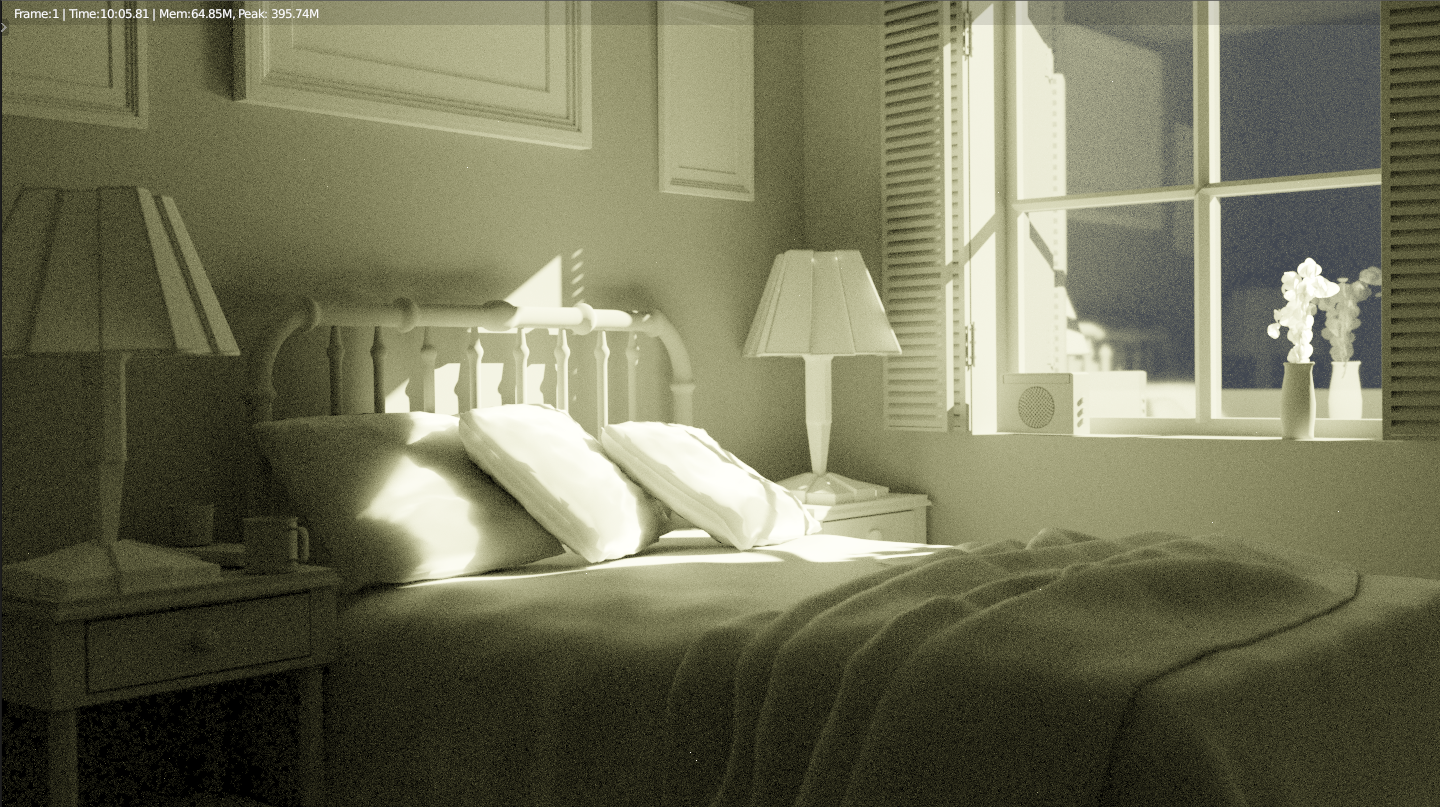 Adaptive Sampling
 Regular Sampling
The second amazing update is viewport denoising. Enabling this option will run Optix AI denoising in real time as you move around the viewport in rendered view! It only works if you have a RTX graphics card though, so I haven't been able to test it for myself yet.
When it comes to rendering volumes, the step size (how big the voxels are) is now automatically calculated. If you'd like to adjust it manually though, you still can via the Step Rate settings in the render, world, or material properties.
Eevee Rendering
Eevee got more render passes! You'll now have compositing access to:
- Emission
- Diffuse Light
- Diffuse Color
- Glossy Light
- Glossy Color
- Environment
- Volume Scattering
- Volume Transmission
- Bloom
- Shadow
Hair geometry can now use alpha hash and alpha clip for transparency and shadows. This means you can make fur look extra fuzzy! In the below example, I'm using the Hair Info node to mix between a Diffuse and a Transparent shader.

Reflection Probes are now calculated differently (cube maps vs. octahedron maps), and now no longer cause artifacts on rounded rough materials.
A new High Quality Normals option in the render settings helps to avoid texture distortion on dense objects. The normals here refer to how Eevee stores the geometry's normals and is not specific to normal maps.
32 bit images now have a Half Float Precision option that is on by default. Turning this off will allow Eevee to use all 32 bits of glorious color depth.
The Shadow Bias for sun lamps has been improved and now behaves exactly as the shadow bias on other lamp types.
You can also now control how much the Lookdev environment map is blurred in the viewport.
Shader Nodes
Thanks to Bartek Moniewski, the Wave Texture is aligned to the X axis by default instead of being strangely rotated. He also included a phase offset, which makes it very easy to animate the texture along it's direction.
Both the Wave Texture and Noise Texture got a new Roughness parameter, which gives you more control over how smooth or rough the noise pattern is.

The White Noise Texture now has a color output for even more levels of randomness.
The Vector Math node gained Sin, Cos, Tan, and Wrap functions, the regular Math node now has a variable number of input sockets based on the operation, and there's also a brand new Vector Rotate node for rotating textures along a specified center point.
Compositing
The Diffuse render pass now includes subsurface scattering and diffuse transmission instead of them all being separate passes. This should make compositing and baking easier since they no longer need to be combined manually.
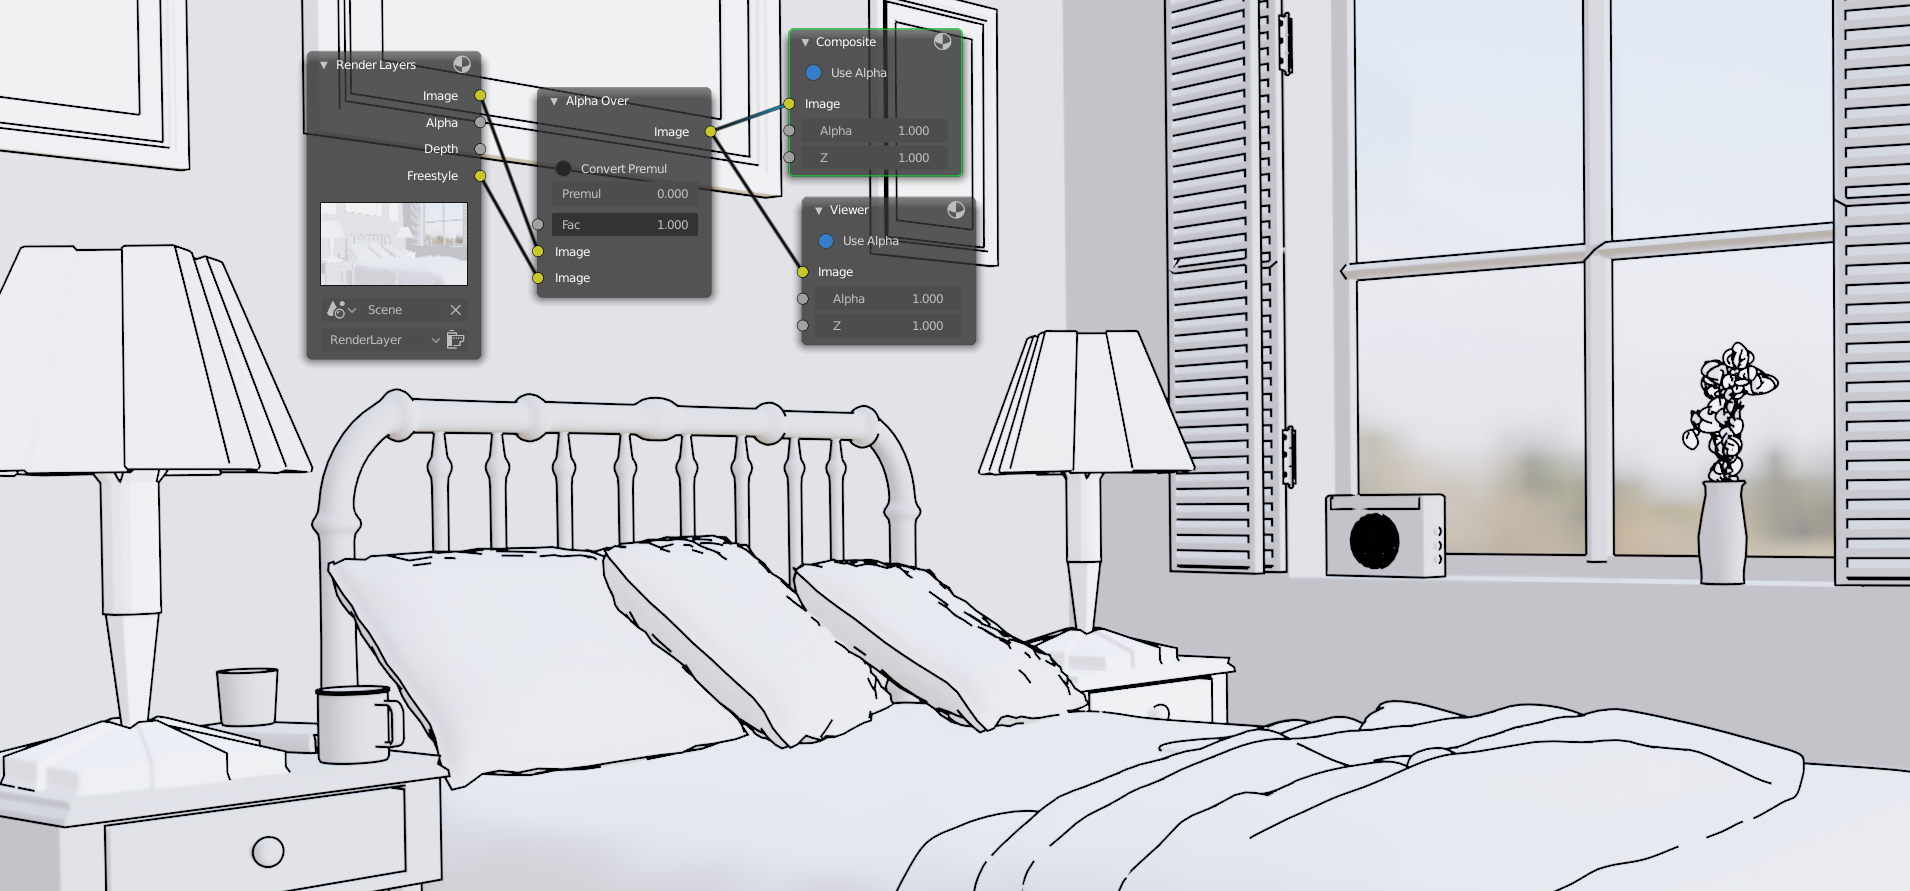
Freestyle strokes, which are like sketch lines drawn over the render, can now be output as a render pass instead of baked into the image. That's incredibly helpful for NPR (non-photoreal) rendering!
Virtual Reality
The very first step for Blender becoming a way to view and interact with scenes in virtual reality is here! It's pretty basic at the moment, but a lot more is coming down the road. The initial feature is called Scene Inspection and simply allows you to look around a scene with a VR headset. It is currently implemented as an addon which is off by default.
The feature is supported only on platforms that support OpenXR, but there are no headsets that officially support that new standard just yet. The documentation notes, however, that there are stable developer previews for it for Windows Mixed Reality and Oculus. I am not able to test this out at the moment because my headset is a Vive, but I am looking forward to seeing how development progresses since it is being spearheaded by a few folks at Ubisoft. You can read more about their plans here.
Video Editing
I've yet to be convinced to edit videos with Blender's Video Sequence Editor, but given that it's still getting upgrades I may change my tune in the future if that continues. Most of the changes to the VSE in Blender 2.83 involve updating it to match the rest of 2.8's design changes including adding a Redo Panel and a Toolbar that has a select tool and a split tool.
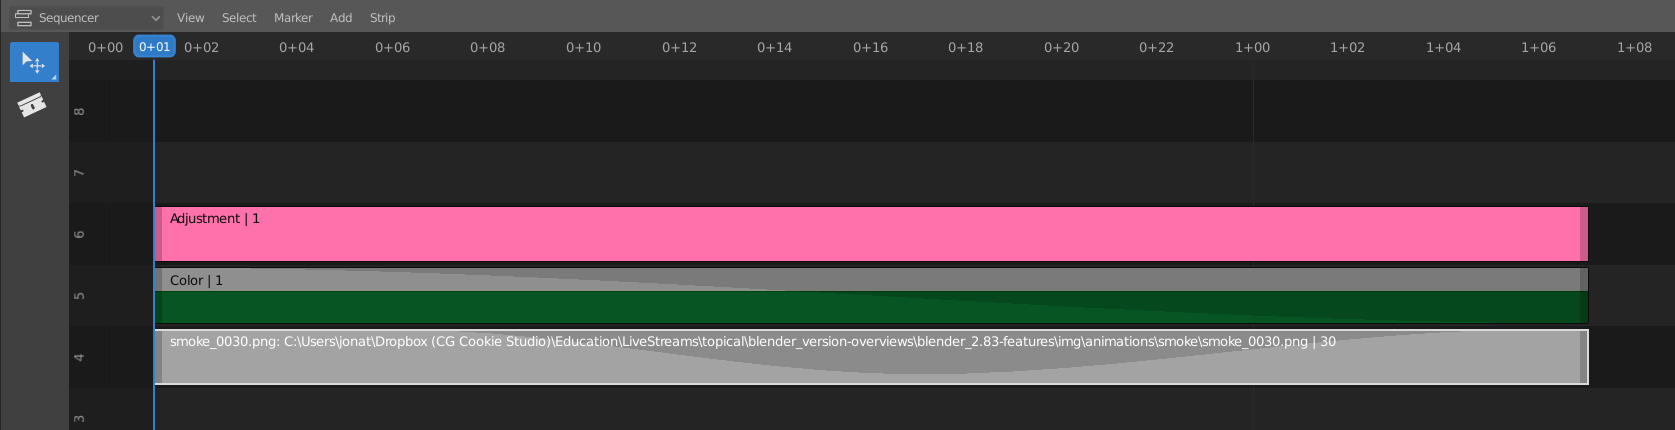
The strips have been updated quite a bit visually so that they read more clearly and are easier to manipulate.
F-curves for opacity and volume values are now drawn directly on the strips. It looks nice!
Performance has also been improved with the introduction of a Disk Cache so that frames can be stored on disk as well as in memory. It's off by default though, so you'll need to turn it on in Blender's preferences under System.
Misc. Other Changes
There are several new theme presets: Deep Grey, Maya, Minimal Dark (by yours truly!) , Modo, Print Friendly, White, and Xsi.
 Minimal Dark Theme
 Maya Theme
 XSI Theme
 Modo Theme
The Info Editor now has icons and better spacing so that it's actually quite legible.
Ctrl+F in the File Browser now jumps you to the search.
High resolution pen tablets are better supported when using Windows Ink - the strokes accurately match the pen motion.
Various USD, Alembic, and glTF import and export improvements.
Last semester, calculus nearly broke me — late-night problem sets, endless formulas, and zero free time. I started asking around and even searched online for What is the best math homework help service? https://forum.nocramming.com/threads/what-is-the-best-math-homework-help-service.11/ because I just needed something dependable. Found a few solid recommendations there, and honestly, it saved me during finals week when I thought I wouldn’t make it through.
Excellent article. Thank you, Jonathan! I love how polished Blender has become. If I had to choose one feature to be most excited about, it's the not-quite-magic adaptive sampling, because I hope it's paving the way for eventually magic sampling, rendering, and even creation like modeling.
nice overview :D thanks a lot