Bit Depth & How Compression Affects Normal Maps
Oct 26th 2017
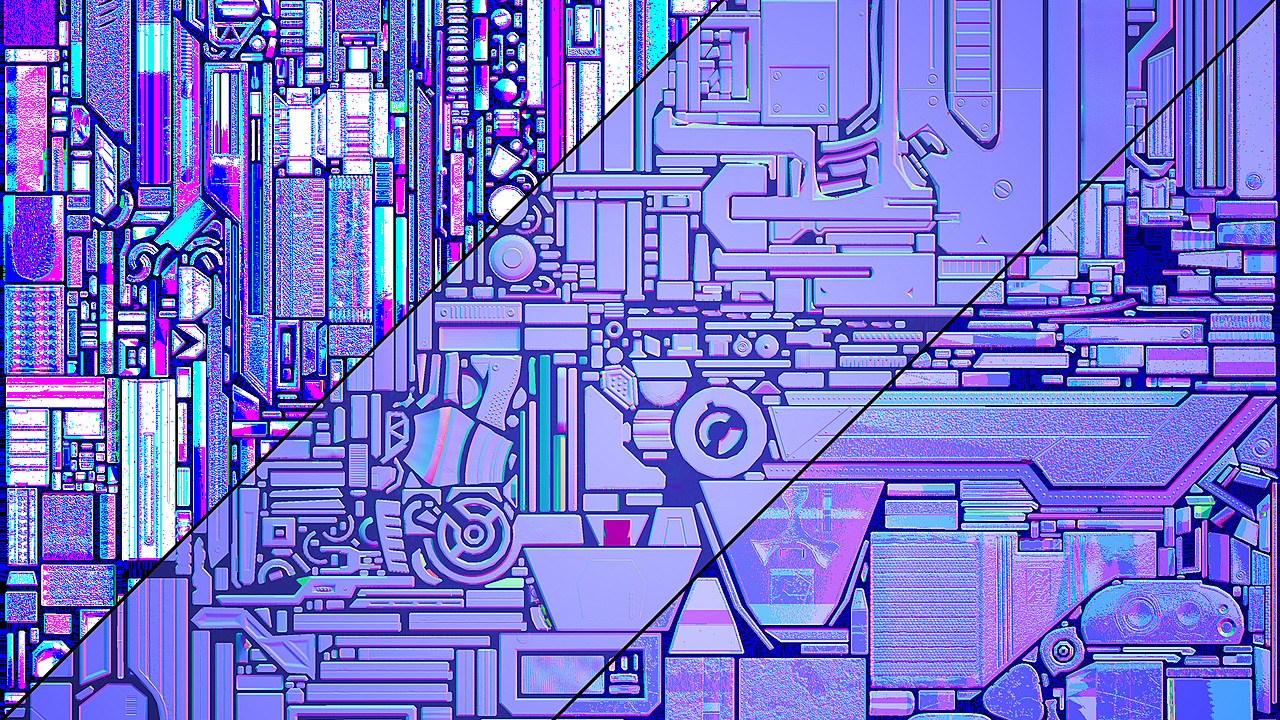
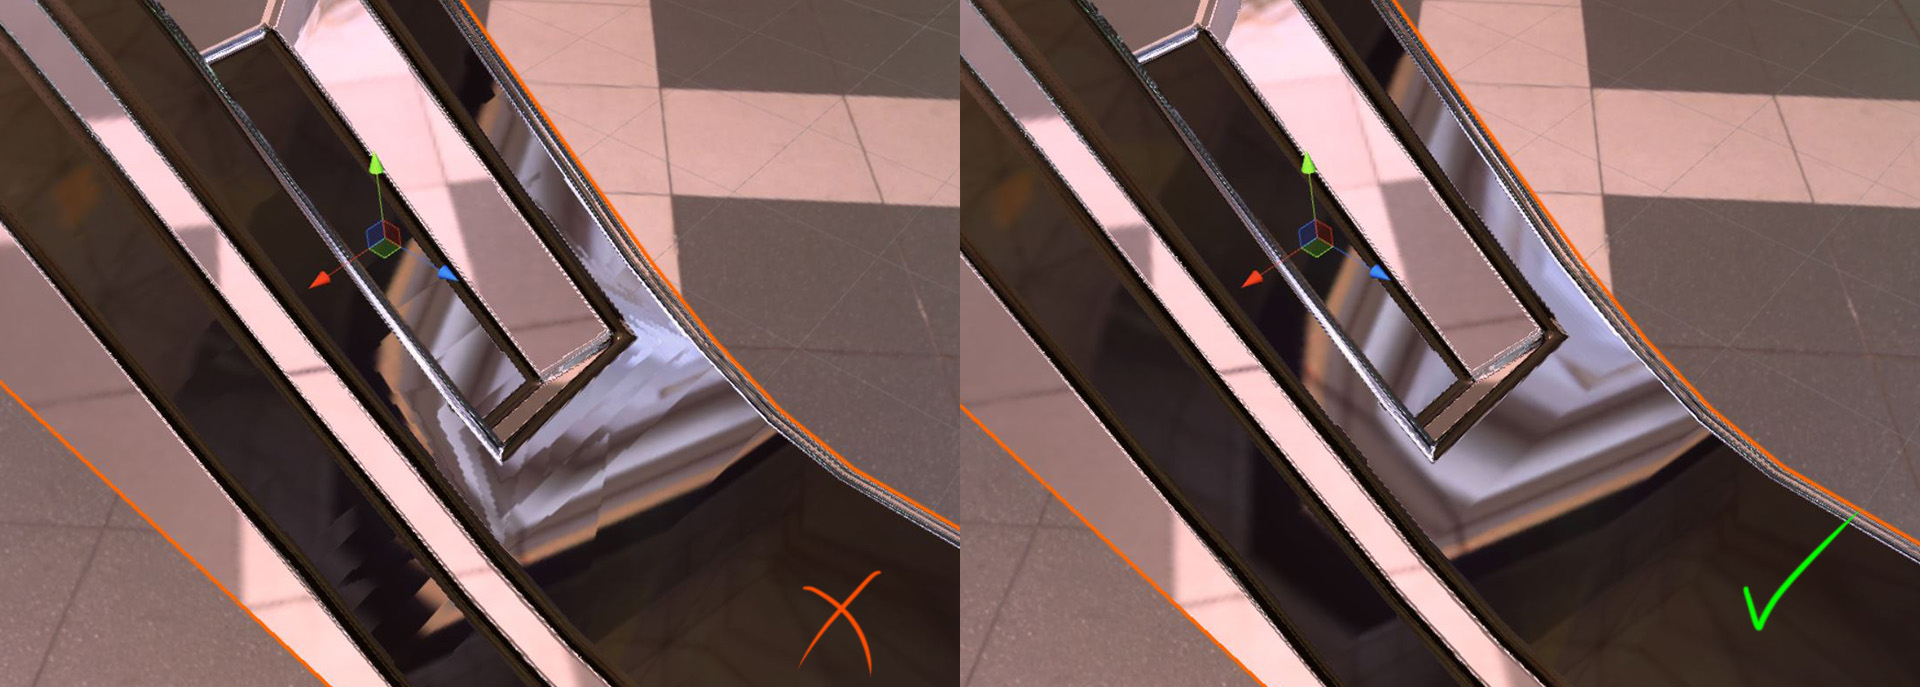
While working on my course about baking normal maps in Blender, I came across one type of artifact that stumped me up until last week. This artifact looks like what should be a flat surface is shattered into little shards.

The first clue to the problem is that I can hardly see the artifacts in Blender, but they are extremely obvious in Unity. That means that the issue has to be with how the maps are being exported or imported. I’ll save you the detective work though and cut straight to the chase:
Bit depth and compression play a huge role in how your normal maps look in any game or render engine.
My problem was twofold - I was both exporting from Blender incorrectly and importing to Unity incorrectly, which is why the problem was magnified at the end of the pipeline.
Understanding Bit Depth
You can think of bit depth as how many colors can be in each channel of your image. The equation for the number of colors is 2^x, so:
- 1 bit images have 2 colors per channel
- 2 bit images have 4 colors per channel
- 4 bit images have 16 colors per channel
- 8 bit images have 256 colors per channel
- 16 bit images have 65,536 colors per channel
- 32 bit images have 4,294,967,296 colors per channel
As you can see, the jump between 8 bit, 16 bit, and 32 bit is massive!

Working in 32 bit float
When you first create your image in Blender, be sure to check the little box labeled 32 bit float:

While you don’t need all 4 billion colors, you may need more than 65,000, and you definitely should be working with floats. The reason for this is that your bake cage is likely not 100% parallel to each face of your low poly object. Any tiny change of angle is going to result in a tiny change of color in your normal map. Left click and drag over any flat area of your normal map in Blender’s image editor, and pay attention to if the color numbers change in the bottom left to see what I mean.
RGB Bytes vs. Floats
Next time you open an image in Blender’s Image Editor, notice the file details in the right hand properties panel. Blender will let you know whether you’re working in floats or bytes.

Floats will not round off long decimal numbers, while bytes will. The change might be so small that you’ll never notice it, except for the fact that any rounding error is exaggerated every time you save the file.

You may not be able to spot the difference by eyeballing it, but your game engine will!
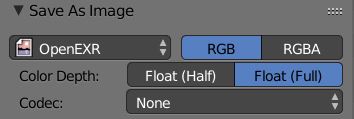
Saving the file
Now that you’ve checked 32 bit Float after creating a new image, you’ll need to be sure that it continues to be a 32 bit float throughout the baking process. To do this, change the format to be a full 32 bit EXR file when you save. Use 16 bit Float (Half) if you need to but don’t use PNG, and stay far away from JPEG.
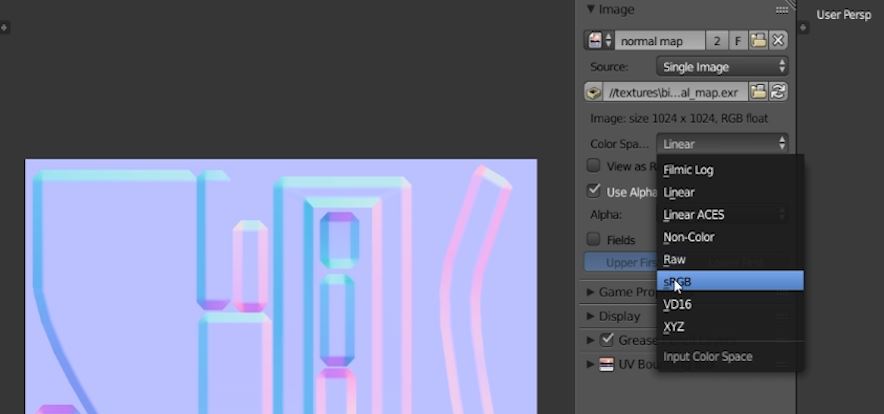
Converting to 8 bit for use in a game engine
You may have noticed by now that the 32 bit float image looks a little lighter than a typical normal map. This is because 32 bit floats work in linear space by default, which is usually a good thing. This time, however, you’ll need to switch the image to sRGB before saving so that your game engine will interpret the colors correctly.
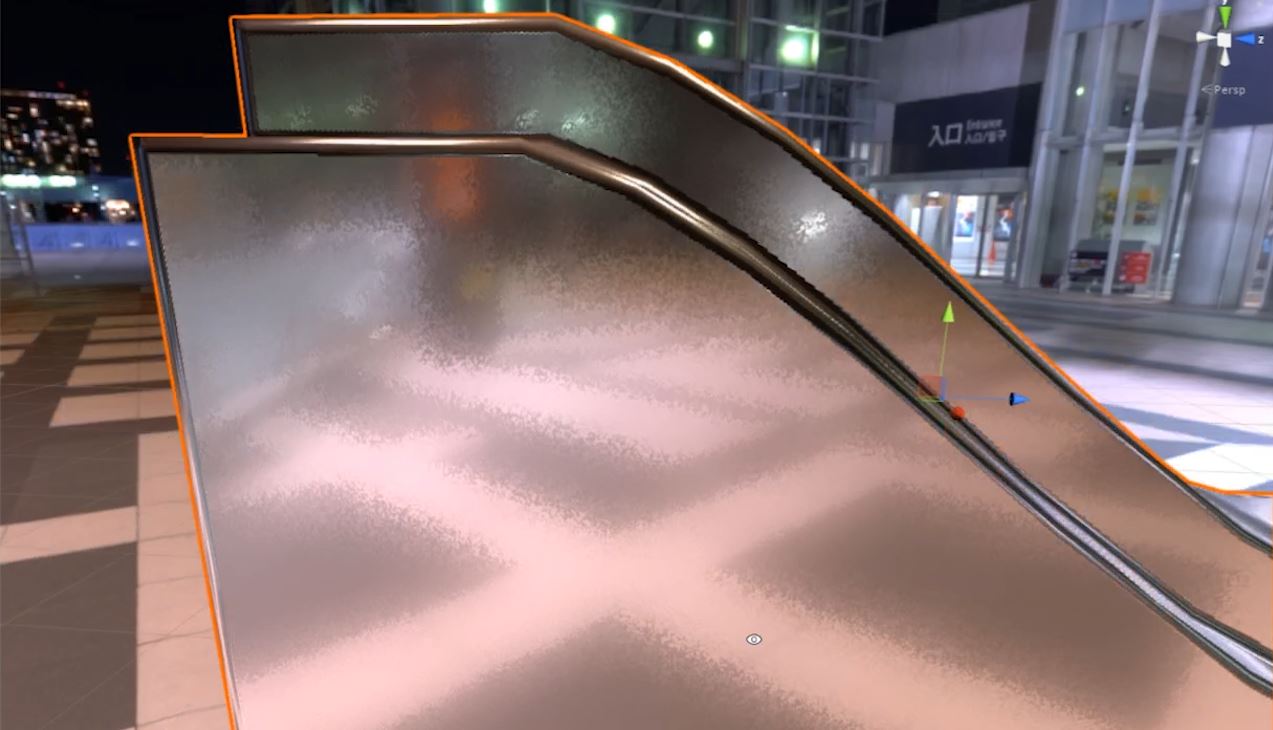
32 bit float files are massive, so we won’t want to plug that straight into a game engine. By default, Unity can only handle 8 bit normal maps anyway. Even if you try to plug in a 16 bit normal map that looks fairly decent in Blender, Unity will convert it to an 8 bit image automatically, and that conversion will leave you with exaggerated banding artifacts.
Fortunately, Photoshop does a much better job of converting, and can even change your 32 bit float into a decent looking 8 bit image. Just drag and drop your EXR file into Photoshop and select Image > Mode > 8 Bits/Channel. At first it will try to apply some nasty filter meant for RAW files, so switch the conversion type to Exposure and Gamma.

This will apply a dithering effect as it converts the 32 bits to 8 bits, which means your normal map will now look speckled, but otherwise artifact free.
The dithering will look much better than artifacts on any curved areas, but it looks a bit strange on the areas that should be flat. To make them flat again, go back to Photoshop, add a new layer, and use the paint bucket tool (with sample all layers turned on) to fill in any flat areas with the RGB color 128, 128, 255 (#8080ff).
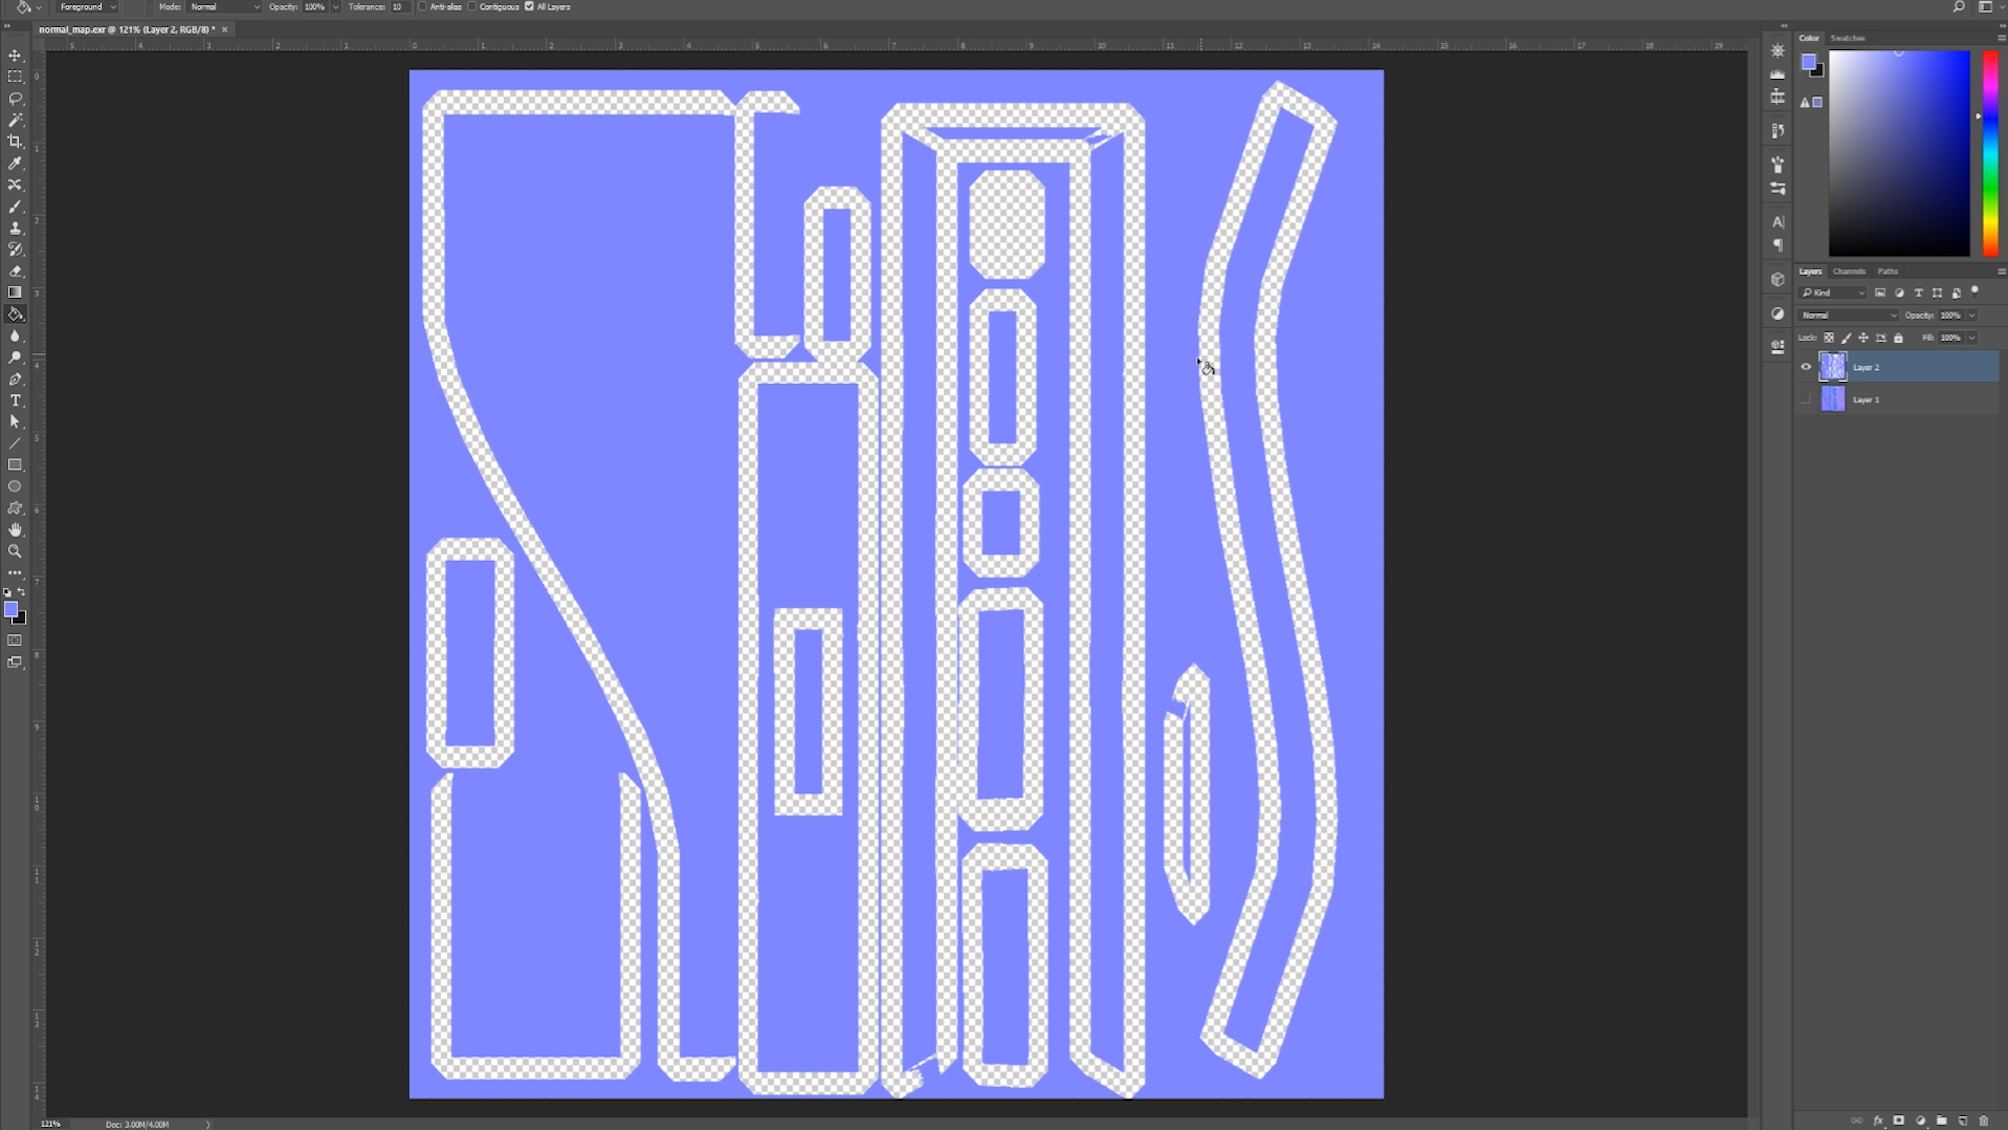
With that, you’ll have a perfectly clear normal map that takes up very little space! It may seem like a bit of a process now, but when you get into the habit of using this workflow it will save you many headaches down the road.
To see this in action, check out the free lesson that I just added to the Intro to Normal Map Modeling for Games course, and be sure to go through the entire course if you’re serious about making great looking game models.
Intro to Normal Map Modeling for Games

awesome, it's great you added the lesson too.
You don't have to export gamma corrected images to unity:
https://docs.unity3d.com/Manual/LinearRendering-LinearTextures.html#DisablingsRGBSampling
vvaculik It is now, thanks!
Great article! Time saving advices in a non easy process like baking normals. Thanks!
A helpful article! Hope you can put things together and make a learning flow of texturing for game model :)
Great article, but
"To see this in action, check out the free lesson"
I don't think the video is free.