
- Embrace the Bend tool
- Use Alt+S to shrink or flatten
- F9 to quickly see tool options
- Turn inset into Extrude and Scale
- Fine-tune Skin modifier results with Ctrl+A
- Isolate a collection in Blender
- Get negative quickly
- Select a polygon region
- Transform an objects pivot point
- Batch rename object
Blender Hot key #1: Embrace the Bend tool to bend your mesh
Blender’s Edit Mode is filled with useful tools but some of them are slightly hidden. The Bend tool (formerly called Warp) is one of those hidden gems.
How the Bend tool works:
Step 1: Enter Edit Mode.
Step 2: Place your 3D cursor at the desired bend pivot position (select vertices and press Shift + S to move the cursor to the selection). The 3D cursor functions as the bend’s base point.

Step 3: Select the vertices you’d like to bend. You can also just select all vertices.
Step 4: Place the pointer at the outer end of the vertices you’d like to bend (usually just outside a mesh).
👉 Note: Warp works in screen space, so usually you’ll want to switch to an orthographic view like the front view.

Step 5: Press Shift + W to activate Bend, and move your pointer to guide the bending.

💡 Tip #1: Hold Alt to make the bend affect the other side of the 3D cursor as well, mirroring the bend effect. Vertices need to be selected in that area too.

💡 Tip #2: Bend also works on Lattice points. 👍
Article Tip: Top 10 Modeling Addons for Blender
Hotkey #2: Use Alt + S to shrink or fatten
Alt + S is a useful multi-purpose shortcut in Blender’s Edit Mode.
Application 1: In mesh Edit Mode, press Alt + S to move vertices, edges or faces along their normals.

Application 2: In curve Edit Mode, use Alt + S to increase or decrease the radius of one or more beveled curve points

💡 Tip: Alt + S also works on curve points (if you’ve used the Curve modifier to deform a mesh) inflating or deflating the deformed mesh around desired curve points.
Hotkey #3: Press F9 to quickly see tool options
As soon as you’ve initiated Blender tools, most of them will give options. You can find the options in an unfoldable menu at the bottom left corner of your 3D viewport.
To get to the options faster, you can also press the F9 function key to make them appear at your pointer’s position.

Article Tip: Model a Cute 3D Character in Blender 2.8
Hotkey #4: Use the Control key to turn Inset into Extrude + Scale
In Edit Mode, after using the ‘E’ key to extrude you often need to scale the extruded polygons by pressing ‘S’ to initiate the Scale tool.
But there's a slightly easier way to extrude + scale:
Step 1: Select one or more polygons, and press the ‘I’ (Inset) key instead of ‘E’.
Step 2: Drag to scale (inset) the polygon(s) that will be extruded.

Step 3: Now hold down Control to extrude the polygon(s).

For straightforward extrusions, you can use the ‘E’ key.
💡 Tip: You can fine-tune an inset in the Inset Faces settings (press the F9 key or open the settings dialog in the lower-left 3D viewport corner).
Hotkey #5: Fine-tune Skin modifier results
The Skin modifier is a super powerful modeling tool. One of the most important hotkeys is Control + A, which adjusts the resulting Skin scale of selected vertices in Edit Mode.
What you may not know is that Control + A offers non-uniform scaling as well!
Press the X or Y key after pressing Control + A to non-uniformly scale the influence of a vertex on the Skin modifier result.

Hotkey #6: Isolate a collection in Blender
When you’ve organized several sets of objects into collections, you can isolate a collection of objects. Do this by selecting all objects that are part of a collection, then invert the selection and press the ‘H’ key to hide everything - except the collection you want to isolate.
But there’s another easier way to isolate a collection. Just press Control + H in the 3D viewport for a pop-up menu showing all collections, then select the collection you’d like to isolate or press the corresponding number in the list.

To keep more collections visible, Shift-click on multiple entries in the list.
Hotkey #7: It’s easy to get negative
Instead of clicking on a value field, placing the cursor at the start of a value, typing a minus sign, and pressing the Enter key, you can simply hover your pointer over a value field…

… and hit the minus key (on the main keyboard, not the numeric keypad) to make it negative. Very handy for mirroring by turning a Scale value negative.

Article Tip: Top 10 Shading & Texturing Addons for Blender
Hotkey #8: Select a polygon region
If you want to select a polygon region in Edit Mode, click on a corner face of the desired region…
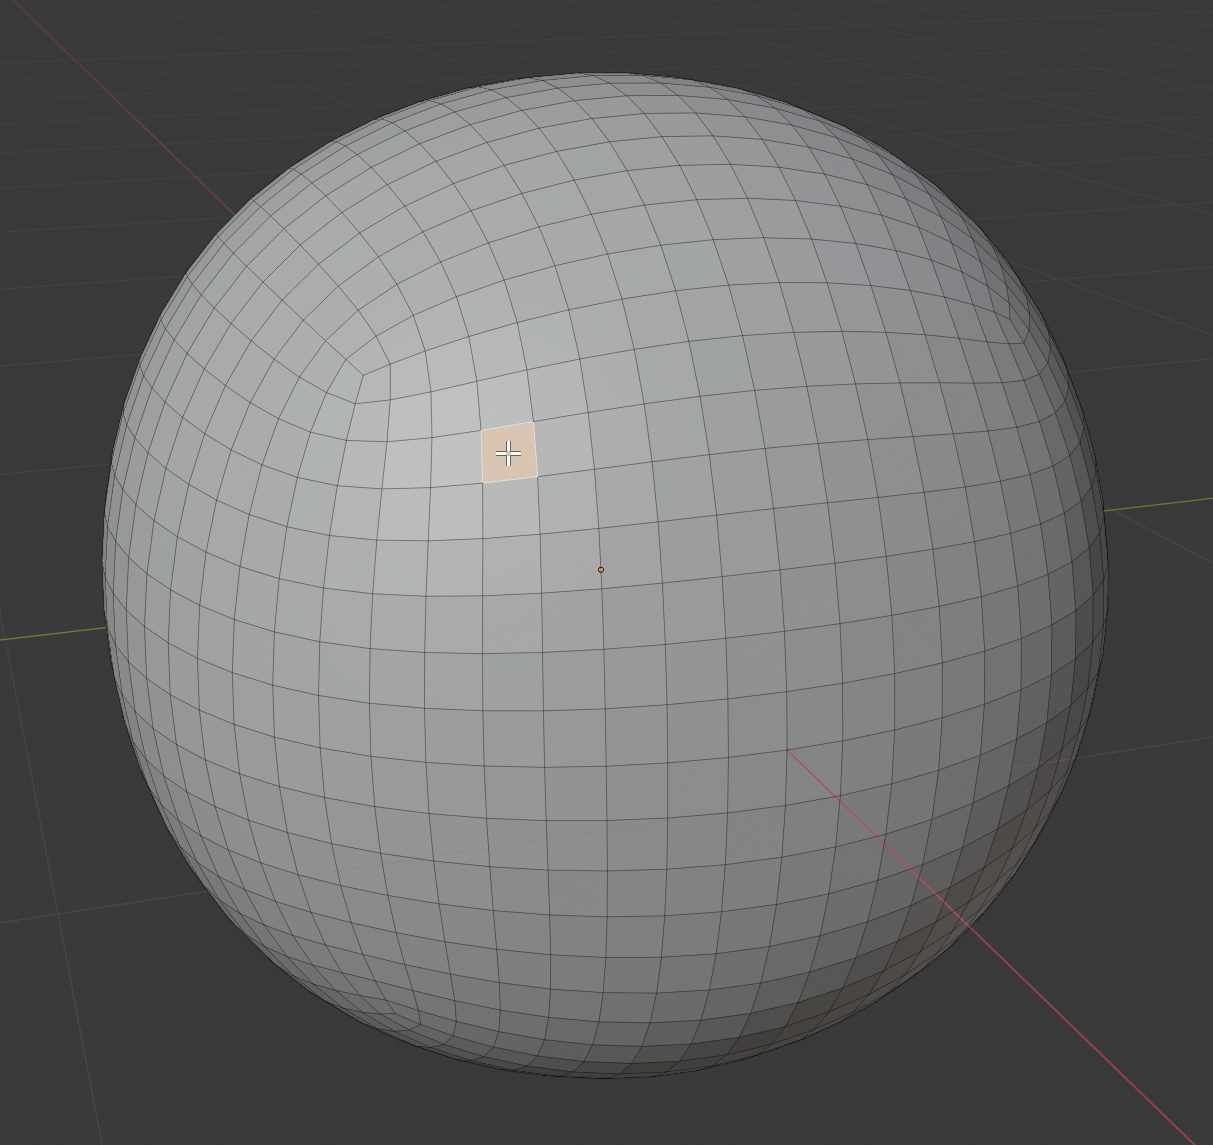
… then Control + Shift + click the other corner face of the desired region to select the matrix of polygons in between.

Hotkey #9: Easily transform an object pivot point
Press Control + ‘.’ (period key) in the 3D viewport to transform only the pivot (origin) point of an object.

Press the ‘G’ key to move the pivot, and optionally turn on snapping (Shift + Tab key) to snap the pivot, but set your desired snapping type first, as the default snapping is the Blender viewport grid.
Article Tip: 8 Tips for Clean Topology in Blender
Hotkey #10: Batch rename objects
Selecting an object and pressing the F2 function key allows you to rename an object, but if you’ve selected multiple objects, press Control + F2 to make the Batch Rename dialog appear, offering some useful options to rename a range of objects at once.

Happy Blending!
Looking for a PDF download of Blender hokeys?
You can download this free Blender hotkey sheet to print and place it near your workspace for easy reference.
Metin Seven | metinseven.nl
CG Cookie author Metin Seven is an old hand at Blender, working with it on a daily basis since 2012, following many years of 3ds Max. He gladly shares some of his favorite Blender 3D keyboard shortcuts to stimulate your Blender productivity.
Also by Metin: Model a Cute Robin Hood Character in Blender 2.81
Also, great tips! Thanks for the post.
Thanks for your answer, @waylow! @blanchsb: Let me know if this helps you out.
If so, make sure you choose "bones" in the type of thing you are trying to rename.
If the .R already exists it will append the .001 to the name, regardless of what object type you are trying to rename.
Hope that helps.
So if I have Arm.L and Arm.R and this continues for every body part, is there a way to batch rename the .R to .L if I wanted to reverse the right side with the left side? I tried doing that by doing a Find: .L and Replace: .R but I was unable to get it to work for some reason. It would always say that it renamed 0 objects.