
After years working in architectural visualization, I've compiled the best arch-viz tips and tricks that you need for your Blender project.
Adding window holes to curved structures
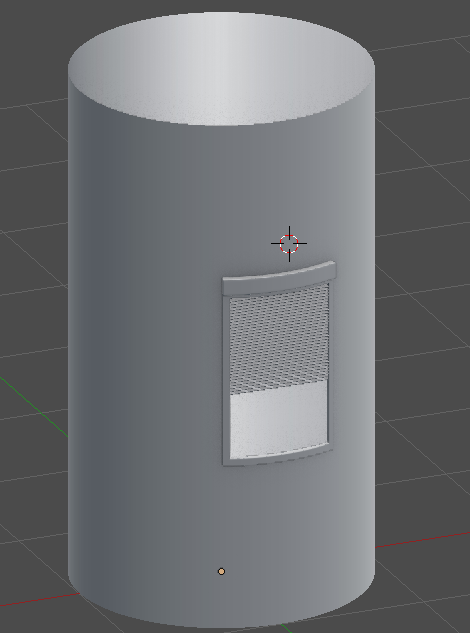
Adding holes to curved structures without creases was an obstacle I faced for years. As you can see below, a subdiv modifier on a curved structure with loop cuts to sharpen the edges will result in a lot of pinching.
I’m sure there are several ways to create the same effect, but my favorite is to use a technique often used for organic modeling. I learned it from Chris plush in his Car Modeling Course.
The idea is to generate a base mesh with the desired shape and duplicate it to create the actual surface you will work on. Once you model every detail, you will need to skin wrap the wall onto the base mesh with the polished shape.
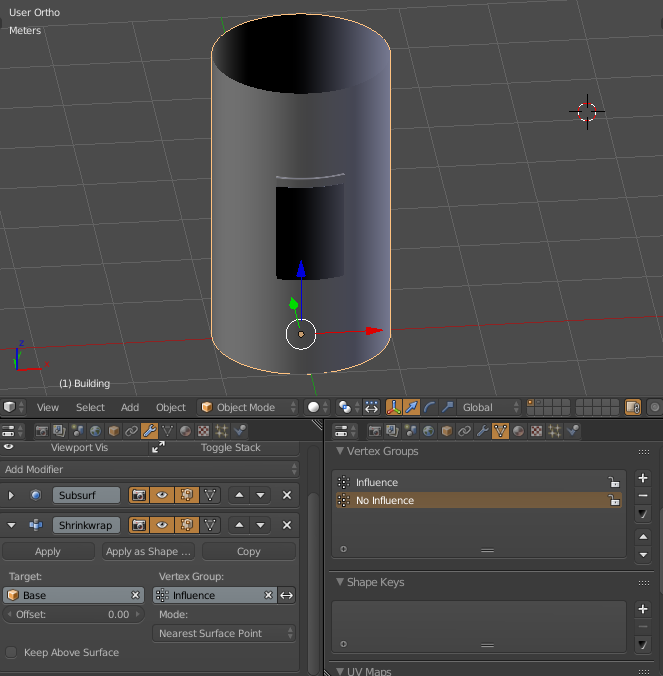 You will face some issues if you extrude from this object because all the vertices will be assigned to the Shrinkwrap modifier. That can be solved using vertex groups by unassigning the vertices you’ve just extruded from the mesh.
In this example, I created two groups: influence and no influence. I assigned the vertices which should follow the base object to the influence group. Then, I selected that group in the Shrinkwrap modifier.
ALTERNATIVE: I assigned the vertices which should follow the base object to the influence group. Then, I selected that group in the Shrinkwrap modifier.
Bevel edges to control material mixing
When working with Subdiv shapes, you might need to mix two different types of materials in the same object.
This can be achieved inside a single material by using gradient textures and all kinds of math operations, but that won’t let you pass the different parts into the compositor separately. That is why using two materials is often a better option for arch-viz.
Let’s check this example with the object we used for the previous tip:
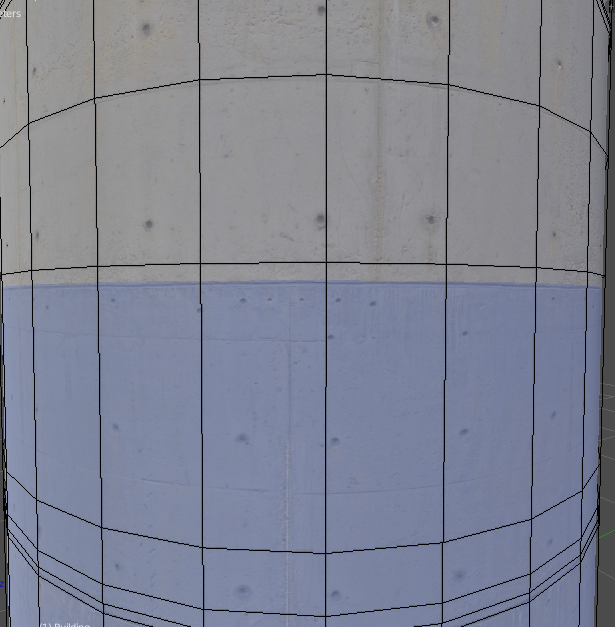
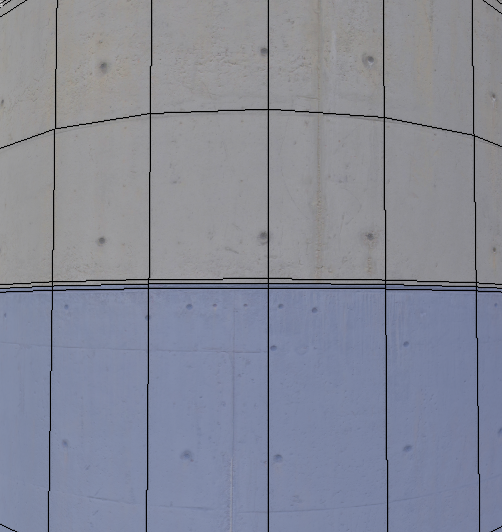
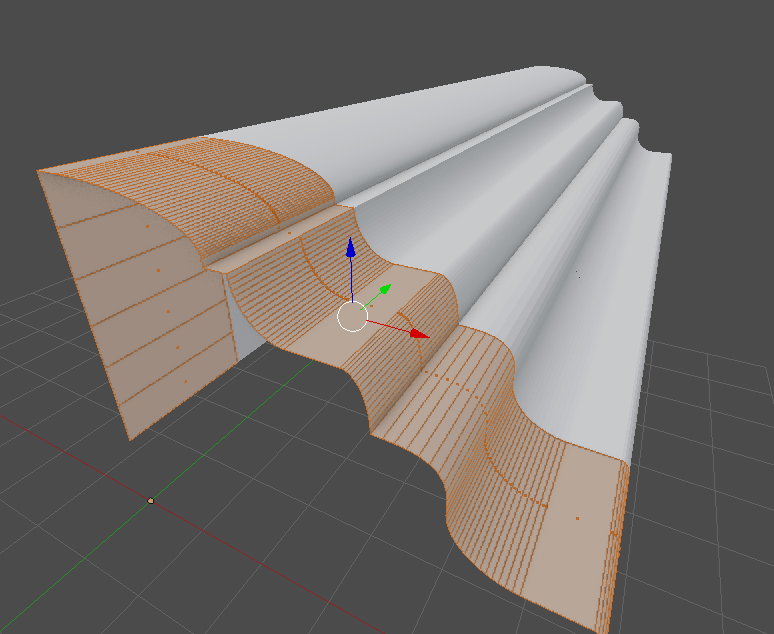
In order to control exactly where the material ends and where the next one begins, you will select the edge which divides both and create a two-segment bevel. That will allow you to control the cutoff precisely, since the two loops on either side will be equidistant from the center loop.
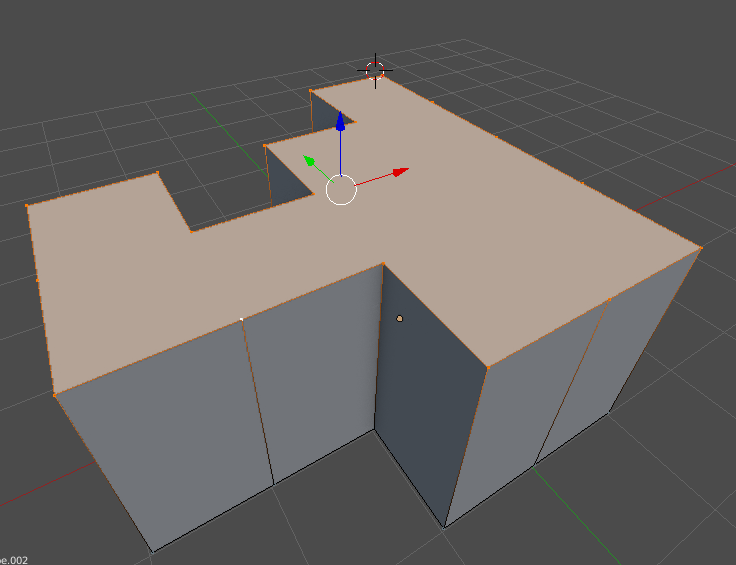
Creating a cornice for non-square structures
Cornices are a key part of any building, but this technique can be applied to moldings, frames, and any extrusion which needs to go inwards or outwards.
You might need to scale edges following the shape of the structure, but it often becomes complicated to scale the extrusion from the shape of the model towards the center.
Let's look at a simple example of an extruded edge that is scaled towards the center.

I found a simple way to create uniformly thick face loops. You need to create a big n-gon and then inset it towards the center.

 You can even leave it as an n-gon when working in arch-viz, since it's a completely flat surface. A single "projected from view" unwrap will create a nice UV map to work with.
Nevertheless, if you want to work on the topology of that n-gon, just press the “J” key while two vertices are selected to connect them by dividing the face.
Using bevel in Edit mode as a modeling resource
The bevel tool in edit mode is powerful for modeling all kinds of curved edges. It adds detail almost magically. Perhaps this tool is not often used because its UI is not clear and the options only appear when you are in the bevel modal.
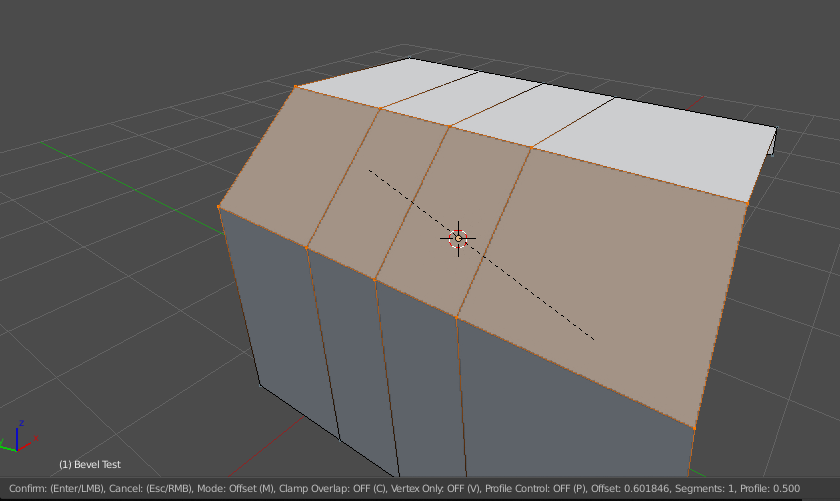
At the bottom of the image above you can see all the different ways you can bevel.
For example, the profile control (activated with P) allows you to create a concave bevel. I encourage everyone to test every option of this tool!
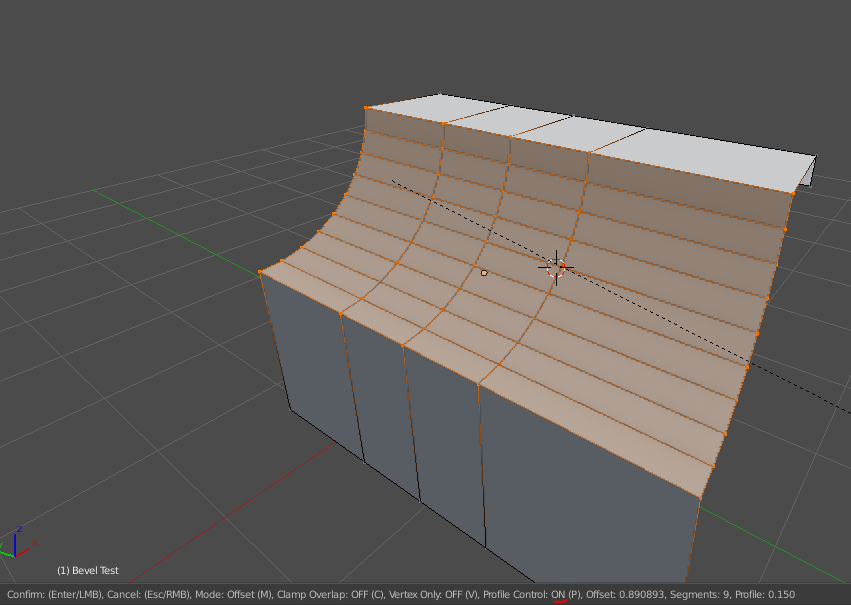
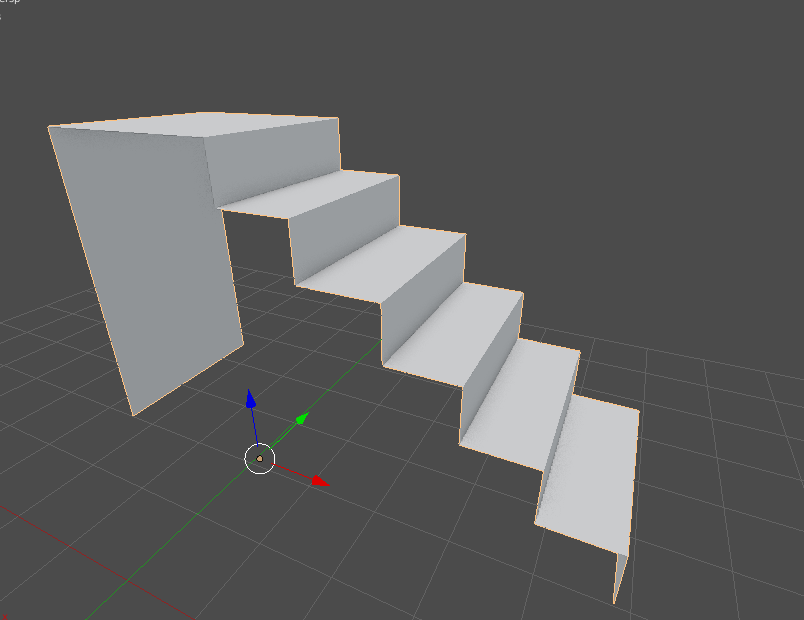
In the example below, I've used different options in each step to create a much more interesting result.
Snap element
As a freelancer, you're sure to find yourself inside somebody else's workflow and need to familiarize yourself with it. Even if you don’t freelance, you need to be organized with the assets you have. With tight deadlines, you won’t have time to create every asset for each project so you’ll have to populate the scenes with preexisting models.
Turn on face snapping to place assets in a fast, easy and flexible way. The align rotation option will let you go crazy and snap your assets to the wall (photos, frames, etc.) or even to the ceiling!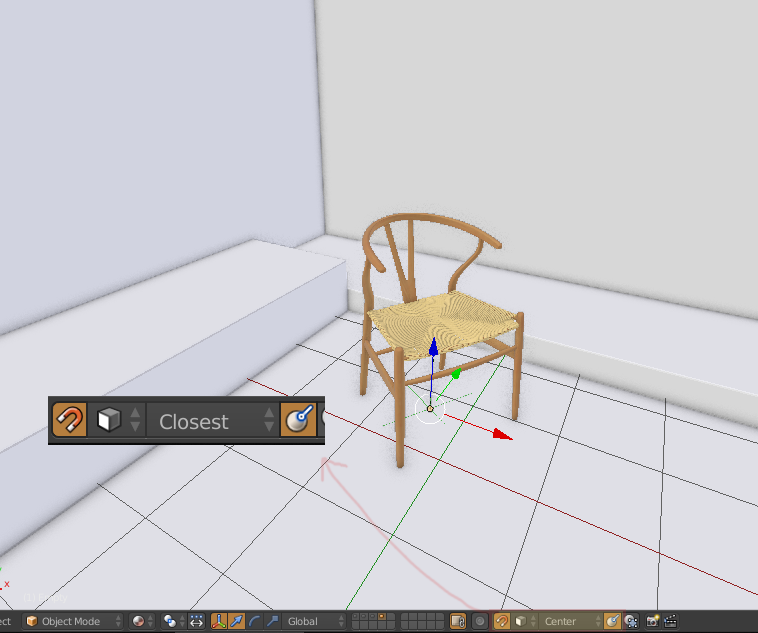
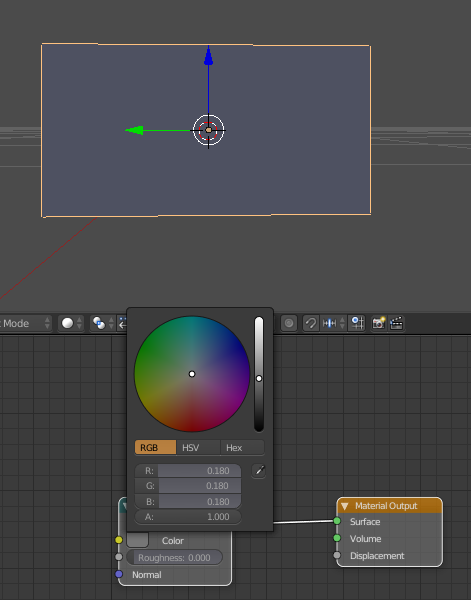
Create a Middle Grey Card
Middle grey cards are a tool to achieve proper exposure for a creative goal. Here is how to use them.
You can create one by making a plane with a diffuse shader that has 18% reflectance ( 0.18 on the R, G and B channel).
Accurately expose your scenes
When you work with architecture, you will render a lot of images used as visualization for something that doesn't exist yet. Your client will expect a photograph-like image, so an accurate amount of light hitting your digital "lens" will be a key factor to delivering an awesome render.
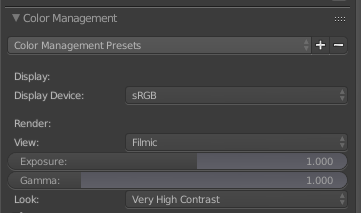
In order to achieve a correct exposure on a high dynamic range scene, it's a healthy practice to use the Middle Grey Card we created above as a reference point for our exposure settings. Match the middle grey from the Middle Grey Card with the grey on the False Color look in the Filmic color management settings.

The variables to match those together are the exposure in the color management settings (less accurate) or the strength of the light sources (more accurate). Once you match those, you can know objectively that your scene is well exposed.
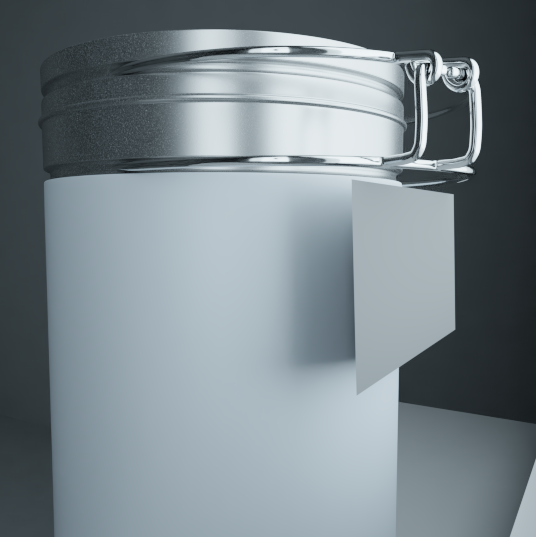
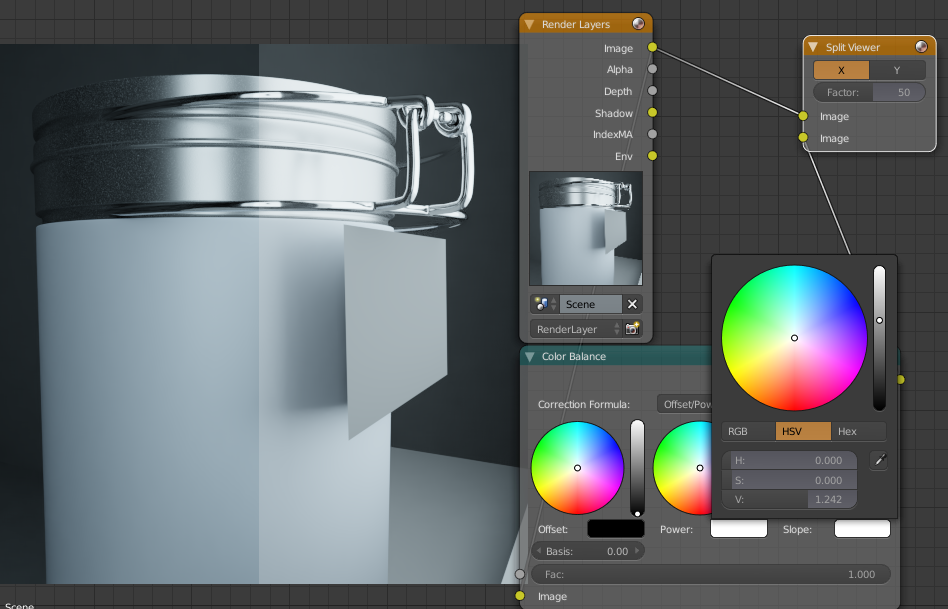
If you render what you’ve just prepared, you will see a washed render. You may need to add contrast with the templated looks under filmic view or you can manually play with the power grading in the Color Balance node in the compositor.
I would recommend learning the basics of color management in general if you want to have maximum flexibility.
Adding mist in the compositor
The mist pass in Blender renders the distance to visible surfaces, mapped to a 0.0-1.0 range. You have to enable this pass in the scene tab and the settings can be found in the world tab where you control the coverage range of this pass. You can also enable the mist box in the camera tab under the Display label to actually see the coverage range in the 3D viewport. This will be shown as a yellow line perpendicular to the camera. The mist pass can be used in compositing to fade out objects that are further away.

Once you have the render done, you will see the mist pass in your render layer. Connecting a color ramp to the Mist Pass output will let you control the depth of the mask. The default number of points for the color ramp node to control where the fog will start to be noticeable is 2, and for our purpose, that’s enough.
It’s important to use the ease mode as the interpolation between the two points in order to have a smooth transition between them. The fog needs to subtly appear beneath the focal element and become more dense in the background.

Mist, as we can perceive it in the real world, stops at a certain height and has all kinds of turbulence. In order to achieve that, you can create a blend and a noise texture inside Blender to limit the height of the mist and control the turbulence.


Bonus Tips
1. Always work with real dimensions. The real values in the lighting settings won’t work properly if the scale is not real. Also, when you create beveled elements, it is easy to understand the bevel scale when the scale of the object is properly set.
2. Never use pure black or pure white if you are aiming for photorealism. There are no pure black or white elements in the real world. (I’m sure in the comments you will tell me the few exceptions) :P
3. Don’t be afraid to clip your light sources. If you get a white result in the false color view, that doesn’t mean it's wrong. Just understand the theory before you bend the rules. When you set the middle grey card for exposure, that middle point doesn't have to be shown in the scene. The middle grey is directional, so don’t go crazy trying to get actual middle grey spots in your scene. You will hardly get a middle grey spot in an underexposed scene.
4. Use chromatic aberration and other camera effects wisely - or not at all. These effects are completely noticeable if you go over the top and can really trash a render.
tthefryingpan thanks Paul! glad these were useful.
Very nice bits of info
When you press ctrl while moving you already active snapping. So i doesnt need to be active perse. You do need to have face and align rotatin set though.
Amazing tips! TY jonimercado !
Good article! Thanks for sharing these tips :)
Great tips, thanks for sharing!
Damn, all of these were super useful tips. Thanks!